
Step 1: Close Avast Internet Security and all its related processes
Before uninstalling Avast Internet Security, it is essential to close the program and terminate all its related processes. This ensures a smooth and successful removal process. Here’s how you can do it:
To begin, locate the Avast icon in the system tray, typically found in the bottom right corner of your screen. Right-click on the Avast icon and a context menu will appear. From the menu, select “Open Avast user interface.”
Once the Avast Internet Security user interface is open, navigate to the “Settings” tab. Within the settings, you will find an “Active Protection” option. Click on it to expand the section.
Now, you need to disable all the active protection features by toggling the switches to the “Off” position. These features include File Shield, Behavior Shield, Web Shield, and Mail Shield. Ensure that all shields are disabled before proceeding.
Next, go to the “Menu” tab in the Avast user interface and select “Settings” in the drop-down menu. From there, navigate to the “General” tab and scroll down until you find the “Troubleshooting” section.
In the Troubleshooting section, you will see an option that says “Enable Avast self-defense module” which is enabled by default. Uncheck this option to disable the self-defense module.
Click “OK” to save the changes and return to the Avast user interface. Now, you need to exit Avast Internet Security completely. Right-click on the Avast icon in the system tray again and select “Quit” from the context menu. This will ensure that all Avast-related processes are closed.
With Avast Internet Security and its processes closed, you are now ready to proceed to the next step of uninstalling the program.
Step 2: Uninstall Avast Internet Security using the Control Panel
The next step in uninstalling Avast Internet Security is to utilize the Control Panel. Follow the instructions below to remove the program:
First, open the Control Panel on your computer. You can do this by typing “Control Panel” in the search bar or by pressing the Windows key + R, then typing “control” and hitting enter.
Once the Control Panel is open, locate the “Programs” or “Programs and Features” option and click on it. This will display a list of all the programs installed on your computer.
Scroll through the list and find “Avast Internet Security.” Click on it once to select it, and then click on the “Uninstall” button located at the top of the list.
A new window will appear, asking for your confirmation to uninstall Avast Internet Security. Here, you may be prompted to select whether you want to keep your personal settings and data or remove them along with the program. Review the options and choose the one that best suits your needs.
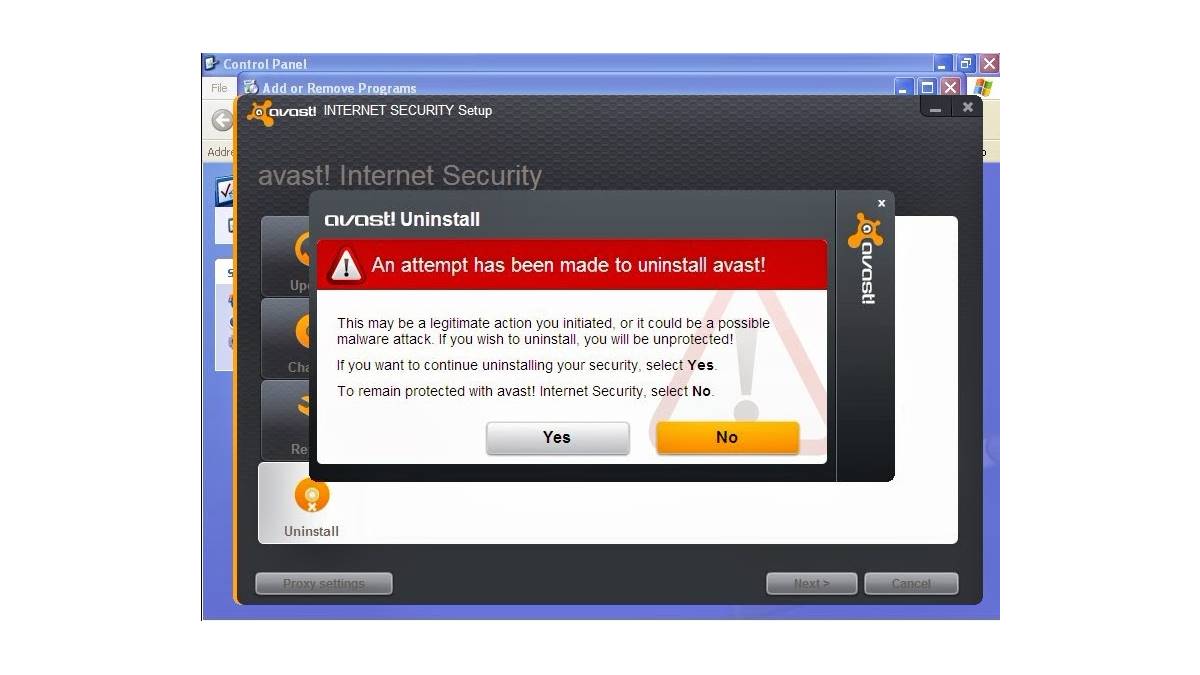
After making your selection, click on the “Uninstall” or “Yes” button to initiate the uninstallation process. The Avast Internet Security setup wizard will launch and guide you through the remaining steps.
Follow the prompts provided by the setup wizard to complete the uninstallation process. This may include confirming the removal of specific components and waiting for the process to finish.
Once the uninstallation is complete, you will be notified of the successful removal of Avast Internet Security. Click “Finish” or “Close” to exit the setup wizard.
It is recommended to restart your computer after uninstalling Avast Internet Security to ensure that all changes are applied correctly.
By following these steps, you have successfully uninstalled Avast Internet Security using the Control Panel. Proceed to the next step to remove any leftover files and folders associated with the program.
Step 3: Remove Avast Internet Security leftovers using Avast Uninstall Utility
In some cases, after uninstalling Avast Internet Security via the Control Panel, there may still be leftover files and registry entries. To ensure a thorough removal of the program, you can use the Avast Uninstall Utility. Follow the steps below:
First, go to the official Avast website and navigate to the Avast Uninstall Utility page. Download the latest version of the utility, ensuring compatibility with your operating system.
Once the download is complete, locate the file and double-click on it to run the Avast Uninstall Utility. You may need to give the utility permission to make changes to your device.
The Avast Uninstall Utility will open in a command prompt window. It will display a list of Avast products installed on your computer. Select the product you want to remove by typing its corresponding number and pressing enter.
The utility will start the uninstallation process, which may take some time to complete. During this process, you may see various messages indicating the progress of the removal.
Once the utility has finished removing Avast Internet Security and its leftovers, you will be prompted to restart your computer. It is important to restart your system to ensure that all changes are properly implemented.
After your computer restarts, check if Avast Internet Security and its remnants are completely removed. You can do this by searching for any remaining Avast files or registry entries, or by verifying in the Control Panel’s “Programs and Features” section.
If you no longer find any traces of Avast Internet Security, then congratulations! You have successfully removed the program and its leftovers using the Avast Uninstall Utility.
However, if you still notice any remnants of Avast, you may consider using a third-party uninstaller or contacting Avast support for further assistance.
Proceed to the next step to remove Avast Secure Browser (if it’s installed) and other related components.
Step 4: Remove Avast Secure Browser (if installed)
If you have Avast Secure Browser installed on your computer along with Avast Internet Security, you might want to remove it as well. Here’s how you can uninstall Avast Secure Browser:
First, open the Control Panel on your computer by typing “Control Panel” in the search bar or by pressing the Windows key + R, then typing “control” and hitting enter.
In the Control Panel, locate the “Programs” or “Programs and Features” option and click on it. This will display a list of all the programs installed on your computer.
Scroll through the list and find “Avast Secure Browser.” Click on it once to select it, and then click on the “Uninstall” button located at the top of the list.
A new window will appear, asking for your confirmation to uninstall Avast Secure Browser. Confirm the uninstallation by clicking “Uninstall” or “Yes.”
Wait for the uninstallation process to complete. This may take a few moments.
Once the removal process is finished, you will be notified of the successful uninstallation. Click “Finish” or “Close” to exit the uninstallation wizard.
After removing Avast Secure Browser, it is recommended to restart your computer to ensure that all changes are applied properly.
By following these steps, you have successfully uninstalled Avast Secure Browser (if it was installed). Now, you can proceed to the next step to remove any remaining Avast Internet Security-related registry entries.
Step 5: Remove Avast Internet Security-related registry entries
After uninstalling Avast Internet Security, there may still be remnants of the program left behind in the Windows registry. Removing these registry entries ensures a more thorough uninstallation. Here’s how you can remove Avast Internet Security-related registry entries:
Before making any changes to the registry, it is highly recommended to create a backup. This will allow you to restore the registry in case any issues arise. To create a backup, open the Registry Editor by typing “regedit” in the search bar or by pressing the Windows key + R, then typing “regedit” and hitting enter.
In the Registry Editor, click on the “File” menu and select “Export.” Choose a location to save the backup file and provide a name for it. Click “Save” to create the registry backup.
Now that you have a backup, navigate to the Avast Internet Security-related registry entries. You can do this by following the path:
HKEY_LOCAL_MACHINE\SOFTWARE\Microsoft\Windows\CurrentVersion\Uninstall
Under the “Uninstall” key, look for any entries related to Avast Internet Security. Right-click on each entry and select “Delete” to remove them from the registry.
Next, navigate to the following registry keys:
- HKEY_CURRENT_USER\Software
- HKEY_LOCAL_MACHINE\Software
- HKEY_LOCAL_MACHINE\Software\Microsoft\Windows\CurrentVersion\Run
Search for any Avast-related keys or values within these locations and delete them accordingly.
Once you have removed all the Avast Internet Security-related registry entries, close the Registry Editor.
Please note that editing the registry can be risky if not done correctly. It is crucial to only modify the specific registry entries related to Avast Internet Security and proceed with caution.
With the registry entries removed, you have successfully cleared out any remnants of Avast Internet Security. Now, you can proceed to the next step to remove any remaining Avast Internet Security-related files and folders.
Step 6: Remove Avast Internet Security-related files and folders
Even after uninstalling Avast Internet Security and clearing the registry entries, there might still be residual files and folders left on your computer. Removing these remnants ensures a complete removal of the program. Here’s how you can remove Avast Internet Security-related files and folders:
First, open the File Explorer on your computer by pressing the Windows key + E.
In the File Explorer, navigate to the following locations:
- C:\Program Files\Avast Software
- C:\ProgramData\Avast Software
- C:\Users\ [Your Username] \AppData\Roaming\Avast Software
Within these locations, search for any Avast-related files and folders. You can do this by looking for folders with names starting with “Avast” or files with “Avast” in their names.
Once you have located the Avast Internet Security-related files and folders, right-click on each item and select “Delete” to remove them from your computer.
Please exercise caution while deleting files and folders. Double-check that you are only removing Avast-related items and not any other important system files or folders.
Continue navigating through the different locations mentioned above, deleting any remaining Avast Internet Security-related files and folders.
Once you have removed all the relevant files and folders, you can close the File Explorer.
By following these steps, you have successfully removed the Avast Internet Security-related files and folders from your computer.
Now, to ensure all changes are applied, it is recommended to restart your computer before moving on to the next step.
After your computer restarts, proceed to the final step to complete the uninstallation process.
Step 7: Restart your computer for the changes to take effect
After uninstalling Avast Internet Security and removing all associated files, folders, and registry entries, it is crucial to restart your computer. Restarting allows the changes to take effect and ensures a clean system state. Here’s how you can restart your computer:
First, save any ongoing work and close all open programs and applications. This ensures that no unsaved data is lost during the restart.
Next, click on the Start Button located in the bottom left corner of your screen. From the Start Menu, select the Power icon, usually represented by a circle with a vertical line inside.
A context menu will appear, offering several power-related options such as sleep, shut down, and restart. Select the “Restart” option.
Your computer will now initiate the restart process. This may take a few moments as the system shuts down and reboots.
Once your computer has restarted, it will load up with a fresh environment, free from any remnants of Avast Internet Security. The changes made during the uninstallation process will be fully applied.
It’s a good practice to wait a couple of minutes after the restart to allow all background processes and services to start up properly. This ensures optimal performance after the restart.
After the restart, you can proceed to use your computer as usual, knowing that Avast Internet Security has been completely uninstalled.
Congratulations! You have successfully uninstalled Avast Internet Security and completed all the necessary steps to remove the program from your computer.
Remember to only restart your computer after completing all the previous steps to ensure that the changes are properly implemented and your system is clean of any remnants.
If you encounter any issues or have any concerns, consider reaching out to Avast support for further assistance.