
Step 1: Download the Avast Internet Security Installer
Avast Internet Security is a powerful antivirus program that offers enhanced protection to your computer against malware, viruses, and online threats. If you are currently using Avast Pro Antivirus and want to upgrade to Avast Internet Security, follow these steps to download the Avast Internet Security Installer:
- Open your web browser and go to the official Avast website.
- Navigate to the “Products” page and find Avast Internet Security.
- Click on the “Download” button to start the download process.
- Save the installer file to a location on your computer.
Downloading the Avast Internet Security Installer ensures that you have the latest version of the software, which includes the most up-to-date protection features and bug fixes. Make sure to download the correct version of Avast Internet Security based on your operating system.
Once the download is complete, you are ready to proceed to the next step.
Step 2: Uninstall Avast Pro Antivirus
If you have Avast Pro Antivirus installed on your computer, you need to uninstall it before installing Avast Internet Security. Here is how you can do it:
- Go to the Control Panel on your computer by clicking on the Start menu and selecting Control Panel.
- In the Control Panel, find the “Programs” or “Programs and Features” option and click on it.
- Scroll down the list of installed programs and locate Avast Pro Antivirus.
- Right-click on Avast Pro Antivirus and choose the “Uninstall” or “Remove” option.
- Follow the on-screen prompts to complete the uninstallation process.
During the uninstallation process, you may be asked to restart your computer. If prompted, make sure to save any unsaved work and click “Restart” to proceed.
After your computer restarts, Avast Pro Antivirus should be completely uninstalled and no longer active on your system. You can now move on to the next step, which involves running the Avast Uninstall Utility.
Step 3: Run the Avast Uninstall Utility
In some cases, the regular uninstallation process may not remove all traces of Avast Pro Antivirus from your computer. To ensure a clean uninstallation, you can use the Avast Uninstall Utility. Here’s how:
- Visit the Avast website and download the Avast Uninstall Utility.
- Save the utility to a location on your computer.
- Close all running programs and ensure that you have saved any important work.
- Locate the downloaded Avast Uninstall Utility file and double-click on it to run it.
- When prompted by the User Account Control dialog, click “Yes” to grant permission.
- Select the version of Avast Pro Antivirus that you want to uninstall (if applicable).
- Click “Uninstall” and wait for the utility to remove Avast Pro Antivirus from your computer.
- Once the uninstallation process is complete, restart your computer.
The Avast Uninstall Utility will thoroughly remove Avast Pro Antivirus from your system, including any leftover files or registry entries. This will ensure a clean slate for installing Avast Internet Security in the next step.
After your computer restarts, you are ready to proceed to the next step and install Avast Internet Security.
Step 4: Restart your computer
After uninstalling Avast Pro Antivirus and running the Avast Uninstall Utility, it is important to restart your computer. Restarting allows any changes made during the uninstallation process to take effect and ensures a clean system before installing Avast Internet Security. Here’s how to restart your computer:
- Save any ongoing work and close all open programs.
- Click on the Start menu or press the Windows key on your keyboard.
- Click on the power icon located in the bottom left corner of the Start menu.
- From the dropdown menu, click on “Restart”.
- Wait for your computer to shut down and start up again.
During the restart process, your computer will go through its boot sequence, loading necessary system files and drivers. This process may take a couple of minutes, so be patient.
Once your computer has restarted, it is now ready for the installation of Avast Internet Security. Proceed to the next step to install the software and enjoy enhanced protection for your computer.
Step 5: Install Avast Internet Security
Now that your computer has been prepared by uninstalling Avast Pro Antivirus and restarting, it’s time to install Avast Internet Security. Follow these steps to install the software:
- Locate the Avast Internet Security Installer file that you downloaded in Step 1.
- Double-click on the installer file to launch the installation wizard.
- Read the Avast End User License Agreement and Privacy Policy, then click “I Agree” to proceed.
- Select the installation options you prefer, such as the installation directory and additional features.
- Click “Install” to begin the installation process.
- Wait for the installation to complete. This may take a few minutes.
- Once the installation is finished, click “Finish” to exit the installation wizard.
Avast Internet Security will now be installed on your computer, providing comprehensive protection against viruses, malware, and other online threats. It is recommended to keep the default settings for optimal security, but you can customize the settings later if desired.
Congratulations! You have successfully installed Avast Internet Security. The next step is to activate the software to unlock all its features and ensure that you receive the latest updates and virus definitions.
Step 6: Activate Avast Internet Security
Once you have installed Avast Internet Security, it is essential to activate the software to fully unlock its features and ensure optimal protection. Follow these steps to activate Avast Internet Security:
- Open Avast Internet Security on your computer. You can usually find it by clicking on the Avast icon in your system tray or by searching for it in the Start menu.
- In the Avast Internet Security interface, click on “Menu” or the three horizontal lines in the top-right corner.
- From the dropdown menu, select “My licenses”.
- Click on “Enter a valid activation code”.
- Enter the activation code provided to you when you purchased Avast Internet Security. The code is typically a combination of letters and numbers.
- Click “OK” to activate Avast Internet Security.
Once the activation process is complete, your Avast Internet Security is ready for use. You can now take advantage of the advanced security features and enjoy peace of mind while browsing the internet, banking online, or engaging in other online activities.
To ensure continued protection, it is essential to keep Avast Internet Security up to date with the latest virus definitions and software updates. You can customize the update settings in the next step.
Step 7: Customize Avast Internet Security settings
Avast Internet Security comes with default settings that offer robust protection out of the box. However, you may want to customize certain settings to suit your preferences or specific security needs. Here’s how you can customize Avast Internet Security settings:
- Open Avast Internet Security on your computer.
- Click on “Menu” or the three horizontal lines in the top-right corner.
- From the dropdown menu, select “Settings”.
- In the Settings window, you will find various categories on the left-hand side.
- Click on each category to explore and customize the settings within.
- Some key settings you may want to consider customizing include:
- Scan settings: Adjust scan preferences, such as the frequency and thoroughness of scans.
- Real-time shields: Configure real-time protection modules, such as file and web shields.
- Firewall settings: Manage firewall rules and network protection options.
- Update settings: Set up automatic updates to ensure your software and virus definitions are always up to date.
- Behavior shield: Customize behavior-based threat detection settings.
- Once you have made your desired changes, click on “OK” to save the settings.
Customizing the Avast Internet Security settings allows you to tailor the software to meet your specific needs and preferences. It empowers you to strike the right balance between security and usability for a personalized experience.
Take some time to explore the various settings available and adjust them according to your requirements. This way, you can maximize the effectiveness of Avast Internet Security while maintaining a seamless and secure browsing experience.
Step 8: Perform an initial scan with Avast Internet Security
After installing and customizing Avast Internet Security, it is crucial to perform an initial scan to ensure that your computer is clean from any existing malware or viruses. Follow these steps to perform an initial scan:
- Open Avast Internet Security on your computer.
- Click on the “Protection” tab or navigate to the scanning section.
- Click on the “Scan” button or select the type of scan you want to perform, such as a smart scan or a full system scan.
- Wait for the scan to complete. The time it takes will depend on the size of your computer’s storage and the selected scan type.
- Once the scan is finished, the results will be displayed, indicating any detected threats or issues.
- If any threats are found, follow the recommended actions provided by Avast to resolve them.
Performing an initial scan with Avast Internet Security helps identify and eliminate any existing malware or viruses that may have been present on your computer before installing the software. This ensures that your computer is starting with a clean slate and provides a baseline for ongoing protection.
It is recommended to periodically perform scans with Avast Internet Security to keep your computer secure. Regular scans help detect and remove any new threats that may have entered your system, providing continuous protection against malware and viruses.
Step 9: Set up automatic updates for Avast Internet Security
Keeping Avast Internet Security up to date is vital in ensuring optimal protection against the latest threats. By enabling automatic updates, you can ensure that your software and virus definitions receive timely updates without manual intervention. Follow these steps to set up automatic updates:
- Open Avast Internet Security on your computer.
- Click on “Menu” or the three horizontal lines in the top-right corner.
- From the dropdown menu, select “Settings”.
- In the Settings window, navigate to the “General” category.
- Scroll down to the “Updates” section.
- Ensure that the “Automatic update” option is enabled.
- By default, Avast Internet Security automatically updates itself and virus definitions.
- If you want to customize the update settings further, click on the “Update” category in the left-hand pane of the Settings window.
- Here, you can specify the frequency of updates, select the update servers, and customize other update-related options.
- Once you have configured your preferred settings, click “OK” to save the changes.
Enabling automatic updates ensures that Avast Internet Security remains updated with the latest security patches, bug fixes, and virus definitions. This proactive approach helps strengthen your computer’s defenses against emerging threats and provides peace of mind knowing that you have the most up-to-date protection.
Remember to periodically check for updates manually if you have disabled automatic updates or want to ensure that you are running the latest version of Avast Internet Security.
Step 10: Enjoy enhanced protection with Avast Internet Security
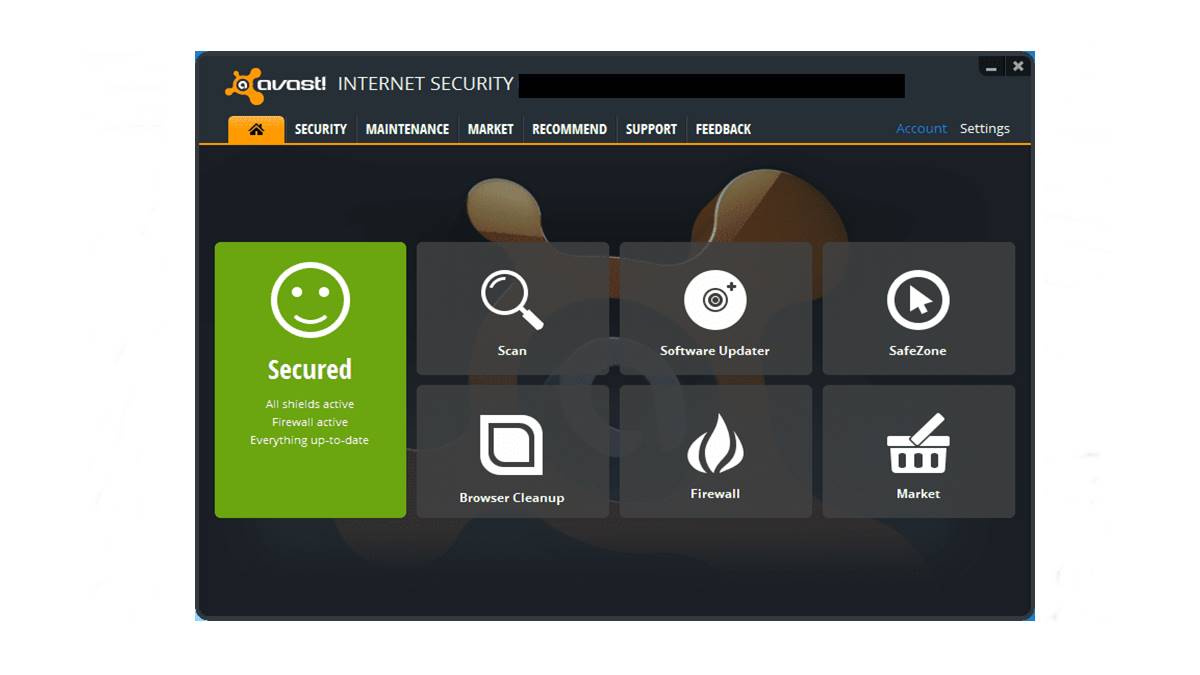
Congratulations! You have successfully completed the installation and setup of Avast Internet Security. By following these steps, you have enhanced the protection of your computer against malware, viruses, and online threats. Now, you can enjoy the numerous benefits and features provided by Avast Internet Security:
Real-time Protection: Avast Internet Security offers real-time protection that continuously monitors and scans your computer for potential threats. It detects and blocks malware before it can cause harm to your system.
Safe Browsing: Avast Internet Security’s web shield feature scans websites for malicious content and prevents you from accessing harmful websites. It also safeguards your online banking and shopping transactions by creating a secure environment.
Email Protection: Avast Internet Security scans your incoming and outgoing emails to identify and block any potential threats, such as phishing attempts or malicious attachments, ensuring your email communication remains secure.
Firewall Protection: Avast Internet Security comes with a powerful firewall that monitors incoming and outgoing network traffic, protecting your computer from unauthorized access and potential network threats.
Behavioral Analysis: Avast Internet Security utilizes advanced behavioral analysis to detect and block suspicious behavior on your computer, helping to prevent zero-day attacks and unknown threats.
Automatic Updates: By setting up automatic updates, Avast Internet Security ensures that your software and virus definitions are always up to date, providing you with the latest protection against emerging threats.
User-Friendly Interface: Avast Internet Security features an intuitive and user-friendly interface that allows you to easily access and manage its various features and settings, making it simple to navigate and customize according to your preferences.
With Avast Internet Security installed and properly configured, you can now browse the internet, download files, and use your computer with enhanced protection and peace of mind.
Remember to regularly perform scans, keep your software up to date, and stay vigilant while browsing the internet to ensure ongoing protection against evolving threats. Stay safe and enjoy the added security provided by Avast Internet Security!