
Reasons to Remove Avast Internet Security
Avast Internet Security is a popular antivirus software that offers a range of features to protect your computer from malware and online threats. However, there are several reasons why you might consider removing Avast Internet Security from your system.
1. Performance Impact: Antivirus software can consume a significant amount of system resources, which can slow down your computer’s performance. If you notice that your computer is running slower after installing Avast Internet Security, removing it may help improve the overall speed and responsiveness of your system.
2. Compatibility Issues: Sometimes antivirus software can conflict with other programs or applications installed on your computer, resulting in compatibility issues. If you’re experiencing frequent crashes, errors, or conflicts with other software while Avast Internet Security is running, uninstalling it may resolve these compatibility issues.
3. Unwanted Notifications: Avast Internet Security has a tendency to display frequent notifications and pop-ups, especially when it detects potential threats or when your subscription is due for renewal. These constant interruptions can be disruptive and interrupt your workflow. If you find these notifications bothersome, removing Avast Internet Security can provide a more streamlined computing experience.
4. Limited Features in Free Version: Avast Internet Security offers both free and paid versions. While the free version provides basic antivirus protection, some of the advanced features, such as firewall protection, email scanning, and real-time web protection, are only available in the paid version. If you feel that the free version does not meet your specific security needs, you may consider removing it and exploring alternative antivirus solutions.
5. Preference for Another Antivirus Software: Personal preferences and experiences play a significant role in the choice of antivirus software. You might prefer the user interface, features, or reliability of another antivirus software over Avast Internet Security. If you have found an alternative antivirus solution that better suits your needs and requirements, removing Avast Internet Security and switching to the new software may be a favorable option for you.
It’s important to note that these reasons may vary from user to user, and your decision to remove Avast Internet Security should be based on your individual requirements and experiences. Before uninstalling any antivirus software, it’s always recommended to have an alternative security solution in place to ensure continuous protection for your computer.
Precautions Before Uninstalling Avast Internet Security
Before you proceed with uninstalling Avast Internet Security from your computer, it’s important to take certain precautions to ensure a smooth and hassle-free process. Here are some important steps to follow:
1. Backup Your Important Data: Before making any changes to your computer, it’s always a good idea to back up your important files and documents. While uninstalling Avast Internet Security shouldn’t affect your personal files, it’s better to be safe than sorry. You can create a backup on an external storage device or use a cloud-based backup service.
2. Disable Avast Shields: Avast Internet Security includes various shields such as File Shield, Web Shield, and Mail Shield that actively protect your computer from malware and threats. Before uninstalling Avast Internet Security, it’s recommended to disable these shields to prevent any interference during the uninstallation process. You can do this by right-clicking on the Avast icon in the system tray, selecting “Avast Shields Control,” and choosing the option to disable all shields temporarily.
3. Close Other Programs: To avoid any potential conflicts, it’s advisable to close all other programs and applications running on your computer before uninstalling Avast Internet Security. This will minimize the chances of encountering errors or interruptions during the uninstallation process.
4. Disconnect from the Internet: It’s a good practice to disconnect your computer from the internet while uninstalling Avast Internet Security. This will prevent any unintentional updates or interruptions that may occur during the uninstallation process. You can either disable your Wi-Fi or unplug the Ethernet cable from your computer.
5. Follow the Uninstallation Wizard: Avast Internet Security provides an uninstallation wizard that guides you through the removal process. To ensure a complete and proper uninstallation, follow the instructions provided by the wizard. Pay attention to any additional prompts or options that may appear during the process.
By taking these precautions, you can minimize the risk of encountering any issues or complications while uninstalling Avast Internet Security. It’s important to note that these steps are general recommendations and may vary depending on your specific operating system and version of Avast Internet Security. If you have any concerns or doubts, it’s always a good idea to consult the official Avast support resources or seek assistance from a trusted IT professional.
Step-by-step Guide to Uninstall Avast Internet Security on Windows
If you have decided to remove Avast Internet Security from your Windows computer, follow these step-by-step instructions to ensure a proper uninstallation:
Step 1: Close Avast Internet Security: Ensure that Avast Internet Security is not running in the background. Right-click on the Avast icon in the system tray and select “Avast Shields Control.” Choose the option to disable all shields temporarily.
Step 2: Open the Control Panel: Click on the Start menu and type “Control Panel” in the search bar. Open the Control Panel application from the search results.
Step 3: Access Programs and Features: In the Control Panel, navigate to the “Programs” section and click on “Uninstall a program.”
Step 4: Locate Avast Internet Security: In the list of installed programs, locate “Avast Internet Security” and click on it to select it.
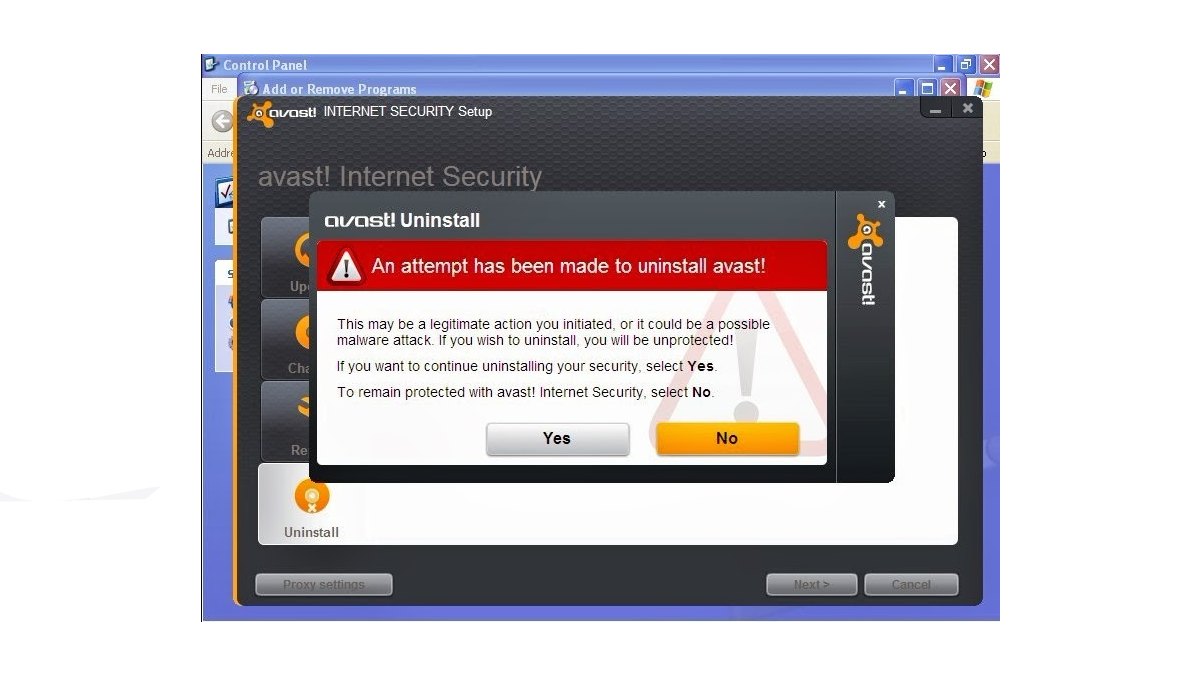
Step 5: Initiate the Uninstallation Process: Click on the “Uninstall” or “Change” button at the top of the programs list. A confirmation prompt may appear asking for your permission to proceed with the uninstallation. Click “Yes” to confirm.
Step 6: Choose Uninstallation Type: Avast Internet Security may present you with two options – “Uninstall” or “Repair.” Select the “Uninstall” option to proceed with the removal process.
Step 7: Uninstall Avast Internet Security: The uninstallation process will begin, and you may be prompted to provide your consent for Avast to make changes to your system. Click “Yes” to allow the uninstaller to proceed.
Step 8: Wait for the Process to Complete: The uninstaller will now remove Avast Internet Security from your computer. This may take a few moments. Ensure that you do not interrupt the process or turn off your computer.
Step 9: Restart Your Computer: Once the uninstallation is complete, you may be prompted to restart your computer to finalize the removal of Avast Internet Security. Follow the on-screen instructions to restart your computer.
Step 10: Verify Uninstallation: After your computer restarts, check if Avast Internet Security has been successfully uninstalled. Go to the Control Panel and navigate to “Programs” > “Uninstall a program” again. Ensure that “Avast Internet Security” is no longer listed in the installed programs.
By following these steps, you can uninstall Avast Internet Security from your Windows computer. It’s important to note that the exact steps may vary slightly depending on your Windows version and the specific Avast Internet Security version installed on your system. If you encounter any issues or need further guidance, refer to the official Avast support resources or seek assistance from a trusted IT professional.
Step-by-step Guide to Uninstall Avast Internet Security on Mac
If you are using Avast Internet Security on your Mac and have decided to remove it, follow these step-by-step instructions for a proper uninstallation:
Step 1: Quit Avast Internet Security: Make sure that Avast Internet Security is not running in the background. Go to the “Avast” menu in the top menu bar and select “Quit Avast.”
Step 2: Open the Applications Folder: Click on the Finder icon in the dock to open a Finder window. From the sidebar, select “Applications” to access the Applications folder.
Step 3: Locate Avast Internet Security: In the Applications folder, look for the Avast Internet Security application. You can also use the search bar in the top-right corner to search for “Avast” to quickly locate the application.
Step 4: Move Avast Internet Security to Trash: Once you have located Avast Internet Security, drag and drop the application icon to the Trash icon in the dock. Alternatively, you can right-click on the application icon and select “Move to Trash.”
Step 5: Remove Avast Internet Security Preferences: Avast Internet Security may leave behind some preference files even after you move the application to the Trash. To remove these files, open Finder and click on “Go” in the top menu bar. Press and hold the “Option” key to reveal the “Library” option, then select it.
Step 6: Delete Avast Internet Security Preference Files: In the Library folder, navigate to the “Preferences” subfolder and look for any files related to Avast Internet Security. You can search for “Avast” to locate these files quickly. Drag any Avast-related preference files to the Trash.
Step 7: Empty the Trash: To complete the uninstallation, right-click on the Trash icon in the dock and select “Empty Trash.” Confirm the action when prompted. This will permanently delete the Avast Internet Security application and its associated files from your Mac.
Step 8: Restart Your Mac: After emptying the Trash, it’s a good idea to restart your Mac to ensure that any remaining traces of Avast Internet Security are fully removed.
Step 9: Verify Uninstallation: Once your Mac restarts, verify that Avast Internet Security has been successfully uninstalled. Check the Applications folder and the Preferences folder to ensure that no Avast-related files or folders are present.
By following these steps, you can effectively uninstall Avast Internet Security from your Mac. Please note that the exact steps may vary slightly depending on the version of Avast Internet Security you have installed. If you encounter any issues or need further assistance, refer to the official Avast support resources or consult with an IT professional.
Troubleshooting Common Issues During Uninstallation
While uninstalling Avast Internet Security, you may encounter certain issues that can disrupt the smooth removal process. Here are some common issues and troubleshooting steps to help you resolve them:
1. Incomplete Uninstallation: If the Avast Internet Security uninstallation process does not complete or gets stuck, try restarting your computer and repeating the uninstallation steps. Ensure that you have administrative privileges to uninstall software on your system.
2. Error Messages: You might come across error messages during the uninstallation process. Some common error messages include “Access Denied” or “Failed to Uninstall.” In such cases, try running the uninstaller as an administrator or use an uninstallation tool provided by Avast support.
3. Unable to Move Application to Trash (Mac): If you are unable to move Avast Internet Security to Trash on your Mac, make sure the application is not running in the background. Quit the application using the steps mentioned earlier and try again. If the problem persists, check if the application is locked, and unlock it by right-clicking on the application icon, selecting “Get Info,” and unchecking the “Locked” checkbox.
4. Leftover Files and Folders: After the uninstallation, you might find some leftover files or folders related to Avast Internet Security. In Windows, search for “Avast” in File Explorer and manually delete any remaining files or folders. On Mac, check the Applications folder and the Preferences folder for any remaining Avast-related files. Always exercise caution and ensure that you’re deleting the correct files.
5. Compatibility Issues: If another antivirus software is installed on your computer, it can cause compatibility issues during the uninstallation process. Disable or uninstall any other antivirus software before attempting to uninstall Avast Internet Security. This will reduce the likelihood of conflicts and errors.
6. Contact Avast Support: If you encounter persistent issues during the uninstallation process or have specific technical problems, it’s advisable to reach out to Avast support for assistance. Avast provides dedicated support resources, including forums, knowledge bases, and live chat options, where you can seek help from their experts.
Remember to perform a thorough check after uninstalling Avast Internet Security to ensure that all its components have been successfully removed. It’s always recommended to have an alternative antivirus solution in place before uninstalling any security software to maintain continuous protection for your computer.
If you still encounter issues during the uninstallation process, it’s best to consult with an IT professional who can provide personalized guidance and help you resolve any specific technical challenges you may face.
Alternative Antivirus Software Recommendations
If you have decided to uninstall Avast Internet Security and are looking for alternative antivirus software to secure your computer, here are some recommendations:
1. Norton Antivirus: Norton is a well-established and highly regarded antivirus software that provides robust protection against various malware threats. It offers features such as real-time threat detection, firewall protection, identity theft prevention, and secure online browsing.
2. Bitdefender Antivirus Plus: Bitdefender is known for its powerful antivirus engine that offers advanced threat detection and comprehensive malware removal. It includes features like ransomware protection, secure browsing, password manager, and an anti-phishing module.
3. McAfee Antivirus Plus: McAfee Antivirus Plus is another popular antivirus program that offers extensive protection against viruses, malware, and online threats. It features real-time scanning, a robust firewall, encrypted storage, and a secure file shredder.
4. Kaspersky Anti-Virus: Kaspersky is recognized for its strong malware detection capabilities and effective protection against ransomware attacks. It comes with features like real-time scanning, web protection, email scanning, and a virtual keyboard to protect against keyloggers.
5. Avira Antivirus Pro: Avira Antivirus Pro is a reliable option that delivers comprehensive protection against malware and online threats. It offers real-time scanning, web protection, ransomware protection, and a secure browsing extension to safeguard your online activities.
6. AVG Antivirus: AVG Antivirus is a widely-used antivirus solution that offers a good balance between performance and protection. It features real-time protection, web browsing protection, email scanning, and regular updates to keep your system secure.
7. Windows Defender: If you’re using a Windows computer, it’s worth noting that Windows Defender comes pre-installed as a built-in antivirus solution. It provides basic, but decent, protection against malware and other threats, making it a suitable choice for users who prefer a simple and no-frills option.
When choosing an alternative antivirus software, consider factors such as the level of protection offered, ease of use, system performance impact, additional features, and compatibility with your operating system. It’s also recommended to read reviews and conduct thorough research to ensure the chosen antivirus software meets your specific needs.
Remember that regardless of the antivirus software you choose, it’s crucial to keep it regularly updated and scan your system regularly to ensure optimal protection against evolving threats.
Take into account your specific requirements and preferences when selecting a new antivirus software to ensure the continued security and protection of your computer.
How to Reinstall Avast Internet Security (if Needed)
If you have uninstalled Avast Internet Security but later decide to reinstall it, here are the steps to follow:
Step 1: Download the Installer: Visit the official Avast website and navigate to the download section. Locate the Avast Internet Security software and click on the download button to obtain the latest version of the installer.
Step 2: Run the Installer: Once the download is complete, locate the installer file, usually located in your Downloads folder, and double-click on it to run the installation process.
Step 3: Grant Administrator Permissions: During the installation process, you may be prompted to provide administrator permissions to proceed. Enter your administrator credentials when prompted to allow Avast Internet Security to make changes to your system.
Step 4: Customize Installation Settings (optional): Avast Internet Security may offer you the option to customize the installation settings. You can choose to enable or disable certain features and select the installation location. Review and adjust the settings according to your preferences, or you can proceed with the default settings.
Step 5: Follow the Installation Wizard: The Avast Internet Security installation wizard will guide you through the process. Follow the on-screen instructions to complete the installation. You may be required to agree to the terms and conditions and choose whether to participate in the Avast data collection program.
Step 6: Wait for the Installation to Complete: The installation process may take a few minutes. Ensure that you do not interrupt the installation or turn off your computer during this time.
Step 7: Activate Avast Internet Security (if applicable): If you have a valid Avast Internet Security license, you may need to activate it during or after the installation process. Follow the prompts to enter your license information or login credentials, depending on your subscription type.
Step 8: Configure Avast Internet Security: Once the installation is complete, you can launch Avast Internet Security and configure its settings according to your preferences. Customize the scanning schedule, adjust the levels of protection, and explore any additional features to enhance your security.
By following these steps, you can successfully reinstall Avast Internet Security on your computer. It’s important to ensure that you have a valid license or subscription to activate the software and access all its features. If you encounter any issues during the reinstallation process, consult the official Avast support resources or reach out to their customer support for assistance.
Frequently Asked Questions (FAQs)
Here are some frequently asked questions about uninstalling and reinstalling Avast Internet Security:
Q1: Can I uninstall Avast Internet Security without any alternative antivirus software?
A1: While it’s not recommended to leave your computer unprotected, you can uninstall Avast Internet Security without immediately installing another antivirus. However, it’s crucial to have an alternative antivirus solution in place to ensure continuous protection against malware and online threats.
Q2: Will uninstalling Avast Internet Security remove all its components from my computer?
A2: In most cases, the uninstallation process should remove all the components of Avast Internet Security. However, there might be some leftover files or registry entries. You can manually delete these files or use a third-party uninstaller program to ensure a complete removal.
Q3: What happens to my Avast Internet Security license if I uninstall and reinstall the software?
A3: If you have a valid Avast Internet Security license, it should remain active even after you uninstall and reinstall the software. During the reinstallation, you may need to reactivate the license by entering your license information or logging into your Avast account.
Q4: Can I reinstall Avast Internet Security on the same computer after uninstallation?
A4: Yes, you can reinstall Avast Internet Security on the same computer after uninstallation. Follow the steps outlined in the “How to Reinstall Avast Internet Security” section to reinstall the software.
Q5: What should I do if I encounter issues during the uninstallation or reinstallation process?
A5: If you face any difficulties during the uninstallation or reinstallation process, consult the official Avast support resources, such as their website, knowledge base, or community forums. You can also reach out to their customer support for personalized assistance and guidance.
Q6: Can I switch to a different antivirus software after uninstalling Avast Internet Security?
A6: Yes, you can switch to a different antivirus software after uninstalling Avast Internet Security. There are many alternative antivirus options available, and you can choose one that best suits your preferences and requirements.
Remember to consider factors such as the level of protection, ease of use, system impact, and additional features when selecting a new antivirus software.
It’s important to stay proactive in protecting your computer from malware and online threats, so ensure that you have an antivirus software installed and regularly update it to stay protected against the latest threats.