
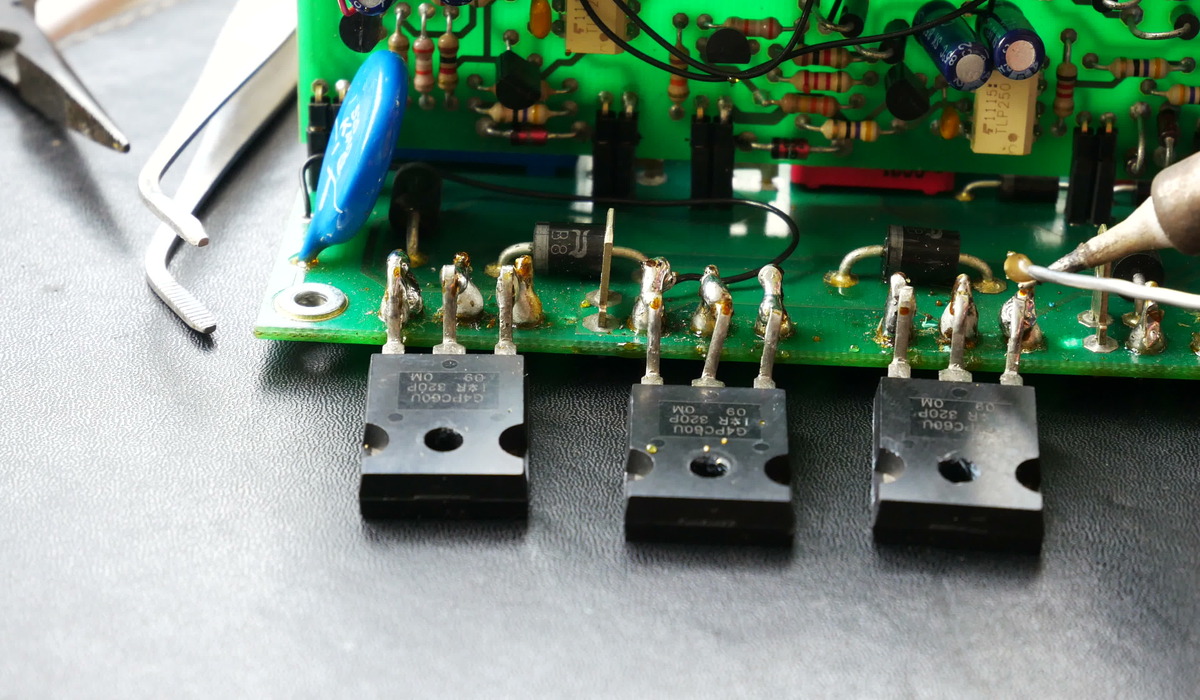
Tools and Materials Required
When it comes to reading electronic circuits, having the right tools and materials is essential. By having these at hand, you can effectively analyze and understand the various components and connections within a circuit. Here are some of the common tools and materials you will need:
1. Multimeter: This versatile tool allows you to measure voltage, current, and resistance in a circuit. It is indispensable for troubleshooting and analyzing circuit behavior.
2. Breadboard: A breadboard is a solderless platform that enables you to quickly prototype and test circuits. It consists of rows and columns of interconnected holes where you can insert components and make connections.
3. Soldering Iron: For more permanent circuits or repairs, a soldering iron is required to join components and create strong connections.
4. Wire Cutters and Strippers: These tools are used to cut and strip the insulation from wires, making it easier to connect components.
5. Component Kit: It’s helpful to have a collection of basic electronic components such as resistors, capacitors, transistors, and diodes. This way, you can easily replace faulty components or experiment with different circuit designs.
6. Schematic Diagrams: These are the visual representations of electronic circuits. It’s important to have access to circuit schematics relevant to your project, either printed or digital, so you can refer to them while reading and understanding the circuit.
7. Safety Equipment: Always prioritize safety when working with electronic circuits. Use safety goggles, gloves, and an anti-static mat to protect yourself and the components from damage.
Remember, having the right tools and materials not only makes your reading and analysis of electronic circuits more effective, but also ensures your safety and the longevity of the components. So, gather these resources before diving into your next circuit reading adventure!
Basic Circuit Terminology
Before diving into reading electronic circuits, it’s crucial to familiarize yourself with some basic circuit terminology. Understanding these terms will help you decipher circuit diagrams and communicate effectively within the field of electronics. Here are a few key terms to know:
1. Voltage (V): Voltage is the electrical potential difference between two points in a circuit. It is measured in volts (V) and determines the flow of current through a circuit.
2. Current (I): Current refers to the flow of electric charge in a circuit. It is measured in amperes (A) and is symbolized by the letter “I.” Current can be either direct current (DC), which flows in one direction, or alternating current (AC), which changes direction periodically.
3. Resistance (R): Resistance is the opposing force in a circuit that restricts the flow of current. It is measured in ohms (Ω) and is symbolized by the letter “R.” Resistors are components used to introduce resistance into a circuit.
4. Capacitance (C): Capacitance refers to the ability of a component, called a capacitor, to store and release electric charge. It is measured in farads (F).
5. Inductance (L): Inductance is the property of a component, known as an inductor, to store energy in a magnetic field. It is measured in henries (H).
6. Ground (GND): Ground is a reference point in a circuit that serves as the common return path for current. It is usually represented by the symbol of a vertical line intersecting a short line at its base.
7. Node: A node is a point in a circuit where two or more components are connected. Nodes are essential for understanding the flow of current and voltage in a circuit.
By understanding these basic circuit terms, you will have a solid foundation for reading electronic circuits. These terms will be used throughout circuit diagrams and discussions, so familiarizing yourself with their meanings will greatly aid your comprehension and analysis of circuits.
Understanding Circuit Symbols
Circuit symbols are graphical representations used to depict various electronic components and their functions in circuit diagrams. These symbols provide a standardized visual language that allows engineers and technicians to quickly understand the components and connections in a circuit. Here are some common circuit symbols and their meanings:
1. Resistor: A resistor is represented by a zigzag line. It is a passive component that restricts the flow of current in a circuit, providing resistance.
2. Capacitor: A capacitor is denoted by two parallel lines with a space between them. It stores and releases electrical energy and is characterized by its capacitance, measured in farads.
3. Inductor: An inductor is symbolized by a series of curved lines. It stores energy in a magnetic field and is characterized by its inductance, measured in henries.
4. Diode: A diode is depicted by a triangle with a vertical line attached to one side. It allows current to flow in one direction only, acting as a one-way valve for electrical energy.
5. Transistor: Transistors have various symbols depending on their type (e.g., NPN or PNP). The symbols consist of combinations of lines, arrows, and circles. Transistors amplify or switch electronic signals.
6. LED: Light emitting diodes (LEDs) are represented by a triangle or arrow pointing away from the diode symbol. LEDs emit light when an electric current passes through them.
7. Switch: A switch is depicted by a line with a gap, often with a connecting arrow. It controls the flow of current in a circuit, allowing it to be opened or closed.
8. Battery: A battery is represented by several horizontal lines stacked vertically. It is a power source that supplies direct current to a circuit.
9. Ground: Ground is indicated by a line intersecting a short horizontal line. It serves as the common reference point for voltage in a circuit.
Understanding the symbols used in circuit diagrams is essential for interpreting and analyzing electronic circuits. By familiarizing yourself with these symbols, you’ll be able to decipher the components and connections in a circuit diagram more effectively.
Reading Resistor Values
Resistors are crucial components in electronic circuits that provide resistance to the flow of current. Understanding how to read resistor values is essential for accurately analyzing and troubleshooting circuits. Resistor values are typically indicated using color codes, although some resistors may also have their values printed on them. Here’s how to read resistor values using color codes:
1. Determine the color code bands: Most resistors have color bands painted or printed on them. Each band represents a specific digit or multiplier value.
2. Identify the tolerance band: Some resistors have an additional band that denotes the tolerance of the resistor. It indicates the maximum deviation from the specified resistance value.
3. Read the first two color bands: The first two color bands represent the significant digits of the resistance value. Each color corresponds to a specific number. Refer to a color code chart to identify the values.
4. Determine the multiplier band: The third color band represents the multiplier by which the significant digits must be multiplied. It indicates the power of ten that must be applied to the two-digit number.
5. Calculate the resistance value: Combine the significant digits with the multiplier to calculate the resistor value. For example, if the bands are brown, black, red, the resistor value would be 10 x 100 = 1,000 ohms or 1 kilohm (1kΩ).
6. Consider the tolerance: If there is a fourth band indicating the tolerance, it specifies the maximum allowable deviation from the specified resistance value. Common tolerance values include 5%, 1%, and 0.5%.
Reading resistor values using color codes may seem daunting at first, but with practice and familiarity with the color code chart, it becomes easier. Remember to double-check your readings and ensure that you are interpreting the color bands correctly.
Additionally, some resistors may have their values printed directly on the component, especially surface-mount resistors. The value may be indicated using alphanumeric codes or numerical values.
By mastering the skill of reading resistor values, you will have the ability to accurately identify and replace resistors in electronic circuits, making troubleshooting and repairs much more efficient.
Identifying Capacitors and Inductors
Identifying capacitors and inductors is an essential skill when reading electronic circuits, as these components play crucial roles in storing and regulating electrical energy. While capacitors and inductors may come in various sizes and shapes, there are certain distinguishing features that can help you accurately identify them. Here’s a guide to identifying capacitors and inductors:
1. Capacitors: Capacitors store and release electrical energy. They are typically cylindrical or rectangular-shaped components with two leads (terminals) coming out of them. Capacitors may have markings indicating their capacitance value and voltage rating. Larger capacitors may also have their capacitance value written directly on the body of the component.
2. Inductors: Inductors store energy in a magnetic field. They are often coil-shaped components with wire wound around a core. Inductors can be identified by their wire coil structure and leads. Some inductors may have color-coded bands to indicate their inductance value. The markings may also include the tolerance, temperature coefficient, and voltage rating.
3. Size and shape: Capacitors and inductors come in various sizes and shapes, ranging from tiny surface-mount components to larger cylindrical or box-shaped variants. The size and shape can provide clues about the capacity or inductance of the component, but it is important to refer to the markings or datasheets for accurate information.
4. Symbols on circuit diagrams: Capacitors are often represented by parallel lines with a space between them, while inductors are denoted by a series of curved lines or spirals. These symbols can help you identify the presence of capacitors or inductors in circuit diagrams.
When identifying capacitors and inductors, it is important to refer to the markings on the component, as well as any datasheets or documentation available. Checking manufacturers’ specifications can provide accurate information on the capacitance, inductance, and voltage ratings of the components.
By familiarizing yourself with the physical characteristics and symbols of capacitors and inductors, you will be able to identify these components with ease. This will greatly enhance your ability to analyze and understand electronic circuits accurately.
Understanding Power Sources
Power sources are essential components in electronic circuits as they provide the necessary energy to drive and operate the circuit. Understanding the different types of power sources is crucial for reading and analyzing electronic circuits effectively. Here are some common power sources you may encounter:
1. Batteries: Batteries are portable power sources that supply direct current (DC) to electronic circuits. They come in various sizes and types, such as alkaline, lithium-ion, or rechargeable batteries. Batteries are often indicated in circuit diagrams by vertical lines stacked vertically.
2. DC Power Supply: A DC power supply is a device that converts an alternating current (AC) input into a steady DC output voltage. It is commonly used in electronic labs and applications where a stable and adjustable voltage is required.
3. AC Power Supply: AC power supplies provide alternating current (AC) to electronic devices. They typically convert the AC voltage from the mains supply to a lower or higher voltage suitable for the circuit.
4. Solar Panels: Solar panels generate electricity from sunlight through a process called photovoltaic conversion. They are used as an environmentally-friendly power source in various applications, especially in remote or off-grid locations.
5. Generators: Generators produce electricity by converting mechanical energy, typically from an engine, into electrical energy. They are commonly used as backup power sources in emergency situations or in areas with unreliable electrical grids.
6. Wall Outlets: Wall outlets provide AC power from the mains supply in residential and commercial buildings. They are commonly used for powering electronic devices and appliances.
Understanding the type of power source used in a circuit is crucial for accurate analysis and troubleshooting. It helps determine the voltage and current requirements of the circuit, ensuring that the components are operated within their specified limits.
When working with power sources, always consider safety precautions, such as ensuring correct polarity, appropriate voltage levels, and using the appropriate fuse protection. Following safety guidelines helps prevent damage to components and ensures personal safety.
By understanding the various types of power sources and their functions, you will be well-equipped to interpret and analyze electronic circuits effectively.
Tracing the Flow of Current
Tracing the flow of current is a fundamental aspect of reading and understanding electronic circuits. By visualizing the path of current through a circuit, you can analyze how different components interact and identify potential issues. Here’s how you can trace the flow of current:
1. Start at the power source: Identify the power source in the circuit, whether it’s a battery, power supply, or a wall outlet. Understand whether it supplies direct current (DC) or alternating current (AC).
2. Follow the circuit path: Examine the circuit diagram and trace the path that the current would take. Note the direction in which the components and wires are connected.
3. Identify conductive paths: Look for connecting wires that act as conductors, allowing current to flow between components. These wires are often represented by simple lines in circuit diagrams.
4. Consider current direction: In DC circuits, current flows from the positive terminal of the power source to the negative terminal. In AC circuits, the flow of current alternates periodically, changing direction.
5. Analyze component functions: Understand the role of each component in the circuit. Some components, such as resistors or capacitors, may affect the flow of current by providing resistance or storing charge. Others, like transistors or diodes, control the current flow or modify its characteristics.
6. Use test equipment: Multimeters and other test equipment can be valuable for tracing the flow of current. By measuring voltage or current at specific points in the circuit, you can confirm the path followed by the current.
Tracing the flow of current helps you uncover connections and dependencies within a circuit. It allows you to identify potential points of failure, such as broken wires or faulty components. By understanding the current flow, you can also determine if the circuit is functioning as intended or if there are any abnormalities or short circuits.
Remember to follow proper safety precautions when working with live circuits. Always disconnect power sources and discharge capacitors before handling or testing circuits to avoid electrical shock or damage to components.
By skillfully tracing the flow of current, you can gain valuable insights into the behavior and functionality of electronic circuits, making it easier to diagnose and troubleshoot any issues that may arise.
Analyzing Circuit Paths
Analyzing circuit paths is a crucial step in understanding the behavior and operation of electronic circuits. By examining the paths that current takes through a circuit, you can gain insights into how components interact and the overall functionality of the circuit. Here’s how you can effectively analyze circuit paths:
1. Identify the circuit path: Begin by visually identifying the path or paths that the current can take through the circuit. This involves closely examining the connections between components and the flow of current indicated in the circuit diagram.
2. Understand series and parallel connections: Components in a circuit can be connected in series or parallel. In a series connection, components are connected end-to-end, forming a single path for current flow. In a parallel connection, components are connected across common nodes, providing multiple paths for current flow. Understanding these connections is crucial for analyzing the behavior of the circuit.
3. Consider voltage drops: As current flows through components, there may be voltage drops across resistors, diodes, or other components. These voltage drops need to be taken into account when analyzing the circuit. Use Ohm’s Law (V = I × R) to calculate voltage drops or measure them using a multimeter.
4. Identify junctions and nodes: Junction points in a circuit where multiple wires or components meet are known as nodes. Analyze how current flows at these nodes, considering the current division and distribution based on the circuit’s series and parallel connections.
5. Determine total resistance or impedance: Calculate the total resistance or impedance of series and parallel combinations of resistors, capacitors, or inductors. This analysis helps understand the overall impact on current flow and voltage drops across the circuit.
6. Investigate circuit behavior: Based on the analysis of circuit paths, consider how the flow of current affects the behavior of individual components and the circuit as a whole. Check for voltage levels, signal amplification or attenuation, and the functioning of switches or other control elements.
Consider using simulation software or circuit analysis tools to support your analysis. These tools can provide accurate calculations and visual representations of circuit paths, making it easier to analyze complex circuits.
By thoroughly analyzing circuit paths, you can gain a deep understanding of how a circuit operates, identify potential issues, and optimize circuit design or troubleshooting efforts. This analysis guides you in making informed decisions for circuit modifications or component replacements, ensuring the circuit functions as intended.
Reading Integrated Circuit Pins
Integrated circuits (ICs) are essential components in modern electronics, containing multiple electronic circuits and functions within a single chip. When working with ICs, it is important to understand how to read the pins, as they provide connections to the internal circuitry. Here’s a guide on how to read integrated circuit pins:
1. Identify the package type: Integrated circuits come in various package types, such as DIP (dual in-line package), SOIC (small outline integrated circuit), and QFN (quad flat no-leads). Different package types have different pin configurations, so first, identify the package type to understand the pin layout.
2. Refer to the datasheet: The datasheet is a crucial resource that provides detailed information about the integrated circuit, including its pinout. Locate the datasheet for the specific IC you are working with, and find the pinout diagram or table that describes the function of each pin.
3. Pin numbering or labeling: The pins on an integrated circuit are usually numbered or labeled for identification. The numbering or labeling convention may vary depending on the IC manufacturer. Commonly, the pins are numbered consecutively in a counter-clockwise direction from a specific starting point.
4. Identify power and ground pins: Look for pins designated as VCC, VDD, or VSS, which indicate the power supply and ground connections. These pins provide the necessary electrical power for the IC to function correctly and are vital for its operation.
5. Determine input and output pins: Study the datasheet to identify pins that serve as inputs or outputs for the integrated circuit. Inputs are where external signals are provided to the IC, while outputs provide the results or responses from the internal circuitry.
6. Understand specialized pins or functions: Some ICs may have pins dedicated to specific functions, such as clock signals, reset signals, or serial communication interfaces. Familiarize yourself with these specialized pins and their functions to effectively utilize the capabilities of the integrated circuit.
7. Consider pin multiplexing: In some integrated circuits, certain pins can have multiple functions. This is known as pin multiplexing. The datasheet will provide information on which functions can be accessed through specific pins based on the desired configuration.
Reading integrated circuit pins accurately is crucial for successful circuit design, implementation, and troubleshooting. Always refer to the datasheet for the specific integrated circuit you are working with, as pin configurations may vary between different ICs even within the same package type.
By understanding the pin functions and configurations, you can effectively connect and utilize integrated circuits in your electronic projects, ensuring proper communication and cooperation with the rest of the circuitry.
Reading Op-Amp Circuits
Operational amplifiers, or op-amps, are versatile and widely used electronic components that perform various analog signal processing tasks. Understanding how to read op-amp circuits is essential for designing and analyzing circuits that utilize these powerful devices. Here’s a guide on reading op-amp circuits:
1. Identify the op-amp symbol: Op-amps are typically represented by a triangle-shaped symbol with two input pins and one output pin. The non-inverting input is denoted by a plus sign (+), the inverting input by a minus sign (-), and the output by an arrow.
2. Determine the power connections: Op-amps require a power supply to operate. Look for pins labeled V+ and V- or +VCC and -VCC, which indicate the positive and negative power supply connections to the op-amp.
3. Understand the input pins: The inverting (-) and non-inverting (+) input pins are critical for understanding the circuit behavior. The signal to be processed is usually applied to one of these input pins, while the other may be used for feedback or reference purposes.
4. Examine the feedback configuration: Op-amp circuits commonly use feedback mechanisms to control and amplify signals. Feedback can be negative or positive, and different feedback configurations, such as inverting or non-inverting, can be used to achieve specific circuit behaviors.
5. Consider the output pin: The output pin of the op-amp provides the processed signal. It is essential to understand how the output is connected to the rest of the circuit and what role it plays in achieving the desired circuit function.
6. Check for additional components: Op-amp circuits often involve additional components, such as resistors, capacitors, or diodes, to shape the input-output relationship. Analyze these components and their connections to understand their impact on the circuit behavior.
7. Determine the operational characteristics: Every op-amp has specifications and characteristics outlined in its datasheet. These include parameters like input bias current, input offset voltage, gain bandwidth product, and slew rate. Understanding these characteristics is crucial for predicting and analyzing the performance of the op-amp circuit.
Reading op-amp circuits requires a combination of understanding the op-amp’s basic functionality, identifying key pins and connections, analyzing feedback configurations, and considering the impact of additional components.
Referencing the op-amp’s datasheet and understanding its operational characteristics is paramount to ensure accurate circuit analysis and to design circuits that meet the desired specifications.
By reading and analyzing op-amp circuits effectively, you can harness the full potential of these versatile components in various analog signal processing applications, such as amplification, filtering, and waveform generation.
Reading Transistor Circuits
Transistors are fundamental components in modern electronic circuits, serving various functions such as amplification, switching, and signal modulation. Understanding how to read transistor circuits is essential for designing and analyzing circuits that incorporate these versatile devices. Here’s a guide on reading transistor circuits:
1. Identify the transistor symbol: Transistors are represented by specific symbols depending on their type – such as NPN or PNP – and the circuit configuration. The symbol consists of three parts: the emitter, base, and collector.
2. Determine the transistor type: Identify whether it is an NPN or PNP transistor by examining the symbol. NPN transistors have the emitter arrow pointing outwards, while PNP transistors have the emitter arrow pointing inwards.
3. Understand the emitter, base, and collector: Each part of the transistor plays a specific role. The emitter is the source of electrons (in NPN) or holes (in PNP). The base controls the transistor’s behavior, and the collector collects the majority of electrons (in NPN) or holes (in PNP).
4. Analyze the circuit configuration: There are different circuit configurations involving transistors, such as common emitter, common collector, and common base. Identify the configuration used in the circuit to comprehend how the transistor is being employed.
5. Consider biasing arrangements: Biasing refers to applying the appropriate voltage or current to the transistor’s base-emitter junction to ensure it operates in the desired mode. Analyze the circuit to understand the appropriate biasing and determine if the transistor is biased in the active, saturation, or cutoff region.
6. Analyze transistor connections: Study how the transistor is connected within the circuit. Look at the connections to other components, such as resistors, capacitors, or diodes, which could influence the transistor’s behavior and function within the circuit.
7. Understand input and output signals: Determine where the input and output signals are applied or obtained in the transistor circuit. Analyze how the transistor amplifies or modulates the input signal to produce the desired output.
8. Refer to the transistor datasheet: Each transistor has specific characteristics outlined in its datasheet, such as voltage ratings, current gain, and frequency response. It is essential to consult the datasheet to understand the transistor’s capabilities and limitations.
Reading transistor circuits requires understanding the transistor symbols, identifying the transistor type, analyzing the circuit configuration and connections, and referring to the transistor datasheet for specific characteristics.
By effectively reading and analyzing transistor circuits, you can design and optimize circuits for various applications ranging from signal amplification to complex digital logic operations.
Troubleshooting Common Circuit Issues
When working with electronic circuits, it’s common to encounter issues that require troubleshooting to identify and resolve. Understanding how to troubleshoot common circuit issues is essential for maintaining functionality and ensuring successful circuit operation. Here are some steps you can follow to troubleshoot common circuit issues:
1. Double-check the power supply: Verify that the power source, such as a battery or power supply, is providing the correct voltage and is properly connected. Inspect for loose or disconnected wires and ensure that the power supply is functioning as intended.
2. Check for loose connections: Examine all connections in the circuit, including wires, connectors, and component leads. Loose or improperly connected components can disrupt the flow of current and cause circuit malfunctions. Re-seat or re-solder any loose connections as necessary.
3. Inspect for damaged components: Look for any visibly damaged components, such as burned resistors, bulging capacitors, or blown fuses. Damaged components can affect circuit performance and should be replaced.
4. Test for short circuits: Use a multimeter to check for short circuits between conductive components or tracks on a circuit board. Short circuits can cause excessive current flow and potentially damage components. Remove any potential short circuits by isolating or replacing faulty components.
5. Check component values: Double-check the values of resistors, capacitors, and other components using a multimeter or by cross-referencing with datasheets and circuit diagrams. Incorrectly selected or faulty components can lead to circuit malfunctions.
6. Use signal tracing techniques: Trace the flow of signals through the circuit using a signal generator or oscilloscope. This can help identify where the signal is being distorted, attenuated, or lost. Check connections, check for broken wires or faulty components along the signal path, and verify that components like op-amps or transistors are functioning as expected.
7. Utilize circuit simulation tools: Use circuit simulation software to model the circuit and identify potential issues virtually. Simulation tools can help pinpoint problems by analyzing voltage levels, current flows, and waveforms within the circuit.
8. Divide and conquer: Divide the circuit into sections or blocks and test each section separately to identify the problematic area. This process of elimination can help narrow down the root cause of the issue.
9. Consult resources: Refer to relevant documentation, circuit diagrams, datasheets, and online resources. These sources can provide valuable insights and troubleshooting tips specific to the circuit or component you’re working with.
Remember to prioritize safety when troubleshooting, especially when working with live circuits. Disconnect power sources, discharge capacitors, and take necessary precautions to prevent electrical shock or damage to components.
By following a systematic troubleshooting approach and using the appropriate tools and resources, you can effectively identify and resolve common circuit issues, ensuring optimal circuit performance and functionality.