
Understanding Electronic Ballasts
Electronic ballasts are an essential component of fluorescent lighting systems. Unlike traditional magnetic ballasts, electronic ballasts use solid-state components to provide a more efficient and reliable operation. They regulate the flow of electricity to the fluorescent bulbs, ensuring optimal performance and extending their lifespan.
One of the main advantages of electronic ballasts is their ability to produce high-frequency alternating current, which results in flicker-free and more energy-efficient lighting. They also offer better lamp control, allowing for dimming capabilities and instant start-up without any noticeable delays.
To understand how electronic ballasts work, it’s important to know their key components. The main elements include:
- Rectifier: This component converts the incoming AC voltage to DC voltage, which is essential for powering the electronic circuitry.
- Power Factor Correction (PFC) circuit: It ensures that the ballast operates with a high power factor, reducing energy waste and improving overall efficiency.
- Inverter: The inverter converts DC voltage to high-frequency AC voltage that is required to drive the fluorescent bulbs.
- Control circuitry: This circuitry regulates various parameters like lamp current, voltage output, and thermal protection to ensure proper operation and prevent damage.
It’s also important to note that electronic ballasts come in different types, such as instant start, rapid start, and programmed start. Each type has its own unique characteristics and applications.
Overall, electronic ballasts offer numerous advantages over traditional magnetic ballasts. They provide energy-efficient, flicker-free lighting with better control and longevity. Understanding the inner workings of electronic ballasts is crucial when it comes to troubleshooting and maintaining fluorescent lighting systems.
Safety Precautions Before Testing
Before you begin testing an electronic ballast, it is important to prioritize safety to avoid any accidents or damage. Electrical components can pose risks if handled improperly. Follow these safety precautions to ensure a safe testing process:
- Turn off the power: Start by switching off the power supply to the lighting system at the circuit breaker. This will help prevent electric shocks or damage to the equipment.
- Allow time for cooling: Fluorescent bulbs can become hot during operation. Allow the bulbs and ballast to cool down for a few minutes before proceeding with the testing.
- Use personal protective equipment (PPE): Wear insulated gloves and safety goggles to protect yourself from electrical shocks and other potential hazards.
- Clear the work area: Remove any potential obstacles or clutter around the ballast to ensure a clear workspace. This will allow you to focus on your testing without any distractions.
- Double-check connections: Ensure that all connections are secure and tight before proceeding with the testing. Loose connections can lead to inaccurate readings or damage to the components.
- Follow manufacturer instructions: Refer to the user manual or manufacturer’s guidelines for specific safety protocols or precautions related to your electronic ballast model.
- Avoid direct contact with live wires: Even with the power turned off, it is important to avoid direct contact with exposed wires or terminals. Use non-conductive tools and handle the equipment with care.
- Stay focused and alert: Testing electronic ballasts requires concentration. Avoid distractions and ensure you are in a well-lit area with good visibility.
- Do not hesitate to seek professional help: If you are unsure about any aspect of testing or troubleshooting electronic ballasts, it is best to consult a qualified electrician or technician for assistance.
By following these safety precautions, you can minimize the risks associated with testing electronic ballasts. Remember that prioritizing safety is crucial to prevent accidents and ensure a successful testing process.
Tools Required for Testing
When it comes to testing electronic ballasts, having the right tools is essential for accurate measurements and troubleshooting. Here are some of the tools you may need:
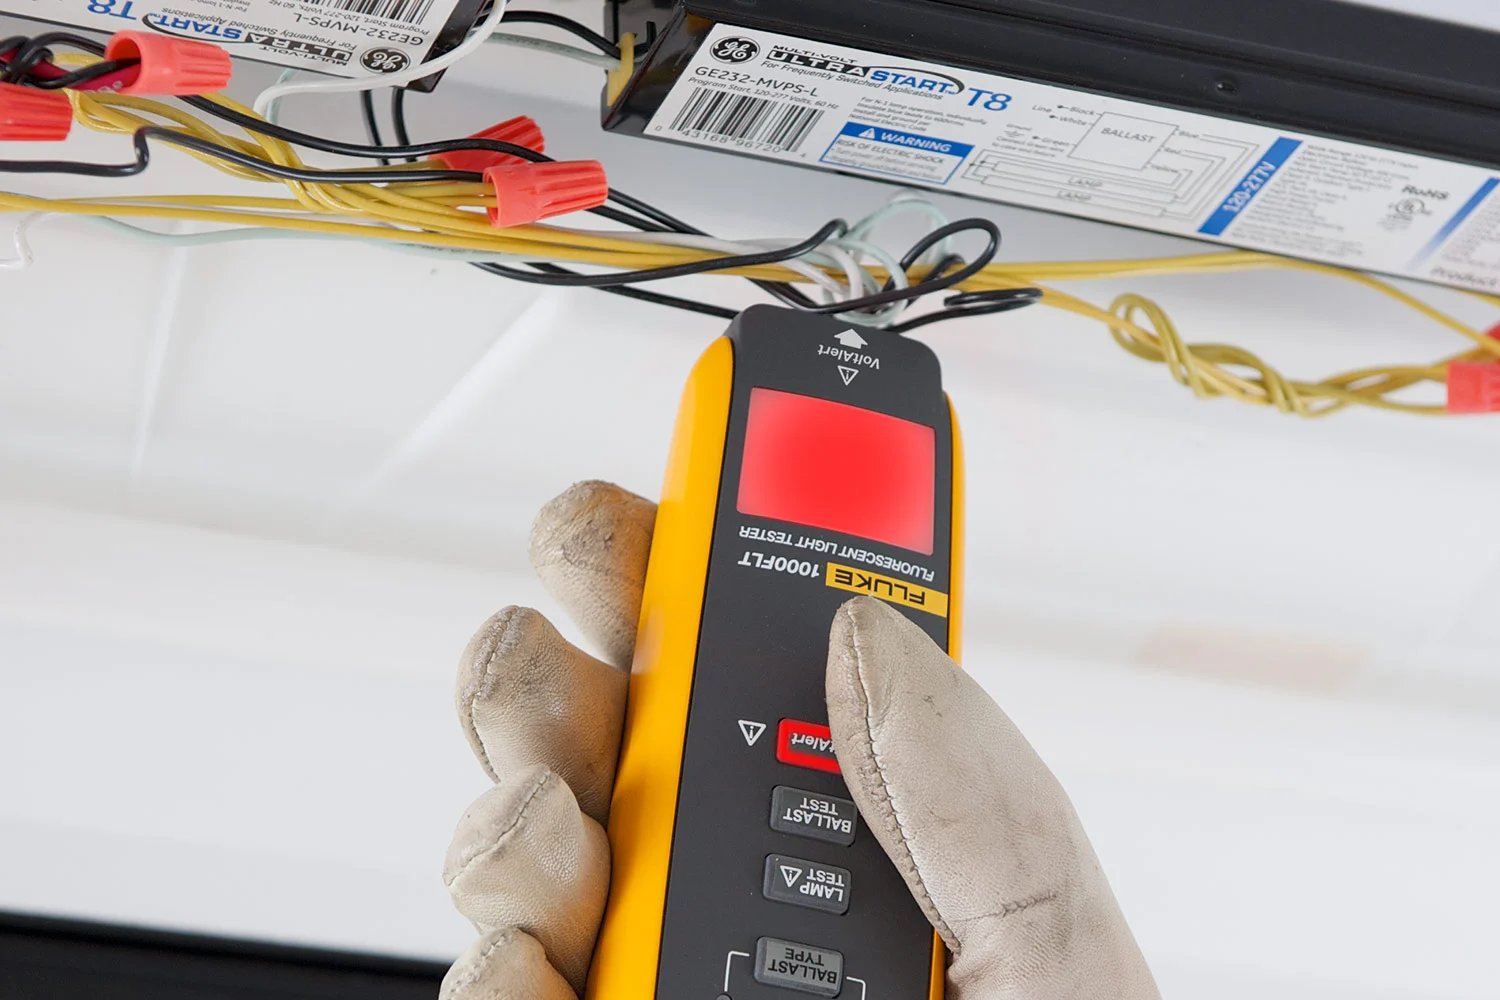
- Multimeter: A multimeter is a versatile tool that can measure voltage, current, and resistance. It is crucial for testing various parameters of the electronic ballast, such as input voltage and output voltage.
- Insulated Screwdriver: An insulated screwdriver is necessary for making connections and adjustments. It helps prevent electrical shocks when working with live circuits.
- Circuit Tester: A circuit tester, also known as a voltage tester or a test light, is used to check for the presence of electrical current in a circuit. It can help identify if the ballast is receiving power or if there are any issues with the connections.
- Insulation Tape: Insulation tape is used to protect exposed wires and prevent accidental contact. It is important to wrap any exposed connections securely to avoid short circuits or electrical hazards.
- Wire Strippers: Wire strippers are necessary for removing the insulation from electrical wires. They allow for a clean and precise cut, ensuring proper connections and accurate readings during testing.
- Alligator Clips: Alligator clips are useful for temporarily connecting wires or probes to various components of the electronic ballast. They provide a secure connection that enables easy testing.
- Reference Manual or Schematic Diagram: It is beneficial to have the reference manual or schematic diagram of the electronic ballast on hand. It provides detailed information about the internal circuitry and helps in troubleshooting and understanding the connections.
It is important to ensure that all tools are in good working condition and properly insulated. Regularly check for damaged or worn-out parts and replace them as necessary. Additionally, familiarize yourself with the proper use of each tool to ensure accurate testing and your safety.
Having the right tools at your disposal simplifies the testing process and allows for efficient troubleshooting of electronic ballasts. Remember to handle all tools with care and use them according to the manufacturer’s instructions for the best results.
Testing the Input Voltage
Testing the input voltage is an essential step in troubleshooting electronic ballasts. It allows you to verify that the ballast is receiving the correct voltage from the power supply. Here’s how you can test the input voltage:
- Start by ensuring that the power to the lighting system is turned off at the circuit breaker.
- Using a multimeter set to measure AC voltage, carefully connect the probes to the input terminals of the electronic ballast. Make sure the probes are inserted securely.
- Turn on the power supply to the lighting system. The multimeter will display the incoming voltage on its screen.
- Compare the reading on the multimeter with the specified voltage range mentioned in the ballast’s user manual or schematic diagram. Typically, the input voltage for electronic ballasts is within the range of 100V to 277V.
- If the measured voltage is within the specified range, the input voltage is satisfactory. However, if the reading is outside the specified range, it indicates a power supply issue that needs to be addressed.
- While monitoring the multimeter, observe if there are any fluctuations or irregularities in the voltage over a few seconds. A stable voltage reading indicates a properly functioning ballast, while fluctuations could indicate a faulty component.
Testing the input voltage helps identify if the electronic ballast is receiving the correct power supply. Incorrect or unstable input voltage can result in improper lamp operation or even damage to the ballast. If the input voltage is not within the specified range or if there are unusual fluctuations, it is recommended to consult a qualified electrician to address the power supply issue.
Remember to always exercise caution when working with electrical equipment, and follow safety precautions to avoid electric shocks or injuries.
Testing the Output Voltage
Testing the output voltage of an electronic ballast is crucial to ensure that it provides the correct voltage to the fluorescent bulbs. This helps verify if the ballast is functioning properly and delivering the required power to the lamps. Here’s how you can test the output voltage:
- Make sure that the power to the lighting system is turned off at the circuit breaker.
- Disconnect the fluorescent bulbs from the ballast to avoid any interference during the testing process.
- Using a multimeter set to measure AC voltage, carefully connect the probes to the output terminals of the ballast. Ensure that the probes are inserted securely and make good contact.
- Turn on the power supply to the lighting system and wait for a few seconds to stabilize the voltage.
- Read the voltage displayed on the multimeter. It should match the specified output voltage mentioned in the ballast’s user manual or schematic diagram.
- If the measured voltage is within the specified range, it indicates that the ballast is functioning properly and supplying the correct voltage to the fluorescent bulbs.
- If the measured voltage is significantly higher or lower than the specified range, it suggests a fault in the ballast. This could be due to a component failure or a wiring issue. In such cases, it is recommended to seek professional assistance to diagnose and rectify the problem.
Testing the output voltage ensures that the electronic ballast is delivering the required power to the fluorescent bulbs. If the output voltage is not within the specified range or shows unusual readings, it can lead to improper lamp operation or reduced bulb performance. Consulting a qualified electrician or technician is recommended to resolve any issues with the ballast’s output voltage.
Ensure that you follow safety precautions and handle electrical equipment with care to avoid electric shock or damage to the components.
Testing the Capacitor
The capacitor is a critical component of an electronic ballast, responsible for storing and releasing electrical energy. Testing the capacitor is essential to ensure its proper functioning and to troubleshoot any issues with the ballast. Here’s how you can test the capacitor:
- Ensure that the power to the lighting system is turned off at the circuit breaker.
- Locate the capacitor in the electronic ballast. It is usually a cylindrical or rectangular-shaped component with two terminals.
- Using a multimeter set to measure capacitance, carefully connect the probes to the capacitor terminals. The polarity does not matter for this test.
- Read the capacitance value displayed on the multimeter. Compare this reading with the capacitance value specified in the ballast’s user manual or schematic diagram.
- If the measured capacitance value is within a reasonable range (typically with a small variance), the capacitor is likely functioning properly.
- If the multimeter shows an open circuit or a very low capacitance value (significantly lower than the specified range), it indicates a faulty capacitor that needs to be replaced.
- In some cases, you might need to perform an additional test called a “capacitance leakage test” to ensure there are no leaks or short circuits in the capacitor. This can be done using a specific capacitance leakage tester or an ESR meter.
Testing the capacitor helps identify any issues with its capacitance value or leakage. A faulty capacitor can result in flickering lamps, poor lamp performance, or ballast malfunctions. If the capacitor fails the test, it is important to replace it with a new one of the same capacitance value specified by the manufacturer.
Remember to follow safety precautions and allow the capacitor to discharge before handling it to avoid electric shocks or injuries.
Testing the Ignitor
The ignitor is a crucial component of an electronic ballast responsible for initiating the electrical discharge of the fluorescent bulbs. Testing the ignitor is important to ensure that it is functioning properly and to troubleshoot any issues with the ballast. Here’s how you can test the ignitor:
- Ensure that the power to the lighting system is turned off at the circuit breaker.
- Locate the ignitor in the electronic ballast. It is typically a small rectangular or cylindrical component connected to the ballast via wires.
- Disconnect the wires from the ignitor, making note of their original positions for reconnection later.
- Using an ohmmeter or a multimeter set to measure resistance, carefully connect the probes to the ignitor terminals.
- Read the resistance value displayed on the ohmmeter or multimeter. Compare this reading with the specified resistance range mentioned in the ballast’s user manual or schematic diagram.
- If the measured resistance is within the specified range, the ignitor is likely functioning properly.
- If the ohmmeter shows an open circuit or a resistance reading significantly higher or lower than the specified range, it indicates a faulty ignitor that needs to be replaced.
- Reconnect the wires to their original terminals on the ignitor.
- Turn on the power supply to the lighting system and observe if the ignitor produces a clicking or buzzing sound while the ballast is operating. This audible indication confirms that the ignitor is functioning and initiating the electrical discharge.
Testing the ignitor ensures that it is working correctly and allowing the proper ignition of the fluorescent bulbs. A faulty ignitor can lead to issues such as flickering lights or failure to start the lamps. If the ignitor fails the resistance test or does not produce the expected sound during operation, it is recommended to replace it with a new ignitor compatible with the electronic ballast.
Remember to exercise caution and follow safety precautions when working with electrical equipment to avoid any electrical hazards or injuries.
Testing the Filament
The filament is an important component of the fluorescent bulb that emits light when energized. Testing the filament helps determine if it is intact and functioning properly. Here’s how you can test the filament:
- Ensure that the power to the lighting system is turned off at the circuit breaker.
- Remove the fluorescent bulb from the electronic ballast.
- Visually inspect the filament inside the bulb for any signs of damage, such as breakage or discoloration. A damaged filament will require bulb replacement.
- If the filament appears visually intact, you can test it further using a multimeter.
- Set the multimeter to measure resistance (ohms).
- With the probes of the multimeter, carefully touch the pins at the base of the fluorescent bulb where it connects to the ballast.
- Read the resistance value displayed on the multimeter. It should be within the specified range mentioned in the bulb’s user manual or packaging.
- If the multimeter shows an open circuit or resistance value significantly higher or lower than the specified range, it indicates a faulty filament that requires bulb replacement.
- If the multimeter displays a resistance value within the specified range, the filament is likely intact and functional.
Testing the filament helps ensure that it is intact and capable of emitting light when powered. A damaged or faulty filament can result in dim, flickering, or non-functional bulbs. In such cases, replacing the fluorescent bulb is necessary for proper lighting performance.
Always handle bulbs with care, avoiding any direct contact with the filament, as it is delicate and sensitive to damage. Remember to follow safety precautions and turn off the power supply when handling or replacing bulbs.
Testing for Short Circuits
Testing for short circuits in an electronic ballast is important to ensure that there is no unwanted electrical connection or abnormal current flow that could potentially damage the ballast or other components. Here’s how you can test for short circuits:
- Ensure that the power to the lighting system is turned off at the circuit breaker.
- Disconnect all loads, such as the fluorescent bulbs, from the ballast.
- Using a multimeter set to measure resistance (ohms), carefully connect the probes to the input and output terminals of the ballast.
- If the multimeter shows a resistance reading of zero (or very close to zero), it indicates a short circuit within the ballast.
- To locate the specific area of the short circuit, disconnect one component at a time from the ballast and retest the resistance.
- If the resistance reading increases significantly after disconnecting a particular component, it indicates that the disconnected component is causing the short circuit.
- Inspect the disconnected component for any signs of damage, such as burnt marks, loose wires, or broken connections. If any issues are found, the component may need to be repaired or replaced.
- If there are no signs of damage or if disconnecting the components does not eliminate the short circuit, it could indicate a fault within the wiring or internal circuitry of the ballast.
- In such cases, it is recommended to consult a qualified electrician or technician for further diagnosis and repair.
Testing for short circuits helps identify any electrical faults within the electronic ballast. Short circuits can lead to overheating, component failure, or even fire hazards. By troubleshooting and rectifying short circuits, you can ensure the safe and proper functioning of the ballast and the lighting system as a whole.
Remember to always exercise caution when working with electrical components and follow safety precautions to avoid electric shocks or injuries.
Troubleshooting Common Issues
Electronic ballasts, like any other electrical components, can experience issues that affect their performance. By troubleshooting common problems, you can identify and resolve issues in your electronic ballast. Here are some common issues and possible solutions:
1. Flickering lights: If the fluorescent bulbs connected to the electronic ballast flicker, it may indicate a loose connection. Check that all connections are secure and tightened properly. Additionally, verify that the bulbs are compatible with the ballast and replace any faulty bulbs.
2. Failure to start: If the fluorescent bulbs fail to start, it could be due to a faulty ignitor or a damaged filament. Test the ignitor and inspect the filament for any breakage or discoloration. If necessary, replace the ignitor or the bulb.
3. Dim lighting: Dim lighting can be caused by various factors, including low input voltage, a faulty capacitor, or a worn-out bulb. Test the input voltage to ensure it is within the specified range. Check the capacitance of the capacitor and replace it if needed. Additionally, consider replacing any bulbs that have reached the end of their lifespan.
4. Buzzing or humming noise: A buzzing or humming noise can result from a loose connection, a faulty ballast, or a defective bulb. Ensure all connections are tight and secure. If the noise persists, it may indicate a faulty ballast that needs to be replaced.
5. Overheating: If the ballast feels excessively hot, it may indicate inadequate ventilation or a malfunctioning component. Make sure the ballast is properly ventilated and clear of any obstructions. If the issue persists, consult a qualified technician to examine and repair the ballast.
6. Inconsistent or fluctuating output: Inconsistent or fluctuating output voltage can be caused by issues with the ballast’s internal components, such as the power supply or control circuitry. In such cases, it is best to seek professional assistance to diagnose and resolve the issue.
Remember to follow safety precautions when troubleshooting electronic ballasts, including turning off the power supply before inspecting or making any adjustments. If you are unsure about any aspect of troubleshooting, it is recommended to seek the guidance of a qualified electrician or technician.
By effectively troubleshooting common issues, you can identify and address problems with your electronic ballast, ensuring optimal performance and longevity.