
Understanding Basic Electronics Concepts
When delving into the world of electronics, it’s crucial to have a solid understanding of some basic concepts. These concepts serve as the foundation for any electronics journey and will help you navigate the intricacies of circuits and components. Let’s explore a few essential concepts:
Electricity: One of the fundamental concepts in electronics is electricity. It is the flow of electric charge through a conductor. Understanding the principles of voltage, current, and resistance is key to comprehending how electricity works in circuits.
Voltage: Voltage, measured in volts (V), represents the electrical potential difference between two points in a circuit. It determines the intensity of the electric field and it is necessary for the flow of current.
Current: Current, measured in amperes (A), is the flow of electric charge through a conductor. It represents the rate at which electric charge moves through a circuit. Current flows from areas with higher voltage to areas with lower voltage.
Resistance: Resistance, measured in ohms (Ω), is the opposition to the flow of electric current. It is determined by the properties of a material and the dimensions of a component. Resistance controls the amount of current flowing through a circuit.
Ohm’s Law: Ohm’s Law expresses the relationship between voltage, current, and resistance in a circuit. It states that the current flowing through a conductor is directly proportional to the voltage across it and inversely proportional to the resistance of the conductor. The formula I = V/R is used to calculate current.
Series and Parallel Circuits: In electronics, components can be connected in series or parallel. In a series circuit, the current has only one path to flow through. In a parallel circuit, the current has multiple paths to flow through. Understanding these circuit configurations is crucial when designing and troubleshooting electronic circuits.
Capacitance and Inductance: Capacitors and inductors are two important passive components in electronics. Capacitors store electric charge, while inductors store energy in their magnetic fields. They play a vital role in filtering and controlling the flow of current in circuits.
Having a solid understanding of these basic electronics concepts is crucial for anyone interested in learning electronics. With this knowledge, you’ll be better equipped to tackle more complex circuits and projects in the future.
Different Types of Electronic Components
Electronic components are the building blocks of electronic circuits. Understanding the different types of components is essential for working with electronics effectively. Let’s explore some of the most common electronic components:
Resistors: Resistors are passive components that resist the flow of electric current. They are used to control the amount of current flowing through a circuit and protect sensitive components from damage. Resistors are identified by their resistance value in ohms (Ω).
Capacitors: Capacitors store and release electrical energy in the form of an electric field. They are used for energy storage, filtering, and timing applications. Capacitors are characterized by their capacitance, measured in farads (F).
Inductors: Inductors are passive components that store energy in the form of a magnetic field. They are used in applications that require energy storage, filtering, and signal transformation. Inductors are typically measured in henries (H).
Diodes: Diodes are electronic components that allow current to flow in one direction while blocking it in the opposite direction. They are widely used in rectification, switching, and voltage regulation applications. Common types of diodes include the pn junction diode, Schottky diode, and Zener diode.
Transistors: Transistors are active components that amplify or switch electronic signals and power. They play a vital role in amplifiers, oscillators, and digital circuits. Common types of transistors include bipolar junction transistors (BJTs) and field-effect transistors (FETs).
Integrated Circuits (ICs): Integrated circuits are complex electronic circuits that incorporate multiple components on a single chip. They are used in a wide range of applications, including microcontrollers, memory chips, and amplifiers. ICs can be categorized as digital or analog based on their functionality.
Microcontrollers: Microcontrollers are single-chip computers that contain a processor, memory, and input/output peripherals. They are extensively used in embedded systems and provide the intelligence for various electronic devices, such as robots, home automation systems, and consumer electronics.
Sensors: Sensors are devices that detect and respond to physical or environmental conditions, such as temperature, pressure, light, or motion. They play a crucial role in a wide range of applications, from environmental monitoring to healthcare and automation.
Connectors: Connectors are used to establish electrical connections between different components or devices. They come in various types, such as USB connectors, audio jacks, and HDMI connectors, and enable seamless integration and communication in electronic systems.
These are just a few examples of the many electronic components available. Each component has its specific function and characteristics, and understanding their usage is crucial for successful electronics projects.
Learning How to Read Electronic Schematics
Electronic schematics, also known as circuit diagrams, are visual representations of electronic circuits. Being able to read and understand schematics is essential for anyone aspiring to work with electronics. Let’s explore some key steps to help you decipher electronic schematics:
Identify the Components: The first step is to familiarize yourself with the symbols used to represent different electronic components. These symbols provide a concise representation of each component’s function and help you understand how they are interconnected in the circuit.
Understand the Circuit Flow: Schematics consist of lines that represent the flow of current through the circuit. It’s important to follow these lines and understand how the current moves from one component to another. Pay attention to the arrows indicating the flow direction.
Read Component Values: Electronic schematics often include labels or numbers next to the components. These labels indicate crucial information such as component values (resistance, capacitance) or pin numbers. It’s important to understand these values to build the circuit correctly.
Follow Connection Lines: Schematics use lines to indicate connections between components. Pay careful attention to how these lines intersect or connect to components. They represent the electrical connections and paths that the current follows.
Identify Power and Ground Connections: Look for symbols representing power and ground connections. These symbols provide a reference for the source of electrical power and the common ground reference point in the circuit.
Study Example Circuits: To improve your schematic reading skills, study example circuits. Analyze well-documented schematics and compare them to the corresponding circuit diagram. This will help you visualize how the circuit is represented and understand its functioning.
Consult Component Datasheets: When working with specific components, refer to their datasheets. Datasheets provide detailed information about component pinouts, functions, and specifications. Understanding the datasheet will help you interpret how the component interacts in the circuit.
Practice with Simple Circuits: Start with simple circuits and practice reading their schematics. Build the circuit on a breadboard or simulator, and compare the physical implementation with the schematic. This hands-on experience will enhance your understanding of schematics.
Reading electronic schematics may seem daunting at first, but with practice and patience, you’ll gain proficiency. It’s an essential skill that will enable you to design, analyze, and troubleshoot electronic circuits with confidence.
Basic Circuit Analysis
Basic circuit analysis involves understanding and analyzing the behavior of electronic circuits. By applying principles of voltage, current, and resistance, you can determine various characteristics of a circuit. Let’s explore some essential concepts and techniques for basic circuit analysis:
Ohm’s Law: Ohm’s Law, which states that voltage (V) is equal to the product of current (I) and resistance (R), is a fundamental principle in circuit analysis. This relationship allows you to calculate unknown values in a circuit when two variables are known.
Series Circuits: In a series circuit, components are connected in a single path, and current remains the same throughout the circuit. To analyze a series circuit, simply sum the individual resistances to calculate the total resistance and use Ohm’s Law to determine the current and voltage across each component.
Parallel Circuits: In a parallel circuit, components are connected in multiple paths, and voltage remains the same across each component. To analyze a parallel circuit, calculate the total resistance using the reciprocal of the sum of the individual resistances. Then, use Ohm’s Law to determine the current flowing through each component.
Equivalent Resistance: When resistors are connected in series or parallel, their combined resistance can be determined by calculating the equivalent resistance. In a series circuit, the equivalent resistance is the sum of the individual resistances. In a parallel circuit, the reciprocal of the equivalent resistance is equal to the sum of the reciprocals of the individual resistances.
Voltage Division: Voltage division is a technique used to determine the voltage across specific components in a series circuit. By applying voltage division, you can calculate the voltage drop across a resistor by multiplying the total voltage by the ratio of the resistance value to the total resistance.
Current Division: Current division is a technique used to determine the current flowing through specific branches in a parallel circuit. By applying current division, you can calculate the individual currents by multiplying the total current by the ratio of the resistance value to the total resistance.
Power Calculation: Power in a circuit can be calculated using the formula P = VI, where P is power, V is voltage, and I is current. Knowing power consumption is vital for selecting appropriate components and ensuring circuit safety.
Superposition Principle: The superposition principle states that in a linear circuit with multiple sources, the individual contributions of each source can be analyzed separately by considering only one source at a time. This principle simplifies the analysis of complex circuits.
By applying these techniques, you can analyze the behavior of electronic circuits and accurately determine voltages, currents, and resistances. Practicing circuit analysis will enhance your understanding of electrical circuits and enable you to design and troubleshoot more complex circuits with confidence.
Safety Guidelines for Working with Electronics
Working with electronics requires careful attention to safety. Although electronics can be exciting and rewarding to work with, it’s essential to prioritize safety to prevent accidents and protect yourself and your equipment. Here are some important safety guidelines to follow when working with electronics:
Unplug Power Sources: Before starting any work on electronic devices or circuits, always ensure that all power sources are disconnected. This includes unplugging devices from the power outlet and removing batteries. This precaution prevents electric shocks and potential damage to the circuit or components.
Wear Safety Equipment: Protect yourself by wearing appropriate safety equipment, such as safety goggles, gloves, and anti-static wristbands. Safety goggles shield your eyes from potential hazards, while gloves provide insulation and protect against injury. Anti-static wristbands help prevent damage due to static electricity.
Work in a Clean and Well-Lit Area: Maintain a clean workspace that is free from clutter. A clutter-free environment reduces the risk of tripping or knocking over equipment. In addition, ensure that your workspace is well-lit. Proper lighting minimizes the chances of errors and accidents during assembly or repair tasks.
Avoid Working Alone: It is always advisable to have someone nearby when working with electronics, especially when dealing with high voltages or potentially dangerous components. Having a partner can provide assistance during emergencies and ensure a quick response in case of accidents.
Use the Right Tools: Ensure that you have the appropriate tools for the task at hand. Using the wrong tools can lead to injuries and damage to components. Invest in quality tools, including screwdrivers, pliers, wire cutters, and soldering irons, for safe and efficient work.
Follow Proper Handling and Disposal of Components: Handle electronic components with care to avoid damage. Use proper techniques, such as holding components by their edges, to prevent contact with sensitive parts. Additionally, dispose of electronic waste responsibly by recycling or following local regulations.
Be Cautious with High Voltage Circuits: High voltage circuits pose significant risks. Take extra precautions when working with high voltage systems, such as power supplies or AC mains. Ensure that the power is off and the circuit is discharged before handling any components or making connections.
Educate Yourself: Continuously educate yourself about electronics safety practices. Stay updated with industry standards and guidelines. Online resources, blogs, forums, and electronic safety courses can provide valuable information and keep you informed about the latest safety recommendations.
Trust Your Instincts: If something feels unsafe, it probably is. Trust your instincts and take necessary precautions to address potential risks. Don’t hesitate to seek help or advice from experienced individuals if you are unsure about a specific task.
By following these safety guidelines, you can create a secure and controlled working environment for your electronics projects. Remember, safety should always be a top priority when working with electronics.
Tools and Equipment for Electronics Projects
Having the right tools and equipment is essential for successfully working on electronics projects. Whether you are a beginner or an experienced electronics enthusiast, having a well-rounded collection of tools will make your work more efficient and enjoyable. Let’s explore some essential tools and equipment for electronics projects:
Soldering Iron: A soldering iron is a fundamental tool for electronics projects. It allows you to join components and wires together by melting solder and creating a strong electrical connection. Look for a soldering iron with adjustable temperature settings to accommodate different soldering requirements.
Solder: High-quality solder is crucial for ensuring reliable connections. Choose solder with a suitable flux core and lead content that complies with your specific requirements and safety regulations.
Wire Cutters and Strippers: Wire cutters and strippers are essential for cutting and stripping wires to the required length and removing insulation. Select tools with sharp precision blades and adjustable stripping gauges for optimal performance.
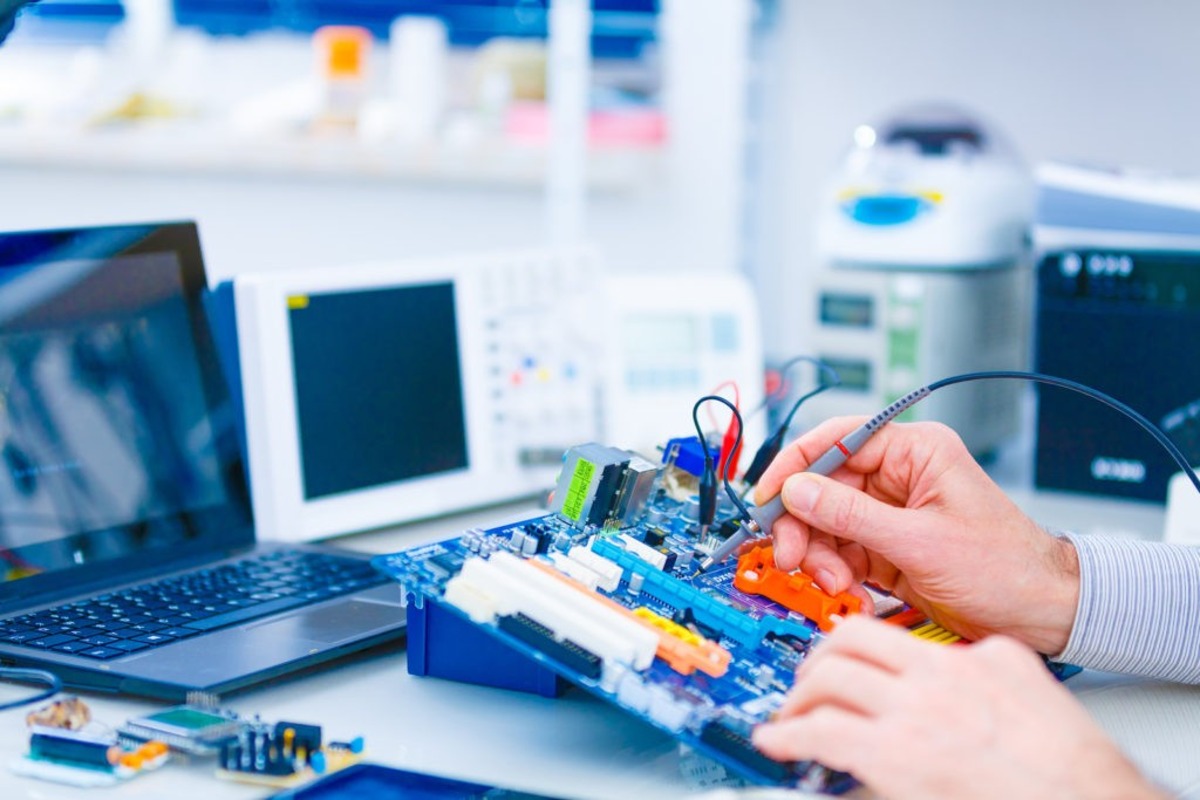
Multimeter: A multimeter is a versatile tool that measures voltage, current, and resistance. It is invaluable for troubleshooting circuits, testing components, and ensuring proper connections. Look for a multimeter with features such as auto-ranging, continuity testing, and a clear LCD display.
Breadboard: A breadboard is a reusable prototyping board that allows you to quickly and easily connect and test electronic circuits without soldering. It provides a convenient platform for experimenting with various component configurations before creating a permanent circuit.
Logic Analyzer: A logic analyzer is a powerful tool for digital circuit debugging and analysis. It captures and displays digital signals, allowing you to analyze their timing, voltage levels, and logical relationships. Look for a logic analyzer with a suitable number of channels and a user-friendly software interface.
Desoldering Tools: Desoldering tools, such as a desoldering pump or desoldering braid, are essential for removing soldered components or correcting soldering mistakes. These tools help you safely and cleanly remove solder from circuit boards without damaging the components or the board itself.
Storage and Organization: Keeping your tools and components organized is vital to maintain efficiency and prevent loss or damage. Invest in storage solutions such as toolboxes, parts organizers, and labeled storage bins to keep your workspace tidy and easily accessible.
Safety Equipment: Safety should never be compromised when working with electronics. Equip yourself with safety goggles, gloves, anti-static wristbands, and a fire extinguisher to protect yourself and your workspace from potential hazards.
Reference Materials: Having reference materials, such as electronics textbooks, datasheets, and online resources, is invaluable for learning and troubleshooting. These materials provide valuable information on component specifications, circuit design, and troubleshooting techniques.
These are just a few examples of the tools and equipment you may need for electronics projects. As you progress in your electronic journey, you might acquire additional specialized tools based on your specific projects and interests. Remember to invest in quality tools and maintain them properly to ensure their longevity and performance.
How to Solder Electronic Components
Soldering is a fundamental skill in electronics that allows you to create strong and reliable electrical connections between electronic components. Whether you’re building circuits, repairing devices, or prototyping, mastering the art of soldering is key. Let’s explore the step-by-step process of soldering electronic components:
Gather Your Tools: Before you start soldering, ensure you have the necessary tools. This includes a soldering iron, solder wire, soldering stand, soldering sponge or wet sponge, and a pair of wire cutters or strippers.
Prepare the Components: Ensure the components you’re soldering are clean and free from any dirt or oxidation. Use a clean cloth or cotton swab to wipe away any debris that may hinder the soldering process. Trimming component leads to an appropriate length might be necessary.
Heat Up the Soldering Iron: Plug in your soldering iron and allow it to heat up to the appropriate temperature for your solder and components. The correct temperature will allow the solder to melt evenly and create reliable connections without damaging the components.
Tin the Tip of the Soldering Iron: Once the soldering iron is heated, apply a small amount of solder to the tip. This process, known as tinning, helps improve the heat transfer and aids in the soldering process.
Apply Flux: Flux is a chemical compound that helps remove oxidation and ensures proper solder flow. Apply a small amount of flux to the parts you are soldering to improve the soldering process and create better connections.
Heat the Joint: Place the heated soldering iron on the joint where the component lead and the PCB pad meet. Apply heat for a few seconds to ensure the area is adequately heated for successful soldering.
Apply the Solder: While the joint is still heated, touch the solder wire to the joint. Allow the solder to flow onto the joint, ensuring it covers the entire surface and forms a smooth, concave fillet. Apply the solder sparingly, as excess solder can cause short circuits or poor connections.
Remove the Soldering Iron: With the solder in place, quickly remove the soldering iron from the joint. Continue holding the components steady until the solder solidifies and cools down.
Inspect the Solder Joint: Examine the solder joint for any defects, such as solder bridges (shorts) or cold joints (dull or grainy appearance). If necessary, rework the joint by using a desoldering tool to remove excess solder or by reapplying heat and fresh solder.
Clean and Maintain: After soldering, clean the soldering iron tip using a sponge or wet sponge to remove any residual solder or flux. Proper maintenance of your soldering iron will ensure its longevity and optimal performance.
With practice, you’ll develop the skill and confidence to solder electronic components effectively. Remember to work in a well-ventilated area, take breaks when needed, and prioritize safety at all times. Soldering is an essential technique that will open up a world of possibilities for your electronics projects.
Getting Started with Arduino
Arduino is an open-source electronics platform that offers a user-friendly way to create and explore a wide range of electronic projects. Whether you’re a beginner or an experienced electronics enthusiast, Arduino can be a powerful tool to bring your ideas to life. Here are the basic steps to get started with Arduino:
Get an Arduino Board: The first step is to acquire an Arduino board. There are various types of Arduino boards available, each with its specification and features. The Arduino Uno is a popular choice for beginners due to its simplicity and versatility.
Install the Arduino IDE: The Arduino Integrated Development Environment (IDE) is the software used to write, compile, and upload code to the Arduino board. Visit the official Arduino website and download the appropriate version of the IDE for your operating system.
Connect the Arduino Board: Use a USB cable to connect the Arduino board to your computer. Upon connecting, the Arduino board should power up and be recognized by the computer.
Write Your First Sketch: In the Arduino IDE, open the Blink example sketch from the File -> Examples -> Basics menu. This simple sketch makes an LED connected to the Arduino board blink. Take some time to understand the code and how it works.
Upload the Sketch: Click on the upload button (a right-facing arrow) in the Arduino IDE to compile and upload the sketch to the Arduino board. The LED connected to the Arduino should start blinking once the upload is complete.
Experiment and Explore: With the basic Blink sketch working, you can start experimenting with other components and sensors. There are numerous tutorials, projects, and libraries available online to guide you and expand your knowledge base. Start with simple projects and gradually move towards more complex ones.
Learn the Arduino Language: The Arduino language is based on C/C++, but simplified to make it more accessible for beginners. Take some time to learn the basics of the Arduino language, including variables, functions, control structures, and libraries. This knowledge will help you write more complex and customized sketches.
Utilize the Arduino Community: The Arduino community is vast and supportive. Join online forums, participate in discussion groups, and share your projects and challenges. Learning from experienced Arduino users and getting feedback on your projects can significantly enhance your understanding and skills.
Expand Your Hardware Collection: As you progress in your Arduino journey, consider expanding your collection of electronic components such as sensors, motors, LCD displays, and wireless modules. These components will enable you to create more diverse and exciting projects.
Getting started with Arduino is an exciting process that opens up endless possibilities for your electronics projects. With each project, you’ll gain new skills, knowledge, and creativity. Embrace the learning curve, explore, and have fun experimenting with Arduino!
Advanced Electronics Concepts and Projects
Once you have a solid foundation in electronics and have mastered the basics, you may be ready to explore more advanced concepts and take on more challenging projects. Here are some advanced electronics concepts and project ideas to further enhance your skills:
Microcontrollers and Programmable Platforms: Dive deeper into microcontrollers such as Arduino, Raspberry Pi, or ESP8266/ESP32. These platforms provide more computational power and open up a whole new realm of possibilities for complex projects, including home automation, IoT applications, robotics, and data logging.
Wireless Communication: Explore wireless communication protocols like Bluetooth, Wi-Fi, and LoRa. Learn how to interface with wireless modules and utilize them to create remote-controlled devices, wireless sensors networks, or even smart home systems.
Advanced Sensor Interfacing: Experiment with various sensors, such as temperature, humidity, gas, light, or motion sensors. Learn how to interface them with microcontrollers and use them to gather data for your projects, such as environmental monitoring systems or smart health devices.
Analog Circuit Design: Enhance your understanding of analog circuit design. Learn about operational amplifiers, filters, oscillators, and signal processing. Explore concepts like voltage regulators, audio amplifiers, and analog-to-digital and digital-to-analog converters.
Advanced PCB Design: Move beyond breadboard prototyping and learn how to design your own printed circuit boards (PCBs). Explore software tools like Eagle, KiCad, or Altium to create professional-grade PCBs for your projects, incorporating advanced techniques such as multi-layer designs, impedance control, and surface-mount components.
Robotics and Automation: Combine electronics with mechanical systems to build robots and automated systems. Learn about motor control, kinematics, and sensors essential for robotics projects. Develop autonomous robots, remote-controlled vehicles, or robotic arms to perform specific tasks.
Internet of Things (IoT) Projects: Utilize the power of the internet and connectivity to create IoT projects. Build smart home systems, weather stations, or agriculturally focused IoT devices that provide real-time data collection and control capabilities.
Data Collection and Analysis: Use microcontrollers, sensors, and data processing techniques to collect and analyze data. Develop projects that involve data logging, visualization, and interpretation, such as environmental monitoring, health tracking, or energy management systems.
Audio and Music Electronics: Explore the fascinating world of audio and music electronics. Learn about amplifiers, audio effects, synthesizers, and MIDI interfaces. Build your own audio systems, effect pedals, or musical instruments.
Industrial Automation: Delve into the field of industrial automation and control systems. Learn about programmable logic controllers (PLCs), human-machine interfaces (HMIs), and supervisory control and data acquisition (SCADA) systems. Design projects that automate industrial processes or monitor and control systems remotely.
These advanced electronics concepts and projects are just a glimpse of what you can achieve with your knowledge and skills. Embrace experimentation, maximize your learning, and let your imagination guide you as you embark on the exciting world of advanced electronics.
Troubleshooting Common Electronics Problems
When working with electronics, it’s inevitable that you may encounter problems along the way. Troubleshooting is a valuable skill that allows you to identify and resolve common issues efficiently. Here are some techniques to help you troubleshoot common electronics problems:
Check Connections: Often, a loose or incorrect connection can cause problems. Verify all connections, including power supplies, cables, and component interconnections. Ensure that everything is properly plugged in and securely connected.
Inspect for Physical Damage: Examine the components, circuit board, and cables for any signs of physical damage, such as burns, bent pins, or broken wires. Physical damage can lead to malfunctioning or non-working circuits.
Measure Voltages and Currents: Use a multimeter to measure voltages and currents at various points in the circuit. Compare the measured values with expected values or reference specifications. Significant deviations may indicate an issue with a specific component or circuit section.
Isolate Components: Disconnect components one by one and test the circuit’s behavior without each component. By doing so, you can identify if a particular component is causing the problem. Replace or repair the faulty component as necessary.
Check Power Supply: Verify that the power supply is delivering the correct voltage and current. Inspect the power supply itself for any signs of malfunction or damage. Consider using a known-working power supply to test the circuit if you suspect power supply issues.
Clean Up Flux Residue: If you have recently soldered components, check for residual flux on the circuit board. Flux residue can cause short circuits or interfere with proper component functioning. Clean the circuit board using an appropriate cleaning agent and ensure it’s completely dry before retesting.
Review Circuit Design and Schematic: Go back to the circuit design and schematic to verify that everything is connected correctly. Compare it with the physical circuit layout to ensure no errors or discrepancies exist. A design or schematic issue can be the root cause of the problem.
Suspect Environmental Factors: Consider external factors that may be affecting the circuit’s performance. Check for electromagnetic interference (EMI), temperature extremes, or humidity. Shield sensitive components, relocate the circuit, or apply suitable environmental controls if necessary.
Utilize Component Datasheets: Consult the datasheets of the components involved in the circuit. Datasheets provide valuable information about component specifications, pin configurations, and recommended operating conditions. Check if the circuit is compliant with the component requirements.
Seek Help and Collaborate: Don’t hesitate to reach out to the electronics community for assistance. Online forums, electronics groups, or colleagues can provide fresh insights and suggestions for troubleshooting. Collaborating with others can lead to a quicker resolution of the issue.
Remember, troubleshooting is an iterative process that requires patience and logical thinking. Document your steps and observations to help track progress and identify patterns. With practice, you’ll develop a troubleshooting mindset and acquire valuable skills to overcome electronics problems confidently.
Resources for Further Learning
Continual learning is essential in the ever-evolving world of electronics. Fortunately, there are numerous resources available to help you expand your knowledge and enhance your skills. Here are some valuable resources for further learning in electronics:
Online Tutorials and Courses: Explore online platforms that offer comprehensive tutorials and courses specifically tailored for electronics. Websites like Coursera, Udemy, and edX provide a wide range of courses on electronics basics, advanced concepts, and specific applications.
Electronics Books and Textbooks: Dive into electronics literature to gain in-depth knowledge. Books authored by renowned individuals such as Charles Platt, Paul Horowitz, and Michael Scherz offer comprehensive coverage of various electronics topics. Textbooks like “The Art of Electronics” by Horowitz and Hill are highly regarded in the field.
Video Channels and Podcasts: Subscribe to YouTube channels dedicated to electronics, such as GreatScott!, EEVblog, and Adafruit. These channels provide informative videos on electronics concepts, projects, and reviews. Additionally, podcasts like “The Amp Hour” and “Embedded.fm” offer audio content focusing on electronics discussions and interviews with experts.
Electronic Component Suppliers: Many electronic component suppliers, such as Adafruit, SparkFun, and Digi-Key, provide tutorials and resources alongside their products. Check their websites for project guides, application notes, and technical articles related to specific components and technologies.
Open-Source Communities: Participate in open-source communities like GitHub, Hackaday, and Arduino forums. These platforms allow you to collaborate, share ideas, and learn from a community of electronics enthusiasts and experts. Explore open-source projects and contribute to the development of new ideas and technologies.
Online Forums and Discussion Groups: Engage in discussions and seek advice from fellow electronics enthusiasts on platforms like Reddit, Stack Exchange, and Electronics Point. Post your questions, share your projects, and learn from the experience and expertise of the community.
Local Maker Spaces and Hackerspaces: Join local maker spaces or hackerspaces in your area. These physical spaces provide access to tools, equipment, and resources for electronics projects. They also offer workshops, classes, and networking opportunities with like-minded individuals.
Industry Magazines and Journals: Subscribe to industry magazines like “Make Magazine,” “Electronics For You,” “Popular Electronics,” and “EDN.” These publications cover the latest trends, technologies, and projects in the world of electronics.
University and College Courses: Consider enrolling in electronics courses at universities or colleges. Many institutions offer programs in electrical engineering, electronics engineering, or related fields. Check their course catalogs for topics that interest you and see if they offer online or part-time options.
Hands-On Project-Based Learning: Take on challenging electronics projects to apply and reinforce your learning. Experiment with new components, technologies, and circuit designs. Learning by doing is a powerful way to deepen your understanding and develop practical skills.
These resources offer a wealth of knowledge and opportunities for continuous learning in electronics. Choose the ones that align with your learning style and interests, and don’t hesitate to explore multiple avenues. The journey of electronics learning is an exciting and fulfilling one, so embrace the resources available and keep expanding your knowledge and skills.