
Choosing the Right Soldering Iron
When it comes to soldering electronic components, having the right tools is crucial. And one of the most important tools in your soldering arsenal is the soldering iron. Choosing the right soldering iron will not only make your soldering job easier but also ensure the quality and durability of your soldered joints. Here are some factors to consider when selecting a soldering iron:
- Wattage: The wattage of a soldering iron determines how quickly it heats up and recovers temperature. For most electronic soldering tasks, a soldering iron with a wattage between 25 and 50 watts should suffice. Higher wattage irons are suitable for heavy-duty applications requiring more heat.
- Temperature Control: A soldering iron with temperature control allows you to adjust the temperature according to the specific solder and component requirements. This is essential for preventing components from overheating or getting damaged.
- Tip Variety: Look for a soldering iron that comes with a variety of interchangeable tips. Different tips are designed for various soldering tasks, such as fine point tips for delicate components and chisel tips for larger joints.
- Comfort and Ergonomics: Since soldering can be a tedious task that requires precision and concentration, it’s important to choose a soldering iron that is comfortable to hold and work with for extended periods. Consider irons with ergonomic handles and lightweight designs.
- Quality and Durability: Investing in a high-quality soldering iron might be more expensive upfront, but it will pay off in terms of durability, reliability, and performance. Look for brands known for their long-lasting soldering tools.
Choosing the right soldering iron is essential for successful soldering. Consider the above factors and select a soldering iron that suits your needs and budget. Remember to always follow safety precautions while working with soldering irons to protect yourself and the components you’re soldering.
Selecting the Right Solder Wire and Flux
In addition to choosing the right soldering iron, selecting the appropriate solder wire and flux is crucial for achieving reliable and durable soldered joints. Here are some considerations to keep in mind:
- Solder Wire Diameter: The diameter of the solder wire determines the amount of solder that will be applied. Thicker wires, such as 0.032 inches, are suitable for larger joints, while thinner wires, like 0.020 inches, are ideal for small, delicate components. Choose the wire diameter that matches the size of the joint you’re working on.
- Lead-Free or Lead-Based Solder: Depending on your project requirements and local regulations, you may need to choose between lead-free or lead-based solder. Lead-free solder is considered more environmentally friendly, but it has a higher melting point and can be slightly harder to work with. Lead-based solder, on the other hand, has a lower melting point and is easier to handle.
- Flux Core: Solder wire is often available with a flux core, which helps improve solder flow and removes oxides from the surface, ensuring a clean solder joint. The flux core can be rosin-based or water-soluble. Rosin-based flux is suitable for general electronics soldering, while water-soluble flux is preferred for applications that require post-solder cleaning.
- Flux Type: In some cases, you may need to apply additional flux to the soldering joint or component before soldering. The choice of flux depends on the type of metals being soldered and the desired level of flux residue removal. Common flux types include rosin flux and no-clean flux.
- Quality and Brand: Opt for high-quality solder wire and flux from reputable brands. They are more likely to provide consistent and reliable results. Cheap solder wire and flux can lead to poor solder connections and may introduce reliability issues with your electronic components.
Properly selecting the right solder wire and flux is essential for achieving successful soldered joints. Consider the specific requirements of your project and choose the appropriate solder wire diameter, lead type, flux core, and flux type. Investing in high-quality solder materials will ensure both the quality of your soldering work and the long-term reliability of your electronic circuits.
Preparing the Components for Soldering
Before you start soldering electronic components, it’s essential to properly prepare them to ensure a successful solder joint. Here are the key steps to follow when preparing your components:
- Clean the Components: Ensure that the components you’re going to solder are clean and free from dirt, dust, or any other contaminants. You can use isopropyl alcohol and a clean cloth or cotton swab to remove any residue or flux from previous soldering attempts.
- Trim Excess Leads: If you’re working with through-hole components, trim any excess leads to prevent short circuits or interference with neighboring components. Use a flush cutter to carefully trim the leads close to the PCB surface.
- Straighten Bent Leads: If any leads are bent or misaligned, gently straighten them using a pair of needle-nose pliers. Be careful not to apply excessive force that could damage the component or lead.
- Secure the Components: If you’re soldering surface mount components, it’s a good practice to secure them in place. You can use double-sided tape or a soldering jig to hold the components steady while you solder. This ensures accurate placement and prevents movement during the soldering process.
- Pre-Heat the PCB: If you’re soldering multiple components on a PCB, pre-heating the board can help maintain a consistent temperature during soldering. You can use a preheating plate or a hot air gun to evenly distribute heat, reducing the chances of heat damage to sensitive components.
By properly preparing your components before soldering, you can ensure a clean and reliable connection. Cleaning the components, trimming excess leads, straightening bent leads, and securing the components will contribute to successful soldered joints. Additionally, pre-heating the PCB can help control the temperature, minimizing the risk of thermal damage to the components. Following these steps will set a solid foundation for the soldering process.
Tinning the Soldering Iron
Tinning the soldering iron is an essential step before you start soldering electronic components. Tinning refers to coating the soldering iron tip with a thin layer of solder. This process helps improve heat transfer, prevents oxidation, and ensures better solder flow. Here’s how to properly tin your soldering iron:
- Clean the Soldering Iron Tip: Before tinning, make sure the soldering iron tip is clean and free from any oxidation or residue. If necessary, use a damp sponge or brass wire tip cleaner to remove any built-up material.
- Heat up the Soldering Iron: Plug in your soldering iron and allow it to heat up to its operating temperature. This may take a couple of minutes depending on the type and wattage of your soldering iron.
- Apply Solder to the Tip: Once the soldering iron is hot, hold it vertically with the tip facing upward. Touch the solder wire to the soldering iron tip, allowing a small amount of solder to melt and flow onto the tip. Move the solder wire along the tip to evenly distribute the solder.
- Spread and Shape the Solder: After applying the solder, use a soldering iron cleaning sponge or brass wire tip cleaner to spread and shape the molten solder on the tip. This helps create a smooth and even coating.
- Wipe and Inspect: Before you begin soldering, wipe the excess solder off the tip using a damp sponge or brass wire tip cleaner. Inspect the tinned tip to ensure it has a shiny, silver appearance.
Tinning your soldering iron is a crucial step in the soldering process. It promotes efficient heat transfer, prevents oxidation, and allows for better solder flow. By following the steps outlined above, you can ensure that your soldering iron is properly tinned and ready for soldering electronic components.
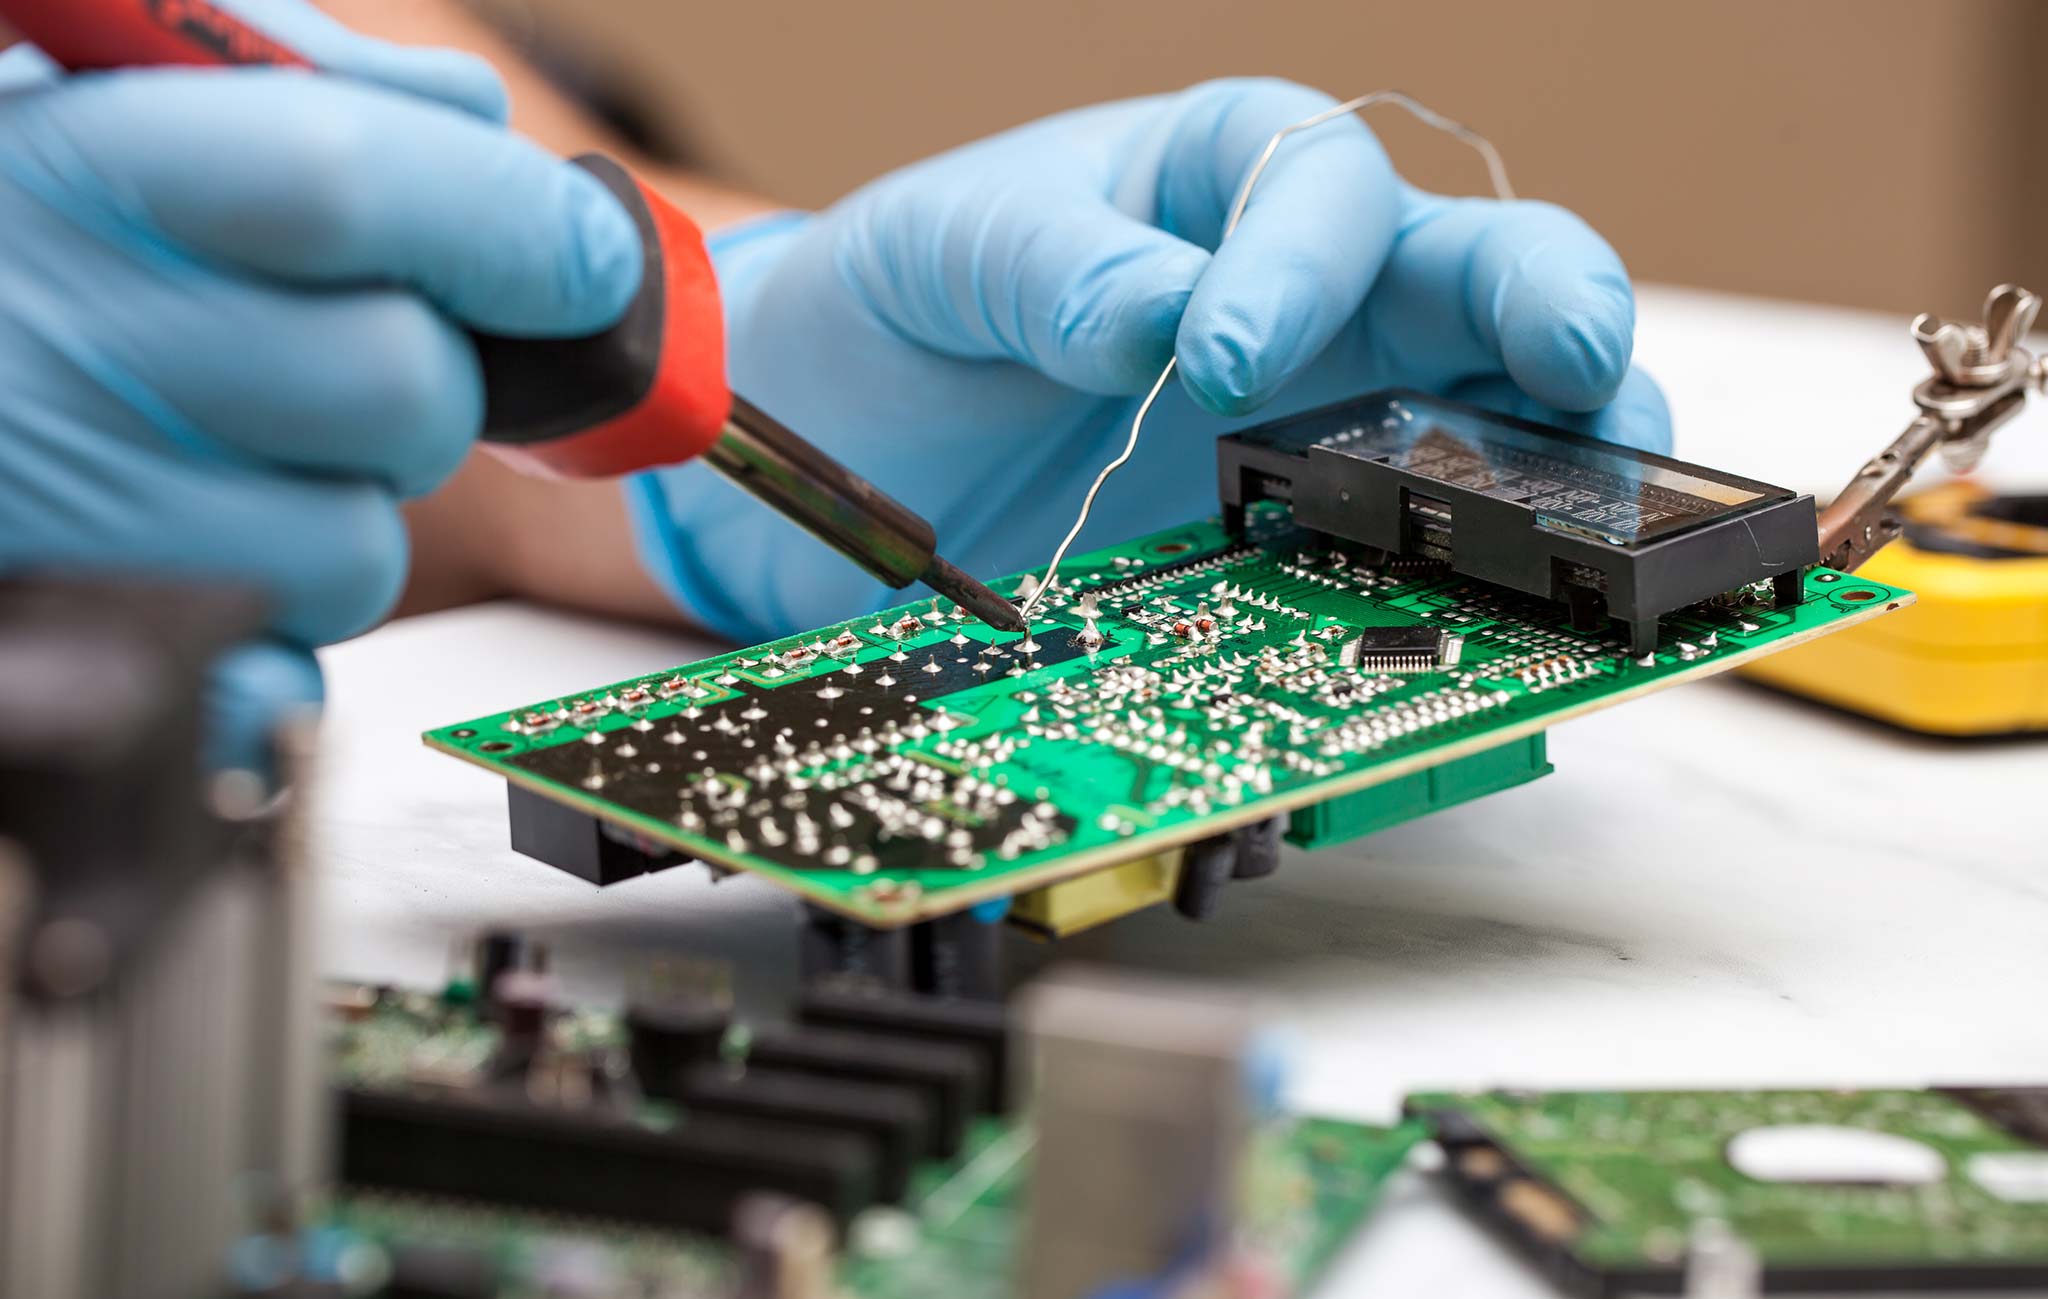
Soldering Surface Mount Components
Surface mount components (SMD) are widely used in modern electronics due to their compact size and high-density packaging. Soldering these components requires precision and care to ensure proper electrical connections. Here’s a step-by-step guide on how to solder surface mount components:
- Prepare the Component and PCB: Ensure that the component and the PCB pads are clean and free from any debris. Align the component with its designated footprint on the PCB, making sure it sits flat and in the correct orientation.
- Apply Flux: Apply a small amount of flux to the pads or the component’s leads using a flux pen or a small brush. Flux helps improve solder flow and prevents oxidation during the soldering process.
- Tack Solder One Pad: With the component in place, use a pair of fine-tipped tweezers to hold the component steady. Heat one pad (usually a corner pad) using the tinned soldering iron tip, and touch the solder to the pad. The solder will melt and form a small bead around the pad.
- Align and Secure: While the tack solder is still molten, adjust the component’s position to align it perfectly with the footprints on the PCB. Apply gentle pressure to keep the component in place until the solder solidifies.
- Solder the Remaining Pads: Once the component is securely aligned, solder the remaining pads one by one. Heat the pad and the lead simultaneously with the soldering iron, touch the solder to the joint, and allow it to flow and form a smooth connection. Be careful not to overheat the component or neighboring pads.
- Inspect and Clean: After soldering all the pads, visually inspect the solder joints for any bridges, cold joints, or insufficient solder. Use a magnifying glass if necessary. Remove any excess flux residue using a brush or lint-free cloth and a solvent appropriate for the flux type.
Soldering surface mount components requires patience and attention to detail. By following these steps and practicing proper technique, you can achieve reliable and aesthetically pleasing soldered connections for your SMD components.
Soldering Through Hole Components
Through-hole components are commonly used in electronics and are characterized by their leads that pass through holes in the PCB. Soldering these components requires careful positioning and reliable electrical connections. Follow these steps to solder through-hole components:
- Prepare the Component and PCB: Ensure that the component leads are straight and aligned with the corresponding holes on the PCB. Place the component on the PCB, making sure it sits flush on the board and the leads go through the holes.
- Tack Solder One Lead: Select a lead, preferably one located at a corner or edge of the component, and bend it slightly to hold the component in place. Heat the lead and the corresponding pad using the tinned soldering iron tip, then touch the solder to the joint. The solder will melt and form a small bead around the lead and pad.
- Align and Secure: While the tack solder is still molten, align the component properly with the PCB and hold it in place until the solder solidifies. Verify that the component remains level and straight before soldering the remaining leads.
- Solder the Remaining Leads: Work your way around the component, soldering the remaining leads one by one. Heat the lead and the pad simultaneously with the soldering iron, touch the solder to the joint, and allow it to flow and create a reliable connection. Be cautious not to apply excessive heat to prevent damage to the component.
- Trim Excess Lead Length: After soldering all the leads, use a pair of flush cutters to trim off any excess lead length close to the PCB surface. Be careful not to apply force that may strain or dislodge the soldered joints.
- Inspect and Test: Inspect the soldered joints for any bridges between leads or insufficient solder. Ensure that each joint has a smooth, shiny appearance. Finally, test the component and related circuitry to verify proper functionality.
Soldering through-hole components requires precision and attention to detail. By following these steps and practicing proper technique, you can achieve secure and reliable soldered connections for your through-hole components, ensuring the optimal performance of your electronic circuits.
Removing Excess Solder
After soldering components, it’s common to end up with excess solder or solder bridges that need to be corrected. Removing excess solder ensures clean and professional-looking solder joints. Here are the steps to remove excess solder:
- Identify Excess Solder: Inspect the solder joints visually or under magnification to identify any areas with excess solder, solder bridges, or solder splashes. Note the specific joints that need attention.
- Heat and Wick: With the soldering iron heated to the appropriate temperature, touch the tip of the iron to the excess solder, heating it up. Quickly position the desoldering wick or solder sucker on the heated solder to absorb the molten solder. The desoldering wick works by drawing the solder into its braided structure through capillary action, while a solder sucker uses suction to remove the solder.
- Clean the Wick and Tip: As you remove excess solder, the desoldering wick may become saturated with solder. Throughout the process, clean the wick or replace it when necessary. For a solder sucker, periodically empty the waste chamber or replace the filter if it becomes clogged.
- Inspect and Repeat if Needed: After removing excess solder, inspect the joints again to ensure they are clean and free from bridges. If any excess solder or bridges remain, repeat the process of heating the solder and using the desoldering wick or solder sucker until the desired result is achieved.
Removing excess solder is an essential step in achieving neat and reliable solder connections. Take your time and be patient to avoid damaging the components or the PCB. When using a desoldering wick, ensure the wick is clean and fresh for optimal performance. With practice, you’ll become more proficient at removing excess solder and achieving clean, professional-looking solder joints.
Inspecting and Testing the Soldered Joint
Once you’ve completed the soldering process, it’s crucial to inspect and test the soldered joint to ensure its quality and reliability. Proper inspection and testing help identify any potential issues or defects and allow for necessary corrections. Here are the steps to inspect and test your soldered joint:
- Visual Inspection: Start by visually inspecting the soldered joint. Look for the following indicators of a well-executed solder joint: a shiny appearance, a smooth and convex fillet, and no visible solder bridges or cold solder joints. Examine the joint from different angles to ensure proper coverage and connection.
- Mechanical Stability: Gently nudge or wiggle the soldered component to check for any movement or looseness. A properly soldered joint should provide a stable and secure connection without any noticeable give or play.
- Continuity Testing: Use a multimeter in continuity mode to test the electrical connectivity of the soldered joint. Touch the multimeter probes to the appropriate points on the solder joint and verify if the multimeter indicates continuity, confirming a successful electrical connection.
- Bulk Insulation Testing: Depending on the application, you may need to perform a bulk insulation test to check for any unintended electrical leakage or short circuits. Use an insulation tester or a megohmmeter to measure the resistance between the soldered joint and adjacent conductive surfaces.
- Functional Testing: If possible, perform functional testing on the soldered component or the entire circuit to ensure proper operation. Confirm that the soldered joint functions as intended and does not interfere with the overall performance of the system.
Thoroughly inspecting and testing the soldered joint is critical for ensuring its quality and reliability. By following these steps, you can identify any issues or defects and take necessary corrective measures. Remember, a careful and systematic approach in inspecting and testing your soldered joints will yield reliable and functional electronic connections.
Troubleshooting Common Soldering Issues
Soldering electronic components may occasionally encounter challenges that can affect the quality and reliability of the soldered joints. Understanding and troubleshooting common soldering issues can help you identify and resolve problems effectively. Here are some common issues and their possible solutions:
- Cold Solder Joint: Cold solder joints occur when there is insufficient heat or improper solder flow, resulting in a dull and grainy appearance. To fix this, reheat the joint and add additional solder to ensure proper wetting and adhesion.
- Solder Bridge: A solder bridge occurs when two adjacent leads or pads are unintentionally connected by excess solder. Use desoldering wick or a solder sucker to remove the excess solder between the bridged connections, ensuring proper isolation of the leads or pads.
- Dry Joint: Dry joints refer to solder joints with inadequate wetting or incomplete solder penetration. These joints may appear dull and rough. To remedy this, reheat the joint and add additional solder to achieve proper wetting and ensure a solid connection.
- Component Damage: Overheating during soldering can damage delicate components, leading to malfunctions or failure. To prevent component damage, use a lower temperature or shorten the soldering time. Utilize heat sinks or thermal clamps when soldering heat-sensitive components.
- Solder Ball or Splatter: Solder balls or splatters occur when molten solder unintentionally splashes or forms small balls on the PCB or components. Properly clean and remove solder balls or splatters using desoldering wick, flux and a soldering iron, or a brush to prevent potential short circuits or interference.
When troubleshooting soldering issues, it’s important to have good lighting, a magnifying glass, and the necessary tools like desoldering wick, solder sucker, and flux. Additionally, practice proper soldering techniques, such as using the right temperature, applying solder evenly, and ensuring proper component and PCB alignment.
Remember that practice makes perfect when it comes to soldering, and learning from your mistakes is a crucial part of the process. By troubleshooting common soldering issues and adjusting your technique accordingly, you’ll improve your soldering skills and create high-quality, reliable connections.
Safety Precautions for Soldering
Soldering involves working with high temperatures and potentially hazardous materials. It is important to prioritize safety while soldering to prevent accidents and protect yourself and your surroundings. Follow these safety precautions when soldering:
- Work in a Well-Ventilated Area: Soldering produces fumes that can be harmful if inhaled. Ensure you work in a well-ventilated area or use a fume extractor to remove the fumes from your workspace. If ventilation is not adequate, wear a respirator to protect your lungs.
- Use Eye Protection: Wear safety glasses or goggles to safeguard your eyes from potential harm. Solder may splatter, and tiny metal fragments or soldering debris can cause eye injuries. Protecting your eyes is essential during the soldering process.
- Protect Your Skin: Soldering irons can reach high temperatures, so ensure you wear heat-resistant gloves or use heat-resistant pads when handling hot tools or components. Avoid touching the soldering iron and freshly soldered joints to prevent burns.
- Avoid Flammable Materials: Keep flammable materials like paper, fabric, and solvents away from your soldering area. Avoid setting the soldering iron on a flammable surface and have a fire extinguisher nearby as a precautionary measure.
- Take Breaks: Soldering requires focus and concentration. Take regular breaks to avoid fatigue and prevent accidents due to loss of attention. It’s essential to stay alert and focused while soldering to maintain safety standards.
- Proper Handling of Tools: Handle soldering irons, solder wire, and other tools with care. Store them safely in designated holders or stands to prevent accidental contact and burns. Unplug the soldering iron when not in use and allow it to cool before storing.
- Be Mindful of Electrical Safety: Ensure you have a stable power source and avoid overloading circuits. Use a grounded outlet and inspect cords and plugs for any damage or fraying. Regularly check tools and equipment for any electrical issues and address them immediately.
- Work Methodically: Maintain an organized workspace to reduce the likelihood of accidents and mishaps. Keep cords and cables secured and out of the way to avoid tripping. Arrange tools and materials systematically to allow for efficient and safe work.
- Keep Children and Pets Away: Soldering should be done in an area inaccessible to children and pets. The high temperatures, hot tools, and potential exposure to hazardous materials present risks to their safety. Ensure your soldering area is secure and restricted to authorized personnel only.
By following these safety precautions and using common sense, you can create a safe soldering environment and minimize potential hazards. Always prioritize safety when working with soldering equipment to protect yourself and others around you.