
Factors to Consider When Choosing Solder for Electronics
Choosing the right solder is crucial for the success of your electronics projects. The type of solder you select can impact the reliability and performance of your circuits. Here are some factors to consider when making your decision:
- Melting Temperature: The melting temperature of the solder is an important factor to consider. It should be compatible with the components and materials you are working with. High melting temperature solders are suitable for applications that require increased durability, while low melting temperature solders can prevent heat damage to sensitive components.
- Solder Composition: Different types of solder have varying compositions. Lead-based solder offers excellent conductivity and ease of use, but it is considered toxic and is being phased out in many regions. Lead-free solder is a safer alternative, but it may have different properties and require higher temperatures for melting.
- Flux Content: Flux is a chemical agent that helps remove oxidation, improves wetting, and enhances solder flow. Some solders come with integrated flux, while others require separate flux application. Consider the flux content and the type of flux (rosin-based or water-based) that best matches your soldering needs.
- Application Method: The method you plan to use for soldering influences the type of solder to choose. For hand soldering, a solder wire is typically used. For reflow soldering, solder paste is applied and heated to create the solder joints. Make sure the solder you choose is suitable for your chosen method.
- Environmental Considerations: If you are working on projects that have specific environmental requirements or comply with certain regulations, make sure the solder you choose meets the necessary standards. RoHS compliance, for instance, ensures that the solder is free from hazardous substances.
By considering these factors, you can make an informed decision when choosing solder for your electronics projects. Remember to always follow proper soldering techniques and handle the solder safely to ensure the best results and the longevity of your circuits.
Types of Solder for Electronics
Solder is a crucial component in the assembly and repair of electronic circuits. There are several types of solder available, each with its own characteristics and uses. Here are the common types:
- Lead-Based Solder: Lead-based solder, also known as tin-lead solder, has been widely used in electronics for many years. It consists of a mixture of tin and lead, typically in ratios such as 60/40 or 63/37. This type of solder has excellent conductivity and is relatively easy to work with. However, due to environmental and health concerns, the use of lead-based solder is being phased out in many countries.
- Lead-Free Solder: As an alternative to lead-based solder, lead-free solder has become more prevalent. It generally consists of tin along with other metals such as silver, copper, and bismuth. Lead-free solder is safer for both humans and the environment. However, it has a higher melting point, which may require a different soldering process, and it can be less ductile than lead-based solder.
- Flux-Cored Solder: Flux-cored solder is a type of solder wire that has flux integrated into its core. The flux helps remove oxidation and impurities as the solder melts, allowing for better soldering results. Flux-cored solder is convenient to use because it eliminates the need for separate flux application. It is commonly used for hand soldering applications.
- Silver Solder: Silver solder contains a higher percentage of silver compared to other solders. It offers superior electrical conductivity and is often used in applications where high electrical or thermal conductivity is required. Silver solder is commonly used in electronics, jewelry making, and plumbing applications.
- Aluminum Solder: Aluminum solder is specifically designed for soldering aluminum and aluminum alloys. It typically contains flux to facilitate bonding with the aluminum surfaces. This type of solder is commonly used in automotive, aerospace, and other industries where aluminum components are prevalent.
Choosing the right type of solder for your electronics projects depends on various factors, including the specific application, environmental considerations, and your soldering skills. Consider the requirements of your project and the materials you are working with to select the most suitable solder type. Remember to follow proper soldering techniques and safety guidelines for optimal results.
Lead-Based Solder: Pros and Cons
Lead-based solder, also known as tin-lead solder, has long been the standard choice for electronics soldering. Here are the advantages and disadvantages associated with using lead-based solder:
Pros of Lead-Based Solder:
- Excellent Conductivity: Lead-based solder offers excellent electrical conductivity, which ensures reliable connections between electronic components. This is particularly important for applications that require high-performance and low resistance.
- Easy to Work With: Lead-based solder has a lower melting point compared to some alternative solders, making it easier to handle during the soldering process. Its relatively low viscosity allows for smooth flow and better wetting of component leads and pads.
- Proven Track Record: Lead-based solder has been widely used in electronics manufacturing for many years. As a result, there is a wealth of knowledge and experience, as well as established soldering techniques and guidelines, associated with its use.
- Availability and Affordability: Lead-based solder is readily available and often less expensive than alternative solders. Its popularity means that it can be easily obtained from electronics suppliers and hardware stores.
Cons of Lead-Based Solder:
- Environmental and Health Concerns: The main drawback of lead-based solder is its potential harm to human health and the environment. Lead is a toxic substance, and improper handling or disposal of lead-based solder can lead to environmental contamination. As a result, the use of lead-based solder is being phased out in many regions to reduce the risk of lead exposure.
- Regulatory Restrictions: Due to the environmental and health risks associated with lead-based solder, various regulations and standards have been put in place to limit its use. Certain industries and applications, such as medical devices and automotive electronics, may have specific requirements for lead-free solder.
- Higher Melting Point: While lead-based solder has a relatively low melting point compared to some alternative solders, it still requires sufficient heat during the soldering process. This can be a concern for heat-sensitive components or materials that may be damaged by excessive heat.
- Alloy Compatibility: Lead-based solder may not be suitable for all types of electronic components and materials. Some components, such as certain surface mount devices (SMDs), may require lead-free solder due to their specific construction and requirements.
When considering the use of lead-based solder for your electronics projects, it is essential to weigh the benefits against the potential risks. It is advisable to stay updated on regulations and industry trends regarding the use of lead-based solder and to explore alternative solder options, such as lead-free solder, to meet environmental and regulatory requirements.
Lead-Free Solder: Pros and Cons
Lead-free solder has emerged as a safer alternative to lead-based solder in response to environmental and health concerns. Here are the pros and cons associated with the use of lead-free solder:
Pros of Lead-Free Solder:
- Environmental and Health Safety: Lead-free solder eliminates the use of lead, a toxic substance that poses risks to both human health and the environment. By using lead-free solder, you contribute to reducing the potential for lead pollution and minimizing health hazards associated with lead exposure.
- Regulatory Compliance: Many countries and regions have adopted regulations and standards, such as the Restriction of Hazardous Substances (RoHS) directive, which restricts the use of hazardous materials, including lead, in electrical and electronic equipment. Using lead-free solder ensures compliance with such regulations.
- Wider Market Acceptance: As the use of lead-free solder becomes more prevalent, manufacturers and suppliers are adapting to meet the increasing demand. Lead-free solder is now widely available, and more electronic components and devices are designed to be compatible with lead-free soldering processes.
- Suitable for High-Temperature Applications: Lead-free solder typically has a higher melting point than lead-based solder. This attribute makes it suitable for applications that involve higher operating temperatures, where lead-based solder may melt or degrade.
Cons of Lead-Free Solder:
- Higher Melting Point: Lead-free solder generally requires higher temperatures for melting compared to lead-based solder. It may necessitate the use of specialized equipment or techniques, such as a soldering iron with adjustable temperature settings, to achieve proper solder joints.
- Less Ductile: Lead-free solder can be less ductile than lead-based solder. This means it is more prone to cracking or becoming brittle over time, especially if subjected to frequent temperature changes or mechanical stress. Proper handling and joint design are critical to minimize these issues.
- Compatibility with Components: Some electronic components, especially those designed for lead-based soldering processes, may have limited compatibility with lead-free solder. It is important to check component datasheets and guidelines to ensure they can be safely soldered with lead-free solder.
- Learning Curve: If you are transitioning from using lead-based solder to lead-free solder, there may be a learning curve associated with adjusting to the different soldering characteristics. Lead-free solder may require adjustments to soldering techniques, such as longer heating times or increased flux use, to achieve optimal results.
Considering the environmental benefits and regulatory requirements, lead-free solder is increasingly becoming the standard choice in electronics manufacturing. It is important to understand and adapt to the unique properties and challenges of lead-free solder to ensure successful solder joints and the long-term reliability of electronic assemblies.
Flux-Cored Solder: What You Need to Know
Flux-cored solder is a popular choice for electronics soldering due to its convenience and effectiveness. Here is what you need to know about flux-cored solder:
Flux:
Flux is a chemical substance that helps remove oxidation, improves wetting, and enhances the flow of solder. Flux serves several important functions during the soldering process, including cleaning the surfaces to be soldered, preventing oxidation, and ensuring smooth and reliable solder joints.
Flux-Cored Solder Composition:
Flux-cored solder is a solder wire with flux integrated into the core. The flux can come in different formulations, such as rosin-based flux or water-based flux. Rosin-based flux is commonly used in electronics soldering due to its effectiveness in removing oxidation and providing good wetting properties. Water-based fluxes are used in some specialized applications where residue-free soldering is required.
Advantages of Flux-Cored Solder:
- Convenience: Flux-cored solder eliminates the need for separate flux application, making the soldering process more efficient and convenient. The flux is already present within the solder wire, ready to be activated as the solder melts.
- Improved Wetting: The integrated flux in flux-cored solder aids in the wetting process, allowing the solder to spread and adhere more easily to the surfaces being soldered. This enhances the formation of reliable solder joints with good electrical and mechanical connections.
- Oxidation Prevention: Flux-cored solder helps protect the metal surfaces from oxidation during the soldering process. Flux removes existing oxides and creates a protective layer to prevent new oxidation from forming, ensuring a clean and stable soldering environment.
Considerations with Flux-Cored Solder:
- Residue Removal: Some flux-cored solders can leave behind residue after the soldering process. This residue should be properly cleaned to prevent potential corrosion or electrical issues. Use appropriate cleaning methods, such as isopropyl alcohol or specialized flux removers, to remove any residues left behind.
- Flux Type and Activity: Different types of flux have varying activity levels. Highly active fluxes can remove more oxidation but may also leave more residue. Consider the specific application and cleaning requirements when selecting flux-cored solder.
- Storage and Shelf Life: Flux-cored solder should be properly stored to maintain its effectiveness. Keep it in a cool, dry place, away from direct sunlight and moisture. Monitor the shelf life of the solder and ensure it is within the stated expiration date for optimal soldering results.
Flux-cored solder offers a convenient solution for effective soldering in electronics projects. By understanding its composition, advantages, and considerations, you can make the most of flux-cored solder and achieve reliable solder joints with improved wetting and protection against oxidation.
Choosing the Right Solder Diameter for Your Project
When it comes to soldering electronics, selecting the appropriate solder diameter is crucial for achieving quality solder joints. The solder diameter you choose depends on various factors, including the complexity of the project, the size of the components, and the desired precision of the soldering. Here are some considerations to keep in mind:
Diameter Options:
Solder wire comes in various diameters, typically ranging from 0.4mm to 2.0mm or more. The most commonly used diameters for electronics soldering are 0.6mm and 0.8mm, but smaller or larger diameters may be suitable for specific applications.
Considerations for Choosing Solder Diameter:
- Component Size: The size of the components being soldered is an important factor in determining the appropriate solder diameter. Smaller components, such as surface mount devices (SMDs), require more precision and may benefit from using a thinner solder diameter, such as 0.4mm. Larger components, on the other hand, may require thicker solder to ensure sufficient solder flow and proper joint formation.
- Joint Accessibility: The accessibility of the soldering joint affects the choice of solder diameter. For soldering in tight or hard-to-reach spaces, using a thinner solder diameter can provide better maneuverability and control. Thicker solder may be more suitable for joints that are easily accessible and require more solder material for a sturdy connection.
- Soldering Technique: Your preferred soldering technique can influence the solder diameter choice as well. If you prefer drag soldering or reflow techniques, which involve transferring solder across several joints at once, using a slightly thicker solder diameter may be more efficient. However, for precise spot soldering or fine-pitch soldering, thinner solder wire allows for better control and accuracy.
- Project Complexity: The complexity of your electronics project can also impact the solder wire diameter selection. Projects with a higher density of components or intricate circuitry may require thinner solder to avoid excessive solder bridging or unintentional short circuits. Simpler projects with larger components may allow for a wider range of solder wire diameters.
It’s worth noting that solder diameter is not the only factor that determines the quality of solder joints. Proper soldering technique, adequate flux application, and suitable temperature control are equally important. Experimenting with different solder diameters and practicing soldering techniques on scrap components can help you find the optimal solder diameter for your specific projects.
By considering the size of the components, joint accessibility, soldering technique, and project complexity, you can select the right solder diameter to achieve reliable and visually appealing solder joints in your electronics projects.
Solder Alloy Selection for Different Electronic Components
Choosing the right solder alloy is essential for achieving strong and reliable solder joints in electronic assemblies. Different electronic components may have specific requirements or compatibility considerations when it comes to solder alloy selection. Here are some factors to consider:
Common Solder Alloys:
The most commonly used solder alloys in electronics are tin-lead (Sn-Pb) and lead-free alloys, such as tin-silver-copper (Sn-Ag-Cu) and tin-copper (Sn-Cu).
Tin-Lead (Sn-Pb) Alloys:
- 63/37: The 63/37 tin-lead alloy is a eutectic alloy, meaning it has a single melting point that ensures easy and consistent soldering. It has been widely used in electronics for its excellent wetting properties and overall reliability. However, due to environmental and health concerns, the use of tin-lead solder has decreased in recent years.
- 60/40: The 60/40 tin-lead alloy is another popular option, offering similar characteristics to the 63/37 alloy. It has a slightly lower melting point and is commonly used in applications where lower temperature soldering is required.
Lead-Free Alloys:
- Tin-Silver-Copper (Sn-Ag-Cu): This lead-free alloy, often referred to as SAC alloy, consists of tin, silver, and copper. It has become a widely adopted replacement for tin-lead solder due to its good mechanical strength, thermal conductivity, and reliability. SAC alloys are compatible with a variety of electronic components and are suitable for general-purpose soldering applications.
- Tin-Copper (Sn-Cu): Tin-copper alloys offer improved resistance to tin whisker growth, which is a potential concern in certain environments. These alloys have good solderability and are commonly used in applications requiring high resistance to mechanical stresses and vibration.
Component Compatibility:
When selecting a solder alloy for different electronic components, it is important to consider their compatibility and soldering requirements:
- Surface Mount Devices (SMDs): Many modern electronic components, including SMDs, are designed for lead-free soldering processes. Lead-free alloys like SAC are suitable for soldering SMDs, ensuring reliable and mechanically stable joints.
- Through-Hole Components: Through-hole components typically have larger leads and can be soldered using both tin-lead and lead-free solder alloys. The choice depends on the specific application requirements and any governing regulations or customer specifications.
- High-Temperature Applications: For electronic components that are subjected to high temperatures during operation, such as certain power devices or automotive components, solder alloys with higher melting points may be required. Consult the component datasheets or manufacturer guidelines for alloy recommendations.
It is crucial to refer to component datasheets, manufacturer recommendations, and industry standards (such as the J-STD-006 for solder alloys) for guidance on solder alloy selection. By considering the compatibility of the components and the specific requirements of your project, you can choose the most appropriate solder alloy to ensure reliable and long-lasting solder joints in your electronic assemblies.
Tips for Properly Handling and Storing Solder
Proper handling and storage of solder is crucial to maintain its quality and effectiveness. Here are some essential tips to ensure optimal handling and storage of solder:
Handling Solder:
- Wash Hands: Before handling solder, it is important to wash your hands thoroughly to remove any dirt, oils, or contaminants that could affect the solder’s adhesion or conductivity.
- Avoid Contamination: Keep solder away from materials or surfaces that may contaminate it, such as greasy or dirty workbenches. Contamination can affect the solder’s flow, wetting ability, and overall quality of the solder joints.
- Use Clean Tools: Ensure that your soldering iron tip and other soldering tools are clean and free from oxidation or residue buildup. Clean tools provide better heat transfer and help maintain the integrity of the solder joint.
- Proper Flux Application: If you are using a flux-cored solder or applying flux separately, use an appropriate amount to ensure effective cleaning and wetting. Too much flux can cause excessive residue, while too little may result in insufficient cleaning and flux activation.
- Soldering Technique: Practice proper soldering techniques, such as applying the iron to the joint and allowing the solder to flow smoothly. Avoid excessive heat or prolonged contact, which can damage components or lead to overheating.
Storing Solder:
- Keep Dry: Moisture can degrade the quality of solder. Store solder in a cool, dry place, away from humidity, to prevent oxidation and corrosion. Consider using a desiccant or silica gel packets to absorb any moisture in the storage area.
- Avoid Extreme Temperature Changes: Rapid temperature changes can cause condensation and moisture buildup on solder. Store solder away from areas with fluctuating temperatures, such as near windows or vents.
- Avoid Excessive Heat: High temperatures can melt solder wire or cause flux degradation. Keep solder away from direct sunlight, heat sources, and hot surfaces to maintain its integrity. Use a soldering iron stand or holder to prevent accidental contact and damage.
- Organize and Label: Properly label and organize different types and diameters of solder to avoid confusion and ensure easy access to the right solder for each project. This can help prevent mix-ups and ensure consistent soldering results.
- Monitor Shelf Life: Monitor the expiration dates or recommended shelf life of your solder. Over time, solder can degrade or lose its effectiveness. Regularly check for signs of degradation, such as discoloration or changes in consistency, and replace if necessary.
By following these tips for proper handling and storage of solder, you can maintain its quality, improve soldering results, and ensure the longevity of your electronic assemblies.
Common Soldering Problems and How to Troubleshoot Them
Even with proper technique and equipment, soldering can sometimes present challenges. Here are some common soldering problems you may encounter during electronics projects and troubleshooting tips to help you resolve them:
Insufficient Wetting:
Insufficient wetting occurs when the solder fails to form a smooth and consistent bond with the components being soldered:
- Possible Causes: Insufficient heat, dirty or oxidized surfaces, inadequate flux application.
- Troubleshooting Tips: Ensure your soldering iron is set to the appropriate temperature for the solder and components being used. Clean the surfaces to be soldered to remove any oxidation or dirt. Apply a suitable amount of flux to facilitate proper wetting and solder flow.
Cold Solder Joint:
A cold solder joint has a brittle appearance and lacks a smooth, shiny surface. It is a weak joint that may lead to poor electrical conductivity or mechanical stability:
- Possible Causes: Insufficient heat, inadequate solder flow, sudden movement during the soldering process.
- Troubleshooting Tips: Ensure your soldering iron is reaching the appropriate temperature for the solder alloy. Allow sufficient time for the solder to melt and flow smoothly. Avoid excessive movement or disturbance of the joint during the cooling process to allow for proper solidification.
Solder Bridging:
Solder bridging occurs when excess solder forms unintended connections between adjacent components or pins:
- Possible Causes: Excessive solder applied, inadequate flux or flux residue, solder overflow due to excessive heating.
- Troubleshooting Tips: Use the appropriate amount of solder for the joint to avoid excess build-up. Ensure adequate flux is applied to promote good solder flow without excessive residue. Adjust the heat and soldering technique to prevent overheating and solder spreading beyond the intended area.
Component Damage:
Component damage can occur during soldering due to excessive heat or improper handling:
- Possible Causes: Excessive heat from the soldering iron, prolonged heat exposure, improper supporting or gripping of components.
- Troubleshooting Tips: Use the proper soldering iron temperature and apply heat only for the necessary time to avoid component damage. Support delicate components or larger components with heat sinks or clamps to dissipate heat. Avoid excessive force when positioning or manipulating components to prevent damage.
Remember, practice and experience play important roles in soldering success. If you encounter soldering problems, don’t get discouraged. Learn from the issues you face and use troubleshooting techniques to improve your soldering skills and achieve better results in your electronics projects.
Best Practices for Soldering Electronics
To ensure successful soldering and reliable connections in your electronics projects, it is essential to follow best practices. Here are some key guidelines to keep in mind:
Prepare and Plan:
- Clean Work Area: Start by setting up a clean and organized work area that is free from clutter and potential sources of contamination. A clean workspace improves efficiency and reduces the risk of damaging components or creating faulty solder joints.
- Component Identification: Familiarize yourself with the components you will be soldering. Identify the polarity, pin configurations, and any specific guidelines or precautions provided in the component datasheets or manuals.
- Plan the Soldering Sequence: Determine the order in which you will solder the components. It is often recommended to start with the smallest and more delicate components first, gradually moving to larger ones. This helps prevent damage to already soldered components and ensures accessibility.
Soldering Techniques:
- Appropriate Heat Control: Set your soldering iron to the appropriate temperature for the solder and component being soldered. Too low temperature can result in insufficient solder flow, while too high temperature can lead to component damage or overheating.
- Proper Solder Application: Apply the soldering iron tip and solder to the joint simultaneously. Make sure the joint is adequately heated before applying solder to achieve good wetting and proper solder flow. Avoid excessive solder application, as it can lead to solder bridges or poor electrical connections.
- Consistent Solder Joint Appearance: Aim for smooth and shiny solder joints. A dull or grainy appearance can indicate insufficient wetting or a cold solder joint. Consistency in joint appearance ensures reliable electrical and mechanical connections.
- Avoid Excessive Heating: Minimize the time components are exposed to the heat from the soldering iron. Prolonged heating can damage sensitive components, cause thermal stress, or result in lifted pads. Be mindful of the heat transfer to surrounding components and use heat sinks or heat shields when appropriate.
- Proper Cooling and Handling: Allow solder joints sufficient time to cool and solidify before handling the assembly. Mechanical stress during the cooling process can lead to weakened joints or component displacement. Handle the assembly with care to avoid damaging the soldered connections.
Safety Considerations:
- Solder Fumes: Work in a well-ventilated area or use a fume extractor to minimize exposure to soldering fumes. Avoid directly inhaling the fumes, as they may contain potentially harmful substances.
- Protective Gear: Wear safety glasses or goggles to protect your eyes from solder splatters or any flying debris. Heat-resistant gloves may also be used to protect your hands from burns or accidental contact with hot surfaces.
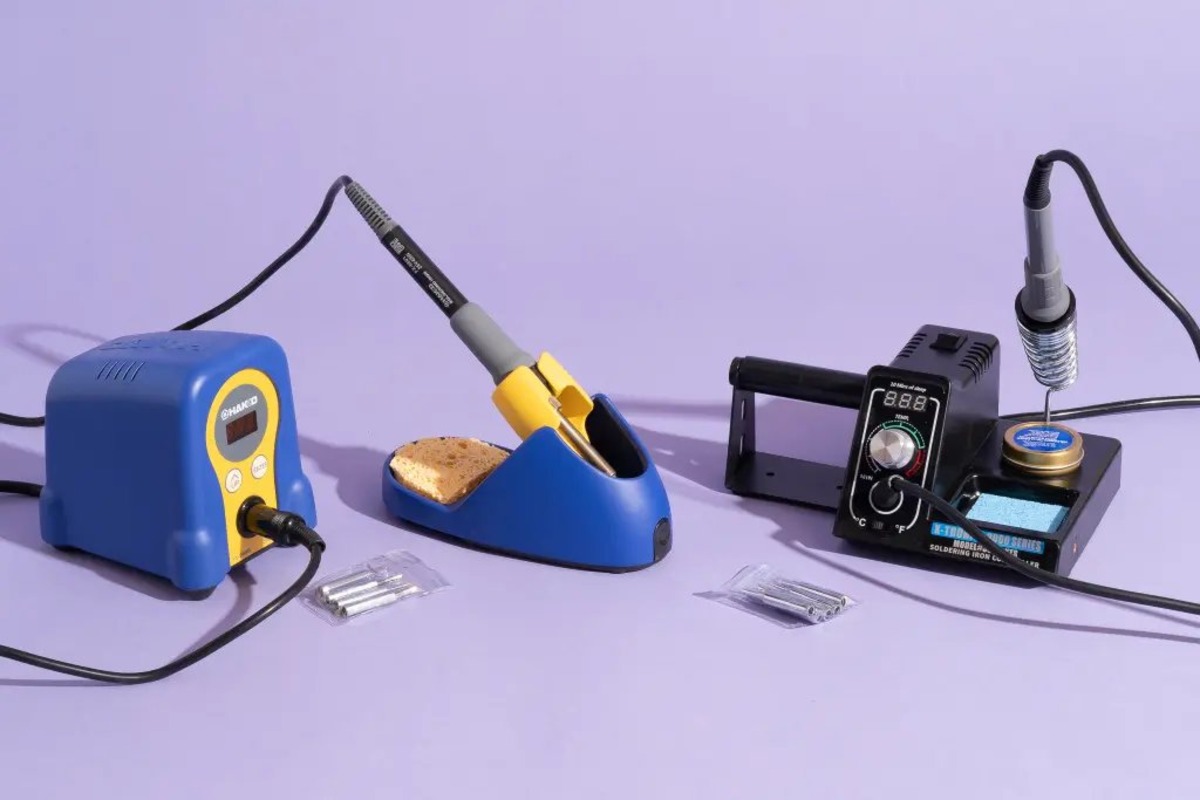
- Proper Tool Handling: Use soldering equipment, such as soldering iron stands, holders, or mats, to safely store and handle hot soldering irons. This reduces the risk of burns or accidental damage from handling hot tools.
- Cleanup and Waste Disposal: Properly clean your work area and dispose of solder scraps, used flux, and other waste materials according to local regulations and safety guidelines.
By following these best practices, you can enhance your soldering skills, ensure reliable connections, and maintain a safe and efficient soldering environment. Remember to practice regularly and continuously improve your techniques to achieve consistent and high-quality soldering results in your electronics projects.