
What is Soldering?
Soldering is the process of joining metal components by melting a filler material, known as solder, to create a strong electrical and mechanical bond. It is commonly used in various industries, including electronics, plumbing, and automotive. In the field of guitar electronics, soldering plays a vital role in connecting wires, components, and circuit boards to ensure the proper functioning of the instrument.
The solder itself is typically a combination of metals, such as tin and lead, or lead-free alternatives, like tin and silver. When heated, the solder melts and flows into the joint, forming a solid connection as it cools down. The process creates a stable electrical pathway, allowing the flow of current between the connected components.
Soldering requires the use of a soldering iron, which is a handheld tool that generates heat to melt the solder. The iron consists of a metal tip, an insulated handle, and a power source. When the tip of the soldering iron touches the solder joint, it transfers heat, causing the solder to liquefy and adhere to the metal surfaces.
Soldering is a delicate procedure that requires precision and attention to detail. It requires a steady hand to ensure that the solder is applied correctly and evenly. The success of a solder joint depends on factors such as the quality of the solder, suitable flux, proper heating, and the preparation of the surfaces to be soldered.
In the world of guitar electronics, soldering is a fundamental skill for any musician or technician. It enables the proper installation and maintenance of pickups, switches, potentiometers, and other electronic components essential for the functioning of an electric guitar. Learning how to solder effectively will empower guitarists to make modifications, repairs, and upgrades to their instruments, ultimately enhancing their performance and sound.
Tools and Materials Needed
Before starting any soldering project for guitar electronics, it is essential to gather the necessary tools and materials. Having the right equipment on hand will ensure a smooth and successful soldering experience. Here are the key tools and materials you will need:
- Soldering iron: A soldering iron with an adjustable temperature setting is preferable. It should have a fine and durable tip to provide precise control during soldering.
- Solder wire: Choose a high-quality solder wire with a suitable composition, such as a 60/40 tin-lead or lead-free solder. Thinner diameters, like 0.032 to 0.050 inches, are generally recommended for guitar electronics.
- Flux: Flux helps to improve the flow and wetting ability of the solder. It cleans the surfaces to be soldered and promotes a stronger bond. Select a flux specifically designed for electrical soldering.
- Soldering stand: A soldering stand or holder keeps the soldering iron in a stable and upright position when not in use. It prevents accidental burns and safeguards your work surface.
- Wire cutters/strippers: These tools are used to cut and strip the insulation from wires, allowing for easier soldering and connection. Invest in quality wire cutters/strippers for precise and clean cuts.
- Desoldering pump or solder wick: Accidents happen, and components may need to be removed or replaced. A desoldering pump or solder wick helps in the removal of excess solder or incorrect solder connections.
- Heat shrink tubing: Heat shrink tubing provides insulation and protects soldered connections. It is essential for covering exposed wires and preventing short circuits.
- Third-hand tool: A third-hand tool, with adjustable alligator clips or clamps, is extremely useful for holding components and wires securely in place during soldering.
- Safety goggles and heat-resistant gloves: Protecting your eyes and hands is crucial while soldering. Invest in safety goggles to shield your eyes from potential splashes or sparks. Heat-resistant gloves will protect your hands from accidental burns.
Having these tools and materials readily available will ensure that you can tackle any soldering project related to guitar electronics with confidence and precision. Remember to always follow good safety practices and work in a well-ventilated area. With the right equipment, you’ll be able to create professional-quality solder joints and bring your guitar electronics to life.
Preparing the Workstation
Setting up a proper workstation is crucial for a successful soldering project. A well-organized and clean workspace will not only ensure your safety but also contribute to the quality of your soldering work. Follow these steps to prepare your workstation:
- Choose a well-ventilated area: Soldering involves the release of fumes, so it’s important to work in a well-ventilated space. Open windows or use fans to ensure proper air circulation in the room.
- Clean the work area: Clear your table or workbench of any unnecessary clutter. This will provide you with ample space to work and reduce the risk of accidents or damage to your equipment.
- Use a non-flammable surface: Place a heat-resistant mat or a non-flammable surface, such as a ceramic tile or a silicone mat, on your work area. This will protect the surface from heat damage and prevent any accidental fires.
- Secure the soldering iron stand: Ensure that your soldering iron stand is stable and securely positioned on your workstation. This will prevent accidents and ensure that your soldering iron is easily accessible when needed.
- Organize your tools and materials: Arrange your soldering tools and materials within easy reach. This will save you time and effort during the soldering process. Use containers, trays, or a toolbox to keep everything organized.
- Ensure proper lighting: Adequate lighting is essential for soldering. Use a bright desk lamp or an adjustable LED light source to illuminate your workspace. This will help you see small details and ensure accurate soldering.
- Have a fire extinguisher nearby: As a safety precaution, keep a fire extinguisher within reach of your workstation. This will allow you to quickly mitigate any potential fire hazards.
By following these steps, you will be able to create a safe and efficient workstation for your soldering projects. Remember to always exercise caution and adhere to safety guidelines while working with soldering irons and other tools. A well-prepared workstation will contribute to successful and professional-quality soldering results.
Understanding Solder and Flux
When it comes to soldering, it’s essential to understand the role of solder and flux in achieving reliable and effective solder joints. Let’s explore these two critical components:
Solder: Solder is the material used to create the bond between metal surfaces. It typically consists of a combination of metals, such as tin and lead, or lead-free alloys like tin and silver. The choice of solder composition depends on the specific application and environmental regulations.
Solder comes in different forms, including wire, paste, and pre-formed shapes. When heated, solder melts and flows into the joint, creating a strong bond as it solidifies. The molten solder forms a metallurgical connection between the metal surfaces, ensuring both mechanical strength and electrical conductivity.
Flux: Flux is a chemical compound used in the soldering process. It serves several critical functions:
- Cleanse and prepare surfaces: Flux removes oxidation, dirt, and contaminants from the metal surfaces to be soldered. This prepares the surfaces for proper bonding and helps solder flow more easily.
- Promote wetting: Flux promotes wetting, which refers to the even spreading of solder over the joint. It helps the solder adhere to the metal surfaces, ensuring a strong and reliable connection.
- Prevent oxidation: Flux creates a protective barrier over the solder joint, preventing oxidation during the soldering process. This ensures a more durable and long-lasting solder connection.
Flux is available in different forms, including liquids, gels, and pastes. The choice of flux depends on the application and personal preference. Some solder wires come with a built-in flux core, providing a convenient option for soldering guitar electronics.
When soldering, it’s important to use the right flux and apply it appropriately. Applying too much flux can lead to excessive residue, which may affect the electrical properties of the solder joint. On the other hand, inadequate flux may result in poor wetting, weak connections, or an increased risk of solder joint failure over time.
By understanding the properties and functions of solder and flux, you can make informed choices when selecting materials for your soldering projects. The proper combination of solder and flux will result in solid, reliable solder joints that ensure the optimal performance and longevity of your guitar electronics.
Safety Precautions
When engaging in soldering for guitar electronics, it is crucial to prioritize safety throughout the entire process. Soldering involves the use of high temperatures and potentially harmful fumes, so taking the necessary precautions is essential. Here are some important safety measures to follow:
- Work in a well-ventilated area: Soldering produces smoke and fumes that can be hazardous if inhaled. Ensure that you are working in a well-ventilated space, such as near an open window or under a fume extractor. If necessary, consider using a respirator or wearing a mask to protect your lungs.
- Protect your eyes: Wear safety goggles or glasses that provide adequate eye protection. The intense heat from the soldering iron can cause tiny molten solder droplets to splatter, posing a risk to your eyes.
- Avoid flammable materials: Keep flammable materials, such as paper, fabric, or solvents, away from your soldering area. The high temperatures involved can cause accidental fires or damage to nearby objects.
- Mind your clothing and accessories: Wear non-loose, heat-resistant clothing to minimize the risk of accidental contact with the soldering iron. Remove any jewelry or accessories that may interfere with your work or be affected by the heat.
- Protect your hands: Use heat-resistant gloves to protect your hands from accidental burns. Additionally, avoid touching the hot soldering iron tip directly as it can cause severe burns.
- Use proper handling techniques: When working with a heated soldering iron, always hold it by the insulated handle to prevent burns or electrical shocks.
- Be cautious with electrical components: Ensure that the power to the electrical circuits you are working on is turned off and unplugged. This prevents accidental shocks and reduces the risk of damaging the components.
- Keep a fire extinguisher nearby: As a precautionary measure, have a fire extinguisher readily available in case of any accidental fires. Make sure you know how to use it effectively.
- Take breaks when needed: Soldering can be a time-consuming process, and fatigue can lead to accidents. Take regular breaks to rest and refocus, especially during long soldering sessions.
By adhering to these safety precautions, you can minimize risks and ensure a safe soldering experience. Remember, safety should always be a top priority, allowing you to concentrate on achieving the best solder joints for your guitar electronics.
Identify the Parts to be Soldered
Before you begin the soldering process for your guitar electronics, it is crucial to identify the specific parts that will require soldering. This step ensures that you have a clear understanding of what needs to be soldered and helps you plan your soldering workflow effectively. Here’s how to identify the parts:
- Review the schematic or diagram: Consult the schematic or diagram of your guitar electronics to identify the components that need to be soldered. This could include pickups, switches, potentiometers, capacitors, or any other electronic elements.
- Inspect the circuit board: If you are working with a printed circuit board (PCB), visually inspect the board and identify the solder pads or through-holes where the components are meant to be soldered. Pay attention to any markings or labels that indicate the specific component placement.
- Examine the components: Take a close look at the individual components you will be soldering. Check for any marks or identification labels that indicate the orientation or proper placement of the component on the circuit board.
- Identify wire connections: In addition to components, identify the wire connections that need to be soldered. This could involve connecting wires from pickups to switches or pots, ground wires, or any other necessary connections.
- Take note of any specific requirements: Some components or wire connections may have specific requirements or instructions. For example, certain wires or terminals may need to be pre-tinned or stripped to a specific length before soldering.
By identifying the parts to be soldered, you can better plan your soldering workflow and ensure that you are well-prepared with the necessary tools and materials for each specific soldering task. It also helps to have a clear understanding of the overall layout and connections within your guitar electronics, enabling you to execute precise and effective soldering techniques.
Prepping the Parts for Soldering
Before you begin soldering the parts for your guitar electronics, proper preparation is essential to ensure clean and reliable solder joints. Prepping the parts involves inspecting, cleaning, and preparing the components and surfaces to be soldered. Here’s how to do it:
- Inspect the components: Before soldering, check the components for any damage, defects, or loose connections. Ensure that there are no bent or broken pins, leads, or terminals that may hinder the soldering process or affect the final result.
- Clean the surfaces: Use a small brush or cotton swab dipped in isopropyl alcohol to clean the soldering surfaces, including the pads on the circuit board and the leads or terminals of the components. This removes any dirt, grease, or oxidation that may hinder the solder flow or compromise the solder joint’s integrity.
- Trim excess leads or wires: If there are any excess leads or wires on the components, use wire cutters to trim them to the desired length. Avoid leaving long protruding leads, as they can cause interference or accidental shorts when soldering.
- Strip insulation from wires: If you are soldering wires, ensure that the insulation at the end of the wire is stripped to expose the bare conductor. Use wire strippers to carefully remove the appropriate length of insulation, taking care not to damage the conductor strands.
- Tin the soldering iron tip: Heat up the soldering iron and use solder to tin the tip. Tinning helps improve heat transfer and solder flow during the soldering process. Make sure to wipe off any excess solder and re-tin the tip as needed throughout the soldering session.
- Apply flux (if necessary): If your components or surfaces require additional flux, apply a small amount using a brush or pen applicator. Ensure that the flux is evenly applied to the areas to be soldered to facilitate proper wetting and bonding of the solder.
By prepping the parts for soldering, you ensure that the soldering surfaces are clean, the components are in good condition, and the wires are properly prepared. This sets the foundation for successful soldering by providing optimal conditions for the solder and flux to create reliable and durable solder joints. Take the time to properly prep your parts, as it is a crucial step in achieving high-quality soldering results for your guitar electronics.
Heating the Soldering Iron
Heating the soldering iron is a crucial step in the soldering process, as it prepares the tool for effective soldering and ensures proper heat transfer to the solder joint. Here’s how to heat the soldering iron correctly:
- Plug in the soldering iron: Start by plugging in the soldering iron and turning on the power. Allow the soldering iron to heat up to its operating temperature. The ideal temperature for soldering guitar electronics is typically between 350°C and 400°C (660°F to 750°F).
- Wait for the iron to reach the desired temperature: Give the soldering iron enough time to reach the desired operating temperature. Most soldering irons have an indicator light that turns off or changes color when the iron is ready to use. Refer to the manufacturer’s instructions for the specific heating time required for your soldering iron.
- Check the temperature: To ensure the soldering iron is properly heated, you can use a temperature testing device or a damp sponge. Lightly touch the tip of the iron to the damp sponge. If the tip produces a sizzle and steam, it indicates that the soldering iron is at the correct temperature for soldering.
- Be patient and avoid rushing: It’s important not to rush the heating process. Giving the soldering iron enough time to reach the proper temperature ensures optimal soldering results. Proper heating ensures that the solder flows smoothly and adheres well to the components and surfaces being soldered.
During the soldering process, it is crucial to maintain the proper temperature of the soldering iron. If the iron becomes too hot or not hot enough, it can lead to poor solder joints, excessive heating of components, or damage to the circuit board.
Remember to always handle the heated soldering iron with caution while it is in operation. Never touch the hot tip or place it on flammable surfaces. Always use the included stand or holder to store the soldering iron when not in use, ensuring it is in a safe position and away from any potential hazards.
By properly heating the soldering iron and maintaining the appropriate temperature, you set the stage for successful soldering and achieve clean, reliable connections for your guitar electronics.
Applying Solder to Wires
Applying solder to wires is a crucial step in soldering for guitar electronics, as it creates a solid and reliable connection between the wires and components. Follow these steps to ensure proper solder application:
- Strip the wire insulation: Use wire strippers to remove a small section of insulation from the end of the wire. Typically, stripping around 1/4 to 1/2 inch of insulation is sufficient, but it may vary depending on the specific application.
- Twist the wire strands: Once the wire is stripped, twist the exposed wire strands tightly together. This helps to create a solid and secure connection when soldering.
- Tin the wire strands: Apply a small amount of solder to the tip of the soldering iron to create a thin coating of molten solder. Touch the tip of the soldering iron to the twisted wire strands and hold it there for a few seconds. The heat from the soldering iron will melt the solder, allowing it to flow evenly over the wire strands. This process is known as tinning and helps improve the soldering process by already having solder on the wire.
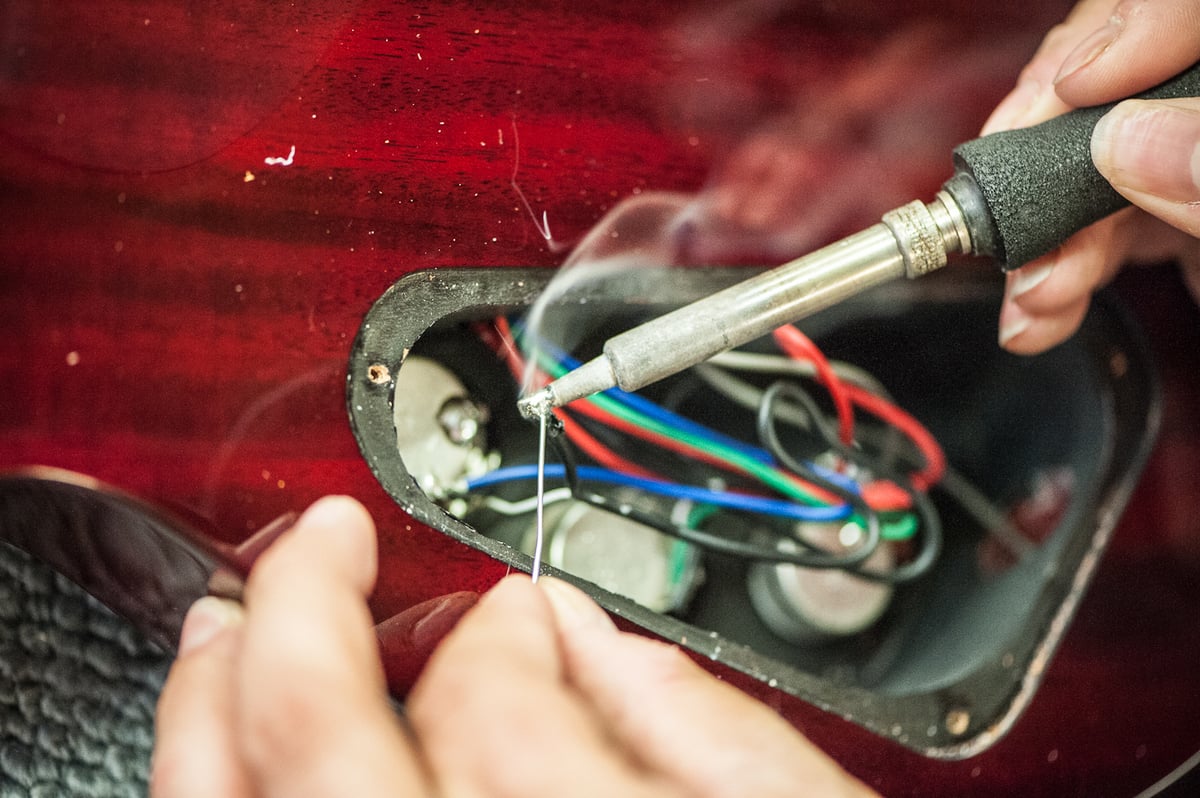
- Apply heat and solder: Once the wire strands are tinned, position the tinned wire next to the component or wire terminal to be soldered. Use the tip of the soldering iron to apply heat to both the wire and the component terminal simultaneously. Once the wire and component are heated, touch the solder wire to the joint. The heat will melt the solder, and it will flow smoothly over the joint. Apply just enough solder to form a shiny, smooth, and concave solder joint without excessive buildup.
- Remove the soldering iron: After the solder has flowed over the joint, remove the soldering iron while holding the joint steady. Allow the solder to cool and solidify before moving or disturbing the solder joint. Avoid any movement or tension on the wire during this cooling process, as it may result in a weak or unreliable connection.
- Inspect the solder joint: Once the solder joint has cooled, visually inspect it to ensure it is compact, shiny, and free from cracks or cold solder joints. A well-executed solder joint will have a smooth and consistent appearance.
Remember to work quickly but methodically during the soldering process to mitigate the risk of overheating the components or wires. Additionally, avoid applying excessive solder or creating solder bridges between adjacent connections, as these can lead to shorts or unintended connections.
With proper technique and attention to detail, you can successfully apply solder to wires and create secure and durable connections for your guitar electronics.
Soldering Components onto a Circuit Board
Soldering components onto a circuit board is a critical step in the assembly of guitar electronics. Proper technique and attention to detail are essential to ensure reliable connections and optimal performance. Follow these steps to solder components onto a circuit board:
- Prepare the circuit board: Ensure that the circuit board is clean and free from any dirt, dust, or oxidation. Use a small brush or a lint-free cloth to gently clean the solder pads or through-holes where the components will be soldered.
- Insert the component: Carefully insert the component into the appropriate solder pad or through-hole on the circuit board. Ensure that it is oriented correctly according to the schematic or diagram, as some components may have specific polarity or orientation requirements.
- Hold the component in place: Use a third-hand tool, alligator clips, or other suitable holding devices to secure the component in place during the soldering process. This ensures stability and prevents movement that could result in misalignment or poor solder joints.
- Heat the solder joint: Heat the solder pad or through-hole by applying the tip of the soldering iron to the joint. The heat transfers to the solder and the component lead, melting the solder and creating a bond between the component and the circuit board.
- Apply solder: Once the solder joint is heated, touch the solder wire to the junction of the component lead and the solder pad or through-hole. The heat from the soldering iron melts the solder, and it flows smoothly around the joint. Apply enough solder to form a solid, concave joint that fully encompasses the component lead and the solder pad.
- Remove the soldering iron: Once the solder has flowed evenly and formed a solid joint, remove the soldering iron while holding the joint steady. Allow the solder to cool and solidify before moving or disturbing the solder joint.
- Inspect the solder joints: Thoroughly inspect each solder joint after it has cooled. Look for smooth, shiny, and concave joints without any excessive solder blobs, bridges, or cold joints. Check for proper wetting and ensure that the solder has formed a strong connection between the component lead and the circuit board.
It’s crucial to work efficiently and avoid overheating the components or the circuit board. Excessive heat can damage sensitive components or cause traces on the circuit board to detach. Practice good soldering technique, maintain a steady hand, and focus on creating clean and reliable solder joints.
Remember, practice makes perfect, and it may take some time to develop the skill and confidence required for soldering components onto a circuit board. Take your time, be patient, and always strive for high-quality solder joints to ensure the optimal functioning of your guitar electronics.
Checking the Solder Joints
After soldering components onto a circuit board for guitar electronics, it is crucial to thoroughly check the solder joints to ensure a reliable and robust connection. Proper inspection helps identify any potential issues or defects that may impact the performance and functionality of the electronics. Here’s how to check the solder joints:
- Visual inspection: Carefully examine each solder joint visually. Look for shiny, smooth, and concave joints. They should be free from any visible defects like solder bridges, cold joints, or excessive solder blobs. Additionally, check for proper wetting, where the solder forms a solid bond with both the component and the circuit board.
- Physical inspection: Gently nudge or wiggle each component to check for any loose or weak solder joints. Properly soldered joints should be strong and securely hold the component in place. Any excessive movement or visible looseness indicates a poorly soldered joint that needs to be reworked.
- Continuity Test: Use a multimeter to perform a continuity test on the solder connections. Probe each solder joint to verify that there is a conductive path between the component lead and the respective solder pad on the circuit board. This ensures that the solder joint has a reliable electrical connection.
- Functional test: Once the solder joints pass the visual, physical, and continuity inspections, it is a good practice to conduct a functional test. Power up the guitar electronics and check if the components and connections are functioning as intended. Test switches, potentiometers, pickups, and any other features to ensure proper operation.
- Document and rework if necessary: If you discover any solder joints that do not meet the desired standards during the inspection or functional test, mark them and make a note for rework. Use proper soldering techniques to fix any issues and ensure the joints meet the required criteria.
Taking the time to thoroughly check the solder joints ensures the reliability and longevity of your guitar electronics. By addressing any defects or weak connections early on, you can prevent potential failures or performance issues down the line.
Remember, proper soldering technique and attention to detail are key to achieving high-quality solder joints. Regular inspection and testing are essential steps to confirm the success of your soldering work and to ensure your guitar electronics perform optimally.
Cleaning and Finishing Up
Once you have completed the soldering process for your guitar electronics, it is important to perform the final steps of cleaning and finishing up. These steps ensure the longevity, reliability, and professional appearance of your solder joints. Here’s how to clean and finish up your soldering work:
- Clean off flux residue: Flux residue is a common byproduct of the soldering process. It is important to remove any residual flux, as it can cause corrosion over time. Use a flux remover, isopropyl alcohol, or a specialized electronics cleaning solution to clean the solder joints and surrounding areas. Gently brush or wipe away any remaining residue with a soft cloth or cotton swab.
- Inspect for missed connections: Thoroughly inspect your solder joints again, paying attention to any areas that may have been missed during the initial inspection. Look for solder joints that appear dull, incomplete, or subpar. If any issues are found, rework those joints to ensure a reliable connection.
- Trim excess wire or leads: If there are any excess wire or component leads that extend beyond the solder joints, use wire cutters or flush cutters to trim them to an appropriate length. This helps to prevent accidental shorts and ensures a tidy and professional-looking final result.
- Protect exposed wires: If there are exposed wires that are not connected to any component or solder pad, it is important to protect them. Use heat shrink tubing or electrical tape to insulate and secure these exposed wires. This prevents accidental contact, shorts, or damage to other components.
- Organize and secure cables: If there are multiple wires or cables in the guitar electronics setup, take the time to organize and secure them properly. Use zip ties, cable ties, or adhesive cable clips to bundle and route the cables neatly. This helps with cable management and prevents tangling or interference with other components.
- Document and label: It is always good practice to document and label your soldering work. Keep a record of the specific components, wire connections, and any modifications made to the guitar electronics. Labeling the various components and wires can be particularly helpful for future troubleshooting or maintenance.
- Test functionality: The final step is to test the functionality of your soldered guitar electronics. Power up the instrument, test all the switches, potentiometers, and outputs to ensure proper operation. Verify that all connections are secure and functional, and make any necessary adjustments or repairs if issues are identified.
By cleaning and finishing up your soldering work, you not only improve the reliability and longevity of your guitar electronics but also create a professional-looking final result. Attention to detail and proper care during these final steps will contribute to the overall performance and aesthetics of your soldered connections.
Remember, thorough cleaning, neat cable management, and proper labeling are essential for maintaining and troubleshooting your guitar electronics in the future. When done correctly, cleaning and finishing up help ensure the best possible soldering outcome.