
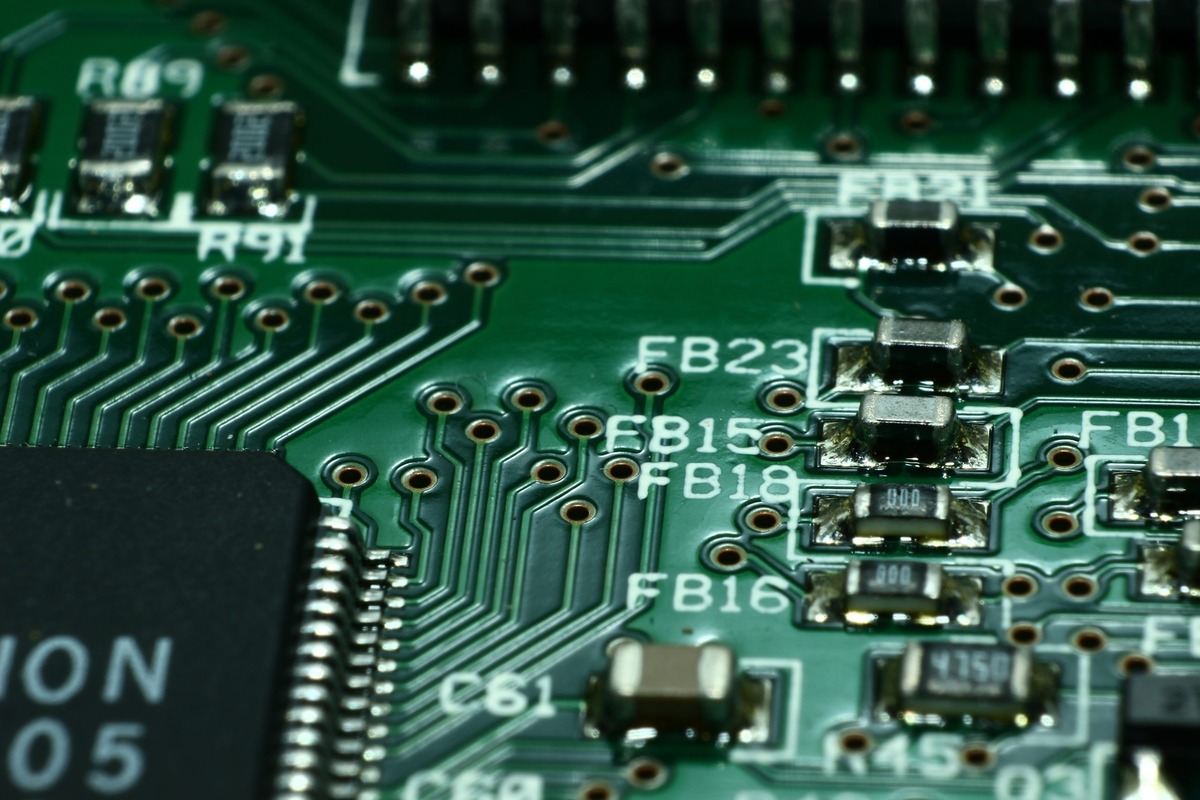
Understanding Symbols and Components
When it comes to reading electronics schematics, one of the fundamental things you need to grasp is understanding the symbols and components used in these diagrams. While schematics can vary depending on the specific circuit, there are some common symbols that you will encounter frequently.
First and foremost, resistors are denoted by a zigzag line. These components are used to limit or control the flow of electric current in a circuit. Capacitors, on the other hand, are represented by two parallel lines. They store electrical charge and are crucial in various applications, such as filtering and energy storage.
Inductors, which are coil-shaped components, are often used to store energy in a magnetic field. They are represented by two horizontal lines connected by a curved line. Transistors, essential for amplification and switching, have different symbols depending on their type (NPN or PNP), but typically feature a triangle and arrow.
Diodes, which allow electric current to flow in one direction, have a symbol resembling an arrowhead pointing towards a line. Integrated Circuits (ICs) are depicted as rectangular boxes with multiple pins or legs, each serving a specific function within the circuit.
It’s important to familiarize yourself with these symbols to decipher the schematic accurately. Additionally, understanding the various components used in electronics circuits is crucial. Components such as resistors, capacitors, inductors, transistors, diodes, and ICs play vital roles in shaping the overall functioning of a circuit.
While this section provides a brief overview of common symbols and components, it’s worth noting that schematics can be more complex and diverse depending on the circuit’s complexity. Hence, it’s always advisable to have a reference guide or datasheet available to cross-check symbols and understand specific component functions.
Reading the Schematic Layout
Once you have a firm grasp on understanding symbols and components, the next step in reading electronics schematics is interpreting the layout of the diagram. Schematics are typically presented in a logical and organized manner, allowing you to follow the flow of electric current and understand the connections between different components.
The first thing to look for in a schematic is the power supply connections. These are typically denoted by symbols representing the positive (+) and negative (-) terminals. Identifying these connections is crucial as they provide the necessary voltage for the circuit to function.
Next, you’ll notice lines connecting the various components in the schematic. These lines represent the pathways through which electric current flows. It’s essential to follow these paths carefully to understand the sequence of operations within the circuit.
In addition to the connections, you may also come across labels or values next to the components. These indicate specific details about the component’s properties, such as resistance values for resistors or capacitance values for capacitors. Paying attention to these labels can provide valuable insights into the functioning of the circuit.
Another essential aspect of reading the schematic layout is the use of different layers or sections. Complex circuits may have multiple layers, each representing a specific part or function of the overall circuit. Understanding the layering or sectioning can help you break down the circuit into manageable parts for analysis.
Overall, reading the schematic layout requires careful observation and systematic analysis. Take your time to follow the flow of current, identify the connections and labels, and make note of any layers or sections present in the diagram. This will enable you to gain a comprehensive understanding of the circuit’s structure and operation.
In the next section, we will explore how to identify power and ground connections, which are fundamental in any electronics circuit.
Identifying Power and Ground Connections
When analyzing electronics schematics, one of the critical steps is identifying the power and ground connections. Power connections provide the necessary voltage for the circuit to operate, while ground connections act as a reference point for measuring voltages and ensuring the circuit’s stability.
The power connections in a schematic are typically indicated by symbols representing the positive (+) and negative (-) terminals. These symbols are often labeled with the appropriate voltage levels, such as +5V or -12V, to indicate the power supply’s magnitude. It is essential to identify these connections as they provide the necessary electrical energy to drive the circuit’s components.
Ground connections, on the other hand, are represented by symbols that resemble three horizontal lines or by the symbol “GND.” They serve as a common reference point for the circuit’s voltages. Ground connections are crucial for establishing proper voltage levels and minimizing the possibility of electrical interference or noise.
It’s important to note that multiple power and ground connections may be present in complex circuits. This is especially true for circuits with multiple components or subsystems that require separate power sources. It is essential to trace and understand the connections to ensure proper functioning of the circuit.
Identifying power and ground connections in a schematic is essential for troubleshooting and analyzing circuit behavior. By understanding where the power is coming from and how the ground connections are established, you can identify potential issues such as improper voltage levels, short-circuits, or open circuits.
Take the time to carefully study the schematic and locate the power and ground symbols. Follow the lines or pathways to ensure that the connections are properly established and connected to the relevant components. This will help you gain a clear understanding of the power flow and ground reference in the circuit.
The next section will focus on tracing the flow of signals in a schematic, which is crucial for understanding how information passes through the different components of a circuit.
Tracing the Flow of Signals
Once you have identified the power and ground connections, the next step in reading electronics schematics is tracing the flow of signals. Understanding how signals move through the circuit is crucial for comprehending the functionality and operation of the various components.
In a schematic, signals are represented by lines or pathways that connect different components. These lines indicate the direction and flow of information or electrical signals. By following these lines, you can trace how signals are transmitted, modified, or processed within the circuit.
Start by identifying the input signals, which are usually located at the beginning of the schematic. These signals may come from external sources or other components within the circuit. Follow the lines that represent these input signals and observe how they interact with the different components along the way.
As you trace the flow of signals, pay attention to any branches or junctions in the lines. These indicate points where the signal can be split or combined with other signals. Understanding these branching points is crucial for comprehending the circuit’s functionality, as they often represent key decision-making or control points.
Follow the signal lines through the various components, such as resistors, capacitors, inductors, transistors, and other active or passive elements. Each component plays a specific role in modifying or processing the signal, and tracing the flow will give you insights into how the signal is transformed during its journey.
By understanding the flow of signals, you can gain a deeper understanding of how the circuit functions. You can observe how signals are amplified, attenuated, filtered, or integrated to achieve the desired outcome.
Tracing the flow of signals is not only crucial for understanding circuit operation but also for troubleshooting purposes. By identifying breaks or interruptions in the signal path, you can pinpoint potential issues or faulty components that may be causing problems in the circuit.
In the next section, we will delve into how to analyze and interpret various components commonly found in electronics schematics, such as resistors, capacitors, and inductors.
Analyzing Resistors, Capacitors, and Inductors
Resistors, capacitors, and inductors are fundamental components in electronics circuits. Analyzing these components in a schematic can provide valuable insights into how the circuit functions and how these components interact with each other.
Resistors, represented by zigzag lines in schematics, are used to limit or control the flow of electric current in a circuit. Their resistance value determines the amount of current that can pass through them. Analyzing resistors involves understanding their resistance values, which are typically indicated by labels or color codes. Higher resistance values restrict current flow, while lower resistance values allow more current to pass through.
Capacitors, depicted by two parallel lines, store electrical charge in an electric field. They are commonly used for energy storage, filtering, and coupling purposes. Analyzing capacitors in a schematic involves identifying their capacitance values, which are usually marked on the component or indicated by labels. The capacitance value determines how much charge the capacitor can store and how it reacts to changes in voltage or frequency.
Inductors, represented by coil-shaped symbols, store energy in a magnetic field. They are often used in applications that involve energy storage, filtering, and inductive coupling. Analyzing inductors in a schematic involves understanding their inductance values, which are indicated by labels or markings. The inductance value determines how much energy can be stored in the magnetic field and how the inductor reacts to changes in current or frequency.
When analyzing resistors, capacitors, and inductors in a schematic, it’s important to consider their values and their placement within the circuit. By understanding their roles and interactions, you can gain insights into how they affect current flow, voltage levels, and the overall behavior of the circuit.
Additionally, it’s crucial to consider any additional components connected to these components. For example, resistors may be used in voltage dividers or in conjunction with other components to control current levels. Capacitors can work in conjunction with resistors to create filtering circuits or timing circuits. Inductors can be used in conjunction with capacitors to create resonant circuits or inductive coupling.
By analyzing resistors, capacitors, and inductors in a schematic, you can uncover the underlying principles and mechanisms at work in the circuit. This knowledge is essential for troubleshooting, modifying, or designing circuits.
In the next section, we will take a closer look at diodes and transistors, which are crucial for signal rectification, amplification, and switching.
Interpreting Diodes and Transistors
Diodes and transistors are key components in electronics circuits, playing vital roles in signal rectification, amplification, and switching. Understanding how these components are represented in schematics is crucial for interpreting their function and impact on the circuit.
Diodes, represented by symbols resembling an arrowhead pointing towards a line, allow current to flow in one direction while blocking it in the opposite direction. Depending on the type of diode used, such as a standard diode, Zener diode, or LED, their specific characteristics and behavior can vary. Analyzing diodes in a schematic involves understanding their orientation, voltage ratings, and potential applications within the circuit.
Transistors, which are essential for amplification and switching, have different symbols depending on their type (NPN or PNP). They are typically represented by a combination of diagonal lines, triangles, and arrows. Analyzing transistors in a schematic involves determining their type and configuration, such as common emitter, common collector, or common base. Understanding the transistor’s operating characteristics, such as its gain, voltage ratings, and collector current, helps interpret its role within the circuit.
When analyzing diodes and transistors in a schematic, it’s important to consider their connections and relationships with other components. Diodes may be used for rectification, voltage clamping, or signal modulation. Transistors can act as amplifiers, switches, or oscillators. By understanding their connections and configurations within the circuit, you can gain insights into how they affect signal flow, voltage levels, and overall circuit behavior.
It’s also important to consider the biasing or drive voltages required for diodes and transistors to operate correctly. These voltages are often specified in the schematic or indicated by accompanying components, such as biasing resistors. By ensuring proper biasing, you can optimize the performance and reliability of these components.
Interpreting diodes and transistors in a schematic requires careful observation and a thorough understanding of their characteristics and connections. By deciphering their symbols, configurations, and relationships with other components, you can grasp their functionality and impact within the circuit.
In the next section, we will delve into understanding Integrated Circuits (ICs) and how to interpret their various components and functions in a schematic.
Decoding Integrated Circuits (ICs)
Integrated Circuits (ICs) are complex electronic devices that contain a multitude of components, such as transistors, resistors, capacitors, and more, all integrated into a single package. Decoding and understanding ICs in a schematic is essential for comprehending their various components and functions within the circuit.
In a schematic, ICs are represented by rectangular boxes with multiple pins or legs. Each pin serves a specific function, such as input, output, power, or ground. The number of pins can vary depending on the complexity of the IC and its specific application.
When decoding an IC in a schematic, it is crucial to consult the datasheet or reference manual for that particular IC. The datasheet provides detailed information about the pinout, functionality, voltage requirements, and recommended usage of the IC.
By understanding the pinout of an IC, you can identify the purpose of each pin and its connection to the rest of the circuit. This allows you to determine how the IC interacts with other components and how signals are transmitted to and from the IC.
In addition to the pinout, the datasheet provides information about the functions and capabilities of the various components inside the IC. It includes details about the internal circuitry, such as the presence of amplifiers, oscillators, logic gates, or memory elements.
Understanding these components and their functions within the IC helps interpret their role in the overall circuit. For example, an IC may include multiple operational amplifiers for signal conditioning or voltage regulators for power management.
By examining the datasheet and understanding the internal components and their functions, you can gain insights into how the IC contributes to the operation and performance of the circuit.
It’s important to note that different ICs have different pin configurations and functionalities. Therefore, it is necessary to consult the specific datasheet for each IC you encounter in a schematic to ensure accurate interpretation and utilization of the IC in the circuit.
Decoding ICs requires thorough examination of their pinouts, datasheets, and internal components. By understanding how each pin is connected and the functionality of the internal components, you can effectively incorporate and utilize ICs in your circuits.
In the next section, we will explore the interpretation of logic gates and flip-flops, which are essential for digital circuitry.
Understanding Logic Gates and Flip-Flops
Logic gates and flip-flops are fundamental components in digital circuitry, playing a crucial role in performing logical operations and storing information. Understanding these components in a schematic is essential for comprehending the digital logic and sequential behavior of a circuit.
Logic gates are electronic devices that perform basic logical operations, such as AND, OR, NOT, and XOR, based on the input signals they receive. In a schematic, logic gates are represented by specific symbols, such as AND gates shown as a D-shaped symbol, OR gates as a plus sign, and NOT gates as a triangle with a circle at the input. Analyzing logic gates involves understanding their symbols, input-output relationships, and the logical operation they perform.
By connecting logic gates in different configurations, you can create digital circuits that perform complex logic functions. For example, using combinations of logic gates, you can build adders, multiplexers, registers, and other digital building blocks. Analyzing these configurations in a schematic involves understanding how the inputs and outputs are connected, as well as the logic function being performed.
Flip-flops, on the other hand, are storage devices that can store a single bit of information, also known as a state. In a schematic, flip-flops are represented by symbols such as a rectangle with inputs and outputs indicated by lines coming in and out. Flip-flops are crucial for sequential logic, allowing circuits to remember and process information over time.
Understanding the behavior of flip-flops involves examining their clock inputs, which control the timing of when the data is stored or updated. Flip-flops can have different types, such as D flip-flops, JK flip-flops, and T flip-flops, each with its own characteristics and functionality. Analyzing flip-flops in a schematic includes understanding their symbols, clock inputs, and data inputs/outputs.
By utilizing logic gates and flip-flops in a circuit, you can implement various digital functions, including arithmetic operations, memory storage, and control logic. Analyzing these components in a schematic enables you to comprehend the logical operations, data flow, and sequential behavior of the circuit.
It’s important to refer to datasheets or relevant documentation for specific logic gates and flip-flops to understand their characteristics, electrical specifications, and recommended usage.
In the next section, we will examine voltage regulators and amplifiers, which are vital components in power supply and signal amplification circuits.
Examining Voltage Regulators and Amplifiers
Voltage regulators and amplifiers are critical components in electronics circuits, serving essential functions in power supply management and signal amplification. Analyzing these components in a schematic provides valuable insights into how they regulate voltage levels and amplify signals.
Voltage regulators ensure stable and regulated output voltage levels despite variations in input voltage or load conditions. In a schematic, voltage regulators are represented by specific symbols, such as a rectangle with input, output, and ground pins. Analyzing voltage regulators involves understanding their voltage rating, input range, output range, and regulating mechanisms, such as feedback control or reference voltage sources.
By utilizing voltage regulators in a circuit, you can ensure that critical components or subsystems receive a consistent and reliable power supply. This is particularly important to protect sensitive components from voltage fluctuations or excess voltage that could lead to damage or malfunction.
Amplifiers, on the other hand, are electronic devices that increase the amplitude of an electrical signal. They play a crucial role in amplifying weak signals to usable levels, and they are commonly used in audio, radio frequency, and instrumentation applications. In a schematic, amplifiers are represented by symbols such as triangles, rectangles, or other customized shapes. Analyzing amplifiers involves understanding their gain, input, and output impedance, frequency response, and class of operation.
Examining amplifiers in a schematic enables you to understand the specific amplification characteristics and requirements of the circuit. By utilizing amplifiers properly, you can boost signals to appropriate levels for further processing or transmission, ensuring accurate and reliable information flow within the circuit.
Both voltage regulators and amplifiers can have various types and configurations, depending on the specific application requirements. It is essential to refer to datasheets or relevant documentation to understand the characteristics, electrical specifications, recommended operating conditions, and proper usage considerations for these components.
By examining voltage regulators and amplifiers in a schematic, you can gain insights into the power supply management and signal amplification aspects of the circuit. This knowledge allows you to design, optimize, and troubleshoot circuits effectively.
In the next section, we will explore techniques for troubleshooting and error correction in electronics schematics.
Troubleshooting and Error Correction
Troubleshooting and error correction are vital skills when working with electronics schematics. When a circuit fails to function as expected, it’s crucial to identify and rectify the errors to restore normal operation. Here are some techniques to help you tackle common issues and correct errors in electronics schematics.
1. Double-check connections: Start by carefully examining the connections in the schematic and the physical circuit. Ensure that all components are properly connected, with no loose or broken wires. Look for any misaligned pins or incorrect solder joints that may be causing connectivity problems.
2. Verify power supply: Confirm that the power supply is providing the correct voltage and is correctly connected to the circuit. Check for any blown fuses, faulty power sources, or incorrect polarity that could disrupt the circuit’s operation.
3. Analyze signal flow: Trace the signal flow through the schematic to identify any points where signals might be getting interrupted or attenuated. Test various points along the signal path using a multimeter or oscilloscope to locate potential issues.
4. Check component values: Review the values and specifications of components in the schematic, such as resistors, capacitors, and transistors. Verify that the actual components used match the intended values and are suitable for the circuit’s requirements.
5. Examine polarities: Pay attention to component polarities, especially for components like diodes, transistors, and electrolytic capacitors that have specific orientations. Verify that components are correctly inserted with the correct polarity to avoid issues with signal flow and circuit operation.
6. Review component datasheets: Consult the datasheets or technical documentation for specific components used in the circuit. This can provide valuable information about component pinouts, operating conditions, and recommended usage, helping you identify any discrepancies.
7. Modify or replace components: If you discover a faulty or damaged component, replace it with a known working component of the correct value and specifications. Additionally, you may consider modifying component values or configurations if necessary, taking into account the impact on circuit performance.
8. Seek assistance: If you encounter difficulties or are unable to resolve the issues, reach out to online forums, electronics communities, or experienced individuals who can provide guidance and assistance in troubleshooting and error correction.
By employing these troubleshooting techniques and error correction methods, you can successfully diagnose and rectify issues in electronics schematics, ensuring that circuits function as intended.
In the next section, we will discuss common mistakes to avoid when working with electronics schematics.
Common Mistakes to Avoid
When working with electronics schematics, it’s important to be mindful of certain common mistakes that can lead to circuit malfunctions or suboptimal performance. By avoiding these mistakes, you can create accurate and reliable circuits. Let’s explore some common errors and how to avoid them.
1. Incorrect component orientation: One of the most common mistakes is inserting components with the wrong orientation, particularly polarized components like diodes or electrolytic capacitors. Always double-check the component’s datasheet or markings and ensure they are placed in the correct direction to maintain proper polarity.
2. Wrong component values: Mistakes in component values, such as resistors or capacitors, can lead to incorrect circuit behavior. Carefully read and interpret the color codes, labels, or markings on the components to ensure accurate values are used in the circuit, or use a multimeter to measure their values accurately.
3. Poor soldering: Inadequate soldering techniques can result in unreliable connections or create short circuits. Ensure components are securely and neatly soldered to the circuit board, avoiding solder bridges or cold solder joints that can cause intermittent connections or signal interference.
4. Inadequate power supply: Neglecting to provide sufficient and stable power to the circuit can lead to erratic behavior or circuit failure. Ensure the power supply is appropriate for the circuit’s voltage and current requirements, and check for any power supply-related problems, such as loose connections or incorrect polarity.
5. Lack of signal grounding: Proper grounding is essential for noise reduction and signal integrity. Avoid floating or ungrounded signals by ensuring all required ground connections are correctly established and connected to the common ground reference point in the circuit.
6. Lack of circuit protection: Failing to incorporate proper circuit protection, such as fuses or surge protectors, can lead to component damage or even hazardous situations. Consider the appropriate protective measures based on the circuit’s power requirements and potential risks.
7. Ignoring datasheets and specifications: Neglecting to refer to component datasheets for pin configurations, operating conditions, and technical specifications can result in incorrect component utilization or suboptimal performance. Take the time to consult the datasheets and ensure proper component usage according to the manufacturer’s guidelines.
8. Rushing through testing and verification: hasty testing or failure to verify circuit functionality can lead to missed errors or faulty designs. Take the time to thoroughly test the circuit and verify that it operates as intended, using appropriate tools such as multimeters, oscilloscopes, or logic analyzers.
By being aware of these common mistakes and taking the necessary precautions, you can avoid potential pitfalls and create reliable, well-functioning circuits based on electronics schematics.
In the next section, we will explore advanced techniques for reading and analyzing complex schematics.
Advanced Techniques for Reading Schematics
Reading and analyzing complex schematics requires advanced techniques and strategies to effectively understand the intricate details and relationships within the circuit. Here are some advanced techniques that can help you navigate and interpret complex schematics:
1. Modular approach: Break down the schematic into smaller modules or sections, focusing on one section at a time. This approach allows you to focus on specific functional blocks or subsystems, making it easier to understand their connections and interactions within the larger circuit.
2. Cross-referencing: Use references such as datasheets, technical manuals, or online resources to cross-reference specific components or symbols in the schematic. This can provide valuable insights into their functionalities, pinouts, operating conditions, and recommended usage.
3. Signal flow analysis: Analyze the signal flow paths within the schematic to understand how information or signals propagate through the circuit. Follow the lines connecting different components to discern how signals are modified, combined, or routed throughout the circuit.
4. Documentation and notes: Create a detailed documentation or note-taking system to keep track of your analysis, observations, and connections within the schematic. This helps in organizing information, ensuring accuracy, and providing a reference for future reviews or modifications.
5. Simulation tools: Utilize circuit simulation software or virtual tools to simulate the behavior of the circuit based on the schematic. This can help validate your understanding and predictions, allowing you to observe the circuit’s response to different inputs or test scenarios.
6. Collaborative analysis: Engage in discussions and collaboration with others who have expertise or experience in interpreting complex schematics. Sharing insights, discussing challenges, and seeking different perspectives can enhance your understanding and lead to innovative solutions.
7. Reverse engineering: In certain cases, reverse engineering a circuit by comparing the physical circuit with the schematic can provide valuable insights and help identify potential errors or discrepancies. This technique requires careful observation, attention to detail, and a systematic approach.
8. Continuous learning: Invest time in expanding your knowledge of electronics and circuit design principles. Familiarize yourself with advanced concepts, specialized symbols, and techniques specific to certain applications or industries. This ongoing learning process enhances your ability to interpret complex schematics effectively.
By employing these advanced techniques, you can enhance your ability to read and analyze complex schematics, enabling you to tackle more challenging circuits and design innovative electronic systems.
In the next section, we will provide resources for further learning to expand your knowledge and skills in reading electronics schematics.
Resources for Further Learning
Expanding your knowledge and skills in reading electronics schematics is an ongoing process, and there are numerous resources available to support further learning. These resources can provide in-depth information, tutorials, and practical examples to enhance your understanding and expertise. Here are some valuable resources for further learning:
1. Online tutorials and courses: Many websites offer online tutorials and courses specifically focused on electronics, circuit design, and schematic reading. Platforms like Udemy, Coursera, and edX offer a wide range of courses taught by industry experts, providing comprehensive learning experiences at your own pace.
2. Electronics textbooks: Textbooks dedicated to electronics, circuit theory, and schematic reading can provide a solid foundation and serve as reference materials. Popular titles include “The Art of Electronics” by Horowitz and Hill, “Practical Electronics for Inventors” by Paul Scherz, and “Electronic Principles” by Albert Malvino and David Bates.
3. Electronics forums and communities: Online forums and communities such as Electronics Stack Exchange, Reddit’s r/AskElectronics, and various electronics-related forums offer a platform to ask questions, share experiences, and interact with electronics enthusiasts and professionals. Engaging in these communities can provide valuable insights and solve specific doubts or challenges.
4. Application notes and datasheets: Manufacturers often provide application notes and detailed datasheets for their components, covering circuit examples, usage guidelines, and specific considerations. These documents can provide valuable insights into the best practices and applications of various components in a schematic.
5. Reference guides and handbooks: Reference guides and handbooks, such as the “Encyclopedia of Electronic Components” series by Charles Platt, offer detailed explanations and visual references for a wide range of electronic components and their applications. These resources serve as quick references for understanding component symbols, behaviors, and circuit configurations.
6. Online simulations and modeling tools: Explore online circuit simulation software and modeling tools like LTspice, Tinkercad, or CircuitLab. These tools allow you to simulate circuits based on schematics, observe their behavior, and gain practical insights into circuit operation.
7. Schematic symbol libraries and CAD tools: Learning to use schematic symbol libraries and Computer-Aided Design (CAD) tools such as Eagle, KiCad, or Altium Designer can enhance your ability to create, understand, and work with schematics effectively. Many CAD tool providers offer tutorials and documentation to facilitate learning.
8. Hands-on projects and experimentation: Engage in hands-on projects and experimentation with electronics. Building circuits, analyzing their schematics, and troubleshooting issues firsthand can provide practical experiences that deepen your understanding of schematics and circuit functionality.
By exploring these resources and engaging in continuous learning, you can expand your knowledge and expertise in reading electronics schematics, facilitating your growth as an electronics enthusiast or professional.