
Choosing the Right Components
When it comes to making your own electronics, choosing the right components is crucial for the success of your project. With a wide range of components available, it can be overwhelming to know where to start. However, by understanding the basic criteria for selecting components, you can ensure that your circuit functions as intended.
First and foremost, you need to consider the specifications of the components. This includes factors such as voltage ratings, current capacity, and resistance values. Make sure that the components you choose can handle the specific requirements of your circuit.
Next, consider the physical form factor of the components. Components come in different sizes and shapes, so it’s important to choose ones that will fit your project’s enclosure or circuit board. Additionally, consider the connection options, such as through-hole or surface mount, and choose components that align with your preferred method of assembly.
Another important aspect is the availability and cost of the components. You want to choose components that are readily available from suppliers, as it can be frustrating to source hard-to-find components. Additionally, consider the cost of the components, especially if you are working on a budget. Research multiple suppliers and compare prices to find the best deal.
Furthermore, compatibility with other components is essential. Check the datasheets and specifications to ensure that the components you choose will work together effectively. Pay attention to parameters such as voltage levels, signal compatibility, and communication protocols. This will help prevent any compatibility issues down the line.
Lastly, consider the future scalability of your project. If you plan to expand or modify your circuit in the future, make sure to choose components that allow for flexibility. Look for components that have multiple functions or can be easily substituted or upgraded without major modifications to the circuit.
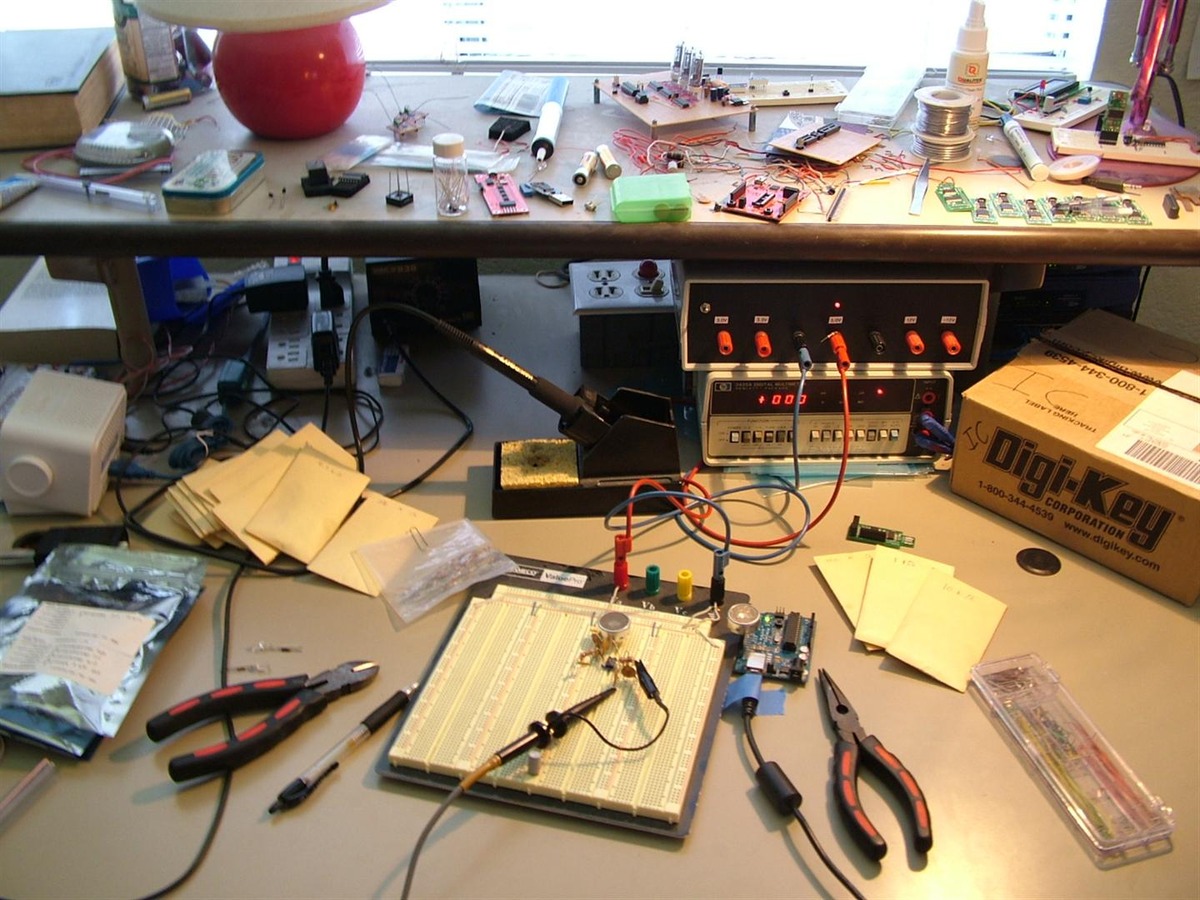
Getting Started with Breadboarding
Breadboarding is a fundamental step in the world of electronics. It allows you to quickly prototype and test your circuit without the need for soldering. Understanding how to effectively use a breadboard is essential for beginners and experienced electronics enthusiasts alike.
To get started with breadboarding, you will need a breadboard, also known as a prototyping board. This board features a grid of interconnected metal clips that allow you to easily insert and connect components. It provides a convenient and temporary platform for assembling and testing your circuit.
The first step is to familiarize yourself with the layout of the breadboard. It consists of two main sections: the terminal strips and the power rails. The terminal strips run vertically along the sides of the breadboard and are used to connect components. The power rails, usually colored red and blue, are horizontal strips that provide power supply connections.
When placing components on the breadboard, it’s important to follow the breadboard’s layout and pin numbering. Insert the component’s pins into the appropriate holes, ensuring they make contact with the metal clips. Use gentle pressure to secure the component without causing any damage to the breadboard or the component itself.
Now, let’s talk about connecting components on the breadboard. The interconnected metal clips underneath the breadboard’s surface allow you to create electrical connections simply by placing components near each other. Use jumper wires, which are flexible cables with pins on both ends, to bridge the gaps between components and build the necessary connections.
It’s important to pay attention to the orientation and placement of the components. Align the components according to the circuit diagram or datasheet to ensure proper functionality. Take note of any polarized components, such as diodes or electrolytic capacitors, which have specific positive and negative terminals. Incorrect placement can cause your circuit to malfunction or even damage the components.
Once all the components are placed and connected on the breadboard, it’s time to test your circuit. Connect a power supply to the appropriate terminals on the power rails and verify that the circuit is functioning as expected. Using a multimeter, you can measure voltages and verify signal outputs at various points in the circuit.
Breadboarding allows you to experiment and make changes to your circuit quickly and easily. It’s a valuable tool for learning electronics and developing your projects. With practice, you’ll become more comfortable with breadboarding techniques and be able to prototype more complex circuits in no time.
Understanding Circuit Diagrams
Circuit diagrams are visual representations of electronic circuits. They use symbols to represent different components and their interconnections. Understanding how to read and interpret circuit diagrams is essential for anyone involved in electronics.
At first glance, circuit diagrams may appear complex and intimidating. However, they follow standardized conventions that make them relatively easy to understand once you become familiar with the symbols and conventions used.
The most basic element in a circuit diagram is the component symbol. Components such as resistors, capacitors, diodes, transistors, and integrated circuits have unique symbols that represent their function and connections within the circuit. Take the time to study and memorize these symbols, as they are the building blocks of any circuit diagram.
Lines and wires in circuit diagrams represent the connections between components. Straight lines denote a direct connection, while curved lines or crosses represent an intersection but no actual connection. The intersection of lines indicates a connection point where components or wires are joined together.
Arrows are often used to indicate the direction of current flow, while plus (+) and minus (-) signs indicate the positive and negative terminals of power sources or batteries. These symbols help to clarify the flow of electricity within the circuit.
In addition to component symbols and lines, circuit diagrams often include labels and annotations to provide additional information. These labels may indicate values for resistors or capacitors, pin numbers for integrated circuits, or specific functions within the circuit. Paying attention to these labels will give you a deeper understanding of how the circuit functions.
When reading a circuit diagram, it’s important to follow the flow of the circuit from left to right and top to bottom. This ensures that you interpret the circuit correctly and understand the logical sequence of components and connections.
Using circuit diagrams, you can gain insight into how a circuit works and identify potential issues or modifications. By comparing the circuit diagram with the actual circuit you are building, you can visually verify your connections and troubleshoot any problems that may arise.
Becoming proficient in reading circuit diagrams takes time and practice. The more you work with circuit diagrams, the more comfortable you’ll become in deciphering their symbols and understanding how the components interact in a circuit. It’s an essential skill for any electronics enthusiast or engineer.
Learning about Resistors, Capacitors, and LEDs
Resistors, capacitors, and LEDs are essential components in electronics. Understanding their functions, characteristics, and applications is key to designing and building electronic circuits.
A resistor is a passive component that restricts the flow of electric current. It is typically used to control the amount of current or voltage in a circuit. Resistors are measured in ohms (Ω) and come in different values. The higher the resistance value, the more it restricts the flow of current. Resistors can be used for various purposes, such as current limiting, voltage division, and signal conditioning.
Capacitors, on the other hand, store electrical energy in an electric field. They consist of two conductive plates separated by a dielectric material. Capacitors are measured in farads (F) but are typically found in microfarads (µF) or picofarads (pF). They are used in circuits for storing energy, filtering out noise, and smoothing voltage fluctuations. Capacitors have polarity, with the positive and negative terminals indicated on the component.
LEDs, or Light Emitting Diodes, are semiconductors that emit light when a current flows through them. They are widely used for indicator lights, displays, and even lighting applications. LEDs have two terminals, an anode (+) and a cathode (-), and they emit light in a specific color depending on the materials used in the construction. They require a current-limiting resistor to prevent excessive current flow and ensure their longevity.
When using resistors, capacitors, and LEDs in circuits, it’s important to select the appropriate values and ratings. The resistance value of a resistor determines the level of current control, while the capacitance value of a capacitor determines its energy storage capacity. LEDs come in various colors and brightness levels, so selecting the right one for your application is important.
In circuit design, resistors, capacitors, and LEDs are often connected together to achieve desired functionalities. It’s important to understand their interconnections and how they affect the overall circuit performance. For example, resistors can be connected in series or parallel to adjust resistance values, while capacitors can be connected to create filters or timing circuits.
By learning about resistors, capacitors, and LEDs, you gain the foundational knowledge to develop a wide range of electronic circuits. Experimentation and hands-on experience are essential for understanding their characteristics and how they interact in different circuit configurations.
With time and practice, you’ll become more comfortable incorporating resistors, capacitors, and LEDs into your electronic projects, allowing you to unlock endless possibilities in the world of electronics.
Building Simple Circuits
Building simple circuits is an exciting way to apply your knowledge of electronics and bring your ideas to life. By combining different components and following circuit diagrams, you can create functioning circuits that perform specific tasks.
Start by selecting a circuit you want to build. Simple circuits are often composed of a few basic components, such as resistors, capacitors, LEDs, and switches. By choosing a simple circuit, you can focus on understanding the fundamentals of circuit building before moving on to more complex projects.
Once you have your circuit diagram, gather the necessary components and tools. It’s important to ensure you have the correct values and ratings for resistors and capacitors, and the appropriate type and color for LEDs. Additionally, make sure you have the necessary tools, including a breadboard, jumper wires, and a power supply.
Place your components on the breadboard, following the layout indicated in the circuit diagram. Start by inserting the resistors, capacitors, and LEDs into the appropriate holes, taking care to align them correctly based on their polarity or pin configurations. Use jumper wires to connect the components as per the circuit diagram, ensuring a secure and reliable connection.
Once your circuit is assembled, it’s time to power it up. Connect the power supply to the appropriate terminals of the breadboard, and if necessary, insert batteries or connect a power source. Make sure the voltage and current levels are suitable for your circuit to prevent damage to the components.
Observe your circuit and look for any signs of activity or functionality. For example, if you’re building a circuit with an LED, check if it illuminates. Use a multimeter to measure voltages and currents at various points in your circuit to verify that it is operating correctly.
If your circuit is not functioning as expected, it’s time to troubleshoot. Check your connections to ensure they are properly inserted and making good contact. Verify component values and correctly follow the circuit diagram. Sometimes, a small mistake or loose connection can cause a circuit to malfunction.
Building simple circuits provides hands-on experience that helps deepen your understanding of electronics. Through experimentation and exploration, you can modify and enhance your circuit designs, expanding your creativity and problem-solving skills.
Remember, practice makes perfect. The more simple circuits you build, the more comfortable you’ll become in understanding their inner workings. Progressing to more complex circuits will become easier as you develop your skills and knowledge in electronics.
Exploring Integrated Circuits (ICs)
Integrated circuits (ICs) are compact electronic devices that contain multiple electronic components, such as transistors, resistors, and capacitors, all built onto a single semiconductor chip. They revolutionized electronics by allowing for greater functionality, miniaturization, and enhanced performance.
ICs come in various types and packages, each designed for specific applications. They can be categorized into digital and analog ICs. Digital ICs process and store binary data, perform logic operations, and control digital systems. Analog ICs handle continuous signals, such as audio or voltage levels, and perform tasks like amplification, filtering, and signal conditioning.
One of the key advantages of ICs is their compact size. By integrating multiple components onto a single chip, ICs save valuable space, making them ideal for miniaturizing electronic devices. This miniaturization has enabled the development of smaller and more portable devices, from smartphones and wearables to medical devices and automotive electronics.
Another benefit of ICs is their improved reliability and performance. By integrating components onto a single chip, ICs reduce the risk of loose connections or signal degradation, resulting in more stable and accurate electronic circuits. The manufacturing process also allows for tighter tolerances and precise control of the components, resulting in improved performance and efficiency.
ICs are typically identified by their part numbers, which consist of a series of letters and numbers that denote the manufacturer, functionality, and specifications of the IC. These part numbers help identify and select the appropriate IC for a specific application.
When working with ICs, it’s important to understand their pinout and how to connect them to the circuit. The datasheet provides detailed information about the IC’s pin configuration, pin functions, and recommended operating conditions. It’s essential to refer to the datasheet to ensure proper wiring and prevent damage to the IC or other components.
Explore the vast world of ICs by studying datasheets, experimenting with different types, and understanding their applications. From microcontrollers and memory chips to operational amplifiers and timers, ICs play a crucial role in countless electronic devices.
With advancements in technology, new ICs continue to emerge, offering improved capabilities, efficiency, and functionality. Staying up-to-date with the latest IC advancements allows you to leverage cutting-edge technology and design innovative electronic systems.
As you delve into ICs, you’ll discover the limitless possibilities they offer for designing and building advanced electronic circuits. Embrace the world of integrated circuits and unlock the potential they hold for your electronic projects.
Designing and Building your own Printed Circuit Board (PCB)
Printed Circuit Boards (PCBs) are essential in modern electronics as they provide a reliable and compact platform for interconnecting components. Designing and building your own PCB allows for greater customization and can greatly enhance the functionality and aesthetics of your electronic projects.
The first step in designing a PCB is creating a schematic diagram of your circuit. A schematic is a visual representation of the circuit’s components and their interconnections. It helps you plan the layout and ensure proper connections between components. There are various software tools available that simplify the process of creating schematics and allow for easy integration into the PCB design.
Once the schematic is complete, the next step is PCB layout design. In this stage, you place the components on the PCB and route the connections between them. Consider factors such as component sizes, signal paths, and power distribution to optimize the layout for efficiency and minimize signal interference.
When designing the PCB layout, pay attention to trace widths, clearances, and vias. Trace widths and clearances ensure proper current flow and prevent short circuits. Vias are used to connect traces between different layers of the PCB, allowing for more complex and compact designs.
After the PCB design is finalized, it’s time to manufacture the board. You have two options: fabricating the PCB yourself or outsourcing it to a professional PCB manufacturer. If you choose to fabricate it yourself, you’ll need specialized tools, such as a PCB etching kit and a drill press, to etch the copper traces and drill holes for component placement.
Alternatively, you can send your design files to a PCB manufacturer. Simply export your PCB layout design as Gerber files, which are industry-standard files used for PCB fabrication. Professional manufacturers have advanced fabrication capabilities and can produce high-quality PCBs with precision and accuracy.
Once you receive your fabricated PCB, it’s time to assemble the components. Start by cleaning the PCB and ensuring any excess copper or debris is removed. Then, carefully solder each component onto the board, following the component placement indicated on the PCB layout. Take care to avoid overheating the components or causing solder bridges between adjacent traces.
After the components are soldered, it’s essential to test the functionality of the PCB. Use a multimeter to measure voltages, check for shorts or open circuits, and verify that the circuit is functioning as intended. This testing phase allows you to identify and fix any errors or issues in the PCB design or component placement.
Designing and building your own PCB provides a sense of pride and ownership over your electronic projects. It allows for customization, optimization, and the freedom to create circuits that perfectly meet your requirements. With practice and experience, you can develop professional-level PCB designs that take your projects to the next level.
Programming Microcontrollers
Microcontrollers are powerful integrated circuits that contain a processor, memory, and input/output peripherals. They are commonly used to control and automate various electronic systems. Learning how to program microcontrollers opens up a world of possibilities for creating interactive and intelligent electronic devices.
Before diving into microcontroller programming, it’s important to choose the right microcontroller for your project. Consider factors such as processing power, memory capacity, and available peripherals. Popular microcontroller families include Arduino, Raspberry Pi, and PIC. Each has its own programming environment and libraries that simplify the development process.
Once you have selected a microcontroller, you need to set up the development environment. This typically involves installing a software development toolchain and the necessary drivers for communication with the microcontroller. The development environment provides an interface for writing, compiling, and uploading code to the microcontroller.
The programming language used for microcontrollers varies depending on the platform and environment. C and C++ are commonly used due to their efficiency and low-level control. These languages provide direct access to the microcontroller’s hardware and memory, allowing for detailed control and optimization.
When programming microcontrollers, you need to understand key concepts such as input/output operations, memory management, and control structures. You’ll work with functions, variables, and libraries to interact with the microcontroller’s peripherals such as GPIO pins, timers, and communication interfaces like UART, SPI, or I2C.
Microcontroller programming often involves working with interrupts and timers to handle time-sensitive events and perform background tasks. You’ll learn how to configure interrupts and use them to respond to external events or time-dependent actions.
Debugging is an essential part of microcontroller programming. It allows you to identify and resolve issues in your code or hardware. Tools such as a debugger, serial monitor, and logic analyzer help in diagnosing problems, monitoring program execution, and analyzing data exchange between the microcontroller and other devices.
As you gain more experience in microcontroller programming, you’ll discover advanced techniques such as power management, real-time operating systems (RTOS), and low-power optimization. These techniques are particularly useful in battery-powered or resource-constrained applications.
Programming microcontrollers requires perseverance and a hands-on approach. Start with simple projects to gradually build your skills and understanding. Online resources, forums, and communities dedicated to microcontroller programming are great places to seek guidance and inspiration for your projects.
Whether you’re interested in robotics, home automation, or embedded systems, mastering microcontroller programming empowers you to create innovative and intelligent electronic solutions. With practice and dedication, you’ll become fluent in the language of microcontrollers and unlock endless possibilities for your projects.
Soldering Techniques for Electronic Assembly
Soldering is a fundamental skill in electronic assembly that allows you to join components and create reliable connections. Whether you’re building a circuit on a breadboard or assembling your own printed circuit board (PCB), understanding and mastering soldering techniques is essential for successful electronic projects.
The first step in soldering is preparing the components and the workspace. Ensure that your workspace is clean, well-ventilated, and free from any flammable materials. Gather the necessary tools, including a soldering iron, solder wire, flux, soldering stand, and cleaning sponge. It’s also important to have a pair of helping hands or clamps to hold the components in place while soldering.
Start by heating up your soldering iron to the appropriate temperature for the components you’re working with. Higher temperatures are generally required for larger components and PCBs, while lower temperatures are suitable for delicate or heat-sensitive components.
Apply a small amount of flux to the soldering joint. Flux helps remove oxidation and improve the flow of solder. It also helps the solder adhere to the component and the board surface. Proper flux application ensures a strong and reliable joint.
Next, touch the tip of the soldering iron to the joint, heating both the component lead and the pad on the circuit board. Allow them to reach the desired temperature before applying solder. The solder should melt and flow smoothly onto the joint, forming a concave-shaped fillet around the lead and pad.
A common mistake is using too much solder. Remember, a small, controlled amount of solder is sufficient for a good joint. Excessive solder can cause bridges between adjacent pads or components, leading to short circuits or unreliable connections.
During the soldering process, it’s important to maintain a steady hand and avoid excessive movement. This ensures that the solder joint is clean, smooth, and properly connected. Practice good hand-eye coordination and apply the soldering iron and solder with precision.
After soldering, let the joint cool naturally without disturbing it or blowing on it. Once the joint has cooled, inspect it visually to ensure it is clean, shiny, and without any visible defects, such as cold joints or solder balls. Use a magnifying glass if necessary to check for any issues.
Proper cleaning and maintenance of your soldering iron are crucial for its longevity and performance. Regularly clean the soldering iron tip using a damp sponge or brass wire cleaner to remove any residue or oxidation. This ensures a clean and efficient transfer of heat during soldering.
As with any skill, practice is key to mastering soldering techniques. Start with simple projects and gradually work your way up to more complex components and PCBs. With time and experience, you’ll gain the confidence and expertise needed to solder components effectively and create reliable connections in your electronic assemblies.
Troubleshooting and Debugging Tips
Troubleshooting and debugging are essential skills for any electronics enthusiast. When building and testing electronic circuits, it’s common to encounter issues or unexpected behavior. Knowing how to identify and resolve these issues will save you time and frustration. Here are some tips to help you troubleshoot and debug your electronic projects:
1. Double-check your connections: Start by carefully inspecting all the connections in your circuit. Ensure that components are properly inserted, wires are securely connected, and solder joints are clean and intact. Loose or faulty connections are a common source of problems.
2. Review your circuit diagram and datasheets: Go back to your circuit diagram or datasheets and compare them with your physical circuit. Check for any discrepancies or errors in component values, pin connections, or wiring. Make sure you have selected the appropriate components and that they are being used correctly.
3. Test individual components: If you suspect a particular component is causing the issue, test it individually. Use a multimeter or an oscilloscope to measure voltages, currents, or signal outputs. Compare your readings with the expected values from the datasheet to identify any discrepancies.
4. Use debugging tools: Take advantage of debugging tools such as a multimeter, logic analyzer, or oscilloscope. These tools can help you monitor signals, track down issues, and verify the behavior of your circuit. Learning how to use these tools effectively will greatly aid in troubleshooting.
5. Sequential testing: If your circuit has multiple stages or subsystems, test and debug them one at a time. This allows you to isolate and identify the problem area more easily. Start with the input and output stages and work your way through the circuit step by step.
6. Divide and conquer: If a large and complex circuit is not working, break it down into smaller sections and test each section individually. This helps narrow down the scope of the problem and makes troubleshooting more manageable. Once you’ve identified a problematic section, focus your attention on that specific area.
7. Consult online resources and forums: If you’re having trouble troubleshooting, seek help from online resources, forums, or communities dedicated to electronics. Experienced individuals may have encountered similar issues and can provide guidance or suggestions for resolving the problem.
8. Take notes and document: Maintain a troubleshooting log or document where you record the steps you’ve taken, the observations made, and the results obtained. This documentation can be valuable for future reference and can help you identify patterns or recurring issues.
9. Be patient and persistent: Troubleshooting electronics can be challenging and time-consuming. It requires patience, persistence, and a systematic approach. Don’t get discouraged if you don’t find a solution right away. Stay focused and tackle the problem methodically.
By following these troubleshooting and debugging tips, you’ll become more skilled at identifying and resolving issues in your electronic projects. Embrace the challenges as opportunities to learn and grow your knowledge in electronics. With time and experience, you’ll develop a strong troubleshooting intuition and become a more confident electronics enthusiast.