
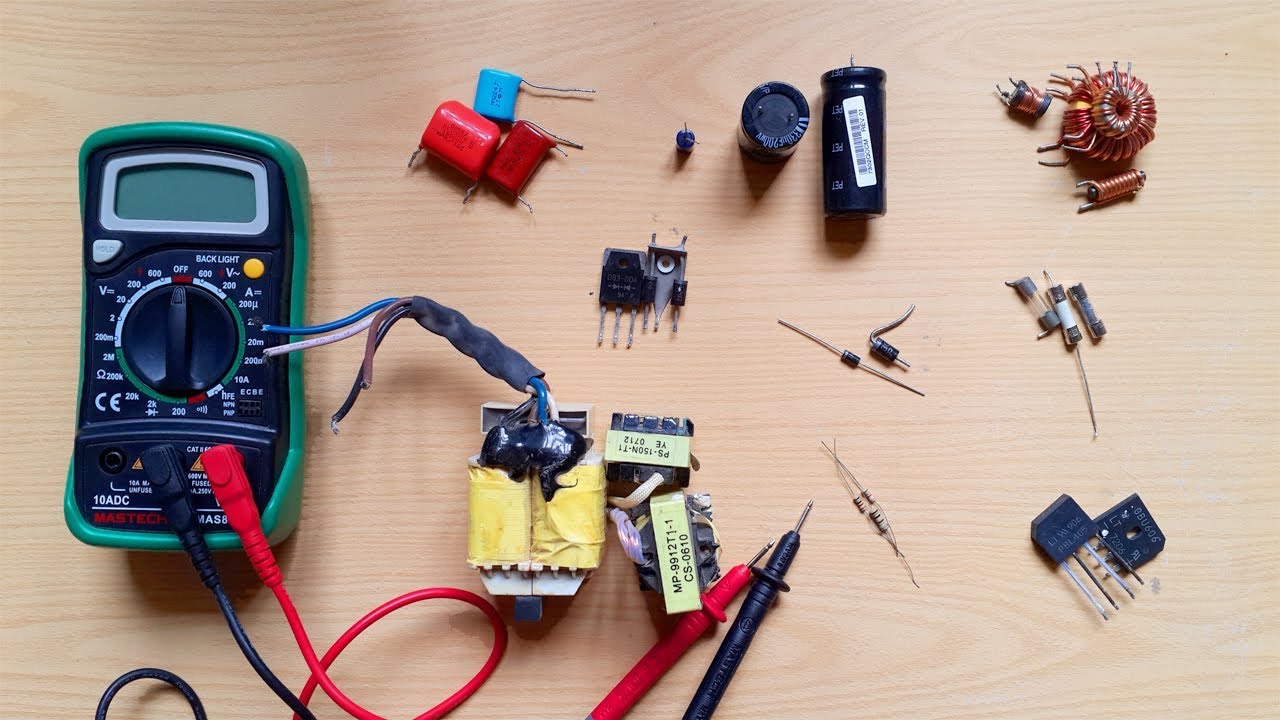
How to Test Resistors
Resistors are one of the most commonly used electronic components in various circuits. To ensure their proper functioning, it’s important to know how to test them. Fortunately, with the help of a digital multimeter, testing resistors is a straightforward process. Here’s a step-by-step guide:
- Turn off power: Before testing any component, it’s important to disconnect power to the circuit to prevent any accidents.
- Set multimeter: Set your digital multimeter to the resistance or ohms (Ω) mode. Make sure the range setting is higher than the resistance value you expect to measure. For example, if you are testing a 1 kiloohm resistor, set the range to 10 kiloohms.
- Measure resistance: Place the multimeter probes across the resistor terminals. The order of probe placement does not matter as resistors are not polarity-sensitive. Read the resistance value displayed on the multimeter’s screen.
- Compare the value: Compare the measured resistance value with the expected value. If they match or are within an acceptable range (usually within 5% tolerance for standard resistors), the resistor is functioning properly.
- Check for open circuits: If the multimeter displays “OL” or “1”, it indicates an open circuit. This means the resistor is broken and needs to be replaced.
- Check for short circuits: If the multimeter displays a value of zero resistance (close to 0 Ω), it indicates a short circuit. In this case, the resistor is defective and needs to be replaced.
- Repeat the test: If you obtain unexpected results, double-check your measurements, connections, and ensure that the resistor is isolated from the circuit. If the problem persists, consider testing the resistor in a different circuit or using another multimeter to ensure accurate results.
Testing resistors is an essential skill for any electronics enthusiast or technician. By following these steps, you can quickly identify faulty resistors and ensure the smooth operation of your electronic circuits.
How to Test Capacitors
Capacitors are vital components used in electronic circuits to store and discharge electrical energy. It is important to test capacitors to ensure their proper functioning and to identify any faulty ones. Here’s a step-by-step guide to testing capacitors using a digital multimeter:
- Discharge the capacitor: Before testing, it is crucial to discharge the capacitor to prevent any electrical shocks. Use a resistor or a discharge tool to safely drain the stored charge.
- Set multimeter: Set your digital multimeter to the capacitance mode (usually marked as “μF” or “nF”). Select a range that is suitable for the expected capacitance value. For example, if you are testing a capacitor with a value of 1 microfarad, set the range to a higher value like 10 μF.
- Test with leads: Connect the capacitor leads to the corresponding multimeter probes. Ensure that the positive and negative terminals are correctly aligned. The multimeter will display the measured capacitance value on the screen.
- Compare the value: Compare the measured capacitance value with the expected value. Capacitors typically have a tolerance range, usually indicated on the component itself. If the measured value falls within the tolerance range, the capacitor is likely functioning correctly.
- Check for short circuits: In addition to capacitance, it’s important to test for short circuits in capacitors. Set your multimeter to the resistance or continuity mode and place the probes across the capacitor terminals. If the multimeter beeps or displays a low resistance value, it indicates a short circuit in the capacitor, and it needs to be replaced.
- Consider ESR measurement: Electrolytic capacitors are prone to high equivalent series resistance (ESR), which can affect their performance. Some advanced multimeters have an ESR measurement function. If available, you can utilize this feature to check the ESR of the capacitor.
- Repeat the test: If you encounter unexpected results or suspect a faulty capacitor, repeat the test using different range settings on the multimeter or try testing with a different capacitor of known value. This will help confirm if the issue lies with the capacitor or the testing setup.
Testing capacitors is essential for troubleshooting electronic devices and ensuring the efficiency of circuits. Follow these steps carefully to determine the functionality and integrity of your capacitors, thus ensuring the optimal performance of your electronic projects.
How to Test Diodes
Diodes are electronic components that allow current to flow in only one direction. They are essential in many electronic circuits, and it’s important to know how to test them to ensure their proper functioning. With the help of a digital multimeter, you can easily test diodes. Here’s a step-by-step guide:
- Turn off power: Before testing any diode, make sure to disconnect power from the circuit to avoid any electrical hazards.
- Set multimeter: Set your digital multimeter to the diode test mode (usually represented by a diode symbol) or the resistance mode (ohms Ω). If using the resistance mode, select the lowest range.
- Identify the diode: Look for the cathode and anode terminals of the diode. The cathode is typically marked with a stripe or a line on the body of the diode.
- Test forward bias: Place the positive (red) probe of the multimeter on the anode terminal and the negative (black) probe on the cathode terminal. The multimeter should display a forward voltage drop between 0.6 to 0.7 volts if the diode is functioning correctly. A higher reading or no reading indicates a faulty diode.
- Test reverse bias: Reverse the probe connections, placing the positive (red) probe on the cathode terminal and the negative (black) probe on the anode terminal. In this configuration, the multimeter should display an “OL” (open loop) or a high resistance value, indicating that the diode is blocking current in the reverse direction. If the multimeter shows a low resistance reading or continuity, the diode is likely defective.
- Check for leakage current: In some cases, a diode may have a small leakage current even in the reverse direction. To test for leakage, switch the multimeter to the current measuring mode (mA or μA), place the positive (red) probe on the diode’s anode terminal, and the negative (black) probe on the cathode terminal. Note the current reading. If it is above the specified leakage current limit, the diode is faulty.
- Repeat the test: If you encounter unexpected results or suspect a faulty diode, retest it using different range settings on the multimeter or try testing with a known working diode for comparison.
By following these steps, you can effectively test diodes and identify any faulty ones. This knowledge is essential for troubleshooting electronic circuits and ensuring the smooth functioning of your electronic devices.
How to Test Transistors
Transistors are crucial components in electronic circuits that control the flow of current. It is important to know how to test transistors to ensure their proper operation and to identify any faulty ones. With the help of a digital multimeter, you can easily test transistors. Here’s a step-by-step guide:
- Turn off power: Before testing any transistor, make sure to disconnect power from the circuit to avoid any potential risks.
- Identify the transistor: There are several types of transistors, such as bipolar junction transistors (BJTs) and field-effect transistors (FETs). Identify the type of transistor you want to test, as the testing procedures may vary slightly.
- Select the correct mode on the multimeter: For testing BJTs, set your digital multimeter to the diode test mode. For FETs, set it to the resistance mode (ohms Ω) and select the lowest range.
- Identify the terminals: Transistors have three terminals: the collector, the base, and the emitter (for BJTs), or the drain, the gate, and the source (for FETs). Refer to the datasheet or the transistor’s identification markings to identify these terminals correctly.
- Test the BJT (NPN type): Place the positive (red) probe of the multimeter on the base terminal and the negative (black) probe on the emitter terminal. The multimeter should display a voltage drop (around 0.6 to 0.7 volts) if the BJT is functioning correctly. Reverse the probes to test the base-emitter diode in the reverse direction.
- Test the BJT (PNP type): For PNP BJTs, reverse the probe connections. Place the positive (red) probe on the emitter terminal and the negative (black) probe on the base terminal. The multimeter should again display a voltage drop within the expected range. Reverse the probes to test the base-emitter diode in the reverse direction.
- Test the FET: For FETs, set the multimeter to resistance mode. Connect the positive (red) probe to the gate terminal and the negative (black) probe to the source terminal. The multimeter should display an open circuit (OL) or a high resistance value, indicating that the FET is functioning correctly. Reverse the probes to test the gate-source diode in the reverse direction.
- Repeat the test: If you encounter unexpected results or suspect a faulty transistor, retest it using different range settings on the multimeter or try testing with a known working transistor for comparison.
By following these steps, you can effectively test transistors and identify any faulty ones. This knowledge is essential for troubleshooting electronic circuits and ensuring the smooth functioning of your electronic devices.
How to Test Integrated Circuits
Integrated circuits (ICs) are complex electronic devices that contain multiple electronic components and perform various functions. Testing ICs is important to ensure their proper functioning and to identify any faulty ones. Although it’s not possible to test every single component inside an IC, there are some methods to check their overall functionality. Here’s a step-by-step guide:
- Turn off power: Before testing any IC, make sure to disconnect power from the circuit to avoid any potential risks.
- Identify the IC pinout: Each IC has a specific pinout configuration, and it’s essential to identify the pins’ functions and connections. Refer to the datasheet or the IC package markings for this information.
- Visual inspection: Visually inspect the IC for any physical damage, such as bent or broken pins, cracks, or discoloration. These signs can indicate a faulty IC that needs to be replaced.
- Test power supply: With the IC powered off, use a digital multimeter to measure the voltage supplied to the Vcc or Vdd pin. Ensure that it matches the expected voltage specified in the datasheet. Inadequate or no voltage can cause the IC to malfunction.
- Check for short circuits: Using the multimeter’s continuity mode, test for short circuits between adjacent pins, as well as between pins and the IC’s body. Any continuity reading indicates a short circuit and a potential fault in the IC.
- Perform functional tests: Depending on the IC’s purpose, perform functional tests to check specific features or outputs. This may involve connecting the necessary external components and circuits to simulate real-world conditions.
- Review manufacturer/application notes: Consult the IC manufacturer’s documentation or application notes for specific testing procedures or recommended testing circuits for that particular IC. The manufacturer may provide guidelines or test programs that can assist in the proper evaluation of the IC’s performance.
- Use IC testing equipment: For more comprehensive testing, specialized IC testing equipment can be used. These devices can provide more detailed analysis of the IC’s various parameters, such as voltage levels, timing, and functionality.
- Repeat the test: If you encounter unexpected results or suspect a faulty IC, retest it using different test setups or try testing with another known-working IC for comparison.
Testing integrated circuits can be challenging due to their complexity, but by following these steps, you can perform basic tests to check their overall functionality and identify any potential issues. Remember to consult the IC’s datasheet and other resources for specific testing guidelines and recommendations provided by the manufacturer.
How to Test Inductors
Inductors are passive electronic components that store energy in the form of a magnetic field. They are commonly used in circuits to control current and filter out unwanted signals. Testing inductors is important to ensure their proper functioning and to identify any faulty ones. With the help of a digital multimeter, you can easily test inductors. Here’s a step-by-step guide:
- Turn off power: Before testing any inductor, make sure to disconnect power from the circuit to avoid any potential risks.
- Set multimeter: Set your digital multimeter to the resistance mode (ohms Ω) and select the lowest range.
- Identify the inductor terminals: Take note of the inductor’s terminals and determine the polarity if applicable. Some inductors may have markings indicating the polarity or coil direction.
- Test for continuity: With the multimeter leads, carefully touch the two terminals of the inductor. If the multimeter shows a low resistance reading or beeps, it indicates continuity, suggesting a short or damaged inductor.
- Test inductance: If your multimeter has an inductance measurement mode, switch to it. Place the multimeter’s probes across the inductor terminals and wait for the reading to stabilize. The resulting value is the inductance of the component, typically measured in Henrys (H) or milliHenry (mH).
- Compare the value: Verify if the measured inductance value falls within the specified range indicated on the inductor or the desired range for your application. While small deviations are tolerable, significant deviations from the expected inductance value may indicate a faulty or damaged inductor.
- Inspect for physical damage: Visually inspect the inductor for any signs of physical damage, such as cracks, breaks, or loose connections. These can indicate a faulty inductor that needs to be replaced.
- Repeat the test: If you encounter unexpected results or suspect a faulty inductor, retest it using different range settings on the multimeter or try testing with another known-working inductor for comparison.
By following these steps, you can effectively test inductors and identify any faulty components. This knowledge is essential for troubleshooting electronic circuits and ensuring optimal performance in applications where inductors are used.
How to Test Transformers
Transformers are essential components used in electronic and electrical circuits to transfer energy between different voltage levels. Testing transformers is important to ensure their proper operation and to identify any faulty ones. With the help of a digital multimeter and some additional tools, you can test transformers effectively. Here’s a step-by-step guide:
- Turn off power: Before testing any transformer, make sure to disconnect power from the circuit to avoid any potential risks.
- Visual inspection: Inspect the transformer for any physical damage, such as broken wires, burnt marks, or loose connections. These signs can indicate a faulty transformer that needs to be replaced.
- Identification of windings: Identify the primary and secondary windings of the transformer. The primary winding typically has a higher number of turns and is connected to the input voltage, while the secondary winding is connected to the output load.
- Test continuity: Use a digital multimeter’s continuity mode to test the continuity of the windings. Place the multimeter probes on each end of the same winding and check if there is continuity. A lack of continuity indicates an open circuit and suggests a fault in the winding.
- Measure resistance: Set the multimeter to the resistance mode (ohms Ω) and measure the resistance of each winding. Compare these readings to the transformer’s specifications or a known working transformer of the same type. Significant deviations in resistance values may indicate a fault in the winding.
- Perform turns ratio test: To test the turns ratio and the transformation ratio of the transformer, use a turns ratio meter. Connect the leads of the turns ratio meter to the primary and secondary windings, ensuring the correct polarities. The turns ratio meter will display the ratio between the number of turns on the primary and secondary windings. Verify if the ratio matches the expected value specified by the manufacturer.
- Verify voltage output: Energize the primary winding of the transformer using a suitable power supply. Measure the voltage output across the secondary winding using a multimeter or an oscilloscope. Compare the measured voltage with the transformer’s specifications or the desired voltage output. Significant deviations from the expected value can indicate a fault in the transformer.
- Repeat the test: If you encounter unexpected results or suspect a faulty transformer, retest it using different test setups or try testing with a known-working transformer for comparison.
Testing transformers is crucial to ensure their proper operation and to avoid potential damage to the circuits they are used in. By following these steps and using appropriate testing tools, you can effectively test transformers and identify any faults, helping to maintain the optimal performance of your electronic devices and electrical systems.
How to Test Switches and Relays
Switches and relays are essential components used in electronic and electrical circuits to control the flow of current. Testing switches and relays is important to ensure their proper operation and to identify any faulty ones. With the help of a digital multimeter and some additional tools, you can test switches and relays effectively. Here’s a step-by-step guide:
- Turn off power: Before testing any switch or relay, make sure to disconnect power from the circuit to avoid any potential risks.
- Visual inspection: Inspect the switch or relay for any physical damage, such as broken or loose connections, burnt marks, or excessive dirt. These signs can indicate a faulty component that needs to be replaced.
- Check for continuity: Use a digital multimeter’s continuity mode to test the switch or relay contacts. With the circuit disconnected and the switch or relay in its normal position (off state), place one multimeter probe on one side of the contacts and the other probe on the other side. Press or toggle the switch or energize the relay coil to see if there is continuity. If the multimeter beeps or shows low resistance, it indicates that the contacts are closed and the component is functioning correctly.
- Test switch operation: Toggle or press the switch through its full range of motion, checking for any sticking or intermittent operation. A switch should move smoothly and consistently between its on and off states. If it feels loose, sticky, or fails to stay in position, it may be faulty and need to be replaced.
- Test relay operation: Apply power to the relay and energize the coil using the appropriate voltage source. Listen for a click sound, indicating that the relay is switching. Inspect the relay contacts to ensure they open and close properly. If the relay fails to operate or the contacts do not switch as expected, it may be faulty and require replacement.
- Measure coil resistance: If needed, you can measure the resistance of the relay coil using a multimeter’s resistance mode (ohms Ω) to ensure it falls within the specified range as indicated on the relay’s datasheet or manual. A significantly different resistance value may indicate a faulty coil.
- Repeat the test: If you encounter unexpected results or suspect a faulty switch or relay, retest it using different test setups or try testing with a known working component for comparison.
Testing switches and relays ensures their proper operation and can help prevent circuit malfunctions or failures. By following these steps and utilizing the appropriate testing tools, you can effectively test switches and relays, identifying any faults and ensuring the reliable performance of your electronic and electrical systems.
How to Test Fuses
Fuses are essential safety components used in electrical circuits to protect against excessive current flow. Testing fuses is important to ensure their ability to interrupt the circuit when necessary and to identify any faulty ones. Although fuses are typically designed to be replaced when they blow, you can still perform some basic tests to check their continuity. Here’s a step-by-step guide:
- Turn off power: Before testing any fuse, make sure to disconnect power from the circuit to avoid any potential risks.
- Visual inspection: Inspect the fuse visually for any signs of damage, such as a broken glass tube or a visibly blown element. If the fuse appears damaged, it should be replaced.
- Remove the fuse: Carefully remove the fuse from its holder or socket, ensuring that no power is present in the circuit.
- Set multimeter: Set your digital multimeter to the continuity mode or the resistance mode (ohms Ω) and select the lowest range.
- Test for continuity: Place the multimeter probes on the two ends of the fuse. If the multimeter beeps or shows low resistance, it indicates continuity, meaning that the fuse is intact. If the multimeter does not beep or shows infinite resistance, it indicates an open circuit, and the fuse is likely blown and needs to be replaced.
- Check fuse rating: Make sure the replacement fuse has the correct voltage and current rating as specified by the circuit’s requirements or the original fuse. Using a fuse with the wrong rating can lead to circuit damage or safety hazards.
- Inspect the fuse holder or socket: While the fuse itself may be intact, a faulty fuse holder or socket can cause connection issues. Check for any signs of corrosion or loose contacts. Clean or replace the holder/socket if necessary.
- Repeat the test: If you encounter unexpected results or suspect a faulty fuse, retest it using a different multimeter or try testing with a known working fuse for comparison.
Testing fuses can help ensure the safety and reliability of electrical circuits. While basic continuity tests can indicate whether a fuse is blown or not, it is important to replace blown fuses with new ones and investigate the underlying cause to prevent further issues. Always follow proper safety precautions when working with electrical circuits.
How to Test LEDs
Light-emitting diodes (LEDs) are popular electronic components that emit light when current passes through them. Testing LEDs is important to ensure their proper functioning and to identify any faulty ones. With the help of a digital multimeter and some additional tools, you can test LEDs effectively. Here’s a step-by-step guide:
- Turn off power: Before testing any LED, make sure to disconnect power from the circuit to avoid any potential risks.
- Visual inspection: Inspect the LED visually for any signs of physical damage, such as cracks, discoloration, or loose connections. These signs can indicate a faulty LED that needs to be replaced.
- Identify the LED terminals: Take note of the LED’s terminals – the longer one is the anode (positive) and the shorter one is the cathode (negative).
- Set multimeter: Set your digital multimeter to the diode test mode or the resistance mode (ohms Ω) and select the lowest range.
- Test forward bias: Connect the positive (red) probe of the multimeter to the anode terminal and the negative (black) probe to the cathode terminal. The multimeter should display a forward voltage drop between 1.8 to 3.3 volts, depending on the LED type. If the multimeter shows no voltage drop or a very low value, it indicates a faulty LED.
- Test reverse bias: Reverse the probe connections, placing the positive (red) probe on the cathode terminal and the negative (black) probe on the anode terminal. In this configuration, the multimeter should display an “OL” (open loop) or a high resistance value, indicating that the LED is blocking current flow in the reverse direction.
- Check brightness with a power source: If you have a regulated power source, you can connect a current-limiting resistor in series with the LED and apply a suitable forward voltage to observe its brightness. If the LED is significantly dim or does not light up at all, it could be faulty.
- Repeat the test: If you encounter unexpected results or suspect a faulty LED, retest it using different range settings on the multimeter or try testing with a known working LED for comparison.
Testing LEDs helps ensure their optimal performance and avoids using faulty components in electronic projects. By following these steps and using proper testing tools, you can effectively test LEDs, identify any faults, and ensure the reliable emission of light from these popular electronic components.
How to Test Voltage Regulators
Voltage regulators are electronic components that maintain a constant output voltage regardless of changes in input voltage or load. Testing voltage regulators is important to ensure their accuracy and stability in regulating voltage. With the help of a digital multimeter and a power source, you can test voltage regulators effectively. Here’s a step-by-step guide:
- Turn off power: Before testing any voltage regulator, make sure to disconnect power from the circuit to avoid any potential risks.
- Identify the regulator pins and connections: Determine the input, output, and ground pins of the voltage regulator. Typically, the input voltage is supplied to the input pin, the regulated output voltage is measured at the output pin, and the ground pin is connected to the circuit’s common ground.
- Set up the test circuit: Connect the voltage regulator to a power source, following the manufacturer’s specifications for input voltage and any required capacitors or load resistors. Ensure proper connection polarity.
- Measure output voltage: Use a digital multimeter to measure the voltage at the output pin of the voltage regulator. It should closely match the specified output voltage as indicated by the manufacturer. A slight variation is acceptable, but a significant deviation may indicate a faulty voltage regulator.
- Check for ripple voltage: Use an oscilloscope or AC voltage mode on a multimeter to measure the ripple voltage present at the output. The ripple voltage should be within acceptable limits, as specified by the manufacturer. Excessive ripple voltage can indicate issues with the regulator’s filtering capacitors or other components.
- Check load regulation: Add a known and stable load to the output of the voltage regulator and measure the output voltage again. The voltage should remain stable within acceptable limits even with varying load conditions. Significant fluctuations or deviations suggest poor load regulation and a potential fault in the regulator.
- Verify transient response: Apply sudden load changes to the output and observe how quickly the voltage regulator responds and stabilizes the output voltage. A well-functioning voltage regulator should exhibit good transient response, providing a stable output voltage despite load variations.
- Repeat the test: If you encounter unexpected results or suspect a faulty voltage regulator, retest it using different test setups or try testing with a known working voltage regulator for comparison.
Testing voltage regulators ensures their reliable performance and stable voltage output. By following these steps and utilizing the appropriate testing tools, you can effectively test voltage regulators and identify any faults, helping to ensure the proper functioning of your electronic circuits or devices.
How to Test Potentiometers
Potentiometers, also known as pots, are variable resistors commonly used for volume control, tone adjustment, and other applications that require adjustable resistance. Testing potentiometers is important to ensure their proper functioning and to identify any faulty ones. With the help of a digital multimeter, you can test potentiometers effectively. Here’s a step-by-step guide:
- Turn off power: Before testing any potentiometer, make sure to disconnect power from the circuit to avoid any potential risks.
- Identify the terminals: Take note of the three terminals on the potentiometer. The two outer terminals are connected to the fixed resistive track, while the middle terminal is the wiper that moves along the track to vary the resistance.
- Set multimeter: Set your digital multimeter to the resistance mode (ohms Ω) and select the lowest range.
- Test continuity: With the potentiometer in the fully counterclockwise position, place one multimeter probe on one outer terminal and the other probe on the middle terminal. If the multimeter beeps or shows low resistance, it indicates continuity, suggesting that the wiper is correctly connected to that terminal.
- Test maximum resistance: Rotate the potentiometer fully clockwise and measure the resistance between one outer terminal and the middle terminal. The multimeter should display the maximum resistance value as specified on the potentiometer’s rating. If the reading is significantly different or shows infinite resistance, it indicates a faulty potentiometer.
- Test variable resistance: Rotate the potentiometer to a desired position between the minimum and maximum positions. Measure the resistance between one outer terminal and the middle terminal. The resistance value should vary smoothly and linearly as you rotate the potentiometer. Any abrupt changes or non-linearity may indicate a faulty potentiometer.
- Inspect for physical damage: Visually inspect the potentiometer for any signs of physical damage, such as cracks, loose connections, or worn-out tracks. These signs can indicate a faulty potentiometer that needs to be replaced.
- Repeat the test: If you encounter unexpected results or suspect a faulty potentiometer, retest it using different range settings on the multimeter or try testing with a known working potentiometer for comparison.
Testing potentiometers helps ensure their reliable performance and accurate control over resistance. With these steps and the appropriate testing tools, you can effectively test potentiometers and identify any faults, ensuring the proper functioning of your electronic circuits or devices.
How to Test Coils
Coils, also known as inductors, are passive electronic components that store energy in a magnetic field. Testing coils is important to ensure their proper functioning and to identify any faulty ones. With the help of a digital multimeter and some additional tools, you can test coils effectively. Here’s a step-by-step guide:
- Turn off power: Before testing any coil, make sure to disconnect power from the circuit to avoid any potential risks.
- Visual inspection: Inspect the coil visually for any signs of physical damage, such as broken wires, loose connections, or burnt marks. These signs can indicate a faulty coil that needs to be replaced.
- Set multimeter: Set your digital multimeter to the resistance mode (ohms Ω) and select the lowest range.
- Test continuity: Check the continuity of the coil by placing the multimeter probes on the two leads of the coil. If the multimeter beeps or shows low resistance, it indicates continuity and suggests that the coil is intact.
- Measure inductance: If you have an inductance meter, use it to measure the inductance of the coil. Follow the manufacturer’s instructions to connect the coil to the meter and obtain the inductance value. Compare it with the expected or specified inductance provided by the coil manufacturer.
- Use an LC meter: If an inductance meter is not available, you can use an LC (inductance-capacitance) meter or a component analyzer with an inductance measurement feature. Follow the instructions provided with the meter to connect the coil and get the inductance reading.
- Spot check impedance: Use an LCR (inductance-capacitance-resistance) meter or impedance analyzer to measure the impedance of the coil at a specific frequency or frequency range. Compare the measured impedance with the specifications provided for the coil to ensure it falls within the expected range.
- Repeat the test: If you encounter unexpected results or suspect a faulty coil, retest it using different test setups or try testing with a known working coil for comparison.
Testing coils helps ensure their reliability and functionality in electronic circuits. By following these steps and using the appropriate testing tools, you can effectively test coils and identify any faults, ultimately ensuring the optimal performance of your electronic devices or systems.
How to Test Optocouplers
Optocouplers, also known as optoisolators, are electronic components that use light to transfer electrical signals between two isolated circuits. Testing optocouplers is important to ensure their proper operation and to identify any faulty ones. With the help of a digital multimeter and a power source, you can test optocouplers effectively. Here’s a step-by-step guide:
- Turn off power: Before testing any optocoupler, make sure to disconnect power from the circuit to avoid any potential risks.
- Visual inspection: Inspect the optocoupler visually for any signs of physical damage, such as cracked casing, loose leads, or burnt marks. These signs can indicate a faulty optocoupler that needs to be replaced.
- Identify the terminals: Take note of the terminals on the optocoupler, typically marked as Anode (A), Cathode (K), Collector (C), Emitter (E), and sometimes Control (C) and Output (O).
- Set multimeter: Set your digital multimeter to the diode test mode or the resistance mode (ohms Ω) and select the lowest range.
- Test the input LED: Connect the positive (red) probe of the multimeter to the anode terminal and the negative (black) probe to the cathode terminal of the optocoupler. The multimeter should display a forward voltage drop, typically around 1.2 to 1.4 volts, indicating that the input LED is functioning correctly. Reverse the probe connections to test the LED in the reverse direction.
- Test the output transistor/photo-detector: Connect the optocoupler’s input LED to a suitable power source, and connect the collector and emitter terminals of the output side to the multimeter in diode mode or resistance mode. Trigger the input LED by applying the appropriate forward voltage. The multimeter should display a low resistance or a voltage drop, indicating that the output transistor or photo-detector is conducting properly.
- Check for signal transfer: Apply a small voltage signal to the input side of the optocoupler and measure the voltage on the output side using an oscilloscope or multimeter. Ensure that the output voltage matches the input signal, indicating successful signal transfer through the optocoupler.
- Repeat the test: If you encounter unexpected results or suspect a faulty optocoupler, retest it using different test setups or try testing with a known working optocoupler for comparison.
Testing optocouplers helps ensure their reliable operation and proper isolation between circuits. With these steps and the appropriate testing tools, you can effectively test optocouplers and identify any faults, ensuring the accurate transfer of electrical signals in your electronic circuits or systems.
How to Test Thermistors
Thermistors are temperature-sensitive resistors that change their resistance based on changes in temperature. Testing thermistors is important to ensure their accurate temperature sensing and to identify any faulty ones. With the help of a digital multimeter and a controlled heat source, you can test thermistors effectively. Here’s a step-by-step guide:
- Turn off power: Before testing any thermistor, make sure to disconnect power from the circuit to avoid any potential risks.
- Visual inspection: Inspect the thermistor visually for any signs of physical damage, such as cracks, broken leads, or burnt marks. These signs can indicate a faulty thermistor that needs to be replaced.
- Identify the terminals: Take note of the terminals on the thermistor. Typically, they are labeled as “T” or “NTC” for the thermistor itself, and “+” and “-” for the additional leads if present.
- Set multimeter: Set your digital multimeter to the resistance mode (ohms Ω) and select the appropriate range based on the expected resistance of the thermistor.
- Test resistance at room temperature: Measure the resistance of the thermistor at room temperature by touching the multimeter probes to the thermistor terminals. The multimeter should display a resistance value within the expected range specified by the thermistor’s datasheet or manufacturer.
- Prepare a controlled heat source: Use a heat source such as a hair dryer or a bowl of hot water to create a controlled temperature change.
- Heat the thermistor: Expose the thermistor to the controlled heat source and observe any changes in its resistance. As the temperature increases, the resistance of a negative temperature coefficient (NTC) thermistor should decrease, while the resistance of a positive temperature coefficient (PTC) thermistor should increase.
- Monitor resistance changes: Continuously monitor the resistance of the thermistor as it is exposed to the controlled heat source. Compare the resistance measurements at different temperature points with the expected resistance-temperature relationship provided by the thermistor’s datasheet or manufacturer.
- Repeat the test: If you encounter unexpected results or suspect a faulty thermistor, retest it using different test setups or try testing with a known working thermistor for comparison.
Testing thermistors ensures their reliable temperature sensing capabilities. By following these steps and using the appropriate testing tools, you can effectively test thermistors and identify any faults, ensuring accurate temperature measurements in your electronic circuits or systems.
How to Test Crystal Oscillators
Crystal oscillators are electronic devices used to generate stable and precise frequencies in various electronic circuits. Testing crystal oscillators is important to ensure their accurate frequency generation and to identify any faulty ones. With the help of a digital multimeter and an oscilloscope, you can test crystal oscillators effectively. Here’s a step-by-step guide:
- Turn off power: Before testing any crystal oscillator, make sure to disconnect power from the circuit to avoid any potential risks.
- Visual inspection: Inspect the crystal oscillator visually for any signs of physical damage, such as cracked casing, loose connections, or bent leads. These signs can indicate a faulty crystal oscillator that needs to be replaced.
- Identify the terminals: Take note of the terminals on the crystal oscillator. Typically, they are labeled as “IN”, “OUT”, and sometimes “GND” for ground.
- Set multimeter: Set your digital multimeter to the frequency measurement mode (Hz) or select the AC voltage mode. Make sure the multimeter is capable of measuring frequencies in the range of the crystal oscillator.
- Test with the multimeter: Connect the multimeter probes across the “IN” and “OUT” terminals of the crystal oscillator. The multimeter should display the frequency produced by the oscillator. If the multimeter does not measure any frequency or shows unstable or incorrect readings, it indicates a faulty crystal oscillator.
- Test with an oscilloscope: Connect the ground probe of the oscilloscope to the “GND” terminal of the crystal oscillator and the signal probe to either the “IN” or “OUT” terminal. Ensure that the oscilloscope settings are appropriate for measuring frequency. The oscilloscope should display a stable waveform with a consistent frequency corresponding to the crystal oscillator’s specifications.
- Monitor stability: Observe the waveform on the oscilloscope to ensure that it remains stable and does not exhibit any significant fluctuations or distortions. Instability or irregularities in the waveform may indicate a faulty crystal oscillator or external interference.
- Repeat the test: If you encounter unexpected results or suspect a faulty crystal oscillator, retest it using different test setups or try testing with a known working crystal oscillator for comparison.
Testing crystal oscillators ensures their reliable frequency generation in electronic circuits. By following these steps and using the appropriate testing tools, you can effectively test crystal oscillators and identify any faults, ensuring accurate frequency output for your electronic projects or systems.
How to Test Speaker Drivers
Speaker drivers are crucial components of audio systems that convert electrical signals into sound waves. Testing speaker drivers is important to ensure their proper functioning and to identify any faulty drivers. With the help of a multimeter and a test signal source, you can test speaker drivers effectively. Here’s a step-by-step guide:
- Turn off power: Before testing any speaker driver, make sure to disconnect power from the speaker system to avoid any potential risks.
- Visual inspection: Inspect the speaker driver visually for any signs of physical damage, such as torn cones, dented diaphragms, or loose connections. These signs can indicate a faulty driver that needs to be replaced.
- Set multimeter: Set your multimeter to the impedance mode or resistance mode (ohms Ω) and select the lowest range.
- Test impedance: Measure the impedance of the speaker driver by placing the multimeter probes across the positive and negative terminals of the driver. The multimeter should display the nominal impedance specified for the driver, such as 4 ohms, 8 ohms, or 16 ohms. If the measured impedance significantly deviates from the specified value, it may indicate a faulty driver.
- Test with a test signal: Connect the speaker driver to a test signal source, such as an audio amplifier or a signal generator. Apply an audio signal with a known frequency and amplitude to the driver.
- Listen for sound: Observe if the driver produces the expected sound corresponding to the input signal. Pay attention to any distortions, buzzing, or other unusual sounds that could indicate a faulty driver.
- Check frequency response: Use an audio spectrum analyzer or a tone generator with frequency sweep capability to test the driver’s frequency response. Sweep through different frequencies and observe if the driver accurately reproduces each frequency without any significant dips or peaks.
- Monitor excursion: Watch the cone or diaphragm of the driver while playing low-frequency signals. Make sure it moves smoothly and without any distortions, indicating proper excursion of the driver.
- Repeat the test: If you encounter unexpected results or suspect a faulty speaker driver, retest it using different test setups or try testing with a known working driver for comparison.
Testing speaker drivers ensures their optimal performance and sound reproduction capabilities. By following these steps and using the appropriate testing tools, you can effectively test speaker drivers and identify any faults, ensuring high-quality audio output in your speaker systems.
How to Test Solenoids
Solenoids are electromagnetic devices used in various applications, such as valves, locks, and relays, to generate linear or rotational motion when energized. Properly testing solenoids is important to ensure their functionality and to identify any faulty ones. With the help of a power source and a multimeter, you can test solenoids effectively. Here’s a step-by-step guide:
- Turn off power: Before testing any solenoid, make sure to disconnect power from the circuit to avoid any potential risks.
- Visual inspection: Inspect the solenoid visually for any signs of physical damage, such as broken wires, loose connections, or dents. These signs can indicate a faulty solenoid that needs to be replaced.
- Identify the solenoid terminals: Take note of the terminals on the solenoid, usually labeled as “C” (common), “NO” (normally open), and “NC” (normally closed) for a typical 3-terminal solenoid.
- Set up the test circuit: Connect a power source to the solenoid by connecting a positive lead to one terminal and a negative lead to the other terminal.
- Test continuity: Use a multimeter in the continuity mode to check for continuity between the common terminal and each of the other terminals. Activate the solenoid (apply power) and ensure that there is continuity between the common and the normally closed (NC) terminal while no continuity between the common and the normally open (NO) terminal. When the solenoid is not energized (no power), the continuity should be the opposite.
- Test the magnetic field: Place a small magnetic object, such as a paperclip, near the solenoid’s plunger or armature. Activate the solenoid by applying power and observe if the magnetic field attracts and moves the object. This test verifies the solenoid’s ability to generate a magnetic field and produce the desired motion.
- Measure current draw: With the solenoid activated (power applied), use a multimeter set in current measurement mode to measure the current flowing through the solenoid. Compare the measured current with the solenoid’s specifications or with known working solenoids of the same type. Significant deviations may indicate a faulty solenoid.
- Repeat the test: If you encounter unexpected results or suspect a faulty solenoid, retest it using different test setups or try testing with a known working solenoid for comparison.
Testing solenoids ensures their proper operation and can help identify any faults in the device. By following these steps and using the appropriate testing tools, you can effectively test solenoids and ensure their reliable performance in various applications.
How to Test Power Supplies
Power supplies are vital components that provide electrical energy to various devices and circuits. Testing power supplies is important to ensure their stability, efficiency, and proper voltage regulation. With the help of a multimeter and a load, you can test power supplies effectively. Here’s a step-by-step guide:
- Turn off power: Before testing any power supply, make sure to disconnect power to the circuit and ensure all devices are powered off.
- Visual inspection: Inspect the power supply visually for any signs of physical damage, such as burnt components, bulging capacitors, or loose connections. These signs can indicate a faulty power supply that needs to be replaced.
- Set up the test circuit: Connect the power supply to a load, such as a resistor or a suitable device, that consumes the power from the supply. Ensure all connections are secure.
- Measure output voltage: Use a multimeter to measure the output voltage of the power supply. Set the multimeter to the appropriate DC voltage range and connect the probes to the positive and negative terminals of the power supply. The measured voltage should be within the specified range mentioned on the power supply or the required voltage for the load.
- Check voltage ripple: Use an oscilloscope to observe the output voltage waveform of the power supply. Check for any fluctuations or noise. Ideally, the waveform should be a smooth and stable DC signal with low levels of ripple voltage. Excessive noise or voltage spikes may indicate a faulty power supply.
- Monitor voltage stability: Observe the output voltage of the power supply over a period of time. It should remain relatively constant with minimal fluctuations or drift. Significant voltage variations may indicate poor voltage regulation or instability in the power supply.
- Monitor temperature: Monitor the temperature of the power supply during operation. Excessive heat can indicate a problem with the power supply, such as overloading or inadequate cooling. The power supply should operate within the designated temperature limits mentioned in its specifications.
- Repeat the test: If you encounter unexpected results or suspect a faulty power supply, retest it using different test setups or try testing with a known working power supply for comparison.
Testing power supplies ensures their reliable operation and the delivery of stable and regulated voltage to devices and circuits. By following these steps and using the appropriate testing tools, you can effectively test power supplies and identify any faults, ensuring the proper functioning of your electronic systems.
How to Test Motors
Testing motors is crucial to ensure their proper functioning and to identify any faults or malfunctions. With the help of a multimeter and a controlled power supply, you can effectively test motors. Here’s a step-by-step guide:
- Turn off power: Before testing any motor, make sure to disconnect power to the circuit and ensure all devices are powered off.
- Visual inspection: Inspect the motor visually for any signs of physical damage, such as loose wires, burnt insulation, or broken components. These signs can indicate a faulty motor that needs to be replaced.
- Identify the motor terminals: Take note of the motor’s terminals and their corresponding functions, such as positive (+), negative (-), or additional leads for specific settings or functions.
- Set multimeter: Set your multimeter to the appropriate measurement mode for resistance (ohms Ω) or continuity.
- Test continuity: Examine the motor’s wiring and use the multimeter to check for continuity between the motor terminals. Ensure there is continuity in the appropriate paths and no unexpected connections or open circuits.
- Test resistance: Measure the resistance of the motor coils using the multimeter in resistance mode. Compare the measured values with the motor specifications provided by the manufacturer. Significant deviations may indicate faulty or damaged coils.
- Prepare a controlled power supply: Connect the motor to a controlled power supply or a motor driver that matches the motor’s voltage and current requirements.
- Apply power: Activate the motor by applying power. Observe if the motor starts, runs smoothly, and produces the expected mechanical output such as rotation, vibration, or movement. Pay attention to any unusual sounds, excessive heating, or erratic behavior that could indicate a faulty motor.
- Monitor current draw: Use a multimeter or a current sensor to measure the current drawn by the motor during operation. Compare the measured current with the motor’s specifications or with known working motors of the same type. Significant deviations may indicate a faulty motor or abnormal load conditions.
- Repeat the test: If you encounter unexpected results or suspect a faulty motor, retest it using different test setups or try testing with known working motors for comparison.
Testing motors ensures their reliability and functionality in various applications. By following these steps and using the appropriate testing tools, you can effectively test motors and identify any faults, helping to ensure their optimal performance in your electronic systems or devices.