
Choosing the Right Digital Multimeter for Your Needs
When it comes to selecting a digital multimeter, it is important to consider your specific needs and requirements. With various models and features available in the market, choosing the right multimeter can make all the difference in efficiently and accurately carrying out your electrical measurements. Here are some factors to consider when making your decision:
Type of Measurements: Determine the types of measurements you will frequently be making. If you mostly work with AC circuits, choose a multimeter with true RMS capability. For automotive applications, consider a multimeter with a min/max feature to capture the highest and lowest values.
Measurement Range: Consider the measurement range you will require. Ensure that the multimeter can measure the voltages, currents, and resistances you commonly encounter in your work. A wider range will provide you with more flexibility and accuracy.
Accuracy: Look for a multimeter with a high degree of accuracy. Check the specifications for the accuracy tolerances of the various measurements. It is important to have confidence in the readings you obtain from your multimeter.
Safety Features: Safety should be a top priority when working with electrical circuits. Choose a multimeter with built-in safety features such as overload protection, fuse protection, and CAT ratings that correspond to the voltage levels you will be working with.
Display: Consider the size and readability of the multimeter’s display. A large, backlit display with high contrast can make it easier to read measurements, especially in low-light conditions.
Additional Features: Depending on your specific needs, consider any additional features that may be useful to you. This could include functions like temperature measurement, capacitance measurement, or data logging capabilities. However, be mindful that additional features may also increase the cost.
Price: Set a budget for your multimeter purchase, keeping in mind the features and quality you require. It is important to strike a balance between affordability and functionality.
By carefully considering these factors, you can choose a digital multimeter that will effectively meet your needs, provide accurate measurements, and ensure your safety when working with electrical circuits.
Understanding the Basics of a Digital Multimeter
A digital multimeter is a versatile tool that is commonly used for measuring voltage, current, resistance, and other electrical parameters. Whether you’re a professional electrician or a DIY enthusiast, understanding the basics of a digital multimeter is essential for performing accurate electrical measurements. Here is a breakdown of its key components and functions:
Display: The display is one of the most important parts of a digital multimeter. It typically shows the measured values, such as voltage or resistance, in numerical form. Some multimeters also have a graphical display or a bargraph to indicate the changes in measurements.
Measurement Selector: The measurement selector allows you to choose the type of measurement you want to make, such as voltage (V), current (A), or resistance (Ω). It is usually a rotary switch or a button that you can adjust to the desired setting.
Probe Ports: The probe ports are where you connect the multimeter’s test leads or probes. These ports are typically color-coded, with red for the positive lead and black for the negative lead. Make sure to insert the leads into the appropriate ports for accurate measurements.
Function Buttons: Many digital multimeters have additional function buttons that allow you to access various measurement settings or special features. These buttons may include options for selecting ranges, activating hold functions, or switching between AC and DC modes.
Range Selector: The range selector sets the measurement range of the multimeter. It allows you to adjust the sensitivity of the device to match the magnitude of the signal you are measuring. Choosing the appropriate range ensures accurate readings and prevents damage to the multimeter.
Continuity Buzzer: Some multimeters have a built-in continuity buzzer. This feature emits a sound or an audible beep when there is a continuous connection between the test leads, indicating low resistance or a closed circuit.
Auto Range: Many modern digital multimeters feature an auto-range functionality, which automatically selects the appropriate measurement range based on the signal being measured. This convenient feature eliminates the need for manually adjusting the range.
Hold Function: The hold function allows you to freeze the displayed value on the multimeter’s screen. This can be useful when taking measurements in hard-to-reach places or when you need to record a reading without the risk of it changing.
Backlight: Some multimeters have a backlight feature that illuminates the display, making it easier to read measurements in dimly lit environments.
By familiarizing yourself with these basic components and functions of a digital multimeter, you will be well-prepared to use the tool effectively and confidently measure various electrical parameters in your electrical projects or troubleshooting tasks.
Safety Precautions When Using a Digital Multimeter
When working with electricity and using a digital multimeter, it is crucial to prioritize safety to prevent accidents or electrical hazards. Here are some important safety precautions to keep in mind:
Ensure Proper Training: Before using a digital multimeter, make sure you have received proper training in electrical safety. Understanding the fundamentals of electricity, circuitry, and multimeter operation is essential to minimize risks.
Inspect the Multimeter: Before each use, carefully inspect the multimeter for any signs of damage, such as frayed cables, loose connections, or cracked casing. If any issues are detected, do not use the multimeter and have it repaired or replaced as needed.
Double-Check the Measurement Range: Verify that the measurement range selector is set correctly for your intended measurement. Using the wrong range could lead to inaccurate readings or damage to the multimeter.
Turn Off Power: Always turn off the power to the circuit or equipment you are testing before connecting the multimeter. This will prevent accidental contact with live circuits and minimize the risk of electric shock.
Use Proper PPE: Wear appropriate personal protective equipment (PPE) when working with electricity. This may include insulated gloves, safety glasses, and protective clothing to protect yourself from potential electrical hazards.
Test the Multimeter: Before using the multimeter, test it on a known voltage source to ensure proper functioning. This will help verify the accuracy of the readings and identify any issues with the multimeter.
Follow Proper Lead Connections: Pay close attention to the correct placement of the multimeter leads. Ensure the leads are securely connected to the appropriate ports and that the red lead is connected to the positive terminal and the black lead is connected to the negative terminal.
Avoid Overloading: Be mindful of the maximum voltage and current ratings of your multimeter. Exceeding these limits can cause damage to the multimeter or pose a safety risk. Choose the appropriate measurement range and switch to higher ranges when necessary.
Avoid Touching Exposed Conductors: Do not touch exposed conductors or probes during measurements, especially when conducting live voltage tests. Always hold the multimeter probes by the insulated handles to prevent electric shock.
Keep Multimeter Away from Water: Avoid using the multimeter in wet or damp environments to prevent the risk of electrical shorts or damage to the device. Store the multimeter in a dry and safe location when not in use.
By adhering to these safety precautions when using a digital multimeter, you can minimize the risk of accidents and ensure your personal safety while working with electricity.
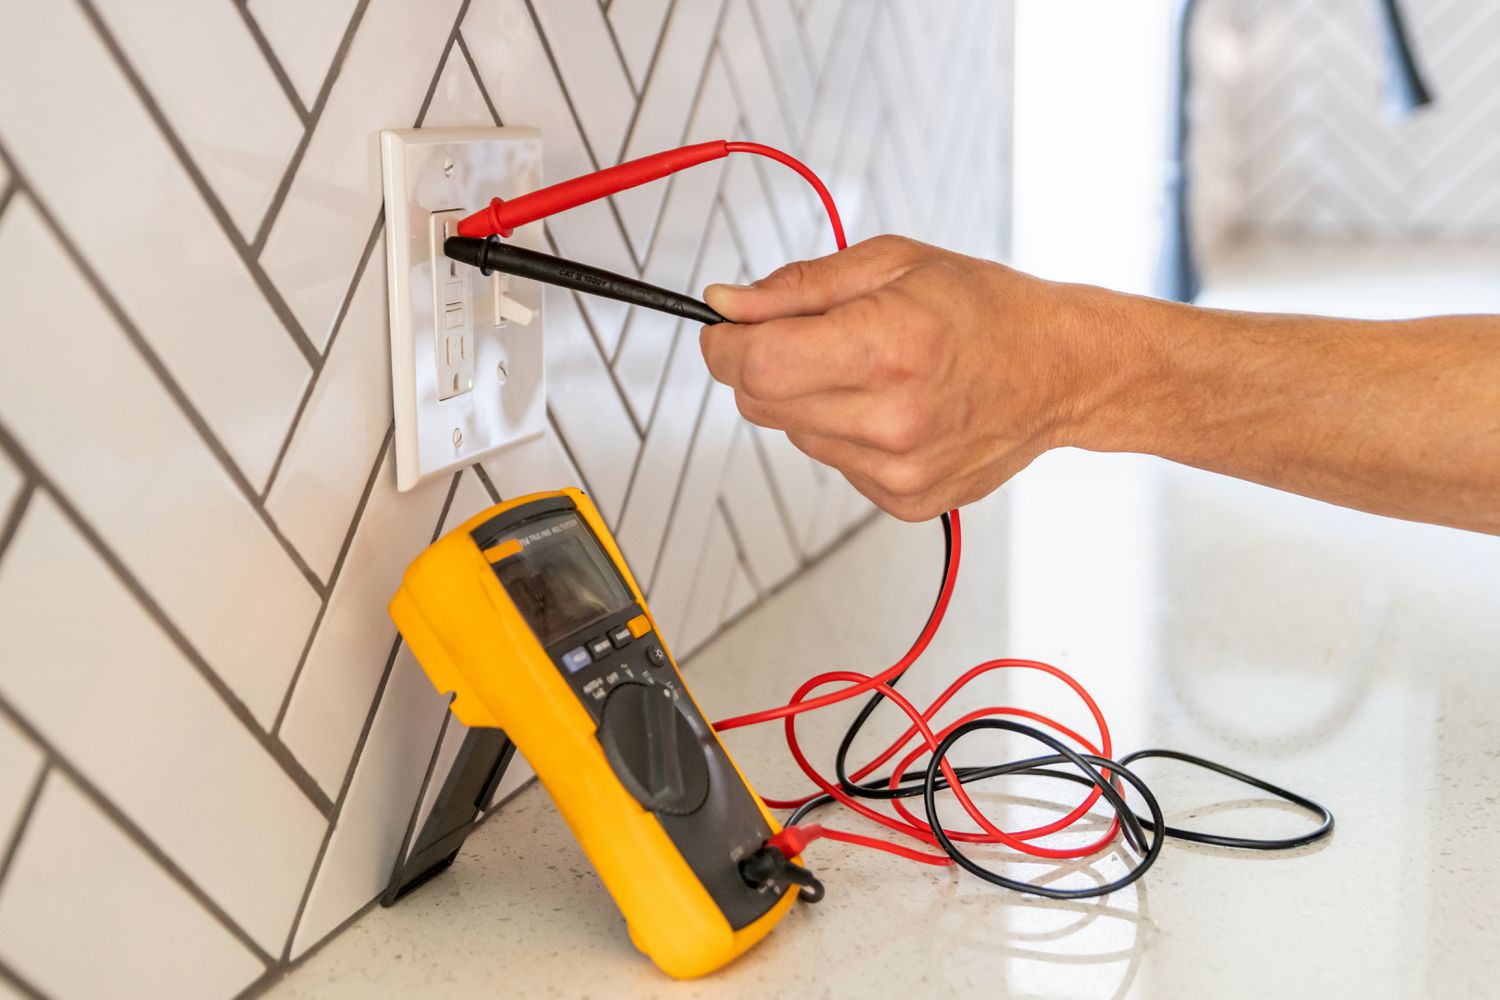
Measuring Voltage with a Digital Multimeter
Measuring voltage is one of the fundamental functions of a digital multimeter. Whether you need to measure the voltage of a power source or troubleshoot an electrical circuit, here are the steps to follow:
- Select the appropriate range: Start by selecting the voltage range on the multimeter that is greater than the expected voltage you will be measuring. This ensures accurate readings and prevents damage to the multimeter.
- Turn off power: If you are measuring voltage in a circuit, make sure to turn off the power before connecting the multimeter. This prevents any potential electrical shock or damage to the multimeter.
- Connect the leads: Insert the red lead into the VΩmA port and the black lead into the COM port of the multimeter. Ensure that the leads are securely connected.
- Connect the leads to the circuit: Place the red lead on the positive side of the voltage source or the point in the circuit where you want to measure the voltage. Connect the black lead to the negative side or the ground reference point.
- Read the voltage: Once the leads are properly connected, turn on the power if necessary, and observe the reading on the multimeter display. The value displayed represents the voltage at the point where the red lead is connected.
- Take note of the polarity: Pay attention to the positive and negative signs displayed on the multimeter. These indicate the polarity of the voltage being measured. Positive indicates the higher potential, while negative indicates the lower potential.
- Disconnect the leads: After you have obtained the voltage reading, turn off the power (if applicable) and disconnect the leads from the circuit. Remove the leads from the multimeter ports as well.
It is important to note that when measuring AC voltage, such as household mains power, ensure that the multimeter is set to the AC voltage mode. The procedure for measuring AC voltage is the same as for DC voltage.
Remember to always exercise caution and follow safety precautions when measuring voltage, especially when dealing with high voltages. Using a digital multimeter correctly will enable you to accurately measure voltage and facilitate electrical troubleshooting tasks efficiently.
Measuring Current with a Digital Multimeter
Measuring current is another important function of a digital multimeter. Whether you need to determine the current flowing through a circuit or test the current draw of a device, here is how you can measure current using a digital multimeter:
- Select the appropriate range: Begin by selecting the current range on the multimeter that is higher than the expected current you will be measuring. This ensures accurate readings and prevents damage to the multimeter.
- Turn off power (if applicable): If you are measuring current in a circuit, it is crucial to turn off the power before making the connections to avoid potential damage to the multimeter or electrical shock.
- Disconnect the load: If you are measuring current in a circuit, disconnect the load from the power source and ensure that the multimeter is inserted in series with the circuit.
- Identify the current pathway: Determine the direction of current flow in the circuit and identify the point where you want to measure the current. Typically, the multimeter’s current measurement probe is inserted in series between the power source and the load.
- Connect the leads: Insert the red lead into the multimeter’s current (A) port and the black lead into the common (COM) port. Ensure proper connection and secure fit.
- Set the multimeter to current mode: Switch the multimeter to the current mode, either AC or DC depending on the type of current you are measuring.
- Connect the multimeter in series: Connect the multimeter in series with the circuit by making the current-carrying path pass through the multimeter. This involves connecting the red lead to the positive side of the circuit and the black lead to the negative side or ground.
- Read the current: Once the multimeter is properly connected, turn on the power (if applicable) and observe the reading on the multimeter display. The value displayed represents the current flowing through the circuit.
- Disconnect the leads: After obtaining the current reading, turn off the power (if applicable) and carefully disconnect the leads from the circuit. Remove the leads from the multimeter ports as well.
It is important to note that when measuring AC current, such as in household appliances, ensure that the multimeter is set to AC current mode. The procedure for measuring AC current is similar to that of DC current.
Always exercise caution and adhere to safety precautions when measuring current, especially when dealing with high current systems. Using a digital multimeter correctly will enable you to accurately measure current and facilitate electrical troubleshooting tasks efficiently.
Measuring Resistance with a Digital Multimeter
Measuring resistance is a common task when troubleshooting electrical circuits or testing the continuity of components. A digital multimeter provides a simple and accurate way to measure resistance. Here is how you can measure resistance using a digital multimeter:
- Select the appropriate range: Start by selecting the resistance range on the multimeter that is higher than the expected resistance you will be measuring. This ensures accurate readings and prevents damage to the multimeter.
- Turn off power (if applicable): Ensure that the power is turned off when measuring resistance in a circuit to prevent any interference or potential damage to the multimeter.
- Disconnect the component: If you are measuring the resistance of a specific component, make sure it is disconnected from any power source or circuit before proceeding.
- Connect the leads: Insert the red lead into the VΩmA port and the black lead into the COM port of the multimeter. Ensure secure and proper connection.
- Set the multimeter to resistance mode: Switch the multimeter to the resistance mode, usually denoted by the Ω symbol.
- Touch the leads to the component: Touch the multimeter leads to the component or circuit being measured. It is important to ensure a good connection between the leads and the component for an accurate reading.
- Read the resistance: Once the leads are in contact with the component, the multimeter will display the resistance value on its screen. Take note of the displayed value, which represents the resistance measurement of the component.
- Disconnect the leads: After obtaining the resistance reading, remove the leads from the component being tested. Remove the leads from the multimeter ports as well.
It is important to note that when measuring resistance, make sure to avoid touching any live connections or circuits to prevent electric shock or damage to the multimeter.
When measuring very low resistances or conducting continuity tests, some multimeters also offer an audible continuity feature that beeps when a circuit is closed or resistance is near zero.
By following these steps, you can use a digital multimeter to accurately measure resistance, aiding in troubleshooting circuits or testing the functionality of electrical components.
Testing Continuity with a Digital Multimeter
Continuity testing is a fundamental function of a digital multimeter that helps determine if a circuit is complete or if there is a break in the electrical continuity. It is often used to test for open connections, identify faulty wiring, or check the functionality of switches, fuses, or conductive paths. Here is how you can test continuity using a digital multimeter:
- Select the continuity mode: Start by switching your multimeter to the continuity mode. This mode is usually denoted by a musical note symbol or the abbreviation “CONT.”
- Turn off power: Ensure that the power to the circuit or device you are testing is turned off. This will prevent any potential damage to the multimeter or electrical shock.
- Connect the leads: Insert the red lead into the multimeter’s positive or continuity (Ω) port and the black lead into the common (COM) port. Ensure a secure fit.
- Touch the leads to the circuit/component: Touch the two ends of the circuit or the two points where you suspect a break in continuity. The multimeter will emit a sound or display a value on the screen if there is continuity, indicating a complete connection.
- Interpret the results: If the multimeter emits a continuous sound or displays a value close to zero, it indicates continuity in the circuit. If there is no sound or the multimeter displays an “OL” (open loop) or a high resistance value, it indicates a break in continuity.
- Disconnect the leads: After testing for continuity, disconnect the leads from the circuit or component being tested. Remove the leads from the multimeter ports as well.
It is important to note that when performing continuity tests, the circuit or device should be disconnected from any power source to prevent any interference or accidents.
Continuity testing is a valuable tool in diagnosing electrical issues and is especially useful in troubleshooting wiring, printed circuit boards, switches, fuses, and other components. By using a multimeter to test continuity, you can quickly identify and locate any breaks or faults in the electrical continuity of a circuit or component.
Using the Diode Test Function on a Digital Multimeter
The diode test function on a digital multimeter is specifically designed to test the functionality of diodes, which are electronic components that allow current to flow in one direction while blocking it in the opposite direction. The diode test function helps identify faulty or damaged diodes. Here is how you can use the diode test function on a digital multimeter:
- Select the diode test mode: Begin by switching your multimeter to the diode test mode. This mode is typically represented by a diode symbol or the abbreviation “DIODE.”
- Turn off power: Ensure that the power to the circuit or device containing the diode is turned off before testing. This prevents any potential damage to the multimeter or electrical shock.
- Connect the leads: Insert the red lead into the multimeter’s positive or diode (Ω) port and the black lead into the common (COM) port. Ensure a secure fit.
- Identify the diode terminals: Identify the anode (positive terminal) and cathode (negative terminal) of the diode. The anode is typically marked with a + symbol and the cathode with a – or a line near the end of the diode.
- Test the diode: Place the multimeter leads across the diode terminals, ensuring that the red lead is connected to the anode and the black lead to the cathode. The multimeter will display a voltage reading that indicates the forward voltage drop across the diode.
- Interpret the results: If the multimeter displays a voltage reading within the expected range (usually 0.5 – 0.7 volts for silicon diodes), it indicates that the diode is functional. If the multimeter displays a voltage reading close to zero or “OL” (open loop), it suggests a faulty or shorted diode. If the multimeter displays no reading or a high voltage reading, it indicates an open diode.
- Disconnect the leads: After testing the diode, remove the multimeter leads from the diode terminals. Remove the leads from the multimeter ports as well.
The diode test function on a digital multimeter is a valuable tool for quickly and accurately testing the functionality of diodes. By performing diode tests, you can identify faulty or damaged diodes and replace them as necessary in electronic circuits or devices.
How to Use a Digital Multimeter to Test Components
A digital multimeter is a versatile tool that can be used to test and troubleshoot various electrical components. Whether you need to check resistors, capacitors, transistors, or other components, here is a general guide on how to use a digital multimeter to test components:
- Select the appropriate test mode: Start by selecting the test mode on the multimeter that corresponds to the component you want to test. For resistors and capacitors, use the resistance (Ω) mode. For diodes, use the diode test mode. For transistors and other components, refer to the specific test mode instructions in the multimeter’s manual.
- Turn off power: Ensure that the power to the circuit or device containing the component is turned off before testing. This prevents any potential damage to the multimeter or electrical shock.
- Connect the leads: Insert the red lead into the appropriate port on the multimeter based on the test mode selected. The black lead goes into the common (COM) port. Ensure a secure fit.
- Identify the component terminals: Identify the terminals of the component you want to test. This may require referring to the component’s datasheet or markings on the component itself.
- Test the component: Depending on the test mode selected:
- Resistance Test: Place the multimeter leads across the component terminals. The multimeter will display the resistance value. Compare this value to the expected range provided by the component’s specifications.
- Diode Test: Connect the multimeter leads to the diode terminals, making sure to observe the correct polarity. The multimeter will display a voltage reading that indicates the diode’s forward voltage drop.
- Other Test Modes: Follow the specific instructions provided in the multimeter’s manual for testing the particular component.
- Interpret the results: Compare the readings obtained from the multimeter to the expected values provided by the component’s specifications. If the readings are within the expected range, the component can be considered functional. If the readings are outside the expected range or if the multimeter indicates an open or short circuit, the component may be faulty.
- Disconnect the leads: After testing the component, remove the multimeter leads from the component’s terminals. Remove the leads from the multimeter ports as well.
It is important to consult the datasheets or technical documentation of the components you are testing for specific testing procedures and expected values. Also, remember to always exercise caution and follow safety precautions when testing components, especially when dealing with high voltages.
By using a digital multimeter to test components, you can quickly and accurately assess their functionality, enabling you to troubleshoot and repair electrical circuits with confidence.
Troubleshooting Electrical Issues with a Digital Multimeter
A digital multimeter is an indispensable tool for troubleshooting electrical issues. Whether you’re dealing with a faulty circuit, malfunctioning equipment, or unexpected voltage fluctuations, a multimeter can help you pinpoint the source of the problem. Here’s a step-by-step guide on how to use a digital multimeter for troubleshooting:
- Identify the problem: Start by understanding the symptoms and identifying the specific electrical issue you’re facing. This could include voltage drop, intermittent connections, abnormal readings, or non-functional components.
- Turn off power: Before beginning any troubleshooting, turn off the power to the circuit or equipment you will be working on. This ensures your safety and prevents damage to the multimeter or other components.
- Choose the appropriate test mode: Depending on the nature of the problem, select the relevant test mode on the multimeter. This could include voltage, current, resistance, continuity, or specific component test modes.
- Check power supply: Test the power supply voltage to ensure it is within the expected range. Use the voltage test mode of the multimeter to measure the voltage at various points in the circuit, comparing it to the desired values.
- Test components and connections: Using the appropriate test modes, verify the functionality of components such as resistors, capacitors, diodes, and transistors. Check for continuity, correct resistance values, and abnormal voltage readings. Inspect connections for loose or damaged wires or terminals.
- Inspect for shorts: Test for short circuits by measuring the resistance between various points in the circuit. A reading close to zero or significantly lower than expected indicates the presence of a short circuit.
- Check for open circuits: Use the continuity test mode to determine if there are any open circuits. A multimeter displaying “OL” (open loop) or a high resistance value signifies an open circuit.
- Monitor voltage fluctuations: Use the multimeter’s voltage mode to monitor for any unexpected fluctuations in voltage levels. This can help identify issues such as voltage spikes or drops that may be causing equipment malfunctions.
- Record readings and compare: Keep a record of all measurements taken during troubleshooting. Compare the obtained readings to the expected values provided by specifications to identify discrepancies.
- Systematic testing: Troubleshoot one component or section of the circuit at a time, starting from the power source and gradually moving towards the problematic area. This helps narrow down the root cause and facilitates efficient troubleshooting.
Remember to always follow safety precautions and refer to the user manual of your multimeter for specific instructions and limitations. Troubleshooting electrical issues using a digital multimeter requires patience, attention to detail, and systematic testing to identify and resolve problems effectively.
Common Mistakes to Avoid When Using a Digital Multimeter
Using a digital multimeter can greatly simplify electrical measurements and troubleshooting tasks. However, there are a few common mistakes that users should avoid to ensure accurate readings and maintain safety. Here are some common mistakes to watch out for when using a digital multimeter:
- Incorrect range selection: Choosing the wrong measurement range can lead to inaccurate readings or overload the multimeter. Always set the range higher than the expected value to ensure accurate measurements.
- Using the wrong test mode: Selecting the incorrect test mode for the component or measurement being taken can result in misleading readings or incorrect values. Refer to the multimeter’s manual or component specifications for the appropriate test mode.
- Not turning off power: Failing to turn off the power before testing a circuit or component can lead to personal injury, damage to the multimeter, or inaccurate readings. Always ensure power is off and the circuit is de-energized before making any connections.
- Poor lead connections: Incorrectly connecting the test leads can lead to unreliable measurements or unsafe conditions. Ensure the leads are correctly inserted into the appropriate ports and securely connected to the circuit or component being tested.
- Forgetting to discharge capacitors: Capacitors can store electrical energy even after power is disconnected. Neglecting to discharge capacitors before testing can result in electrical shock or damage to the multimeter. Always discharge capacitors using a suitable discharge tool before touching or measuring them.
- Not checking battery levels: Using a multimeter with low battery levels can affect accuracy and lead to erroneous readings. Regularly check the battery status and replace them as needed to maintain reliable measurements.
- Relying solely on auto range: While the auto range feature is convenient, it may not always provide the most precise measurements. Manually selecting the appropriate range can result in better accuracy and prevent overloading the multimeter.
- Not observing safety precautions: Working with electricity carries inherent risks. Failing to wear appropriate personal protective equipment, neglecting to follow safety protocols, or working on live circuits without proper precautions can result in accidents or injuries. Always prioritize safety by following best practices and using the multimeter in a safe manner.
- Not calibrating the multimeter: Over time, the accuracy of a multimeter may drift. Failing to calibrate the multimeter regularly can introduce measurement errors. Follow the manufacturer’s guidelines for calibration to ensure accurate readings.
Avoiding these common mistakes will help you get the most out of your digital multimeter, ensuring reliable measurements and maintaining your safety while working with electrical circuits and components.
Tips for Maintaining and Calibrating Your Digital Multimeter
Maintaining and calibrating your digital multimeter is crucial to ensure accurate and reliable measurements over time. Regular maintenance and calibration can help prolong the lifespan of your multimeter and maintain its performance. Here are some helpful tips for maintaining and calibrating your digital multimeter:
- Store it properly: When not in use, store your multimeter in a clean, dry, and protected environment to prevent dust, moisture, or physical damage.
- Handle with care: Treat your multimeter with care, avoiding drops, impacts, or rough handling that could potentially damage the internal components or accuracy of the device.
- Check and clean the leads: Regularly inspect the condition of the multimeter leads for any signs of damage, such as worn insulation or frayed wires. Clean the leads with a mild detergent if they become dirty, and ensure they are securely connected to the multimeter.
- Replace batteries when needed: Monitor the battery status of your multimeter and replace the batteries as soon as they show signs of weakness. Weak batteries can affect accuracy and lead to unreliable readings.
- Calibrate regularly: Multimeters may drift from their original calibration over time. Consult the manufacturer’s guidelines for recommended calibration intervals and have your multimeter calibrated by a qualified technician or a calibration service provider to ensure accurate measurements.
- Follow proper calibration procedures: If you choose to calibrate the multimeter yourself, carefully follow the manufacturer’s instructions and use appropriate calibration standards to ensure accurate results. Note that professional calibration may be necessary for certain applications or industries where traceability is required.
- Keep calibration records: Maintain a record of the calibration dates, results, and any adjustments made during calibration. This documentation helps track the performance of the multimeter over time and provides a reference for future calibrations.
- Periodically test against known references: As part of your maintenance routine, periodically test your multimeter against known voltage, current, or resistance references to verify its accuracy. This can be done using certified calibration standards or other trusted instruments.
- Protect the display: The display is a critical component of the multimeter. Consider using a screen protector or keeping the multimeter in a protective case to prevent scratches or damage to the display.
- Refer to the user manual: Always consult the user manual of your multimeter for specific maintenance and calibration instructions provided by the manufacturer. This will ensure that you follow the recommended procedures and guidelines specific to your multimeter model.
By following these tips for maintaining and calibrating your digital multimeter, you can extend its lifespan, maintain its accuracy, and ensure reliable measurements for your electrical projects and troubleshooting tasks.