
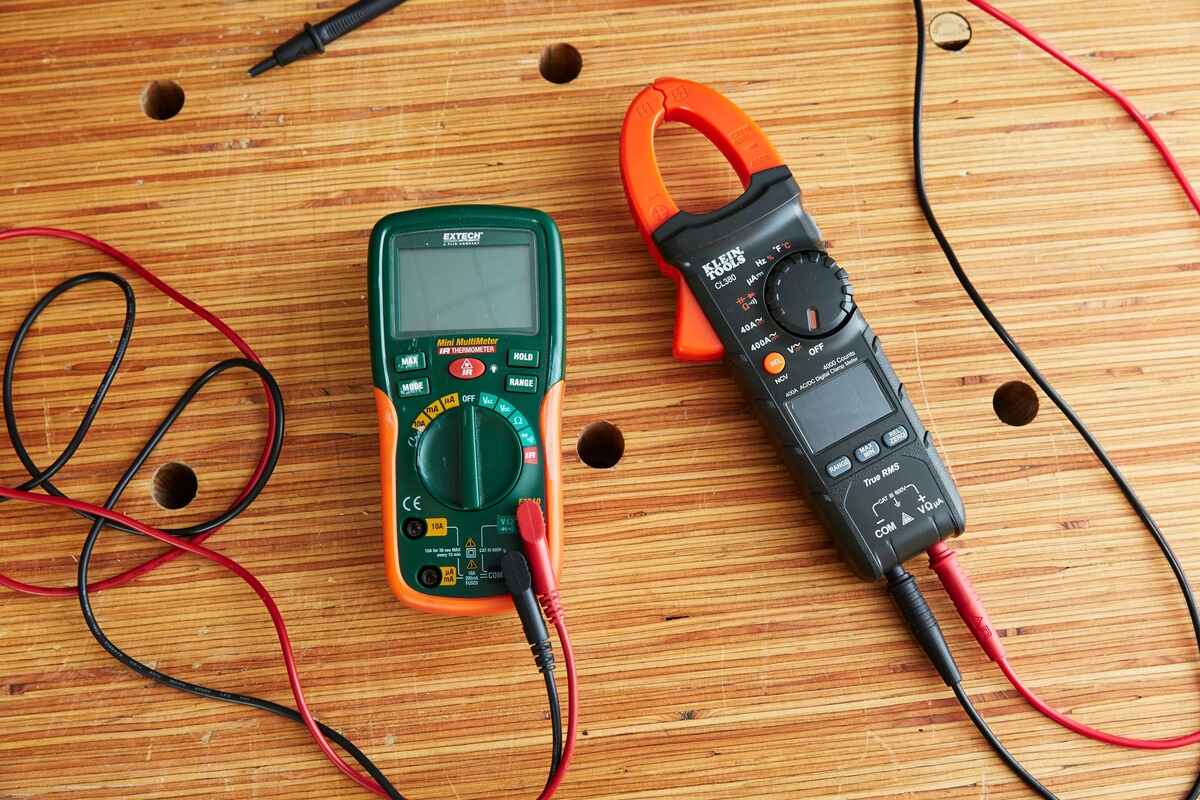
Digital Multimeter (DMM)
A Digital Multimeter (DMM) is a versatile electronic device used to measure various electrical parameters such as voltage, current, resistance, capacitance, frequency, and temperature. It is an essential tool for engineers, electricians, and hobbyists who work with electronics regularly.
With its digital display, a DMM provides accurate readings, making it more precise and convenient compared to its analog counterpart. The display typically shows numerical values along with the unit of measurement, allowing users to interpret the measured parameters easily.
Unlike analog multimeters, which use a linear scale to indicate values, DMMs use integrated circuits and analog-to-digital converters to convert electrical signals into digital form. This makes them faster, more reliable, and easier to read.
DMMs come in various types and models, each offering specific functionalities and ranges. Some basic DMMs only measure voltage, current, and resistance, while more advanced models include features like capacitance and frequency measurement, diode testing, continuity testing, and transistor measurements.
Another advantage of digital multimeters is their ability to auto-range. This means that the DMM can automatically select the appropriate range for a given parameter, making measurements more accurate and eliminating the need for manual range selection.
Overall, the digital multimeter is an indispensable tool for anyone involved in electronics. Its versatility, precision, and ease of use make it a must-have device for troubleshooting electrical circuits, conducting experiments, and ensuring the safe functioning of electrical systems.
Definition and Overview
A Digital Multimeter (DMM) is a widely used electronic measuring instrument that combines various testing capabilities into a single device. It is designed to measure electrical parameters such as voltage, current, resistance, capacitance, frequency, and temperature.
The primary purpose of a DMM is to provide accurate and reliable measurements of these electrical quantities. By connecting the test leads of the DMM to a circuit or electronic component, users can obtain quantitative data to analyze and diagnose electrical issues, perform experiments, or verify the functionality of a device.
DMMs are equipped with digital displays, typically in the form of an LCD (liquid crystal display) or LED (light-emitting diode), which provides clear and precise numerical readings of the measured values. The digital display eliminates the need for interpreting a scale or needle position, making it easier for users to read and interpret the results.
One significant advantage of DMMs is their ability to measure both AC (alternating current) and DC (direct current) voltage and current. This versatility allows users to work with a wide range of electrical systems and components. Additionally, DMMs often offer different measurement ranges to accommodate various voltage and current levels.
As technology has advanced, DMMs have become increasingly compact, portable, and user-friendly. Many models feature additional functions, such as data logging, peak and hold measurements, relative measurements, and auto-ranging capabilities to simplify the measurement process and enhance productivity.
Furthermore, DMMs can exhibit different levels of accuracy and precision, which is crucial for obtaining reliable and repeatable measurements. These characteristics are typically specified by the manufacturer and can vary depending on the model and price range of the DMM.
Parts of a DMM
A Digital Multimeter (DMM) consists of several key components that work together to perform accurate electrical measurements. Understanding the different parts of a DMM is essential for using the device effectively. Here are the main components:
1. Display: The display is the visual interface of the DMM, usually in the form of an LCD or LED screen. It shows the numerical readings of the measured electrical parameters, including voltage, current, resistance, and more.
2. Selection Knob: The selection knob allows users to choose the desired electrical parameter they wish to measure. It typically has multiple settings, such as voltage (V), current (A), resistance (Ω), capacitance (C), frequency (Hz), and temperature (°C/°F).
3. Input Terminals: These are the connection points where the test leads are connected to the DMM. The input terminals are color-coded to indicate the type of measurement, such as red for positive and black for negative or ground.
4. Test Leads: The test leads are flexible wires with insulated probes at the end. They connect the DMM to the circuit or component being tested to measure the electrical parameters accurately.
5. Function Buttons: DMMs often have additional function buttons to facilitate specific measurement tasks. These buttons enable features such as data hold (to freeze the displayed value), range selection (to manually choose the measurement range), and mode selection (to switch between AC and DC or different measurement units).
6. Power Button: The power button controls the on/off state of the DMM. Some DMMs may also have an auto power-off function to conserve battery life.
7. Battery Compartment: DMMs are typically powered by batteries. The battery compartment allows easy access for battery replacement when necessary.
8. Backlight: Many DMMs have a backlight feature that illuminates the display for clear visibility in low-light or dark environments.
9. Protective Casing: DMMs often come with protective casings that help safeguard the device from accidental drops, impacts, and other damage.
By familiarizing yourself with the different parts of a DMM, you can confidently navigate the device and make accurate measurements in various electrical scenarios. Always refer to the user manual provided by the manufacturer for specific instructions on operating your DMM model.
Voltage Measurements
Voltage measurement is one of the primary functions of a Digital Multimeter (DMM). It allows users to determine the electrical potential difference between two points in a circuit or system. Here are the key aspects of voltage measurements with a DMM:
Range Selection: Before taking a voltage measurement, it is important to select the appropriate range on the DMM. Most DMMs have multiple voltage ranges, such as 200mV, 2V, 20V, 200V, and 1000V, to accommodate different voltage levels. It is crucial to choose a range higher than the expected voltage to avoid overload and damage to the DMM.
Test Lead Connections: To measure voltage, the red test lead should be connected to the positive terminal or point in the circuit, while the black test lead should be connected to the negative terminal or ground. Incorrect connections can lead to inaccurate readings or potential circuit damage.
AC or DC Measurements: DMMs can measure both AC (alternating current) and DC (direct current) voltage. Ensure that your DMM is set to the appropriate mode based on the type of voltage you are measuring. AC voltage is commonly used for household electrical systems, while DC voltage is prevalent in electronic circuits and batteries.
Reading the Display: The DMM display will show the numerical value of the measured voltage. Ensure that the decimal point and unit of measurement (V) are correctly interpreted. Some DMMs may also indicate if the measured voltage is in the AC or DC mode.
Accuracy and Precision: The accuracy of a DMM determines how close the measured voltage value is to the actual value. Precision refers to the level of detail provided in the measurement. Higher-grade DMMs generally offer better accuracy and precision. Refer to the specifications in the user manual or datasheet to understand the accuracy and precision of your DMM.
Voltage measurements with a DMM are crucial for troubleshooting electrical systems, checking for proper power supply, and analyzing circuit behavior. By mastering voltage measurements, you can effectively diagnose and resolve electrical issues, ensuring the smooth operation of various electronic devices and systems.
Current Measurements
Current measurement is another essential capability of a Digital Multimeter (DMM). It allows users to determine the flow of electric current through a circuit or device. Here are the key aspects of current measurements with a DMM:
Range Selection: Before measuring current, it is important to select the appropriate current range on the DMM. Most DMMs have multiple current ranges, such as 200mA, 2A, 10A, to accommodate different current levels. It is crucial to choose a range higher than the expected current to avoid blowing a fuse or damaging the DMM.
Test Lead Connections: To measure current, the DMM’s test leads need to be connected in series with the circuit. In other words, the path of the current flow must pass through the DMM. The red test lead should be connected to the DMM’s current input marked with “A” or “mA,” and the black test lead to the common or ground terminal.
Mode Selection: DMMs have different modes for measuring current. These modes include AC or DC current measurements. Ensure that your DMM is set to the appropriate mode based on the type of current you are measuring.
Avoiding Overload: It is important to note the current limitations of the DMM and avoid exceeding its maximum current rating. Exceeding the current limit can result in a blown fuse or damage to the DMM. If you anticipate measuring a higher current, consider using a dedicated current clamp or shunt resistor with the DMM.
Reading the Display: The DMM’s display will show the numerical value of the measured current. Ensure that the decimal point and the unit of measurement (A or mA) are correctly interpreted. Some DMMs may also display the polarity of the current (positive or negative).
Accuracy and Precision: The accuracy and precision of current measurements can vary among DMMs. Higher-quality DMMs generally offer better accuracy and precision. Consult the user manual or datasheet for your DMM to understand its specifications in terms of accuracy and precision.
Current measurements with a DMM are vital for diagnosing faulty components, assessing power consumption, and verifying proper current flow in circuits. By performing accurate current measurements, you can effectively troubleshoot electrical systems, identify abnormal current levels, and ensure the safe functioning of various devices and equipment.
Resistance Measurements
Resistance measurement is an important function of a Digital Multimeter (DMM). It allows users to determine the resistance of a component or a circuit, providing crucial information about its conductivity and integrity. Here are the key aspects of resistance measurements with a DMM:
Range Selection: Before measuring resistance, it is important to select the appropriate range on the DMM. Most DMMs offer multiple resistance ranges, ranging from ohms (Ω) to kilohms (kΩ) and even megohms (MΩ). Select a range higher than the expected resistance to obtain accurate readings.
Test Lead Connections: To measure resistance, the DMM’s test leads need to be connected across the component or circuit being tested. The red test lead should be connected to the positive terminal or one end of the resistor, and the black test lead to the negative terminal or the other end of the resistor.
Open Circuit and Short Circuit Detection: DMMs have the capability to detect open (infinite) and short (near zero) circuits. An open circuit indicates a broken or disconnected component, while a short circuit suggests a direct connection. These detection features are useful for troubleshooting faulty components or circuitry.
Reading the Display: The DMM’s display will show the numerical value of the measured resistance. Ensure that the decimal point and the unit of measurement (ohms, kilohms, or megohms) are correctly interpreted. Some DMMs may also display the symbol for the resistance measurement (Ω).
Measurement Accuracy and Precision: The accuracy and precision of resistance measurements depend on the quality of the DMM. Higher-end DMMs generally provide greater accuracy and precision. Consult the specifications of your DMM to understand its accuracy, expressed as a percentage of the value or a specified number of digits.
Zeroing or Nulling: To obtain more accurate resistance readings, some DMMs feature a zero or null function. This function compensates for any stray resistance in the test leads and ensures that the DMM measures only the resistance of the component being tested.
Resistance measurements with a DMM are vital for identifying faulty or damaged components, verifying circuit integrity, and troubleshooting electrical systems. By accurately measuring resistance values, users can pinpoint potential issues, calculate current flow, and ensure the optimal performance of electronic circuits and devices.
Capacitance Measurements
A Digital Multimeter (DMM) is a versatile tool that can also measure capacitance, which is the ability of a component to store electrical energy in an electric field. Capacitance measurements are crucial in various electronic applications, particularly when working with capacitors. Here are the key aspects of capacitance measurements with a DMM:
Range Selection: Before measuring capacitance, it is important to select the appropriate capacitance range on the DMM. DMMs typically offer multiple ranges, from picofarads (pF) to microfarads (μF) or even millifarads (mF), to accommodate different capacitance values. Choose a range higher than the expected capacitance for accurate measurements.
Test Lead Connections: To measure capacitance, the DMM’s test leads need to be connected to the component being tested. The red test lead is typically connected to the positive terminal or one lead of the capacitor, while the black test lead is connected to the negative terminal or the other lead of the capacitor.
Nulling or Subtracting: Some DMMs provide a null or subtracting function to compensate for the parasitic capacitance of the test leads. This function subtracts the stray capacitance from the measurement, providing a more accurate value of the component being tested.
Reading the Display: The DMM’s display will show the numerical value of the measured capacitance. Ensure that the decimal point and the unit of measurement (pF, nF, μF, or mF) are correctly interpreted. Some DMMs may also display the symbol for capacitance (F).
Accuracy and Precision: The accuracy and precision of capacitance measurements depend on the quality of the DMM. Higher-grade DMMs generally offer better accuracy and precision. Refer to the specifications of your DMM to understand its accuracy, usually expressed as a percentage of the value or a specified number of digits.
Additional Capacitance Measurement Features: Some advanced DMMs offer additional capacitance measurement features, such as measuring the equivalent series resistance (ESR) of capacitors or analyzing the quality factor (Q factor) of ceramic capacitors.
Capacitance measurements are valuable for selecting capacitors with specific capacitance values, assessing the health and functionality of capacitors, and troubleshooting electronic circuits. By accurately measuring capacitance, users can ensure proper energy storage, minimize signal distortion, and optimize the performance of various electronic systems.
Diode Testing
One of the useful features of a Digital Multimeter (DMM) is its ability to test diodes. Diodes are semiconductor devices that allow current to flow in one direction while blocking it in the opposite direction. Diode testing with a DMM is crucial for verifying diode functionality and identifying faulty or damaged diodes. Here are the key aspects of diode testing:
Diode Test Mode: Most DMMs have a dedicated diode test mode. To perform a diode test, select this mode on the DMM. This mode typically applies a small forward bias voltage (around 0.6-0.7V) to the diode and measures the resulting current flow.
Test Lead Connections: To test a diode, the DMM’s test leads need to be correctly connected to the diode. The red test lead should be connected to the anode (positive terminal) of the diode, while the black test lead should be connected to the cathode (negative terminal).
Forward and Reverse Bias: During the diode test, the DMM applies a forward bias voltage to the diode. It measures the resulting current flow through the diode. A properly functioning diode should allow current to flow in the forward direction, indicating a low resistance or forward voltage drop. In the reverse direction, a functioning diode should block the current flow, resulting in a high resistance or open circuit reading.
Reading the Display: The DMM’s display will show the diode test results. A functioning diode typically displays a low resistance reading (around 0.3-0.7V) in the forward bias direction. In the reverse bias direction, a properly functioning diode should display a high resistance reading or indicate an open circuit.
Diode Polarity: The polarity of the diode is crucial during the diode test. Connecting the test leads to the diode with reversed polarity can result in reversed test readings or invalid measurements.
Diode Identification: Some DMMs have additional features to identify the type of diode being tested, such as identifying if it is a standard diode, a Zener diode, or a Schottky diode. This feature can be helpful when working with different types of diodes.
Diode testing with a DMM is invaluable for verifying diode functionality, identifying faulty or damaged diodes, and troubleshooting electronic circuits. By accurately testing diodes, users can ensure proper signal routing, prevent reverse current flow, and maintain the integrity of electronic systems.
Continuity Testing
Continuity testing is a fundamental function of a Digital Multimeter (DMM) that allows users to quickly determine if there is a complete path of electrical continuity between two points. It is commonly used to identify open circuits, broken wires, or faulty connections. Here’s what you need to know about continuity testing:
Testing for Continuity: To perform a continuity test, switch the DMM to the continuity mode or the “beep” mode. This mode activates an audible tone or beeping sound when continuity is detected, indicating a complete electrical path.
Test Lead Connections: Connect the test leads to the two points being tested. The red test lead is typically connected to one point, while the black test lead is connected to the other point. The DMM will then check for continuity between these points.
Beep or No Beep: When the DMM detects continuity, it emits an audible beep or a continuous tone. This indicates that there is a complete electrical path between the two points being tested. If no beep or tone is heard, it suggests an open circuit or a lack of continuity.
Resistance Threshold: The DMM has a predefined resistance threshold for continuity testing. If the resistance between the two test points is below this threshold, the DMM considers it a continuity and triggers the audible alert. If the resistance is above the threshold, the DMM assumes an open circuit and does not produce a beep.
Multiple Test Points: You can also use a DMM for testing continuity across multiple points or checking for continuity between specific components on a PCB. Simply place the test leads on the desired test points and listen for the audible indication of continuity.
Testing Components: Continuity testing can be useful for checking the continuity of components such as switches, fuses, relays, and PCB traces. It helps identify faulty components or connections that may disrupt the flow of current.
Continuity testing is a quick and efficient way to identify circuit problems, locate breaks in wiring, and ensure proper electrical connections. By utilizing the continuity function on a DMM, you can save time and effort in troubleshooting electrical systems and maintaining the integrity of circuits.
Transistor Measurements
Transistor measurements are an essential capability of a Digital Multimeter (DMM) for analyzing and testing transistors in electronic circuits. Transistors are semiconductor devices that amplify or switch electronic signals, making them crucial components in various applications. Here’s an overview of transistor measurements with a DMM:
Transistor Types: Transistors come in different types, such as bipolar junction transistors (BJT) and field-effect transistors (FET). It is important to identify the type of transistor being tested, as the measurement procedures may differ.
Base-Emitter Junction (BJT): For BJT transistors, the DMM can measure the base-emitter voltage drop. By selecting the diode test mode on the DMM and connecting the collector to the positive terminal and the emitter to the negative terminal, the DMM can measure the forward biased voltage drop across the base-emitter junction.
Gate-Source Voltage (FET): For FET transistors, the DMM can measure the gate-source voltage. By selecting the diode test mode and connecting the gate to the positive terminal and the source to the negative terminal, the DMM can measure the gate-source voltage.
Hfe (BJT): DMMs with a transistor gain (Hfe) measurement feature can also measure the current gain of BJT transistors. By connecting the appropriate test leads to the transistor leads and selecting the Hfe mode, the DMM can display the current gain of the transistor.
Pin Identification: Proper identification of the transistor’s pin configuration is essential for accurate measurements. Consult the datasheet or transistor specifications to identify the base, emitter, and collector pins (BJT) or gate, source, and drain pins (FET).
Reading the Display: The DMM’s display will show the measured voltage drop or gain value. Ensure that the decimal point and the unit of measurement (volts or Hfe) are correctly interpreted. Refer to the transistor’s datasheet or specifications to compare the measured values with the recommended or expected values for the given transistor.
Transistor measurements with a DMM enable users to analyze transistor functionality, ensure correct configurations, and troubleshoot electronic circuits. By accurately measuring transistor parameters, users can select appropriate transistors for specific applications, verify proper transistor operation, and troubleshoot issues related to transistor behavior within electronic circuits.
Frequency Measurements
Frequency measurements are a valuable capability of a Digital Multimeter (DMM) that allow users to determine the frequency of an electrical signal or waveform. Frequency is an essential parameter in many electronic applications, and DMMs provide a convenient way to measure it. Here’s what you need to know about frequency measurements with a DMM:
Frequency Range: DMMs are typically designed to measure frequencies within a specific range, such as a few hertz (Hz) to several megahertz (MHz). Ensure that the frequency of the signal you’re measuring falls within the range of your DMM.
Frequency Modes: DMMs offer different frequency measurement modes, including auto-ranging and manual ranging. Auto-ranging mode automatically selects the appropriate measurement range based on the input signal, while manual ranging allows users to manually choose the range.
Input Connections: Connect the DMM’s test leads to the signal source you want to measure. Ensure that the test leads are connected to the correct input terminals on the DMM, typically marked for frequency measurements.
Reading the Display: The DMM’s display will show the numerical value of the measured frequency. The frequency is usually expressed in hertz (Hz) or kilohertz (kHz), depending on the range and resolution of the DMM.
Accuracy and Precision: The accuracy and precision of frequency measurements depend on the quality and specifications of your DMM. Higher-grade DMMs generally offer better accuracy and precision. Consult the user manual or datasheet of your DMM to understand its specifications in terms of frequency measurement accuracy.
Addition Features: Some advanced DMMs may offer additional frequency-related features, such as measuring duty cycle, pulse width, or providing frequency counting capabilities.
Frequency measurements play a crucial role in troubleshooting electronic circuits, evaluating signal integrity, and analyzing waveform characteristics. By accurately measuring the frequency of electrical signals, users can optimize system performance, verify the operation of oscillators or clocks, and ensure the correct functioning of various electronic devices and systems.
Temperature Measurements
A Digital Multimeter (DMM) can also serve as a useful tool for measuring temperature. Temperature measurements are essential in various applications, including HVAC systems, electronic equipment, and scientific experiments. Here’s what you need to know about temperature measurements with a DMM:
Temperature Probes: DMMs utilize temperature probes to measure temperature. These probes can be thermocouples, thermistors, or RTDs (Resistance Temperature Detectors). Thermocouples are widely used and can measure a wide temperature range, while thermistors and RTDs offer higher accuracy in smaller temperature ranges.
Probe Connections: Depending on the type of temperature probe, the DMM may have dedicated input terminals or special connectors for connecting the probe. It is crucial to ensure proper probe connections to obtain accurate temperature readings.
Temperature Range: Each type of temperature probe has its specific temperature range. Before performing temperature measurements, make sure that the temperature range falls within the capabilities of the DMM and the temperature probe being used.
Selector Mode: DMMs with temperature measurement capabilities usually have a selector mode or a separate temperature function to switch between temperature and other measurement modes. Ensure that the DMM is set to the correct temperature measurement mode.
Units of Measurement: Temperature can be measured in various units, such as degrees Celsius (°C), Fahrenheit (°F), or Kelvin (K). Ensure that the DMM is set to the desired unit of measurement for accurate temperature readings.
Reading the Display: The DMM’s display will show the numerical value of the measured temperature. Pay attention to the decimal point and the selected unit of measurement to interpret the temperature reading correctly.
Accuracy and Calibration: The accuracy of temperature measurements can vary based on the quality and calibration of the temperature probe and the DMM itself. Regular calibration of the temperature probe is recommended to ensure accurate temperature readings.
Temperature measurements with a DMM can be beneficial for monitoring temperature variations in electronic components, troubleshooting heating or cooling systems, conducting experiments, or verifying temperature-sensitive processes. By accurately measuring temperature, users can ensure appropriate operating conditions, prevent overheating, and maintain the reliability of various systems and devices.
Accuracy and Precision of a DMM
The accuracy and precision of a Digital Multimeter (DMM) play a crucial role in obtaining reliable and trustworthy measurements. Accuracy refers to the closeness of a measured value to the true value, while precision refers to the repeatability and consistency of a set of measurements. Here’s what you need to know about the accuracy and precision of a DMM:
Accuracy: DMM accuracy indicates how close the measured values are to the true values. Manufacturers specify accuracy as a percentage of the reading or as a number of digits. For example, a DMM with ±1% accuracy means that the measured value can deviate by 1% of the reading. In general, higher-priced DMMs tend to offer better accuracy due to the quality of components and calibration processes.
Factors Affecting Accuracy: Several factors can affect the accuracy of a DMM, including temperature variations, input impedance, and calibration drift over time. It is important to consider these factors and understand the specifications provided by the manufacturer to ensure accurate measurements.
Precision: Precision relates to the degree of repeatability and consistency in a series of measurements. A DMM with high precision provides measurements that are close to each other when the same quantity is measured multiple times under similar conditions. Precision is often expressed as the number of digits or resolution of the DMM. For example, a 4½ digit DMM provides a resolution of 0.0001 for the least significant digit.
Resolution: Resolution refers to the smallest change that a DMM can detect in a measurement. It is determined by the number of digits displayed on the DMM. Higher-resolution DMMs can display smaller changes in the measured values, offering greater detail and accuracy in measurements.
Trade-off between Accuracy and Precision: Achieving high accuracy and precision simultaneously can be challenging and expensive. DMMs with higher accuracy tend to have lower precision, while those with higher precision might have lower accuracy. It is important to consider the specific requirements of your applications and strike a balance between accuracy and precision.
Calibration: To maintain accuracy, DMMs need regular calibration. Calibration involves comparing the DMM’s measurements to a known standard and adjusting it if necessary. DMMs can be calibrated in accredited calibration laboratories or through calibration services provided by the manufacturer.
Understanding the accuracy and precision of a DMM is critical for obtaining reliable measurements. Whether you need precise readings or high accuracy, considering the specifications and calibration requirements of the DMM will help ensure accurate and consistent measurements in your applications.
Common DMM Features
A Digital Multimeter (DMM) is a versatile device that offers various features to enhance its functionality and usability. These features expand the capabilities of a DMM and make it a valuable tool for electrical measurements. Here are some common features found in DMMs:
Auto-ranging: DMMs equipped with auto-ranging capability automatically select the appropriate measurement range based on the input signal. This feature saves time and ensures accurate measurements without the need for manual range selection.
Data Logging: Some DMMs include data logging functionality, allowing users to capture and record measurements over time. This feature is useful for monitoring changes in electrical parameters or for creating logs for future analysis.
Peak Hold: The peak hold feature enables DMMs to capture and display the maximum or minimum value of an electrical signal. This function is particularly useful for measuring transient or fluctuating signals that might not be captured by a regular measurement.
Relative Measurements: DMMs with relative measurement capabilities allow users to measure the difference between two measurements. This feature is beneficial when measuring resistance, capacitance, or other values that are dependent on a known reference value.
Backlight: DMMs equipped with a backlight feature illuminate the display for enhanced visibility in low-light or dark environments. This feature ensures that measurements can be easily read, even in challenging lighting conditions.
Hold Function: The hold function allows users to freeze the displayed value on the DMM. This feature is useful when reading measurements in situations where it is not convenient or safe to view the display while taking measurements.
Auto Power-off: To conserve battery life, some DMMs have an auto power-off feature that automatically turns off the device after a period of inactivity. This feature helps prolong battery life and ensures the DMM is ready for use when needed.
Continuity Beep: DMMs often feature an audible continuity beep mode that emits a sound when continuity is detected between two test points. This feature simplifies continuity testing and allows for quick identification of open or closed circuits.
Diode Test: DMMs commonly include a diode test mode that allows users to test the forward bias voltage drop or continuity of diodes. This feature is valuable for quickly identifying faulty or damaged diodes within electronic circuits.
Protective Casing: Many DMMs come with a protective casing or holster that provides physical protection against accidental drops, shocks, and general wear and tear. This feature helps extend the lifespan of the DMM and ensures long-term durability.
With these common features, DMMs offer enhanced functionality and convenience for a variety of electrical measurements. Understanding and utilizing these features can greatly enhance efficiency and accuracy in conducting electrical tests and troubleshooting various electronic systems.
How to Use a DMM
A Digital Multimeter (DMM) is a powerful tool for measuring electrical parameters, but it’s important to use it correctly to obtain accurate and reliable results. Here’s a step-by-step guide on how to use a DMM:
Step 1: Familiarize Yourself with the DMM: Read the user manual or guide that comes with your DMM to understand the specific features, functions, and safety precautions of your device. Pay attention to the proper use of test leads, input terminals, range selection, and any special modes or settings.
Step 2: Safety First: Before starting any measurements, ensure you are working in a safe environment. Be aware of potential electrical hazards and follow appropriate safety measures, such as wearing insulated gloves or using a non-contact voltage detector to check for live circuits.
Step 3: Select the Measurement Mode: Determine the electrical parameter you want to measure (e.g., voltage, current, resistance, etc.) and select the corresponding measurement mode on the DMM. Ensure the DMM is set to the appropriate range for your expected value.
Step 4: Connect the Test Leads: Connect the test leads to the input terminals of the DMM. The red test lead is typically connected to the positive terminal, and the black test lead is connected to the negative or ground terminal. Ensure proper connections, as incorrect connections can lead to incorrect readings or potential damage.
Step 5: Make the Measurement: Place the test probes or clips on the points where you want to measure the electrical parameter. Ensure a secure and stable connection. For voltage and resistance measurements, always ensure the circuit under test is de-energized and disconnected from any power source.
Step 6: Read and Interpret the Display: Take note of the numerical value displayed on the DMM’s screen. Ensure you’re reading the correct unit of measurement (e.g., volts, amps, ohms) and decimal point position. Keep in mind any measurement tolerances or specifications provided by the DMM manufacturer.
Step 7: Range Selection and Adjustments: If the initial range selection does not provide a clear or accurate measurement, adjust the range on the DMM accordingly to obtain a better reading. Fine-tune any necessary adjustments or perform multiple measurements for increased precision if required.
Step 8: Record or Repeat: If desired, record the measured value or jot down any relevant details for later reference. If necessary, repeat the measurement or perform additional measurements to gather comprehensive data or verify your readings.
Step 9: Disconnect and Power Off: After completing your measurements, safely disconnect the test leads from the circuit or device. Turn off the DMM, especially if the device does not have an auto power-off feature, to conserve battery life and prevent unintentional connections in the future.
By following these steps and using your DMM in a safe and conscientious manner, you can confidently perform a wide range of electrical measurements and effectively troubleshoot electrical systems with accuracy and precision.
Safety Tips for Using a DMM
When working with electricity and using a Digital Multimeter (DMM), safety should always be the top priority. Here are essential safety tips to follow when using a DMM:
1. Familiarize Yourself: Read and understand the user manual or guide that comes with your DMM. Familiarize yourself with its features, functions, and safety precautions before use.
2. Inspect Before Use: Inspect the DMM and test leads for any signs of damage, such as frayed wires or cracked probes. Do not use if there are visible signs of wear or if the equipment is damaged.
3. Ensure Proper Ratings: Confirm that the voltage and current ratings of your DMM are suitable for the electrical measurements you intend to make. Using a DMM with insufficient ratings can result in hazardous situations.
4. De-Energize Circuits: Before making any electrical measurements, ensure that the circuit is de-energized and disconnected from any power source. This minimizes the risk of electric shocks or damage to the DMM.
5. Use Proper PPE: Depending on the situation, use appropriate personal protective equipment (PPE), such as insulated gloves or safety glasses, when working with electrical circuits. This provides an extra layer of protection for your safety.
6. Test Leads Safety: Ensure that the test leads are in good condition, with no exposed wires or loose connections. Verify the insulation integrity and securely connect the leads to the DMM and the circuit under test.
7. Avoid Overload: Use caution not to exceed the voltage and current limits specified by the DMM. Overloading the DMM can result in equipment damage, inaccurate readings, or potential injury.
8. Proper Grounding: When working with grounded or earthed circuits, ensure that the DMM and any test equipment are properly grounded to prevent electric shocks and ensure accurate measurements.
9. Stay Alert: Be focused and attentive when using a DMM. Avoid distractions and maintain a clear work area. Concentration is crucial to minimize errors and accidents.
10. Maintain Clean and Dry Environment: Keep your work area clean and dry to avoid any accidental short circuits or moisture-related safety hazards. Ensure that your hands are dry when handling the DMM or operating the test leads.
11. Follow Proper DMM Use: Only use the DMM for its intended purpose and within its specified measurement ranges. Avoid using the DMM for measurements that exceed its limits or for non-electrical applications.
12. Regular Calibration: Periodically calibrate your DMM to maintain accuracy. Follow the manufacturer’s recommendations for calibration intervals or seek professional calibration services.
By adhering to these safety tips, you can minimize the risk of accidents, protect yourself from electrical hazards, and ensure safe and effective use of a DMM in your electrical measurements and troubleshooting tasks.
DMM Troubleshooting Tips
Like any electronic device, Digital Multimeters (DMMs) can experience issues or malfunctions. Troubleshooting a problematic DMM can help identify and resolve common issues. Here are some troubleshooting tips to consider:
1. Check Power and Batteries: Ensure that the DMM has sufficient power by checking the battery level or power source. Replace the batteries if they are low or dead. Verify that the batteries are installed correctly and that the battery contacts are clean.
2. Inspect Test Leads: Examine the test leads for any signs of damage, such as frayed wires or worn-out probes. Clean the contacts and ensure proper connections to the DMM and the measured circuit. Replace any damaged or faulty test leads.
3. Verify Range Selection: Double-check that you have selected the correct measurement range for the parameter you are testing. Selecting an inappropriate range can result in inaccurate readings or no response from the DMM.
4. Clean the DMM: Over time, dirt, dust, or debris can accumulate on the DMM’s buttons, display, or measurement inputs. Use a soft, dry cloth to gently clean the DMM and ensure a clean and clear interface for operation.
5. Calibrate the DMM: If you notice consistent inaccuracies in measurements, consider calibrating the DMM. Consult the user manual or contact the manufacturer for calibration instructions and recommendations. Proper calibration can restore accuracy and reliability.
6. Test Known Values: Verify the functionality of the DMM by testing known values using reliable sources. This can help identify any discrepancies or inconsistencies in measurements and determine if the issue lies with the DMM or the measured circuit.
7. Reset or Restart: If the DMM is not responding or functioning as expected, try performing a reset or restarting the device. Refer to the user manual for instructions on how to reset or restart your particular DMM model.
8. Seek Professional Help: If you have exhausted all troubleshooting attempts and the DMM still exhibits issues, contact the manufacturer’s customer support or seek assistance from a qualified technician. They can provide expert guidance or perform repairs if needed.
9. Update Firmware: Some advanced DMMs may have firmware updates available from the manufacturer. Check for firmware updates and follow the provided instructions to ensure your DMM has the latest features and bug fixes.
Remember that troubleshooting should be approached with caution, and if you are unsure about the issue or the troubleshooting process, it is best to seek professional assistance. By following these troubleshooting tips, you can identify and resolve common DMM issues, allowing for accurate and reliable measurements in your electrical applications.
Comparing Analog and Digital Multimeters
Analog and Digital Multimeters (DMMs) are both commonly used tools for electrical measurements. Each type offers its own advantages and considerations. Here’s a comparison between analog and digital multimeters:
Analog Multimeters:
- Display: Analog multimeters use a traditional analog needle or pointer to indicate measurements on a scale. Users read the position of the needle to determine the measured value.
- Measurement Range: Analog multimeters typically have a limited range and may require manual range selection for each measurement.
- Measurement Accuracy: Analog multimeters have lower accuracy compared to digital multimeters. Reading errors and inaccuracies can occur due to parallax or needle vibration.
- Response Time: Analog multimeters have a slower response time due to the mechanical nature of the needle movement.
- Cost: Analog multimeters are generally less expensive than digital multimeters.
- Applications: Analog multimeters are still preferred in some scenarios where fast-changing signals or circuits with rapid fluctuations need to be measured, thanks to their ability to display changing values more smoothly.
Digital Multimeters:
- Display: Digital multimeters feature a numeric digital display that provides precise readings and eliminates interpretation errors.
- Measurement Range: Digital multimeters have auto-ranging capabilities, automatically selecting the appropriate measurement range based on the input signal, ensuring more accurate readings.
- Measurement Accuracy: Digital multimeters offer higher accuracy and precision, with readings displayed with greater resolution and fewer chances for reading errors.
- Response Time: Digital multimeters have a faster response time due to the digital conversion of signals, providing instantaneous measurements.
- Additional Functions: Digital multimeters often offer additional features like data logging, frequency measurement, diode testing, and continuity testing.
- Cost: Digital multimeters tend to be more expensive than analog multimeters due to their advanced features and higher accuracy.
- Applications: Digital multimeters are widely used in various fields, including electronics, engineering, and HVAC, due to their accuracy, versatility, and ease of use.
Overall, digital multimeters offer greater accuracy, precision, and flexibility compared to analog multimeters. They provide instant digital readings, auto-ranging capabilities, and additional features for various measurement needs. However, analog multimeters still have a place in certain applications, such as monitoring rapidly changing signals or when cost is a significant consideration.
Choosing the Right DMM for Your Needs
When selecting a Digital Multimeter (DMM), it’s important to consider your specific requirements and the features that will best suit your needs. Here are some factors to consider when choosing the right DMM:
Measurement Requirements: Identify the electrical parameters you frequently measure, such as voltage, current, resistance, capacitance, or frequency. Ensure the DMM you choose covers your measurement needs and has the necessary measurement ranges and resolutions.
Accuracy and Precision: Consider the level of accuracy and precision required for your applications. Higher-grade DMMs with better accuracy and higher resolution might be necessary for more critical measurements, while lower-grade DMMs may suffice for general use.
Additional Functions: Determine if you need any additional measurement functions, such as data logging, frequency measurement, diode testing, or continuity testing. These functions can enhance your capabilities and make troubleshooting or experimentation more efficient.
Ease of Use: Consider the user interface and ease of operation. Look for a DMM with a clear and easy-to-read display, intuitive controls, and a user-friendly interface. Backlighting and large digits can enhance visibility in various working conditions.
Build Quality and Durability: Assess the build quality and durability of the DMM. Look for sturdy casing, reliable test leads, and durable buttons to ensure the DMM can withstand regular usage and potential accidental drops or impacts.
Safety Features: Check if the DMM offers safety features such as overload protection, fuses, or insulation to protect against electrical hazards during measurements. Safety certifications like CAT (Category) ratings provide an indication of the DMM’s intended use in specific electrical environments.
Budget Considerations: Determine your budget and balance it with your measurement needs. Higher-end DMMs with advanced features and greater accuracy will come at a higher cost, while basic models might be more affordable but have limited functionality.
Manufacturer Support and Warranty: Research the reputation of the DMM manufacturer, their customer support, and available warranty coverage. A reliable manufacturer with good customer support ensures assistance when needed and may offer extended warranty options for added peace of mind.
User Reviews and Recommendations: Read user reviews and seek recommendations from professionals or trusted sources in your specific field. Real-life experiences can provide insights into the performance and suitability of different DMM models for specific applications.
By considering these factors and evaluating your measurement needs, you can make an informed decision when choosing the right DMM. Remember that the right DMM is the one that meets your requirements, provides accurate measurements, and assists you in effectively performing your electrical tasks.