
Why Test a Start Capacitor?
A start capacitor is an essential component of many electrical appliances, particularly those with electric motors. It provides the initial jolt of electricity to start the motor and allows it to run smoothly. Over time, start capacitors can wear out or fail, which can lead to issues such as motor malfunctions or failure to start altogether. Testing a start capacitor is crucial to ensure the proper functioning of the motor and prevent further damage.
By testing the start capacitor, you can identify if it is functioning correctly or if it needs to be replaced. This can save you time and money by avoiding unnecessary repairs or replacements of motors or other electrical components. Testing the start capacitor is also a preventive measure that can help detect any underlying problems before they escalate.
Moreover, testing a start capacitor can be particularly useful in troubleshooting motor issues. If a motor is not starting or experiencing difficulties, the start capacitor is usually one of the first components to check. By testing it, you can ascertain if the start capacitor is the root cause of the problem or if there are other underlying issues that need to be addressed.
Overall, testing a start capacitor is a vital step in maintaining the functionality and longevity of motors and electrical appliances. It allows you to diagnose potential problems, extend the lifespan of your equipment, and ensure optimal performance.
What is a Start Capacitor?
A start capacitor is a type of electrical capacitor that is specifically designed to provide the initial boost of electricity needed to start an electric motor. It is commonly found in appliances such as air conditioners, refrigerators, washing machines, and power tools.
The start capacitor is connected to the motor’s circuit and charged with electrical energy when the motor is initially turned on. This stored energy is then discharged into the motor, creating a surge of power that initiates the motor’s rotation. Once the motor is up to speed, the start capacitor’s role diminishes, and the motor continues to operate using its own internal mechanisms.
Start capacitors are typically electrolytic capacitors, which are specifically designed to handle large amounts of charge and discharge quickly. They are constructed with two conducting plates separated by an electrolyte, allowing for the rapid transfer of electrical energy.
The capacitance value of a start capacitor is an important factor in its functionality. This value determines the amount of electrical charge that the capacitor can store, which impacts the strength of the initial boost provided to the motor. Start capacitors are available in various capacitance ratings, ranging from a few microfarads (µF) to several hundred microfarads.
It is worth noting that start capacitors are different from run capacitors. While start capacitors are responsible for the initial start-up of the motor, run capacitors provide a continuous source of electrical energy to keep the motor running smoothly. Some equipment may have both start and run capacitors, while others may only have a start capacitor depending on the motor’s requirements.
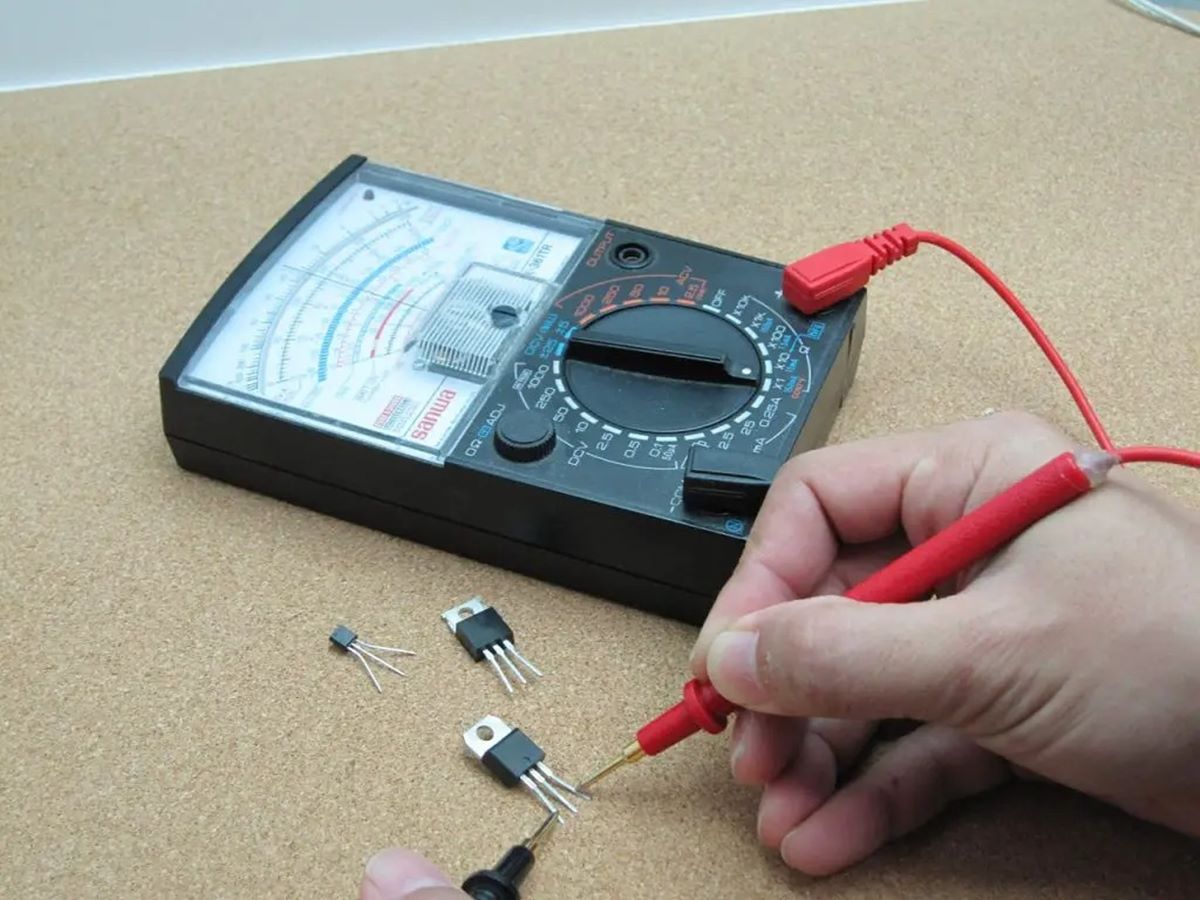
What is a Digital Multimeter?
A digital multimeter, often abbreviated as DMM, is a versatile and indispensable tool used by electricians, technicians, and electronics enthusiasts for measuring electrical quantities, including voltage, current, and resistance. It is a modern and more accurate alternative to the analog multimeter.
A digital multimeter typically consists of three main components: a display screen, selection knobs or buttons, and probes. The display screen shows the measured values in numerical form, making it easy to read and interpret the measurements. The selection knobs or buttons are used to choose the type of measurement and the range to be measured. The probes, which are usually detachable, are connected to the device being tested to capture the electrical signals.
One of the key advantages of a digital multimeter is its ability to provide precise and accurate readings. Unlike analog multimeters that rely on a moving needle pointing to a scale, digital multimeters use electronic circuits to convert the measured electrical signals into numerical values. This digital technology enhances accuracy and eliminates parallax errors associated with analog displays.
Digital multimeters offer a wide range of measurement capabilities. They can measure AC voltage and DC voltage, AC and DC currents, resistance, capacitance, frequency, temperature, and more. Some advanced models even come with additional features like diode testing, continuity testing, and transistor testing.
Another significant advantage of digital multimeters is their ease of use. The numerical display makes it straightforward to read the measurements, even in low-light conditions. Moreover, many digital multimeters have auto-ranging capabilities, meaning they can automatically select the appropriate measurement range, simplifying the testing process for users.
Setting up the Digital Multimeter
Before you can start testing a start capacitor with a digital multimeter, it is essential to set up the multimeter correctly. Here are the steps to follow:
- Turn off the device or appliance you will be testing and unplug it from the power source to ensure your safety.
- Locate the dial or menu on the digital multimeter that allows you to select the appropriate measurement function. Look for settings such as voltage (V), resistance (Ω), or capacitance (F).
- Based on the capacitance rating of the start capacitor you will be testing, select the capacitance (F) setting on the multimeter. If the exact value is not available, choose the nearest available option that is higher than the capacitance rating of the capacitor.
- Set the multimeter to the appropriate measurement range. If you are unsure of the expected value, it is advisable to start with the highest range and gradually decrease it until you get a more accurate reading.
- Ensure that the multimeter probes are connected correctly. The red probe should be connected to the positive (+) terminal, and the black probe should be connected to the negative (-) terminal.
- If your multimeter has an auto-ranging feature, enable it to allow the multimeter to automatically set the measurement range based on the detected values.
Once you have set up the digital multimeter correctly, you are ready to proceed with testing the start capacitor. Remember to exercise caution and adhere to safety guidelines to avoid any potential electrical hazards.
Step-by-step Guide to Testing a Start Capacitor
Testing a start capacitor with a digital multimeter is a relatively straightforward process. Follow these steps to ensure accurate and reliable results:
- Begin by ensuring that the device or appliance is turned off and unplugged from the power source for your safety.
- Locate the start capacitor within the appliance or motor. It is usually cylindrical in shape and is connected to the motor’s circuit.
- Using a screwdriver or appropriate tool, carefully disconnect the wires connected to the start capacitor. Take note of the wire connections to ensure proper reconnection later.
- Set up your digital multimeter according to the instructions provided in the previous section. Ensure that the multimeter is set to capacitance (F) mode and the appropriate range is selected.
- Take the red probe from the multimeter and touch it to the terminal on the start capacitor that was previously connected to the positive (+) wire. Similarly, touch the black probe to the terminal that was connected to the negative (-) wire.
- Observe the display screen of the digital multimeter. It should show a reading corresponding to the capacitance value of the start capacitor. If the reading is within the acceptable range, the start capacitor is functioning correctly. If the reading is significantly different or close to zero, it indicates a faulty or defective start capacitor that requires replacement.
- After obtaining the measurement, disconnect the probes from the start capacitor terminals. Reconnect the wires to their original terminals, ensuring they are securely fastened.
By following these steps, you can efficiently test the start capacitor using a digital multimeter. Remember to exercise caution and refer to the manufacturer’s instructions for specific guidance on your particular appliance or motor.
Interpreting the Test Results
After conducting the test on the start capacitor using a digital multimeter, it’s important to interpret the results accurately. Here’s a guide to help you understand what the different readings mean:
If the digital multimeter displays a reading within the acceptable range of the capacitance value stated on the start capacitor, it indicates that the capacitor is functioning correctly. This means that the start capacitor has the necessary capacitance to provide the initial electrical boost to the motor, allowing it to start and run smoothly. You can conclude that the start capacitor is not the cause of any motor issues you may be experiencing.
On the other hand, if the digital multimeter shows a reading significantly different from the stated capacitance value or close to zero, it indicates a faulty or defective start capacitor. A reading that is considerably higher than the specified value might indicate a shorted capacitor, while a reading close to zero could suggest an open or failed capacitor.
It’s important to note that interpreting the test results may also depend on the brand and specifications of the start capacitor. Some manufacturers provide a tolerance range for the capacitance value, which indicates an acceptable deviation from the marked value. Refer to the manufacturer’s guidelines or consult a professional if you are unsure about the interpretation of the results.
If the test results indicate a faulty start capacitor, it is recommended to replace it with a new one of the same capacitance rating. It’s important to use a replacement capacitor that meets the manufacturer’s specifications to ensure compatibility and optimal performance.
Remember that testing a start capacitor with a digital multimeter is just one step in troubleshooting potential motor issues. If you are still experiencing problems with the motor after replacing the start capacitor, it may be necessary to consult a professional technician or electrician for further inspection and diagnosis.
Troubleshooting Common Issues
While testing a start capacitor can help identify potential problems with motor functionality, there are other common issues that may affect the overall performance of electrical appliances. Here are some troubleshooting tips to address these common problems:
- Motor not starting: If the motor fails to start, even after confirming that the start capacitor is functioning correctly, check if other components, such as the power supply or the motor’s internal mechanism, are causing the issue. Inspect the wiring connections and ensure they are secure. If the problem persists, seek professional assistance.
- Inconsistent motor performance: If the motor starts inconsistently or experiences fluctuations in speed, it may indicate a problem with the start capacitor, run capacitor, or the motor itself. Test both capacitors to ensure they are within the specified capacitance range. If the capacitors are functioning correctly, consult a professional to inspect the motor and its controls.
- Intense or abnormal noise: Unusual noises, such as grinding or screeching sounds, coming from the motor may be a sign of faulty bearings, worn-out parts, or misalignment. If you suspect these issues, it is recommended to get the motor inspected and repaired by a professional technician.
- Overheating: Excessive heat generated by the motor can indicate various issues, such as incorrect voltage supply, an overloaded motor, or inadequate ventilation. Ensure that the motor is receiving the correct voltage, and check for any obstructions that may block proper airflow around the motor. If the problem persists, seek professional help.
- Electrical issues: If you observe sparks, smoke, or a burning smell coming from the motor, immediately disconnect the power supply and seek professional assistance. These symptoms may indicate a serious electrical malfunction that requires immediate attention.
It’s worth noting that troubleshooting complex motor issues often requires technical expertise. If you are unsure about how to address a specific issue or if the problem persists after performing basic troubleshooting steps, it’s recommended to consult a professional technician or electrician. They will have the knowledge and experience to diagnose and resolve more complex motor issues safely and efficiently.
Safety Precautions to Take While Testing
When testing a start capacitor or performing any electrical work, it is crucial to prioritize safety to prevent accidents or damage to yourself and the equipment. Here are some essential safety precautions to keep in mind:
- Turn off the power: Always ensure that the device or appliance you are working on is turned off and unplugged from the power source. This will eliminate the risk of electric shocks when handling the components.
- Protective gear: Wear appropriate protective gear, such as safety glasses and insulated gloves, to protect yourself from potential electrical hazards.
- Discharge capacitors: Before touching any electrical components, make sure to discharge capacitors to prevent any residual electrical charge. You can do this by shorting the terminals using an insulated screwdriver.
- Use the correct tools: Ensure that you are using the right tools for the job. Using insulated tools specifically designed for electrical work will help avoid accidental contact with live wires.
- Avoid moisture: Keep the work area dry and free from moisture to minimize the risk of electrical short circuits.
- Read the user manual: Familiarize yourself with the user manual or manufacturer’s instructions for both the digital multimeter and the appliance you are working on. This will provide specific safety guidelines and procedures for your particular equipment.
- Consult professionals if unsure: If you are unsure about any aspect of the testing process or if you encounter an issue that you are not equipped to handle, do not proceed further. Instead, seek assistance from a professional electrician or technician.
Remember, electrical work can be hazardous, and it’s always better to err on the side of caution. By following these safety precautions, you can ensure a safer testing process and minimize the risk of accidents or harm while working with start capacitors and other electrical components.