
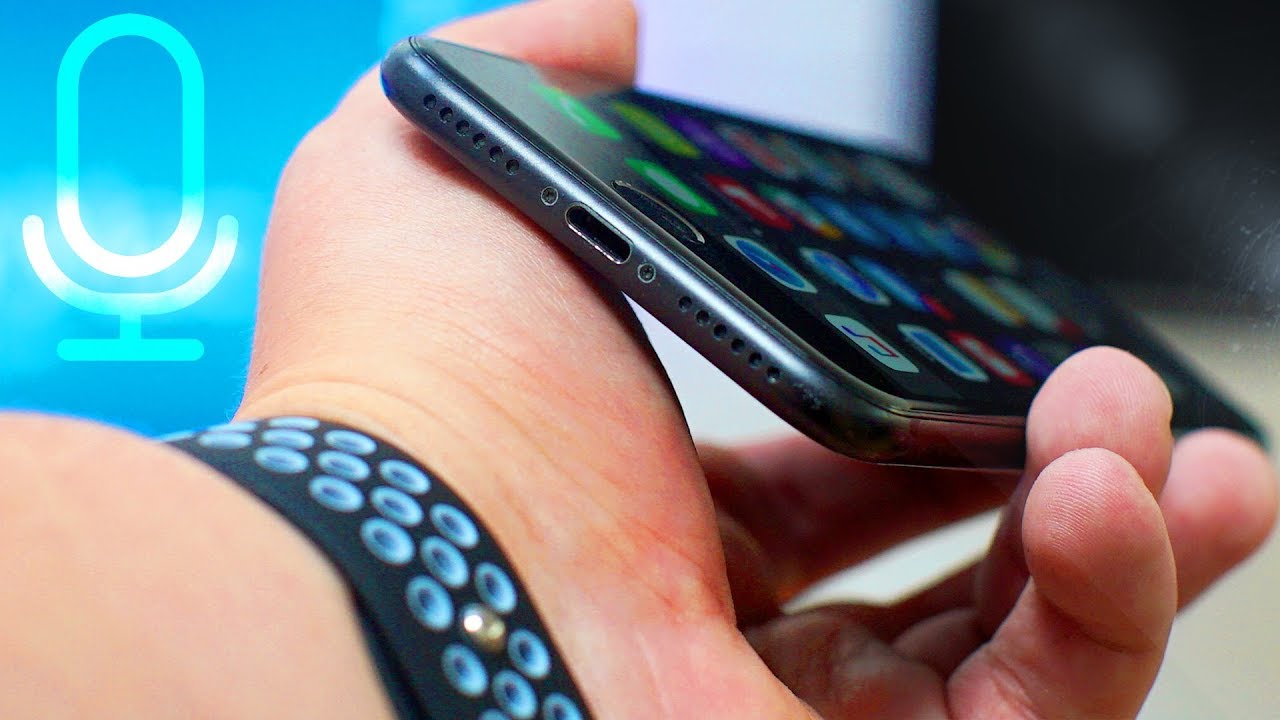
Check for Physical Obstructions
When your iPhone microphone isn’t working, the first thing you should check for are any physical obstructions that may be blocking it. Sometimes, small particles like dust or debris can accumulate on the microphone and affect its performance. Follow these steps to check for physical obstructions:
- Inspect the microphone port: Take a close look at the microphone port at the bottom of your iPhone. Check for any visible dirt, lint, or debris. If you see any, use a soft-bristled brush or a clean toothbrush to gently remove the obstructions. Be careful not to cause any damage to the port.
- Remove the case or cover: If you have a protective case or cover on your iPhone, temporarily remove it. Sometimes, these cases can inadvertently cover or block the microphone, causing issues with sound input.
- Clean the microphone and speaker: Using a soft, lint-free cloth, gently clean the microphone and speaker areas of your iPhone. Wipe away any residue or dirt that may be affecting the microphone’s functionality.
- Check for water damage: If your iPhone has been exposed to water or any other liquids, it may have caused damage to the internal components, including the microphone. Check the Liquid Damage Indicator (LDI) located in the SIM card tray. If it has turned red or pink, it indicates water damage, and you may need to seek professional assistance.
If none of these steps resolve the issue, proceed to the next troubleshooting methods. It’s important to note that physical obstructions are the most common cause of microphone problems, so carefully checking and cleaning your device can often solve the issue without further intervention.
Clean the Microphone and Speaker
If you’re experiencing issues with your iPhone microphone, it’s possible that dirt or debris may have accumulated on the microphone or speaker, affecting their performance. Cleaning these components can often resolve the problem. Follow these steps to clean the microphone and speaker on your iPhone:
- Turn off your iPhone: Before cleaning, it’s important to turn off your iPhone to avoid any potential damage.
- Inspect the microphone and speaker: Take a close look at the microphone and speaker areas of your iPhone. Check for any visible dirt, dust, or debris. You can use a flashlight to see more clearly.
- Use compressed air: If there is visible dirt or debris in the microphone or speaker, you can use compressed air to remove it. Hold the canister about 6 inches away from the affected areas and give short bursts of air to dislodge any particles. Avoid blowing directly into the ports, as this can push debris further inside.
- Wipe with a soft cloth: After using compressed air, gently wipe the microphone and speaker areas with a soft, lint-free cloth. This will help remove any remaining dirt or residue.
- Avoid liquid cleaning solutions: It’s important to note that you should never use liquid cleaning solutions or water to clean the microphone and speaker on your iPhone. These can potentially damage the device and its components.
After cleaning the microphone and speaker, turn on your iPhone and test the microphone to see if the issue has been resolved. If the problem persists, you can proceed to the next troubleshooting steps. Cleaning the microphone and speaker is a simple and effective way to address common sound-related issues on your iPhone, so it’s worth trying before exploring further solutions.
Check for Software Updates
One of the reasons why your iPhone microphone may not be working could be due to outdated software. Apple regularly releases software updates to address various bugs, including issues related to hardware components like the microphone. Follow these steps to check for and install any available software updates:
- Connect to Wi-Fi: Make sure your iPhone is connected to a stable Wi-Fi network. Software updates can be large in size, so a Wi-Fi connection is recommended to avoid using excessive cellular data.
- Go to Settings: Open the Settings app on your iPhone and scroll down to find the “General” option. Tap on it to proceed.
- Software Update: In the General settings, you will find a “Software Update” option. Tap on it to check for available updates.
- Install the update: If there is a software update available for your iPhone, tap on the “Download and Install” button. Follow the on-screen instructions to complete the installation process.
- Restart your iPhone: After the software update is installed, it is recommended to restart your iPhone. This helps to ensure that the new software is properly initialized.
By regularly updating your iPhone’s software, you can ensure that you have the latest bug fixes and improvements, including any updates that may address microphone issues. Checking for software updates is a simple but effective troubleshooting step that may help resolve the problem without any further action.
Restart Your iPhone
When faced with a microphone issue on your iPhone, a simple yet effective troubleshooting step is to restart your device. Restarting your iPhone can help resolve temporary software glitches or conflicts that may be causing the microphone to malfunction. Here’s how you can restart your iPhone:
- Side button and volume button: Press and hold the side button along with either the volume up or down button simultaneously.
- Slide to power off: Keep holding the buttons until the “slide to power off” slider appears on the screen.
- Slide to power off: Use your finger to slide the power off slider from left to right to turn off your iPhone.
- Side button to turn on: After your iPhone is completely powered off, press and hold the side button until the Apple logo appears on the screen.
Once your iPhone restarts, test the microphone to see if the issue has been resolved. In most cases, a simple restart can fix minor software-related problems and restore the proper functioning of the microphone.
If the issue persists after restarting your iPhone, you can try some additional troubleshooting steps. However, it’s worth noting that restarting your device is often the first step recommended by Apple’s support team, as it can solve many common issues.
Reset All Settings
If your iPhone microphone is still not working after trying the previous troubleshooting methods, you can consider resetting all settings on your device. This will revert all settings to their default values, without affecting your personal data or media. Follow these steps to reset all settings:
- Open the Settings app: Launch the Settings app on your iPhone.
- Go to General: Scroll down and tap on “General” in the list of options.
- Reset: In the General settings, scroll down and tap on “Reset.”
- Reset All Settings: Tap on “Reset All Settings” and enter your passcode if prompted.
- Confirm the reset: A pop-up window will appear, asking you to confirm the action. Tap on “Reset All Settings” to proceed.
Once the reset process is complete, your iPhone will restart, and all settings will be restored to their default values. Keep in mind that this will not erase any of your personal data or media, but you will need to reconfigure your preferences, such as network settings and display options.
After the reset, check if the microphone is functioning properly. It’s crucial to note that resetting all settings may fix software-related issues, but if the problem persists, you may need to consider other solutions, such as contacting Apple support or visiting an authorized service center.
Resetting all settings is considered a more extensive troubleshooting step, so it’s advisable to try it only after attempting the previous methods without success. Make sure to back up your important data before proceeding with this option.
Disable Noise Cancellation
If you’re experiencing microphone issues on your iPhone, one possible solution is to disable the noise cancellation feature. Noise cancellation is designed to reduce background noise during phone calls or recordings, but it can sometimes interfere with the microphone’s functionality. Follow these steps to disable noise cancellation on your iPhone:
- Open the Settings app: Launch the Settings app on your iPhone.
- Go to Accessibility: Scroll down and tap on “Accessibility” in the list of options.
- Hearing section: Under the Accessibility settings, locate the “Hearing” section and tap on it.
- Audio/Visual: In the Hearing settings, you will find the “Audio/Visual” option. Tap on it to proceed.
- Disable Noise Cancellation: You will see the option to toggle off the “Noise Cancellation” feature. Tap on the switch to disable it.
After disabling noise cancellation, test the microphone to see if the issue has been resolved. Disabling this feature can help eliminate any conflicts or interference caused by noise cancellation and restore the proper functionality of the microphone.
If the microphone issue persists even after disabling noise cancellation, you may need to explore other troubleshooting methods or seek assistance from Apple support. Keep in mind that disabling noise cancellation is a non-destructive troubleshooting step that can be easily reversed, so it’s worth trying before moving on to more advanced solutions.
Test the Microphone in Other Apps
If you’re encountering microphone problems on your iPhone, it’s essential to determine whether the issue is specific to a particular app or if it affects all applications that require microphone input. Testing the microphone in other apps can help identify if the problem is app-related or device-related. Follow these steps to test the microphone in other apps:
- Select different apps: Open different apps on your iPhone that use the microphone, such as Voice Memos, Camera, or any voice or video calling app.
- Record or make a call: In the selected app, try recording your voice or making a call to see if the microphone is functioning correctly. Speak closely into the microphone to ensure optimal input.
- Listen for audio: After recording or making a call, play back the recorded audio or ask the person on the other end if they can hear you clearly. Pay attention to any distorted or muffled sounds.
- Repeat the process: Test the microphone in multiple apps to gather more data. Make sure to try apps that have previously exhibited microphone issues.
By testing the microphone in multiple apps, you can determine if the issue is app-specific or if there is a more significant problem with the iPhone’s microphone hardware or software. If the microphone works fine in some apps but not in others, it may indicate app compatibility issues or settings specific to those apps.
If the microphone doesn’t work properly in any app, it suggests a broader issue with the device. In such cases, consider trying the other troubleshooting methods mentioned earlier or contacting Apple support for further assistance.
Testing the microphone in various apps is a crucial step in troubleshooting microphone issues, as it helps narrow down the root cause of the problem and guides you towards the appropriate solution.
Force Restart Your iPhone
If your iPhone microphone is still not working after attempting the previous troubleshooting methods, a force restart may help resolve the issue. Force restarting your iPhone can help address software glitches or temporary conflicts that may be affecting the microphone’s functionality. Follow these steps to force restart your iPhone:
- iPhone 6s and earlier: Press and hold both the Home button and the Sleep/Wake (Power) button simultaneously. Continue holding them until you see the Apple logo on the screen.
- iPhone 7 and 7 Plus: Press and hold both the Volume Down button and the Sleep/Wake (Power) button simultaneously. Keep holding them until the Apple logo appears on the screen.
- iPhone 8, 8 Plus, X, or newer: Press and quickly release the Volume Up button, then press and quickly release the Volume Down button. Finally, press and hold the Side button until the Apple logo appears on the screen.
After force restarting your iPhone, check if the microphone is functioning properly. This simple step can help resolve temporary software issues that may have caused the microphone to stop working.
If the issue persists even after a force restart, you may need to consider additional troubleshooting methods or contact Apple support for further assistance. However, a force restart is an effective and non-destructive solution that often resolves common software-related problems, including microphone issues.
Note: It’s important to avoid confusion between a force restart (a software reset) and a factory reset (a complete erase and restore of your device). A force restart does not result in data loss, while a factory reset erases all data on your device, so be cautious when performing any reset procedures.
Restore Your iPhone
If none of the previous troubleshooting methods have resolved the issue with your iPhone microphone, restoring your device may be the next step to consider. Restoring your iPhone essentially erases all the data and settings on the device and reinstalls the operating system. Before proceeding with the restore, it’s crucial to create a backup of your iPhone to ensure you don’t lose any important data. Follow these steps to restore your iPhone:
- Create a backup: Connect your iPhone to a computer and open iTunes (for Windows users) or Finder (for macOS Catalina or later). Select your iPhone and click on “Back Up Now” to initiate the backup process. Confirm that the backup is complete before proceeding.
- Put your iPhone in recovery mode: Disconnect your iPhone from the computer and turn it off. Connect your iPhone to the computer again while holding the Home button (or Volume Down button for iPhone 7 and newer) until the iTunes or Finder screen appears with the option to Restore or Update.
- Restore your iPhone: In the iTunes or Finder screen, click on the “Restore” button. This will erase all the data and settings on your iPhone and reinstall the latest version of iOS. Follow the on-screen instructions to complete the restore process. It may take some time for the restore to finish.
- Set up your iPhone: After the restore process is complete, your iPhone will restart. Follow the on-screen instructions to set up your device. You can choose to set it up as a new iPhone or restore it from the backup you created earlier.
Restoring your iPhone can help address complex software issues that could be causing the microphone problem. However, it is important to note that restoring your iPhone will erase all data, so it should be considered as a last resort after exhausting other troubleshooting methods.
If the microphone issue persists even after restoring your iPhone, it may indicate a hardware problem. In such cases, it’s recommended to contact Apple support or visit an authorized service center to get your device inspected and repaired.
Please remember to proceed with caution and ensure you have a backup of your data before performing any restore procedures.
Contact Apple Support
If you have gone through all the previous troubleshooting steps and your iPhone microphone is still not working, it may be time to reach out to Apple support for further assistance. Apple’s support team is well-equipped to diagnose and troubleshoot complex issues with their devices. Here’s how you can contact Apple support:
- Visit the Apple Support website: Go to the Apple Support website (https://support.apple.com/) on your computer or another iOS device.
- Select your device: Choose your iPhone model from the list of available options.
- Choose a topic: Select the relevant topic related to microphone issues. For example, you can choose “Repairs & Physical Damage” or “Audio & Music.”
- Select contact options: On the support page, you will find various contact options, such as live chat, phone support, or scheduling an appointment at an Apple Store or authorized service center.
- Explain the issue: When contacting Apple support, provide them with a detailed description of the microphone problem you are experiencing and the troubleshooting steps you have already taken.
The Apple support team will guide you through the troubleshooting process and offer appropriate solutions based on your specific situation. They may suggest additional troubleshooting methods, advise a visit to an Apple Store or authorized service center, or provide information on warranty coverage or repair options.
Remember to be patient and polite when dealing with support representatives. They are there to assist you and will do their best to resolve the issue with your iPhone microphone.
Keep in mind that contacting Apple support should be considered when all other troubleshooting methods have been exhausted. They have the expertise and resources to help you determine if the problem is software-related or if there is a hardware issue that needs repair.