
Selecting the Network Connection Method
When it comes to connecting two home computers through a network, you have several options to choose from. It’s important to understand the different network connection methods available so you can select the one that best suits your needs. Here are three common network connection methods to consider:
1. Wired Connection:
A wired connection involves physically connecting the two computers using Ethernet cables. This method offers a stable and reliable connection, making it ideal for situations where high-speed data transfer is required. To set up a wired connection, you will need Ethernet cables and network adapters for each computer.
First, connect one end of the Ethernet cable to the Ethernet port on one computer and the other end to the Ethernet port on the other computer. Once connected, you may need to configure the network settings on both computers to enable file sharing and communication.
2. Wireless Connection:
A wireless connection eliminates the need for physical cables and allows for greater flexibility in connecting multiple devices. This method requires a wireless router that broadcasts a Wi-Fi signal. Both computers must have wireless network adapters to connect to the router.
To set up a wireless connection, ensure that the Wi-Fi feature is enabled on both computers. Use the network settings to locate and connect to the wireless network. Once connected, you may need to configure the network settings and enable file sharing on both computers.
3. Powerline Adapter:
A powerline adapter provides a convenient way to establish a network connection by using the electrical wiring in your home. This method allows you to extend the network to different rooms without the need for additional wiring or relying solely on wireless connections. Each computer will require a powerline adapter.
To set up a powerline connection, plug one powerline adapter into an electrical outlet near the router and connect it to the router using an Ethernet cable. Then, plug the second powerline adapter into an electrical outlet near the second computer and connect it to the computer using another Ethernet cable. Finally, configure the network settings on both computers to establish the connection.
Consider your specific requirements, such as the distance between the computers, the need for mobility, and the desired data transfer speed when choosing the network connection method. By selecting the most suitable method, you can ensure a reliable and efficient network connection between your home computers.
Setting Up a Wired Network
If you’ve decided to set up a wired network to connect your two home computers, follow these steps to get started:
1. Gather the necessary equipment:
Make sure you have the following items before proceeding: Ethernet cables, a router, and network adapters for each computer if they don’t already have built-in ethernet ports.
2. Connect the computers:
Take one end of an Ethernet cable and plug it into the Ethernet port on the first computer. Then, take the other end of the cable and connect it to the Ethernet port on the second computer.
3. Set up the router:
Connect one end of an Ethernet cable to the router’s WAN (Wide Area Network) port. Plug the other end of the cable into the modem provided by your internet service provider (ISP). This will establish an internet connection for your network.
Next, connect one end of another Ethernet cable to one of the router’s LAN (Local Area Network) ports, and connect the other end to the Ethernet port on the first computer.
Lastly, connect one end of a third Ethernet cable to another LAN port on the router, and connect the other end to the Ethernet port on the second computer.
4. Configure network settings:
On both computers, go to the Control Panel and open the Network and Sharing Center. Then, select “Change adapter settings” and find the Ethernet adapter. Right-click on it and choose “Properties.”
In the Properties window, select “Internet Protocol Version 4 (TCP/IPv4)” and click on “Properties.” Select “Obtain an IP address automatically” and “Obtain DNS server address automatically.” Click “OK” to save the changes.
5. Enable file sharing:
Go back to the Network and Sharing Center and click on “Change advanced sharing settings.” Make sure that network discovery, file sharing, and printer sharing are turned on.
After completing these steps, your wired network should be set up and ready to use. The computers should now be able to communicate with each other, and you can easily share files and resources between them.
Remember to test the network connection by transferring some files between the computers to ensure everything is working properly. If you encounter any issues, double-check the connections and network settings on both computers.
Setting Up a Wireless Network
If you prefer the convenience and mobility of a wireless network for connecting your two home computers, follow these steps to set it up:
1. Gather the necessary equipment:
Make sure you have the following items before proceeding: a wireless router and wireless network adapters for each computer.
2. Install the wireless network adapters:
If your computers don’t have built-in wireless capabilities, connect the wireless network adapter to an available USB port on each computer.
3. Set up the wireless router:
Connect the router to your modem provided by your internet service provider (ISP). Refer to the router’s instruction manual for specific steps.
Access the router’s configuration page by typing its IP address into a web browser. The exact address and login information can usually be found in the router’s manual or on its label.
Follow the on-screen instructions to configure the wireless network settings, such as network name (SSID) and password (WPA2 encryption is recommended for better security).
4. Connect the computers to the wireless network:
On each computer, locate the Wi-Fi icon in the system tray or the network settings. Click on it to view available wireless networks. Select your network from the list and enter the password if prompted.
After successfully connecting to the network, the computers should be able to communicate with each other wirelessly.
5. Configure network settings:
On both computers, go to the Control Panel and open the Network and Sharing Center. Here, you can ensure network discovery, file sharing, and printer sharing are turned on.
6. Enable file sharing:
In the Network and Sharing Center, click on “Change advanced sharing settings.” Make sure that network discovery, file sharing, and printer sharing are turned on.
Once you’ve completed these steps, your wireless network should be set up and ready to use. The computers can now communicate with each other, allowing you to share files and resources seamlessly.
It’s important to regularly update the router’s firmware and secure your wireless network with a strong password to prevent unauthorized access.
Remember to test the network connection by transferring files between the computers to verify everything is functioning correctly. If you encounter any issues, double-check the wireless settings on both computers and ensure they are connected to the same wireless network.
Configuring the Network Settings on Both Computers
After setting up the network connection method, the next step is to configure the network settings on both computers. Here’s how you can do it:
1. Open the Network Settings:
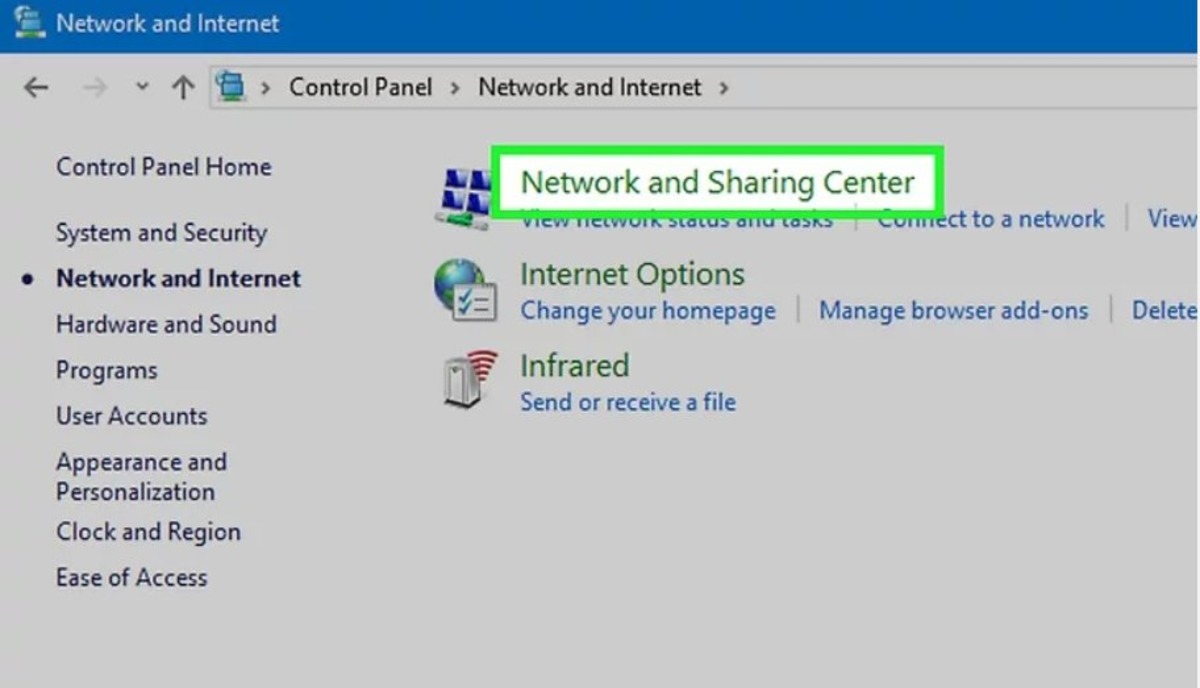
Go to the Control Panel on each computer and open the Network and Sharing Center. You can access this by searching for “Network and Sharing Center” in the Start menu.
2. Check the Network Adapter:
In the Network and Sharing Center, click on “Change adapter settings” to view the network adapters installed on the computer. Look for the adapter responsible for the network connection method you have set up (e.g., Ethernet or Wi-Fi).
3. Configure TCP/IPv4 Settings:
Right-click on the network adapter and select “Properties”. In the Properties window, locate “Internet Protocol Version 4 (TCP/IPv4)” and click on “Properties”.
Choose the option to “Obtain an IP address automatically” and “Obtain DNS server address automatically” if they are not already selected. These settings allow your computer to automatically obtain IP and DNS addresses from the network.
4. Disable Other Network Adapters:
If you have other network adapters that are not being used, such as Bluetooth or Virtual adapters, it is recommended to disable them. This can help prevent any conflicts or interference.
To disable an adapter, right-click on it and select “Disable”. Note that you should only disable adapters that are not essential for your network connection. Be cautious when disabling any network adapters.
5. Apply the Network Settings:
Click “OK” to save the changes and apply the network settings. You may need to restart the computer for the changes to take effect.
By configuring the network settings on both computers, you ensure that they are properly connected and able to communicate with each other. These settings allow the computers to obtain the necessary IP and DNS addresses for seamless network communication.
After configuring the network settings, you can proceed to enable file and printer sharing and create a homegroup or workgroup for easy network sharing between the computers.
Remember to test the network connection by transferring files or pinging the computers to ensure they are successfully communicating with each other. If you encounter any issues, double-check the network settings on both computers and make sure they match.
Enabling File and Printer Sharing
To enhance collaboration and make sharing files and printers between your two home computers easier, you need to enable file and printer sharing. Here’s how you can do it:
1. Open the Network and Sharing Center:
Go to the Control Panel on each computer and open the Network and Sharing Center. You can access this by searching for “Network and Sharing Center” in the Start menu.
2. Change Advanced Sharing Settings:
In the Network and Sharing Center, click on “Change advanced sharing settings” on the left-hand side. This will open the Advanced Sharing Settings window.
3. Turn on Network Discovery:
In the Advanced Sharing Settings window, under the “Network discovery” section, select the option that says “Turn on network discovery”. This will allow the computers to find each other on the network and share resources.
4. Enable File and Printer Sharing:
In the same Advanced Sharing Settings window, scroll down to the “File and printer sharing” section. Choose the option that says “Turn on file and printer sharing”. This will enable sharing of files and printers between the computers.
5. Save the Changes:
Click on the “Save changes” button to apply the settings. You may need to restart the computers for the changes to take effect.
6. Repeat for Both Computers:
Make sure to perform these steps on both computers to enable file and printer sharing on each one.
Enabling file and printer sharing allows you to easily share files, folders, and printers between the two connected computers. You can now access files from one computer on the other, and print documents using shared printers from either computer.
Remember that for the sharing to work, the files or printers you want to access must be placed in shared folders or shared printers must be set up on at least one of the computers.
After enabling file and printer sharing, you can proceed to create a homegroup or workgroup, depending on the operating system, for even more streamlined network sharing capabilities.
It’s important to maintain network security by only enabling file and printer sharing on trusted networks and setting appropriate permissions for shared resources to prevent unauthorized access.
Now that file and printer sharing is enabled, you can start sharing files and printing effortlessly between your two home computers.
Creating a Homegroup or Workgroup
To further enhance the network sharing capabilities between your two home computers, you can create a homegroup or workgroup. A homegroup or workgroup allows you to easily share files, folders, and printers between computers on the same network. Here’s how you can create a homegroup or workgroup:
1. Open the Network and Sharing Center:
Go to the Control Panel on each computer and open the Network and Sharing Center. You can access this by searching for “Network and Sharing Center” in the Start menu.
2. Create a Homegroup (Windows 7 and 8) or Join a Homegroup (Windows 10):
If both computers are running Windows 7 or 8, you can create a homegroup on one of the computers by selecting the “Create a homegroup” option in the Network and Sharing Center. Follow the on-screen instructions to create a homegroup, and you will be provided with a unique password.
If one or both of the computers are running Windows 10, you can join an existing homegroup by selecting the “Join now” option in the Network and Sharing Center. Enter the homegroup password when prompted to join the homegroup.
3. Create a Workgroup:
If you want to create a workgroup instead, click on “Change advanced sharing settings” in the Network and Sharing Center. Scroll down to the “HomeGroup connections” section and select the option that says “Use user accounts and passwords to connect to other computers”.
Next, click on “Change” next to “Computer name, domain, and workgroup settings” and select the “Workgroup” radio button. Enter a name for the workgroup (e.g., “Workgroup”) and click “OK”.
4. Apply the Changes:
Click on the “Save changes” button to apply the homegroup or workgroup settings. You may need to restart the computers for the changes to take effect.
By creating a homegroup or workgroup, you can easily share files, folders, and printers between the computers within the same network. This simplifies the process of accessing shared resources and enhances collaboration between the two computers.
Remember to configure the appropriate sharing permissions for the shared folders and printers to control access and ensure the security of your network.
After creating a homegroup or workgroup, you can start sharing files, folders, and printers seamlessly between your two home computers.
Connecting the Computers to the Network
Now that you have set up the network connection method, configured the network settings, and enabled file and printer sharing, it’s time to connect your two home computers to the network. Here’s how you can do it:
1. Power on the Computers:
Ensure that both computers are powered on and ready to connect to the network.
2. Join the Homegroup or Workgroup:
If you have created a homegroup, ensure that both computers have joined the same homegroup. This will allow them to communicate and share resources within the homegroup.
If you have created a workgroup, ensure that both computers have joined the same workgroup by going to the Control Panel, opening the System settings, and checking the workgroup name.
3. Check the Network Connections:
On each computer, go to the Network and Sharing Center and click on “Change adapter settings”. Check if the network adapter that corresponds to your selected network connection method (e.g., Ethernet or Wi-Fi) is enabled and connected.
4. Connect to the Network:
On each computer, go to the Network and Sharing Center and click on “Connect or disconnect” to view the available networks. Select the network you want to connect to (e.g., the Wi-Fi network name or the Ethernet connection).
If the network is secured, enter the password when prompted. The computers will then attempt to establish a connection to the network.
5. Verify the Connection:
Once the connection is established, the network icon in the system tray should show that the computer is connected to the network. You can also check the Network and Sharing Center to ensure that the network is listed as “Connected”.
By connecting your computers to the network, you enable communication and resource sharing between the two machines. This allows you to easily share files, folders, and printers, making collaboration and data transfer seamless.
Remember to periodically check the network connection status to ensure that the computers are consistently connected to the network. If you experience any difficulties or intermittent connectivity issues, double-check the network settings and re-establish the connection if necessary.
Now that your computers are connected to the network, you can start enjoying the benefits of a networked environment, making sharing and collaboration between the two computers a breeze.
Testing the Network Connection
After setting up the network connection and connecting your two home computers, it is essential to test the network connection to ensure that everything is working correctly. Here are some tests to perform:
1. Ping Test:
Open the Command Prompt on one of the computers by searching for “Command Prompt” in the Start menu. Type “ping [IP address of the other computer]” and press Enter.
If you receive a response with low latency and no packet loss, it indicates that the computers are successfully communicating with each other over the network.
2. File Transfer:
Try transferring a small file between the two computers. You can select a file on one computer, right-click on it, and choose “Send to” or “Copy to” the other computer’s shared folder. Ensure that the file transfer is successful without any errors.
3. Print Test:
If you have a shared printer between the two computers, try printing a document from one computer to the shared printer. Make sure that the print job is successfully sent and the document is printed without any issues.
4. Internet Connectivity:
Check if both computers have internet connectivity by opening a web browser and visiting a website. Ensure that both computers can access the internet without any problems.
5. Network Speed:
You can also test the network speed by transferring a larger file between the two computers and monitoring the transfer speed. This will give you an idea of the network’s performance and throughput. There are various software tools available that can help you measure network speed and performance.
Performing these tests will help you confirm that the network connection between your two computers is working properly. If any issues arise during the testing, double-check the network settings, connections, and configurations on both computers.
If the tests indicate issues with the network connection, check the cables, router settings, and firewall configurations to troubleshoot and resolve the problem. In some cases, you may need to consult your network equipment’s user manual or contact your internet service provider for assistance.
Regularly testing the network connection is essential to ensure continuous and reliable communication between the two computers. By doing so, you can identify and address any network-related issues promptly, ensuring smooth operation and efficient file and resource sharing.
Sharing Files and Folders Between Computers
Once your two home computers are connected and the network is set up, you can start sharing files and folders between them. Here’s how you can do it:
1. Set up Shared Folders:
On one computer, select a folder or multiple folders that you want to share. Right-click on the folder(s) and choose “Properties”. In the Properties window, go to the “Sharing” tab and click on “Advanced Sharing”. Enable the option to share the folder and assign a share name.
2. Set Permissions:
In the Advanced Sharing window, click on “Permissions” to set access permissions to the shared folder(s). You can grant Read or Read/Write permissions to specific users or groups.
3. Access Shared Folders:
On the other computer, open File Explorer or Finder and navigate to the Network section. You should see the shared folder(s) from the other computer listed there. Double-click on the shared folder to access its contents.
4. Copy or Modify Files:
From the shared folder, you can copy files and folders to your local computer by dragging and dropping or using the right-click menu. You can also modify files directly in the shared folder if you have appropriate permissions.
5. Map Network Drives:
To make accessing shared folders more convenient, you can map a network drive on each computer to the shared folders. Right-click on “This PC” (Windows) or “Computer” (Mac) and select “Map network drive” (Windows) or “Connect to Server” (Mac). Enter the network path to the shared folder and assign a drive letter (Windows) or choose a mount point (Mac).
6. Accessing Password-Protected Shares:
If the shared folder requires a username and password, you will be prompted to enter the credentials when accessing the shared folder from the other computer. Ensure that you have the appropriate credentials to access the password-protected share.
By sharing files and folders between your computers, you can easily transfer documents, media files, and other data. This makes collaboration, data synchronization, and backup processes seamless and efficient.
Remember to regularly update shared files, maintain proper access permissions, and secure shared folders with appropriate passwords to protect sensitive information.
If you encounter any issues when sharing files and folders, ensure that both computers are connected to the same network, the shared folders have the correct permissions, and there are no firewall or security software restrictions blocking the file sharing.
Enjoy the convenience of sharing files and folders between your home computers and make collaboration a breeze.
Sharing Printers Between Computers
If you have a printer connected to one of your home computers, sharing it with other computers on the network allows you to print from any connected computer. Here’s how you can share a printer between your computers:
1. Connect the Printer:
First, ensure that the printer is connected and installed correctly on the computer it is directly connected to. Follow the manufacturer’s instructions to connect the printer to the computer via USB or wireless connection and install the necessary drivers.
2. Enable Printer Sharing:
On the computer to which the printer is connected, go to the Control Panel, open the Devices and Printers or Printers and Scanners settings, and locate the printer. Right-click on the printer and choose “Printer properties” or “Printer sharing”.
In the Printer Properties window, navigate to the “Sharing” tab and check the option that says “Share this printer”. Assign a share name for the printer.
3. Set Permissions:
In the Printer Properties window, click on “Security” or “Permissions” to set access permissions for the shared printer. You can grant print access to specific users or groups and set their printing preferences.
4. Access the Shared Printer:
On the other computers, go to the Control Panel, open the Devices and Printers or Printers and Scanners settings, and click on “Add a printer” or “Add a device”. Choose the option to add a network printer and select the shared printer from the list.
5. Install Printer Drivers:
If prompted, install the printer drivers for the shared printer on the other computers. This ensures that the computers have the necessary software to communicate with the printer.
6. Print to the Shared Printer:
Now, you can print from any connected computer. Find the document or file you want to print, choose the shared printer as the printing device, and click on the “Print” button. The print job will be sent to the shared printer and printed accordingly.
By sharing a printer between your computers, you can conveniently print from any computer on the network without physically connecting to the printer. This is particularly useful in a home office or collaborative environment.
Remember to maintain the printer’s connectivity, update drivers regularly, and ensure that the printer is online and available for printing.
If you encounter any issues with printer sharing, double-check the printer’s connection, the printer sharing settings on the computer it is connected to, and the printer permissions on the other computers.
Enjoy the ease and convenience of printing to a shared printer from multiple computers in your home network.
Troubleshooting Network Connection Issues
While setting up a network connection between your home computers, you may encounter some common issues. Here are troubleshooting steps to help you resolve network connection problems:
1. Check Physical Connections:
Ensure that all cables are properly connected. Check Ethernet cables for any damage, and make sure they are securely plugged into the correct ports on the computers and the router. For wireless connections, ensure that the Wi-Fi adapter is enabled and connected to the correct network.
2. Restart Network Equipment:
Restart your modem, router, and computers. This can help resolve temporary connectivity issues and refresh the network connection.
3. Verify Network Settings:
Check the network settings on both computers to ensure they are configured correctly. Verify IP addresses, subnet masks, and gateway settings. Ensure that both computers are set to obtain IP addresses automatically if you are using DHCP.
4. Update Network Drivers:
Ensure that the network drivers on both computers are up to date. Outdated drivers can cause connectivity problems. Visit the manufacturer’s website to download and install the latest drivers for your network adapters.
5. Disable Firewall and Security Software:
Temporarily disable any firewall or security software on both computers. Sometimes, these applications can block network communication. If disabling the software resolves the issue, consider adjusting the settings to allow network connections or configuring exceptions for the required ports or services.
6. Reset TCP/IP Stack:
If you are experiencing persistent connectivity issues, you can try resetting the TCP/IP stack on both computers. Open the Command Prompt as an administrator and enter the following command: “netsh int ip reset”. Restart the computers to apply the changes.
7. Test with a Different Cable or Port:
If you suspect a faulty cable or port, try using a different cable or switch to a different Ethernet port on the router. This can help determine whether the issue lies with the cable, port, or network adapter.
8. Check for Interference:
If you are using a wireless connection, check for any potential sources of interference such as other electronic devices, walls, or appliances. Move the router and computers closer together or consider using a Wi-Fi range extender for better signal strength.
If you have exhausted these troubleshooting steps and are still experiencing network connection issues, you may need to consult your internet service provider (ISP) for further assistance. They can help troubleshoot any issues with your network connection outside of your home network.
Remember to document any changes made during the troubleshooting process, as this information can be helpful when seeking professional assistance.
With these troubleshooting steps, you can diagnose and resolve common network connection problems, ensuring a smooth and reliable network connection between your home computers.