
Things to consider before connecting two routers
Expanding your home network by connecting two routers can be a great way to improve your network coverage and accommodate multiple devices. However, before diving into the process, there are a few important factors to consider. Taking the time to evaluate these considerations can save you headaches down the road and ensure a smooth setup.
1. Router compatibility
Not all routers are designed to be connected together, so it’s crucial to check if your routers are compatible for this kind of setup. Look for routers that support the feature known as “bridge mode,” “access point mode,” or “wireless repeater mode.” These modes allow routers to be connected seamlessly and extend your network’s coverage.
2. Network topology
Consider the kind of network topology you want to achieve. Depending on your needs, you may choose to connect the routers in a daisy-chained configuration, where one router is connected to another, or in an access point configuration, where the secondary router extends the network of the primary router. Think about how the devices will be distributed in your home and choose the topology that best suits your requirements.
3. Desired network features
Take a moment to think about the features you want your network to have. If you need advanced security, parental controls, or guest network capabilities, make sure that the routers you choose support these features. Not all routers offer the same options, so consider your requirements and check the specifications of the routers before making a purchase.
4. Available ports and connections
Check the number and type of ports available on your routers. Consider the devices you plan to connect and ensure that there are enough Ethernet ports to accommodate them. Also, check if the routers have USB ports if you need to connect external storage devices or printers to your network. Additionally, make sure that the routers support the same Wi-Fi standards so that all devices can seamlessly connect.
5. Router placement
Proper router placement is essential for optimal network performance. Before connecting the routers, consider the locations where you will place them. Ensure that each router is positioned in an area that maximizes signal strength and minimizes interference. Additionally, keep in mind that the primary router should be connected to the internet source, such as a modem.
By taking these considerations into account, you can ensure a successful and hassle-free setup when connecting two routers on your home network. Once you have evaluated these factors, you can move on to the next steps of checking compatibility, configuring settings, and establishing the connection between the routers.
How to check if your routers are compatible for connection
Before connecting two routers on your home network, it’s important to ensure that they are compatible for this type of setup. Here are some simple steps to check the compatibility of your routers:
1. Access the router’s web-based interface
To check if your routers are compatible, you’ll need to access their web-based interface. Open a web browser on a device connected to the router and enter the router’s IP address in the address bar. The default IP address can usually be found in the router’s manual or on the manufacturer’s website.
2. Check for bridge or AP mode
Once you have accessed the web-based interface, look for the settings related to bridge mode, access point (AP) mode, or wireless repeater mode. These options indicate that the router supports connecting to another router to extend the network. If you find these settings, it’s a good indication that your router is compatible for connection.
3. Refer to the router’s manual or manufacturer’s website
If you’re unsure where to find the specific settings mentioned above, consult the router’s manual or visit the manufacturer’s website. The manual or website should provide detailed instructions on how to check if your router supports connecting to another router. Look for keywords like “bridge mode,” “access point mode,” or references to extending the network.
4. Research the router’s model number
If you’re still unsure about the compatibility of your routers, try researching the model numbers of both routers. Perform an online search, and look for any compatibility information or user experiences related to connecting those specific router models together. You may come across forums or articles discussing similar setups that can provide insights into compatibility.
5. Contact customer support
If you have exhausted all other options and are still unsure about the compatibility of your routers, reach out to the manufacturer’s customer support. They should be able to provide you with accurate information regarding the compatibility of your routers and guide you through the process if they are indeed compatible.
By following these steps, you can determine if your routers are compatible for connection. Remember, it’s essential to ensure compatibility to avoid any potential issues during the setup process. Once you have confirmed compatibility, you can proceed with the configuration and connection of the routers to create a seamless and expanded home network.
Ways to connect two routers on a home network
Connecting two routers on a home network can be accomplished in several ways. The method you choose will depend on the specific needs of your network and the capabilities of your routers. Here are some common ways to connect two routers:
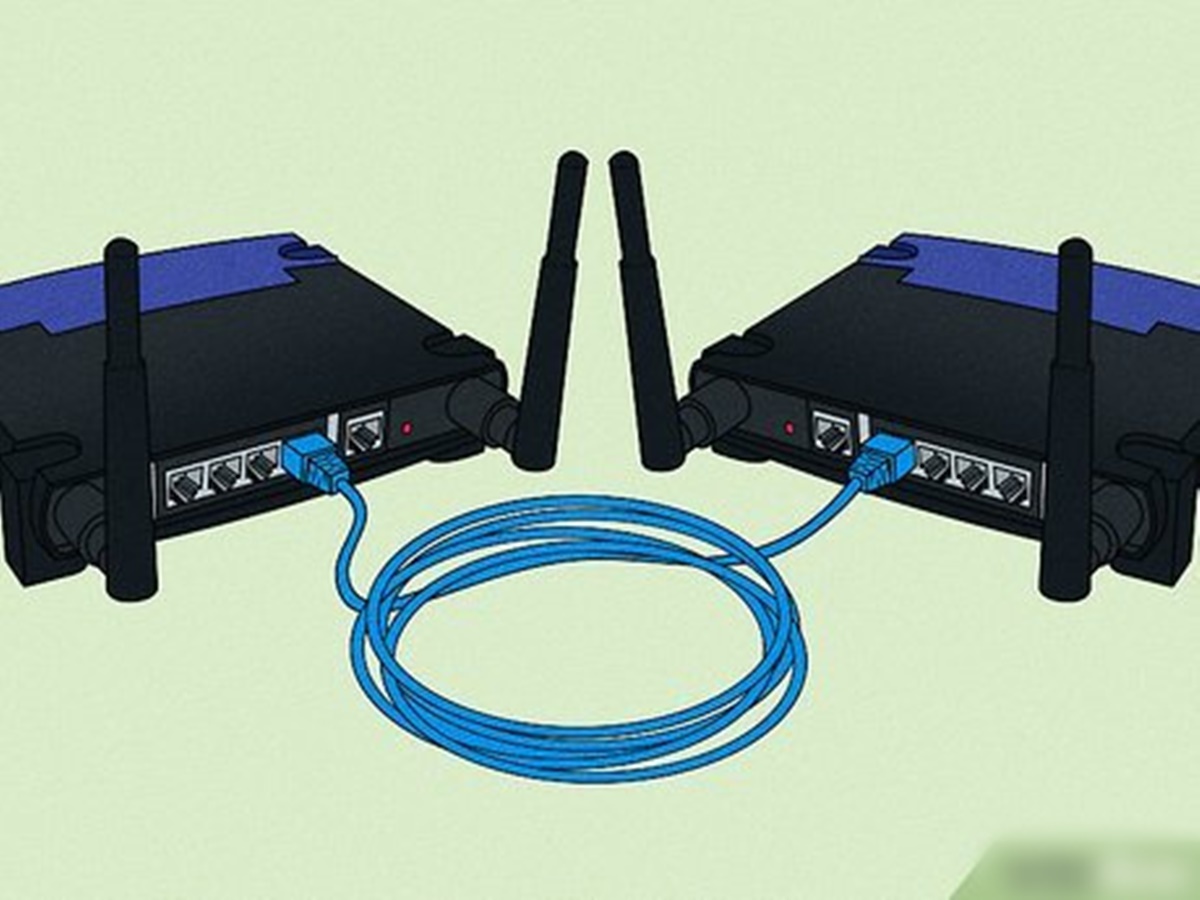
1. Ethernet cable connection
One of the simplest ways to connect two routers is through an Ethernet cable. Start by connecting one end of the Ethernet cable to a LAN port on the primary router and the other end to the WAN port of the secondary router. This method allows the secondary router to extend the network coverage, with the primary router handling the internet connection.
2. Wireless connection
If both routers support wireless capability, you can connect them wirelessly. Enable the wireless feature on both routers and configure the SSID (network name) and password settings to be the same. Place the secondary router within range of the primary router’s signal and ensure that they are operating on different channels to minimize interference. This method allows devices to connect to either router and seamlessly roam between them.
3. Powerline networking
If running an Ethernet cable between the routers is not feasible, powerline networking can be a viable alternative. Powerline adapters use your home’s electrical wiring to transmit data signals. Connect one adapter to the primary router via Ethernet cable and plug it into a power outlet. Then, connect the second adapter to the secondary router and plug it into another power outlet. This method allows the secondary router to extend the network coverage using the electrical wiring in your home.
4. Wireless bridge mode
If one of the routers supports bridge mode, you can configure it to act as a wireless bridge. In this mode, the router connects to the primary router’s network wirelessly and extends the network coverage. To set up the bridge mode, access the router’s web interface, enable bridge mode, and enter the primary router’s SSID and password. Once configured, the secondary router will join the network as a bridge and provide network access to devices in its range.
5. Ethernet over Coax (MoCA) networking
If your home has existing coaxial cable wiring, you can utilize Ethernet over Coax (MoCA) adapters to connect the routers. Connect one adapter to the primary router via Ethernet cable and connect it to a coaxial wall outlet. Then, connect the second adapter to the secondary router and connect it to another coaxial wall outlet. This method allows the secondary router to extend the network coverage using the coaxial cables already present in your home.
These are just a few of the ways to connect two routers on a home network. The method you choose will depend on factors such as router capabilities, network layout, and available resources. By selecting the appropriate method and following the necessary configuration steps, you can create an expanded and robust home network to accommodate your devices and ensure seamless connectivity.
Setting up the main router
Before connecting the secondary router, it’s essential to properly set up the main router. This will ensure a solid foundation for extending your home network. Here are the steps to set up the main router:
1. Connect the main router
Start by connecting the main router to your internet source, typically a modem. Use an Ethernet cable to connect the WAN (Internet) port of the router to the modem. This will establish the primary internet connection for your network.
2. Access the router’s web-based interface
To configure the main router’s settings, you’ll need to access its web-based interface. Open a web browser on a device connected to the router and enter the router’s IP address in the address bar. The default IP address can usually be found in the router’s manual or on the manufacturer’s website.
3. Log in to the router
Once you have accessed the web-based interface, you may be prompted to enter a username and password. Use the default login credentials provided in the router’s documentation, and change them later for security purposes.
4. Configure basic settings
Once logged in, go through the initial setup wizard or navigate to the settings menu. Configure the basic settings such as the network name (SSID) and password. This will be the primary network that devices will connect to.
5. Enable security features
To secure your network, enable encryption such as WPA2-PSK (Wi-Fi Protected Access 2 with Pre-Shared Key). This will help protect your network from unauthorized access. Set a strong password for the network to ensure maximum security.
6. Set up DHCP
Enable the DHCP (Dynamic Host Configuration Protocol) server on the main router. This allows devices connecting to your network to automatically receive an IP address, subnet mask, and other network settings. By default, DHCP is usually enabled.
7. Save and apply the settings
Once you have made the necessary changes to the settings, remember to save and apply them. This ensures that the changes take effect and the router is configured correctly.
With the main router properly set up, you have established the core of your home network. Now, you can proceed with connecting and configuring the secondary router to extend the network coverage and accommodate more devices.
Setting up the secondary router
After setting up the main router, it’s time to configure the secondary router to extend your home network. Follow these steps to properly set up the secondary router:
1. Reset the secondary router
Before beginning the setup process, it’s recommended to reset the secondary router to its factory default settings. Locate the reset button on the router (usually a small pinhole) and press it for a few seconds using a paperclip or a similar tool. This will ensure that any previous configurations are cleared.
2. Connect the secondary router
Connect the secondary router to a computer using an Ethernet cable. Plug one end of the cable into a LAN port on the secondary router and the other end into a LAN port on the computer. This will allow you to access the secondary router’s web-based interface for configuration.
3. Access the router’s web-based interface
Open a web browser on the computer connected to the secondary router and enter the router’s IP address in the address bar. This IP address is typically different from the main router’s IP address. Refer to the secondary router’s manual or the manufacturer’s website to find the correct IP address.
4. Log in to the secondary router
Once you have entered the router’s IP address, you may need to enter a username and password to log in to the router’s web-based interface. Consult the router’s documentation for the default login credentials or any specific instructions for logging in.
5. Configure basic settings
Within the router’s web-based interface, navigate to the settings menu. Configure the basic settings such as the network name (SSID) and password. It’s important to ensure that the SSID and password on the secondary router match those of the main router, allowing devices to seamlessly connect to either router.
6. Disable the DHCP server
As the main router already has DHCP enabled, it’s crucial to disable the DHCP server on the secondary router. This prevents conflicts by allowing the main router to handle IP address assignments for all devices on the network.
7. Save and apply the settings
Once you have made the necessary changes to the settings, save and apply them within the router’s web interface. This ensures that the changes take effect and the secondary router is configured correctly.
8. Position the secondary router
Physically position the secondary router in a location that extends your network coverage. Ensure it is placed within range of the main router’s signal and in an area with minimum interference. This will ensure optimal performance and coverage for devices connecting to the secondary router.
By following these steps, you can successfully set up the secondary router and extend your home network. With both routers properly configured, devices in your home can seamlessly connect and enjoy extended network coverage, allowing for efficient and uninterrupted connectivity.
Configuring IP addresses and DHCP settings
When connecting two routers on a home network, it’s important to properly configure the IP addresses and DHCP settings to ensure smooth and efficient connectivity. Here are the steps to configure these settings:
1. Access the main router’s web-based interface
Start by accessing the web-based interface of the main router. Open a web browser on a device connected to the main router and enter the router’s IP address in the address bar. Log in using the appropriate username and password.
2. Navigate to the LAN settings
Within the router’s web-based interface, locate the LAN (Local Area Network) settings. This is where you can configure the IP address range and other DHCP settings associated with the main router.
3. Set the IP address range
Specify the IP address range that the main router will assign to devices on the network. This range should be within the router’s subnet. Typically, a common range is from 192.168.1.2 to 192.168.1.254, leaving the first IP address (192.168.1.1) for the router itself.
4. Configure the DHCP server
Enable the DHCP (Dynamic Host Configuration Protocol) server on the main router. The DHCP server is responsible for assigning IP addresses automatically to devices connecting to the network. Specify the lease duration, which determines how long devices will be assigned a specific IP address before it is renewed.
5. Save and apply the settings
Once you have made the necessary changes, save and apply the settings within the main router’s web-based interface. This ensures that the changes take effect and the DHCP server is configured correctly.
6. Configure the secondary router’s IP address
Access the web-based interface of the secondary router using the steps mentioned earlier. Within the interface, navigate to the LAN settings of the secondary router.
7. Set a static IP address for the secondary router
Assign a static IP address to the secondary router within the range of the main router’s IP address range. This ensures that the secondary router always receives the same IP address and can be easily accessed in the network. Set the IP address, subnet mask, default gateway, and DNS server according to the specifications of the main router’s network.
8. Disable the DHCP server on the secondary router
As the main router is handling DHCP assignments for the network, it’s important to disable the DHCP server on the secondary router. This prevents conflicts and ensures that IP addresses are assigned correctly by the main router.
9. Save and apply the settings on the secondary router
Once the IP address and DHCP settings have been configured on the secondary router, save and apply the settings within its web-based interface. This ensures the changes are implemented correctly.
By properly configuring the IP addresses and DHCP settings on both routers, you can establish a seamless network where devices are assigned appropriate IP addresses and can communicate effectively. This allows for efficient network connectivity and ensures that devices can access the internet and communicate with other devices within the home network.
Configuring wireless settings on both routers
Configuring the wireless settings on both routers is essential to ensure seamless connectivity and optimal performance across your home network. Here are the steps to configure wireless settings on both routers:
1. Access the main router’s web-based interface
Begin by accessing the web-based interface of the main router. Open a web browser on a device connected to the main router and enter the router’s IP address in the address bar. Log in using the appropriate username and password.
2. Navigate to the wireless settings
Within the router’s web-based interface, locate the wireless settings section. This is where you can configure the SSID (network name), wireless channel, security settings, and other wireless-related configurations.
3. Set the SSID and password
Specify the SSID (network name) for the main router. Choose a unique and easily recognizable name. Set a strong password for wireless network security. A combination of uppercase and lowercase letters, numbers, and symbols is recommended.
4. Choose the wireless channel
Select an appropriate wireless channel for the main router. It’s recommended to use channels that are least congested in your area. Avoid overlapping channels to minimize interference from neighboring networks.
5. Enable wireless security
Enable wireless security on the main router to protect your network from unauthorized access. Use WPA2-PSK (Wi-Fi Protected Access 2 with Pre-Shared Key) encryption for maximum security. Set a strong password that must be entered by devices trying to connect to the network.
6. Save and apply the settings
Once you have made the necessary changes to the wireless settings, save and apply the settings within the main router’s web-based interface. This ensures that the changes take effect and the wireless network is configured correctly.
7. Repeat the process for the secondary router
Access the web-based interface of the secondary router using the steps mentioned earlier. Navigate to the wireless settings section of the secondary router.
8. Configure the SSID and password
Set the SSID and password on the secondary router to match those of the main router. This ensures that both routers share the same network name and password, allowing devices to seamlessly connect and roam between the routers.
9. Choose a different wireless channel
Ensure that the secondary router operates on a different wireless channel from the main router. This prevents interference and improves the overall performance of your home network.
10. Enable wireless security
Enable wireless security on the secondary router using the same WPA2-PSK encryption and password as the main router. This ensures that devices connecting to the secondary router are also protected from unauthorized access.
11. Save and apply the settings on the secondary router
Once all wireless settings have been configured on the secondary router, save and apply the settings within its web-based interface. This ensures that the changes are implemented correctly.
By properly configuring the wireless settings on both routers, you can create a seamless and secure wireless network across your home. Devices can connect to the wireless network and seamlessly roam between the main router and the secondary router, ensuring a consistent and reliable wireless connection.
Configuring LAN and WAN settings
Configuring the LAN (Local Area Network) and WAN (Wide Area Network) settings on your routers is crucial for proper network communication and connectivity. Here are the steps to configure LAN and WAN settings on both routers:
1. Access the main router’s web-based interface
Begin by accessing the web-based interface of the main router. Open a web browser on a device connected to the main router and enter the router’s IP address in the address bar. Log in using the appropriate username and password.
2. Configure LAN settings
Within the router’s web-based interface, find the LAN settings section. This is where you can configure the IP address range, subnet mask, and other LAN-related settings.
3. Set the LAN IP address
Set a static IP address for the main router within the router’s IP address range. This IP address should fall within the specified range but should not conflict with the range of the DHCP server. It’s common to set the LAN IP address of the main router as 192.168.1.1.
4. Choose the subnet mask
Set the subnet mask for the main router. This determines the number of available IP addresses in the network. The default subnet mask for most home networks is usually 255.255.255.0, which provides a range of 254 possible IP addresses.
5. Configure DHCP settings
Navigate to the DHCP settings section of the main router. Here, you can configure the lease duration and DHCP pool. The lease duration determines how long devices are assigned specific IP addresses, while the DHCP pool specifies the range of IP addresses available for automatic assignment.
6. Access the secondary router’s web-based interface
Access the web-based interface of the secondary router using the steps mentioned earlier. Within its interface, navigate to the WAN settings section.
7. Set the WAN connection type
Select the appropriate WAN connection type for the secondary router. This could be DHCP, PPPoE, static IP, or other options depending on your internet service provider. Refer to the documentation provided by your ISP or contact them for the correct connection type.
8. Set the WAN IP address
For most connection types, the secondary router will obtain its IP address automatically from the main router (via DHCP). In some cases, you may need to manually configure the IP address provided by your ISP. Consult the documentation provided by your ISP for the correct settings.
9. Set the default gateway
Specify the default gateway IP address for the secondary router. This should be the LAN IP address of the main router (e.g., 192.168.1.1). This ensures that the secondary router’s traffic is properly routed through the main router.
10. Save and apply the settings on both routers
Once you have made the necessary changes to the LAN and WAN settings on both routers, save and apply the settings within their respective web-based interfaces. This ensures that the changes take effect and the routers are configured correctly.
By properly configuring the LAN and WAN settings on both routers, you can establish seamless communication between devices on your network and ensure proper connectivity to the internet. Devices connected to the routers can communicate with each other and access the internet with ease and efficiency.
Establishing a wired connection between the routers
Establishing a wired connection between the routers is a reliable and straightforward method to expand your home network. By connecting the routers using an Ethernet cable, you can ensure a stable and fast connection. Follow these steps to establish a wired connection between the routers:
1. Position the routers
First, determine the optimal placement for both routers. Ensure that they are within reach of each other and that the length of the Ethernet cable is sufficient to connect them. It’s recommended to place the routers in a central location to ensure adequate coverage throughout your home.
2. Identify the LAN and WAN ports
Identify the LAN (Local Area Network) and WAN (Wide Area Network) ports on both routers. The LAN ports are typically labeled with numbers (LAN 1, LAN 2, etc.), while the WAN port is labeled specifically as “WAN” or “Internet.”
3. Connect the Ethernet cable
Take an Ethernet cable and plug one end into a LAN port on the main router. Then, plug the other end into a LAN port on the secondary router. This establishes a direct wired connection between the two routers.
4. Power on the routers
Ensure that both routers are powered on and connected to a power source. Allow them a few moments to boot up and establish a connection between each other.
5. Verify connectivity
Once the routers are powered on and connected, verify the connectivity between them. You can do this by checking the status lights on both routers. The LAN port lights should indicate a successful connection, and the WAN port light on the secondary router should be active.
6. Test the network
Connect a device, such as a computer or smartphone, to one of the LAN ports on either router. Ensure that the device is successfully connected to the network and can access the internet. You can also check if devices connected to the secondary router have internet connectivity.
7. Configure necessary settings
After establishing the wired connection, you may need to configure some settings on the routers. This includes ensuring that both routers have the same SSID (network name) and password for seamless roaming between them. Additionally, verify that the DHCP settings are properly configured on the main router to assign IP addresses to devices connected to the secondary router.
By following these steps, you can establish a reliable wired connection between the routers and extend your home network. This method ensures stable data transfer and reduces potential interference, offering an enhanced network experience for devices connected to your home network.
Establishing a wireless connection between the routers
Establishing a wireless connection between routers allows you to extend your home network coverage without the need for physical cables. By connecting the routers wirelessly, devices can seamlessly connect to either router and roam between them. Here are the steps to establish a wireless connection between the routers:
1. Position the routers
Start by positioning the routers in locations that provide optimal coverage throughout your home. Ensure that both routers are within range of each other and that their wireless signals overlap to provide a seamless connection.
2. Access the main router’s web-based interface
Connect a computer or mobile device to the main router’s Wi-Fi network. Open a web browser and enter the router’s IP address in the address bar. Log in using the appropriate username and password.
3. Configure wireless settings
Within the router’s web-based interface, navigate to the wireless settings section. Set the SSID (network name) and password for the main router’s Wi-Fi network. Ensure that the settings match those of the secondary router to enable seamless roaming between the routers.
4. Select a wireless channel
Choose a wireless channel for the main router that is different from neighboring networks to minimize interference. You can use Wi-Fi analyzer tools or the router’s automatic channel selection feature to find the least congested channel. Make a note of the chosen channel for later use.
5. Enable wireless function on the secondary router
Access the web-based interface of the secondary router using the steps mentioned earlier. Enable the wireless function on the secondary router and set the same SSID and password as the main router. Select a wireless channel for the secondary router that is different from the main router but does not overlap with neighboring networks.
6. Save and apply the settings on both routers
Once the wireless settings have been configured on both routers, save and apply the settings within their respective web-based interfaces. This ensures that the changes take effect and the routers are properly configured.
7. Test the wireless connection
Connect a device, such as a smartphone or laptop, to the Wi-Fi network of either router. Verify that the device can connect successfully and access the internet. Move throughout your home to test the seamless roaming capability between the routers.
8. Adjust the wireless signal strength
If needed, adjust the wireless signal strength on both routers to ensure consistent coverage throughout your home. Some routers allow you to increase or decrease the transmit power to optimize the signal range.
By following these steps, you can establish a wireless connection between the routers and extend your home network coverage. This method provides flexibility and convenience for devices to connect and roam seamlessly between the routers, ensuring a reliable wireless network experience throughout your home.
Troubleshooting common issues when connecting two routers
Connecting two routers on a home network can sometimes present challenges. Thankfully, many common issues have simple solutions. Here are some troubleshooting tips for resolving common issues when connecting two routers:
1. Verify cable connections
Ensure that all cable connections between the routers are secure. A loose or improperly connected cable can cause connectivity issues. Double-check that the Ethernet or coaxial cables are firmly plugged into the appropriate ports on both routers.
2. Check router settings
Verify that both routers are properly configured for a connected setup. Ensure that the main router is set to act as the primary router and that the secondary router is configured as an access point or wireless repeater. Check that the IP addresses, subnet masks, and default gateway settings are correctly assigned on both routers.
3. Reset the routers
If you’re experiencing persistent connectivity issues, try resetting both routers to their factory default settings. This can often resolve configuration conflicts. Use the reset button on each router (usually a small pinhole) and hold it down for about 10 seconds to initiate the reset process.
4. Update firmware
Make sure that the firmware on both routers is up to date. Outdated firmware can cause compatibility issues and performance problems. Check the manufacturer’s website for firmware updates and follow their instructions to install the latest version.
5. Adjust wireless settings
If you’re encountering issues with the wireless connection between the routers, try adjusting the wireless settings. Experiment with different wireless channels to reduce interference from neighboring networks. Also, ensure that the SSID and password match on both routers for seamless roaming.
6. Power cycle the routers
Sometimes, power cycling the routers can resolve temporary connectivity issues. Simply unplug the power cables from both routers, wait for about 30 seconds, and then plug them back in. Allow the routers a few minutes to boot up, and then check if the issue is resolved.
7. Disable conflicting settings
Ensure that conflicting settings, such as DHCP servers or firewall settings, are disabled on the secondary router. Only the main router should be acting as the DHCP server to avoid IP address conflicts. Additionally, check if any firewall settings are blocking communication between the routers.
8. Reposition the routers
If you’re experiencing signal coverage issues, try repositioning the routers to different locations. Place them in central areas of your home, away from obstructions and interference sources. Experiment with various placements to find the optimal positioning for maximum coverage.
If you’ve tried these troubleshooting tips and are still experiencing difficulties, consult the documentation provided by the router manufacturer or reach out to their customer support for further assistance. They can provide specific guidance and solutions based on your router models and setup.
Remember, patience and persistence are key when troubleshooting network connectivity issues. By following these troubleshooting tips, you can identify and resolve common issues, ensuring a stable and reliable connection between your two routers.
Final tips and recommendations
As you connect two routers on your home network, here are some final tips and recommendations to ensure a successful setup and optimal performance:
1. Choose high-quality routers
Invest in high-quality routers with excellent performance and reliability. While it may be tempting to go for the cheapest option, better routers offer better speed, coverage, and stability, resulting in a more seamless network experience.
2. Update firmware regularly
Regularly update the firmware on your routers to ensure they have the latest security patches and feature enhancements. Check the manufacturer’s website for updates and follow their instructions to keep your routers up to date.
3. Secure your network
Always enable wireless security on both routers, using strong passwords and encryption protocols. This helps protect your network from unauthorized access and ensures the privacy and security of your data.
4. Optimize router placement
Properly position your routers to maximize coverage and minimize interference. Experiment with different locations and orientations to find the best setup for your home. Consider using range extenders or mesh Wi-Fi systems if needed.
5. Perform regular speed and coverage tests
Periodically test the speed and coverage of your network to ensure optimal performance. Use online speed testing tools and check for any dead zones or weak signal areas that need improvement. Adjust router settings or consider additional network equipment to address any issues identified.
6. Monitor network traffic
Use tools and applications to monitor your network’s traffic and ensure that all devices are functioning properly. This can help identify any potential bandwidth or security issues caused by specific devices or excessive usage.
7. Keep your routers cool
Routers can generate heat during operation, which can potentially affect performance. Ensure that your routers have proper ventilation and are not placed in confined spaces. Consider using cooling fans or ensuring adequate airflow around the routers.
8. Regularly review and optimize settings
Periodically review and optimize the settings on your routers, such as channel selection, QoS (Quality of Service) settings, and firewall configurations. This allows you to adapt to changes in your network environment and maintain optimal performance.
By following these final tips and recommendations, you can enhance your home network’s performance, security, and reliability. Remember to stay informed about the latest networking technologies and best practices to make the most of your connected routers and ensure a seamless and enjoyable network experience.