
Check System Requirements
Before reinstalling Kaspersky Internet Security, it’s important to ensure that your system meets the necessary requirements to run the software smoothly. By checking the system requirements, you can avoid potential compatibility issues and ensure a hassle-free installation process.
Here are the minimum system requirements for Kaspersky Internet Security:
- Operating System: Kaspersky Internet Security is compatible with Windows 10, 8.1, and 7. It also supports macOS versions 10.13 and later.
- Processor: For Windows, a minimum of 1 GHz or higher processor is recommended. For macOS, an Intel-based processor is required.
- RAM: Windows systems should have at least 1 GB of RAM (32-bit) or 2 GB of RAM (64-bit). For macOS, a minimum of 2 GB RAM is required.
- Hard Disk Space: The software needs approximately 1.5 GB of available hard disk space for installation.
- Internet Connection: An active internet connection is required for product activation and database updates.
- Web Browser: A compatible web browser is necessary for safe online banking and secure web surfing features.
It’s worth noting that these are the minimum requirements, and for optimal performance, it is recommended to have a higher configuration system. Ensure that your device meets these specifications before proceeding with the reinstallation process.
Uninstall Kaspersky Internet Security
If you are planning to reinstall Kaspersky Internet Security, you first need to uninstall the existing version from your system. Here, we will guide you through the steps to properly uninstall the software:
- Open Control Panel: On a Windows computer, go to the Start menu and search for “Control Panel.” Click on the Control Panel option to open it.
- Find the Program: In the Control Panel window, look for the “Programs” or “Programs and Features” option and click on it.
- Locate Kaspersky: In the list of installed programs, find and select Kaspersky Internet Security.
- Uninstall the Program: Once you have selected Kaspersky Internet Security, click on the “Uninstall” or “Remove” button.
- Follow the prompts: A confirmation dialog box will appear, asking if you want to uninstall the program. Click “Yes” or “Uninstall” to proceed.
- Complete the Uninstallation: Follow any additional prompts that appear on the screen to complete the uninstallation process. It may take a few minutes for the software to be completely removed from your system.
- Restart your Computer: After the uninstallation is complete, it is recommended to restart your computer to ensure any leftover files or settings are cleared.
By following these steps, you can successfully uninstall Kaspersky Internet Security from your device. Once the software is removed, you can proceed with the reinstallation process to enjoy the latest version of Kaspersky Internet Security and its advanced security features.
Download the Latest Version of Kaspersky Internet Security
Before reinstalling Kaspersky Internet Security, you need to download the latest version of the software. Here’s a step-by-step guide on how to download Kaspersky Internet Security:
- Visit the Official Website: Open your preferred web browser and go to the official website of Kaspersky Internet Security.
- Navigate to the Downloads Page: Once you are on the website, navigate to the “Downloads” or “Product Downloads” section. Here, you will find a list of available products.
- Choose the Correct Version: Look for the latest version of Kaspersky Internet Security. Make sure to select the version that is compatible with your operating system.
- Select the Download Option: Click on the “Download” button next to the version you have chosen. Depending on your browser settings, you may be prompted to save the file or it may start downloading automatically.
- Wait for the Download: The download process may take some time, depending on your internet connection speed. Ensure that the download is complete before proceeding.
It’s important to download the latest version of Kaspersky Internet Security as it includes the most recent security updates and enhancements. By keeping your software up to date, you can ensure optimal protection against the latest threats and vulnerabilities.
Once the download is complete, you are ready to proceed with the installation of Kaspersky Internet Security. In the next section, we will guide you through the installation process to safeguard your device and data effectively.
Install Kaspersky Internet Security
Installing Kaspersky Internet Security is a straightforward process. Follow the steps below to install the software on your computer:
- Locate the Installation File: Navigate to the folder where you saved the downloaded installation file of Kaspersky Internet Security.
- Run the Installation: Double-click on the installation file to begin the installation process.
- Language Selection: Select your preferred language for the installation process and click “OK.”
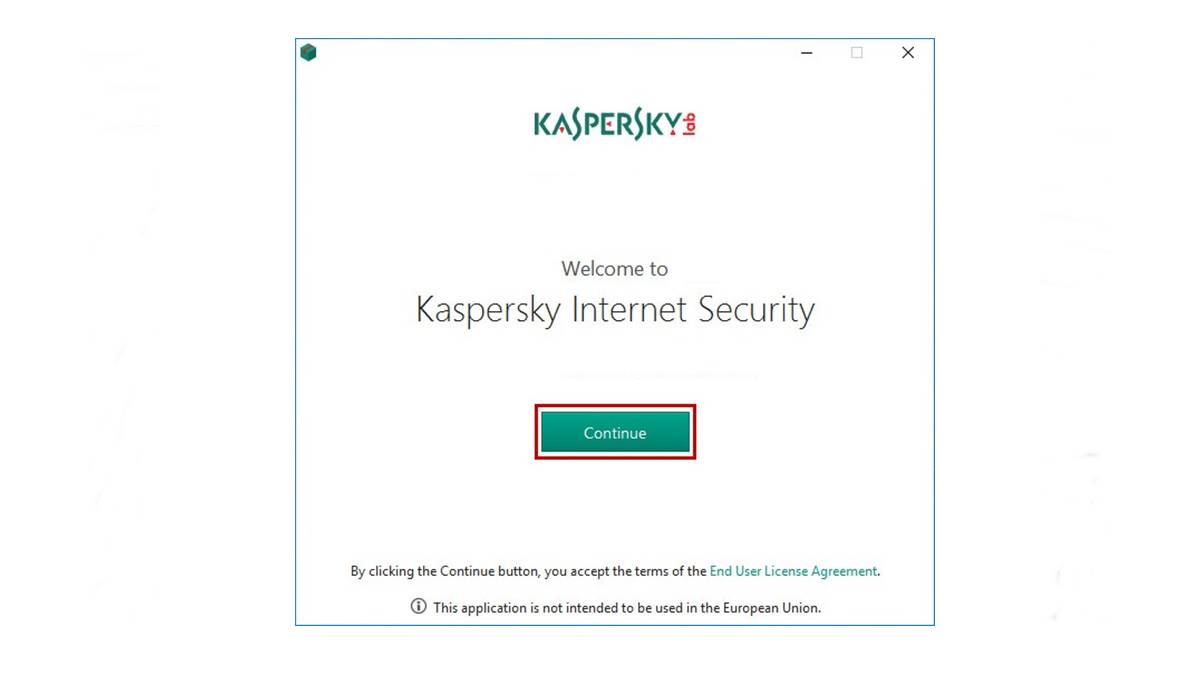
- Read and Accept the End User License Agreement (EULA): Carefully read the terms and conditions of the EULA. If you agree to them, check the box indicating your acceptance and click “Continue.”
- Choose Installation Type: You will be presented with two installation options: “Full” or “Custom.” Choose the type that suits your needs. The “Full” installation includes all the features of Kaspersky Internet Security, while the “Custom” installation allows you to select specific features to install.
- Wait for the Installation: The installation process may take a few minutes to complete. Be patient and avoid interrupting the process.
- Activation: After the installation is complete, you will be prompted to activate Kaspersky Internet Security. Enter your activation code or sign in with your Kaspersky account, if required.
- Finish: Once the activation is successful, you will see a confirmation message. Click “Finish” to complete the installation process.
After the installation is complete, Kaspersky Internet Security will start protecting your computer against various threats, including malware, viruses, phishing attacks, and more. It is recommended to update the software regularly to ensure you have the latest security features and protection in place.
In the next section, we will cover how to activate and update Kaspersky Internet Security to keep your system secure.
Activate Kaspersky Internet Security
Activating Kaspersky Internet Security ensures that you can access all the features and benefits of the software. Here’s how you can activate your copy of Kaspersky Internet Security:
- Open Kaspersky Internet Security: Launch the Kaspersky Internet Security application on your computer.
- Access the Activation Window: Look for the “Activate” or “License” button within the main interface of the software and click on it. This will open the activation window.
- Choose Activation Method: In the activation window, you will have two options to activate the software. You can either enter the activation code manually or sign in with your Kaspersky account.
- Enter the Activation Code: If you have an activation code, enter it in the appropriate field. The activation code is usually a combination of letters and numbers provided when you purchased the software.
- Sign in with Kaspersky Account: If you prefer to sign in with your Kaspersky account, click on the “Sign in” or “Use existing account” option. Enter the required credentials and click “Sign in.”
- Activation Confirmation: Once you have entered the activation code or signed in with your Kaspersky account, click on the “Activate” or “Finish” button to initiate the activation process.
- Confirmation Message: After the activation is successful, you will see a confirmation message indicating the activation status of Kaspersky Internet Security.
It’s important to note that the activation code is unique to each license and should be kept securely. Activating your copy of Kaspersky Internet Security ensures that you can access all the essential features of the software, such as real-time protection, firewall, vulnerability scanning, and more.
Now that Kaspersky Internet Security is activated on your system, it’s crucial to keep the software up to date with the latest virus definitions and security patches. In the next section, we will discuss how to update Kaspersky Internet Security effectively to maximize its protective capabilities.
Update Kaspersky Internet Security
Regularly updating Kaspersky Internet Security is essential to ensure that your system stays protected against the latest threats and vulnerabilities. Here’s how you can update the software effectively:
- Open Kaspersky Internet Security: Launch the Kaspersky Internet Security application on your computer.
- Access the Updates Section: Look for the “Updates” or “Database Update” option within the main interface of the software and click on it. This will take you to the updates section.
- Check for Updates: In the updates section, click on the “Check for updates” or “Update now” button. The software will connect to the Kaspersky servers to check for any available updates.
- Download and Install Updates: If there are any updates available, click on the “Download” or “Update” button to start the download and installation process. The updates may include virus definitions, security patches, and new features.
- Wait for the Update: The update process may take a few minutes, depending on your internet connection speed. It’s important to wait for the process to complete and avoid interrupting it.
- Restart if Required: After the updates are installed, Kaspersky Internet Security may prompt you to restart your computer to apply the changes effectively. If prompted, click on the “Restart now” or “Restart” button to reboot your system.
By regularly updating Kaspersky Internet Security, you can enhance the effectiveness of the software in protecting your computer from new and emerging threats. It’s recommended to enable automatic updates so that the software can check for updates and install them automatically in the background.
With the software updated, it’s important to configure Kaspersky Internet Security settings to suit your needs and optimize its performance. In the next section, we will guide you through the process of configuring the software settings to enhance your cybersecurity experience.
Configure Kaspersky Internet Security Settings
Configuring the settings of Kaspersky Internet Security allows you to customize the software according to your preferences and enhance its performance. Here are the steps to configure the settings:
- Open Kaspersky Internet Security: Launch the Kaspersky Internet Security application on your computer.
- Access the Settings: Look for the “Settings” or “Preferences” option within the main interface of the software and click on it. This will take you to the settings section.
- General Settings: In the settings section, you will find various options to customize the behavior of Kaspersky Internet Security. You can adjust general settings such as language, notifications, and proxy server configurations.
- Protection Components: Explore the protection components settings where you can enable or disable specific features according to your needs. These components include real-time protection, firewall, network attack blocker, and more.
- Scan Settings: Configure the scan settings to determine the type of scans (quick, full, or custom) and schedule automatic scans to ensure regular system checkups for potential threats.
- Web Protection: Customize the web protection settings to enable safe browsing, block malicious websites, and protect your online banking and shopping activities.
- Updates: Adjust the update settings to enable automatic updates, specify the frequency of updates, and choose the sources from where updates will be downloaded.
- Application Control: Manage the application control settings to allow or block specific applications from accessing the internet or making system modifications.
- Privacy Protection and Parental Control: If these features are available in your version of Kaspersky Internet Security, configure the settings to protect your privacy and control content access for children.
By configuring the settings of Kaspersky Internet Security, you can personalize your security experience and ensure that the software aligns with your specific requirements. It’s recommended to explore each setting category and make adjustments based on your preferences and needs.
Once you have configured the settings, it’s important to set up scheduled scans to ensure proactive protection against potential threats. In the next section, we will guide you through the process of scheduling scans with Kaspersky Internet Security.
Set up Scheduled Scans
Scheduling regular scans with Kaspersky Internet Security is an effective way to ensure continuous protection and proactive detection of threats. Here’s how you can set up scheduled scans:
- Open Kaspersky Internet Security: Launch the Kaspersky Internet Security application on your computer.
- Access the Scan Options: Look for the “Scan” or “Scan options” tab within the main interface of the software and click on it. This will take you to the scan settings section.
- Select Scan Type: Choose the type of scan you want to schedule – quick scan, full scan, or custom scan. Quick scans are faster and focus on the most vulnerable areas, while full scans check the entire system for threats.
- Set Scan Schedule: Click on the “Schedule” or “Create Schedule” button to set up the scan schedule. Choose the desired frequency, such as daily, weekly, or monthly, and select the specific time for the scan to start.
- Customize Scan Settings: Customize the scan settings according to your preferences. You can specify the areas to scan, enable deep scanning, and choose whether to scan archives and removable drives.
- Save and Apply the Schedule: Once you have configured the scan schedule and settings, save the changes and apply the scheduled scan to activate it.
Scheduled scans provide an extra layer of protection by automatically checking your system for potential threats at specified intervals. It’s recommended to schedule regular scans to ensure any new malware or suspicious files are detected and resolved promptly. This proactive approach helps maintain a secure and healthy computer environment.
In addition to setting up scheduled scans, you can further customize Kaspersky Internet Security to suit your specific needs and preferences. In the next section, we will explore how you can customize the software for an optimized security experience.
Customize Kaspersky Internet Security
Kaspersky Internet Security offers various customization options that allow you to tailor the software according to your preferences and requirements. Here’s how you can customize Kaspersky Internet Security:
- Open Kaspersky Internet Security: Launch the Kaspersky Internet Security application on your computer.
- Access the Settings: Look for the “Settings” or “Preferences” option within the main interface of the software and click on it. This will take you to the settings section.
- General Settings: In the settings section, you can customize general preferences such as language, notifications, and appearance. Adjust these settings to enhance your user experience.
- Protection Settings: Customize the protection settings to configure specific behaviors. For example, you can enable or disable detection of potentially unwanted programs (PUPs), adjust heuristic analysis sensitivity, and configure exclusions for trusted files and folders.
- Web Protection: Personalize web protection settings to suit your browsing habits. Enable safe browsing, configure website blocking options, and adjust the level of phishing and malicious URL detection.
- Scan Settings: Customize the scan settings to define the scope and thoroughness of the scans. You can specify file types, scan archives and removable drives, and set exclusions for files or folders that you trust.
- Privacy Protection: If available, customize privacy protection settings to safeguard your sensitive information. This may include features like webcam protection, anti-phishing measures, and confidential data encryption.
- Application Control: Manage the application control settings to allow or block specific applications from accessing the internet or modifying system settings. Customize the level of control based on your preferences.
- Update Settings: Adjust the update settings to configure the frequency and sources for downloading updates. You can also enable or disable automatic updates based on your preference.
By customizing Kaspersky Internet Security, you can optimize the software to align with your specific needs and preferences. Take some time to explore the various settings categories and make adjustments according to your requirements.
Configuring Kaspersky Internet Security helps ensure that the software provides effective protection while offering a seamless user experience. In the next section, we will address common issues you may encounter during the installation or reinstallation process and provide troubleshooting tips to resolve them.
Troubleshoot Installation Issues
While reinstalling or installing Kaspersky Internet Security, you may encounter certain issues that can hinder the process. Here are some common installation issues and troubleshooting steps to help resolve them:
- Compatibility Issues: Ensure that your operating system meets the system requirements for Kaspersky Internet Security. Check if your system has the necessary hardware specifications and the latest updates installed. If there are compatibility issues, consider updating your OS or contacting Kaspersky support for assistance.
- Conflicting Software: Other security software or firewall programs on your computer may interfere with the installation process. Temporarily disable any conflicting software or uninstall it before reinstalling Kaspersky Internet Security.
- Corrupted Installer: If the installation file is corrupted, it can lead to installation issues. Re-download the installation file from the official website to ensure you have a fresh and intact installer.
- Insufficient Disk Space: Kaspersky Internet Security requires a certain amount of disk space for installation. Check if you have sufficient free space on your hard drive and make necessary arrangements to free up storage if needed.
- Interrupted Installation: If the installation process was interrupted or stopped abruptly, it can cause errors. Restart your computer and try the installation process again from the beginning. Ensure that no other programs or processes are running that may interfere with the installation.
- Anti-virus Exclusion: Some anti-virus software may flag Kaspersky Internet Security as a potentially harmful program. Exclude the installation file and the program folder from the scanning and real-time protection of other anti-virus software before proceeding with the installation.
- Administrator Privileges: Make sure you have administrator privileges on your computer to install Kaspersky Internet Security. Right-click on the installation file and choose “Run as administrator.”
- Network Connectivity: Ensure that you have a stable internet connection during the installation process. Unstable or interrupted internet connectivity can lead to installation errors. Consider temporarily disabling any VPN or proxy connections that may interfere with the installation.
If you encounter any other issues during the installation or reinstallation process, it is recommended to refer to the official documentation or contact Kaspersky support for further assistance. They will provide specialized guidance to help you overcome any specific obstacles you may encounter.
By troubleshooting installation issues, you can successfully reinstall Kaspersky Internet Security and enjoy its comprehensive security features to protect your computer and data.