
Step 1: Downloading Kaspersky Internet Security
When it comes to protecting your Android phone from malware, viruses, and other online threats, Kaspersky Internet Security is a reliable choice. The first step in using this powerful security app is to download it onto your device. Here’s how you can do it:
1. Open the Google Play Store on your Android phone. This app store is usually pre-installed on most Android devices.
2. In the search bar at the top of the screen, type “Kaspersky Internet Security.” As you type, the Play Store will display suggestions based on your input.
3. Select the official Kaspersky Internet Security app from the search results. Look for the app with the Kaspersky logo and the highest ratings.
4. Once you’ve found the app, tap the “Install” button. This will initiate the download and installation process.
5. Depending on your internet connection speed, the app may take a few moments to download. You can monitor the progress by looking at the download bar at the top of the screen.
6. After the download is complete, tap the “Open” button to launch Kaspersky Internet Security on your Android phone.
Before proceeding to the next steps, it’s essential to ensure that you’re downloading the official Kaspersky app from the Google Play Store. This helps to verify its authenticity and guarantee that the app is free from any malicious code.
With Kaspersky Internet Security successfully downloaded and installed on your Android phone, you’re now ready to move on to the next step in securing your device.
Step 2: Opening the Kaspersky App on Your Android Phone
Now that you have downloaded and installed Kaspersky Internet Security on your Android phone, it’s time to open the app and start exploring its features. Here’s how you can do it:
1. Locate the Kaspersky Internet Security icon on your device’s home screen or in your app drawer. It is represented by a distinctive logo with the word “Kaspersky.”
2. Tap on the Kaspersky app icon to launch it. The app will begin initializing and loading its interface.
3. On the welcome screen, you may be prompted to sign in with your Kaspersky account credentials. If you already have an account, enter your email address and password in the provided fields. If you don’t have an account, you can create one by tapping on the “Create Account” or “Register” option.
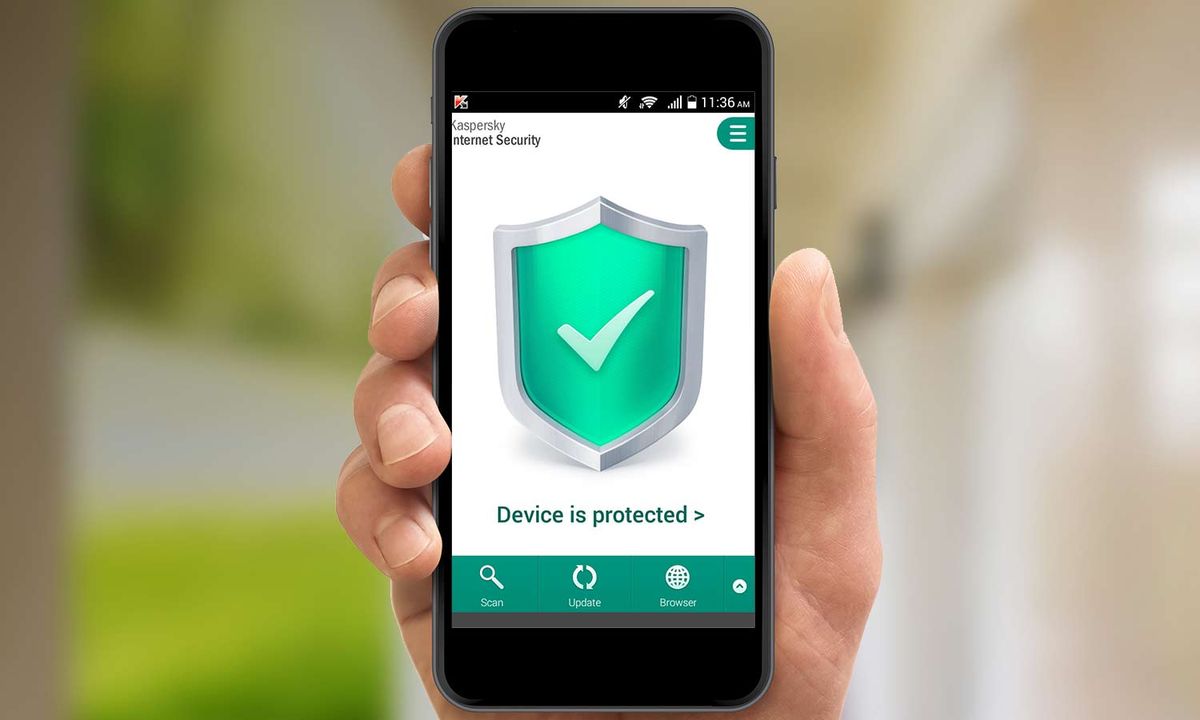
4. Once you have signed in or created a new account, you will be taken to the main dashboard of the Kaspersky Internet Security app. Here, you will find an overview of your device’s current security status and access to various security and privacy features.
The Kaspersky app interface is designed to be user-friendly and intuitive, making it easy for you to navigate through the different sections and settings. You’ll find options to run scans, configure security features, manage app permissions, and more.
Before proceeding, take a moment to familiarize yourself with the app’s layout and navigation. This will allow you to make the most of Kaspersky Internet Security and ensure that you can easily access the features you need to protect your Android phone.
Opening the Kaspersky app is just the beginning. In the next step, we will guide you through the process of activating Kaspersky Internet Security to ensure that it provides optimal protection for your Android device.
Step 3: Activating Kaspersky Internet Security
After opening the Kaspersky Internet Security app on your Android phone, it’s time to activate it to unlock all the premium features and ensure comprehensive protection. Here’s what you need to do:
1. On the main dashboard of the Kaspersky app, locate the “Activate” or “Activate Now” button. It is usually prominently displayed on the screen.
2. Tap on the “Activate” button to proceed with the activation process. This will prompt you to enter a valid activation code.
3. If you have already purchased a license for Kaspersky Internet Security, enter the activation code in the provided field. You can find the activation code in the confirmation email or printed on the retail box if you purchased a physical copy.
4. If you haven’t purchased a license yet, you can tap on the “Buy Now” or “Purchase Activation Code” option to proceed with the purchase. This will redirect you to the official Kaspersky website or e-commerce platform to complete the transaction.
5. Follow the instructions provided on the screen to enter your payment details and complete the purchase. Once the purchase is successful, you will receive the activation code through email or as a digital download.
6. After obtaining the activation code, enter it in the designated field within the Kaspersky app. Double-check the code to ensure accuracy, as any typographical errors can prevent successful activation.
7. Tap on the “Activate” button or a similar option to initiate the activation process. The app will connect to the Kaspersky servers to verify and activate your license.
8. Once the activation is complete, you will receive a confirmation message or notification. This indicates that Kaspersky Internet Security is now fully activated on your Android device.
By activating Kaspersky Internet Security, you gain access to powerful features such as real-time scanning, web protection, anti-phishing, and more. It’s important to activate the app to ensure maximum security for your Android phone and safeguard your personal information.
In the next step, we will guide you through the process of configuring the various security features offered by Kaspersky Internet Security.
Step 4: Configuring the Security Features
Now that you have activated Kaspersky Internet Security on your Android phone, it’s time to customize and configure its security features to best suit your needs. Here’s how you can do it:
1. Open the Kaspersky Internet Security app on your device if you haven’t already done so. You will be taken to the main dashboard of the app.
2. Look for the “Settings” or “Preferences” option within the app. It is usually represented by a gear or cog icon. Tap on it to access the settings menu.
3. In the settings menu, you will find various options to configure and personalize your security settings. These may include options related to scanning schedules, notifications, privacy settings, and more.
4. Take some time to explore each setting and understand its purpose. For example, you may want to adjust the scanning schedule to run regular scans at a convenient time. Or, you may want to customize the app’s notifications to your preferences.
5. Additionally, you can configure specific security features such as real-time scanning, web protection, and anti-phishing. These options can be found within the settings menu, typically under the “Security” or “Protection” section.
6. Enable the security features that you deem necessary for your Android phone. For example, turning on real-time scanning will continuously monitor your device for any potential threats. Enabling web protection will safeguard your browsing activities from malicious websites.
7. Adjust the settings according to your preferences and requirements. You can customize the level of protection based on your comfort level and the sensitivity of the data stored on your device.
8. Finally, once you have configured the security features to your satisfaction, tap on the “Save” or “Apply” button to save the settings and ensure they take effect.
By configuring the security features of Kaspersky Internet Security, you can enhance your Android device’s protection and tailor it to your specific needs. Regularly review and update these settings to adapt to any new threats and optimize the security of your device.
In the next step, we will guide you through running a scan for malware and viruses using Kaspersky Internet Security.
Step 5: Running a Scan for Malware and Viruses
Keeping your Android phone protected from malware and viruses is crucial for maintaining its security and performance. Kaspersky Internet Security offers a powerful scanning feature to help detect and eliminate any potential threats. Follow these steps to run a scan on your device:
1. Launch the Kaspersky Internet Security app on your Android phone. You will be taken to the main dashboard of the app.
2. Look for the “Scan” or “Scan Now” option within the app. It is usually prominently displayed on the screen. Tap on it to initiate a system scan.
3. Kaspersky will offer you different scan options. The two primary types of scans are Quick Scan and Full Scan.
a. Quick Scan: This option performs a rapid scan of the most critical areas of your device, such as installed apps and system files. It is a good option for a fast checkup of your phone’s security status.
b. Full Scan: This option carefully examines all files and folders on your Android phone. It provides a more comprehensive analysis of your device, ensuring no hidden threats are present.
4. Choose the scan type that suits your needs. If you want a quick check, select the Quick Scan option. If you prefer a thorough examination, opt for the Full Scan.
5. Once you have selected the scan type, tap on the “Start Scan” or “Scan Now” button to begin the process. Kaspersky will automatically start scanning your device for malware, viruses, and other potential threats.
6. The scan may take some time, depending on the size of your device’s storage and the number of files it contains. You can monitor the progress of the scan through a progress bar or percentage indicator.
7. After the scan is complete, Kaspersky will present you with a detailed report of any threats found on your device. You can review the results and take appropriate actions to resolve the detected issues.
8. If Kaspersky detects any malware or viruses during the scan, it will offer you options to quarantine or remove the threats. Follow the prompts provided by the app to mitigate the risks and keep your Android phone protected.
Regularly running scans with Kaspersky Internet Security ensures that your device stays protected from the ever-evolving landscape of malware and viruses. It provides peace of mind and allows you to address any security risks promptly.
In the next step, we will explore the anti-theft features offered by Kaspersky Internet Security for added protection of your Android phone.
Step 6: Using the Anti-Theft Features
Kaspersky Internet Security provides powerful anti-theft features that can help you protect your Android phone in case of loss or theft. These features allow you to remotely track, locate, lock, and wipe your device to keep your personal information secure. Follow these steps to use the anti-theft features:
1. Open the Kaspersky Internet Security app on your Android phone. You will be taken to the main dashboard of the app.
2. Look for the “Anti-Theft” or “Find My Phone” option within the app. Tap on it to access the anti-theft features.
3. Enable the anti-theft feature by turning it on. The app may require additional permissions or settings to be configured for the feature to function properly.
4. Once the anti-theft feature is activated, you can perform several actions remotely:
a. Locate Your Device: Kaspersky allows you to track the location of your Android phone if it is lost or stolen. Use the app’s interface to view the device’s current location on a map.
b. Lock Your Device: In case your phone gets into the wrong hands, you can remotely lock it to prevent unauthorized access to your personal data. This feature lets you set a secure passcode to safeguard your device.
c. Sound an Alarm: If you have misplaced your phone in a nearby location, you can activate an alarm sound to help you locate it. The sound will be audible even if your device is in silent mode.
d. Wipe Your Device: In extreme cases where recovery is not possible or you want to ensure the complete erasure of your data, Kaspersky allows you to remotely wipe your device. This will delete all the data on your phone, including personal files and settings.
5. To access these anti-theft features, you can use the Kaspersky web portal or another Android device with the Kaspersky Internet Security app installed. Simply log in to your Kaspersky account and select the appropriate action for your lost or stolen device.
By utilizing the anti-theft features of Kaspersky Internet Security, you can have peace of mind knowing that your personal data is secure, even if your Android phone is lost or stolen.
In the next step, we will delve into the privacy protection features offered by Kaspersky Internet Security.
Step 7: Enabling the Privacy Protection Features
The privacy of your personal information is of utmost importance, and Kaspersky Internet Security offers a range of features to help safeguard your privacy on your Android phone. By enabling these privacy protection features, you can control the access to your sensitive data and ensure your privacy is maintained. Follow these steps to enable the privacy protection features:
1. Open the Kaspersky Internet Security app on your Android phone. You will be taken to the main dashboard of the app.
2. Look for the “Privacy” or “Privacy Protection” option within the app. Tap on it to access the privacy-related settings and features.
3. In the privacy settings, you will find various features that you can enable to enhance your privacy:
a. App Lock: This feature allows you to lock specific apps on your device with a PIN, pattern, or fingerprint. Enable this option and select the apps that you want to protect from unauthorized access.
b. Call and SMS Filter: With this feature, you can block unwanted calls and text messages from specific contacts or unknown numbers. Enable the option and customize the blocking settings according to your preferences.
c. Permissions Checker: Kaspersky can monitor and notify you about the permissions that apps on your device request. Enable this feature to have better control over the access rights granted to various apps.
d. Private Browsing: This feature allows you to browse the internet privately, preventing websites from tracking your online activities. Enable the private browsing mode to protect your privacy while surfing the web.
4. Review each privacy protection feature and customize the settings according to your preferences. You can toggle the switches to enable or disable specific functions based on your comfort level.
5. Additionally, consider enabling the “Secure Connection” feature offered by Kaspersky Internet Security. This feature encrypts your internet traffic, ensuring that your sensitive information remains secure when connected to public Wi-Fi networks.
6. Once you have configured the privacy protection features to meet your needs, tap on the “Save” or “Apply” button to save the settings and activate the privacy protection features.
By enabling the privacy protection features of Kaspersky Internet Security, you can take control of your personal information and ensure that your privacy is maintained on your Android phone.
In the next step, we will explore how to enhance web protection using Kaspersky Internet Security.
Step 8: Enhancing Web Protection
Enhancing web protection is a crucial step in ensuring the security of your Android phone while browsing the internet. Kaspersky Internet Security offers robust web protection features that help safeguard your online activities from various threats. Follow these steps to enhance web protection using Kaspersky Internet Security:
1. Open the Kaspersky Internet Security app on your Android phone. You will be taken to the main dashboard of the app.
2. Look for the “Web Protection” or “Safe Surfing” option within the app. Tap on it to access the web protection settings and features.
3. In the web protection settings, you will find various features that you can enable to enhance your online security:
a. Anti-Phishing: Enable this feature to protect yourself from phishing attacks. Kaspersky Internet Security will warn you if you attempt to visit a malicious website designed to steal your personal information.
b. URL Advisor: This feature provides you with real-time information about the safety of websites you visit. It displays color-coded icons next to search results and links, indicating their safety levels.
c. Safe Money: If you perform online transactions, enable this feature to protect your financial information. Safe Money provides a secure environment for banking or making online payments by launching a protected browser.
d. Parental Control: If you want to protect your children from inappropriate content or manage their online activities, enable this feature. It allows you to set restrictions and control their access to specific websites.
4. Customize the settings for each web protection feature according to your preferences. You may want to adjust the sensitivity level of the anti-phishing feature or set specific rules for the parental control feature.
5. Additionally, make sure the “Database Updates” option is enabled. This ensures that your Kaspersky Internet Security app receives regular updates with the latest threat definitions and protection techniques.
6. Once you have configured the web protection features to suit your needs, tap on the “Save” or “Apply” button to save the settings and activate the enhanced web protection features.
By enhancing web protection using Kaspersky Internet Security, you can browse the internet with confidence, knowing that your Android phone is protected from online threats and malicious websites.
In the next step, we will explore how to manage app permissions using Kaspersky Internet Security.
Step 9: Managing App Permissions
Managing app permissions is essential to maintain the privacy and security of your Android phone. Kaspersky Internet Security offers a feature that allows you to monitor and control the permissions requested by apps installed on your device. Follow these steps to manage app permissions:
1. Open the Kaspersky Internet Security app on your Android phone. You will be taken to the main dashboard of the app.
2. Look for the “App Permissions” or “Permissions Control” option within the app. Tap on it to access the app permissions settings and features.
3. In the app permissions settings, you will find a list of installed apps on your device, along with the permissions they have requested.
4. Tap on an app to view the specific permissions it has requested. This will provide you with detailed information about the access rights the app requires.
5. Review each permission and consider whether it is necessary for the app to function properly. Some permissions may be necessary for the app’s core functionality, while others may seem excessive or unnecessary.
6. To manage app permissions, you have several options:
a. Grant or Deny Permissions: For each app, you can individually grant or deny specific permissions. Simply toggle the switches to enable or disable a particular permission according to your preferences.
b. Revoke Permissions: If you no longer want an app to have certain permissions, you can revoke them. This ensures that the app no longer has access to the restricted information.
c. Use Privacy Advisor: Kaspersky Internet Security offers a Privacy Advisor feature that analyzes the permissions requested by apps and provides recommendations based on their potential risks. Utilize this feature to make informed decisions about app permissions.
7. Repeat the process for each installed app, carefully considering the implications of each permission request and managing them accordingly.
8. Regularly review and update app permissions as new apps are installed or existing apps are updated. This allows you to maintain control over the access rights granted to apps on your Android phone.
By managing app permissions using Kaspersky Internet Security, you can protect your personal data and reduce the risk of apps accessing sensitive information without your knowledge or consent.
In the next step, we will explore how to keep Kaspersky Internet Security up to date by updating the software.
Step 10: Updating Kaspersky Internet Security Software
Keeping your Kaspersky Internet Security software up to date is crucial to ensure optimal protection for your Android phone. Regular updates provide the latest security patches, bug fixes, and new features. Follow these steps to update Kaspersky Internet Security software:
1. Open the Kaspersky Internet Security app on your Android phone. You will be taken to the main dashboard of the app.
2. Look for the “Settings” or “Preferences” option within the app. Tap on it to access the settings menu.
3. In the settings menu, locate the “Update” or “Software Update” option. Tap on it to check for available updates for Kaspersky Internet Security.
4. The app will connect to the Kaspersky servers and check for updates. If a new update is available, follow the on-screen prompts to download and install it.
5. Depending on your internet connection speed and the size of the update, the process may take a few moments. You can monitor the progress through a progress bar or percentage indicator.
6. Once the update is downloaded, Kaspersky Internet Security will automatically install it. You may be prompted to grant certain permissions for the update installation process.
7. After the update is installed, you will receive a notification confirming that Kaspersky Internet Security is now up to date. It is important to ensure that you are using the latest version to benefit from the most recent security enhancements.
8. Additionally, enable the “Automatic Updates” feature within the Kaspersky settings. This ensures that the app checks for updates regularly and installs them in the background, keeping your device protected without manual intervention.
Regularly updating Kaspersky Internet Security software is essential to stay ahead of emerging threats and ensure the highest level of protection for your Android phone.
In the next step, we will explore troubleshooting tips for resolving any issues you may encounter with Kaspersky Internet Security on your Android device.
Step 11: Troubleshooting Kaspersky Internet Security on Android
While Kaspersky Internet Security is a reliable security app, you may occasionally encounter issues or face challenges in its operation. The following troubleshooting tips can help you resolve common problems and ensure the smooth functioning of Kaspersky Internet Security on your Android device:
1. Update the App: Ensure that you have the latest version of Kaspersky Internet Security installed on your device. Outdated versions can sometimes cause compatibility issues with newer Android operating systems. Check for updates in the app settings or through the Google Play Store.
2. Restart Your Device: A simple but effective troubleshooting step is to restart your Android device. This can often resolve minor glitches and restore normal functionality to the app.
3. Clear App Cache and Data: If Kaspersky Internet Security is experiencing performance issues or not functioning properly, clearing the app’s cache and data can help. Go to your device’s settings, find the app manager, locate Kaspersky Internet Security, and select the option to clear cache and data.
4. Reinstall the App: If none of the above steps resolve the issue, uninstall and reinstall Kaspersky Internet Security. This can help remove any potential conflicts or corrupt files that may be affecting the app’s performance.
5. Check Internet Connectivity: Ensure that your Android device has a stable internet connection. Kaspersky Internet Security relies on an active internet connection for various features, such as updates and real-time protection.
6. Disable Battery Optimization: Some devices have battery optimization settings that can limit the functioning of certain apps in the background. To ensure that Kaspersky Internet Security runs without interruption, disable battery optimization for the app in your device’s settings.
7. Contact Kaspersky Support: If the issue persists or you require further assistance, reach out to Kaspersky support. They can provide specific guidance based on your device, operating system, and the nature of the problem you are facing.
By following these troubleshooting steps, you can address common issues and ensure that Kaspersky Internet Security is functioning optimally on your Android device.
With Kaspersky Internet Security successfully configured and troubleshooting steps in your arsenal, you can confidently protect your Android phone from malware, viruses, and other online threats. Stay proactive in maintaining the security of your device and enjoy a safe online experience.