
Overview of GIMP’s User Interface
GIMP, or GNU Image Manipulation Program, is a popular open-source image editing software that offers a wide range of powerful tools and features. Its user interface plays a crucial role in providing a seamless editing experience and easy access to various functions. Understanding the basics of GIMP’s user interface is essential for navigating the software efficiently and harnessing its full potential.
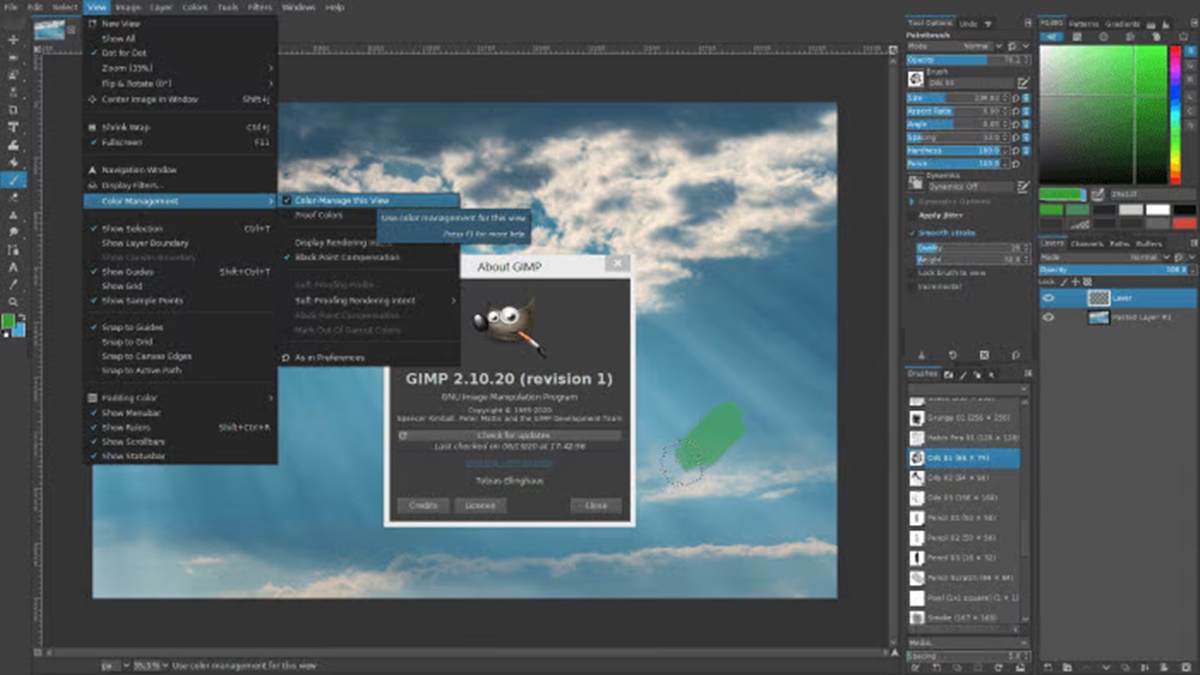
When you launch GIMP, you’ll be greeted by a comprehensive interface consisting of multiple elements. At the top, you’ll find the menu bar, which houses various menus, submenus, and options for accessing different tools and functionalities. The toolbox, located on the left side of the interface, contains a collection of tools for editing and manipulating images.
Adjacent to the toolbox is the layers dock, where you can manage and manipulate individual layers within your image. It allows you to stack and organize different elements to create complex compositions. Additionally, the brushes and patterns dock provides quick access to various brush presets and patterns that can be used to enhance your images.
The main canvas, occupying the central area of the interface, is where you can view and edit your images. It displays the current image or project you’re working on and allows you to zoom in, zoom out, and navigate through different areas of the image. Surrounding the canvas, you’ll find panels such as the tool options, brush editor, and color picker, which provide precise control and customization options for the selected tool or feature.
GIMP’s user interface is highly customizable, enabling you to personalize it according to your preferences and workflow. This allows you to create a workspace tailored to your specific needs and optimize your editing process. Customizing the user interface involves modifying the appearance, rearranging the elements, and even applying themes to give GIMP a new look and feel.
By familiarizing yourself with GIMP’s user interface, you can efficiently navigate through the software, access the tools and functions you need, and unleash your creative potential. In the following sections, we will explore the benefits of customizing GIMP’s UI with themes and provide step-by-step guidance on how to change GIMP’s UI to suit your style and workflow.
Benefits of Customizing GIMP’s UI with Themes
Customizing GIMP’s user interface with themes not only allows you to personalize the look and feel of the software but also offers several practical benefits that can enhance your editing experience. Here are some of the advantages of customizing GIMP’s UI with themes:
- Improved Visual Appeal: Applying themes to GIMP can transform its appearance, making it visually appealing and engaging. You can choose themes that align with your personal style or match the aesthetics of your workspace, creating a more enjoyable editing environment.
- Enhanced Workflow Efficiency: Customizing GIMP’s UI with themes can optimize your workflow by rearranging elements and emphasizing the most frequently used tools. With a well-designed theme, you can streamline your editing process and access the essential functions more efficiently, saving time and effort.
- Reduced Eye Strain: By customizing the color scheme of GIMP’s UI through themes, you can adjust the interface to be more comfortable for your eyes. Choosing soothing colors or high-contrast themes can minimize eye strain, especially during long editing sessions.
- Increased Focus on Content: A clean and minimalistic theme can help declutter GIMP’s interface, allowing you to focus more on the content you’re editing. With a distraction-free environment, you can concentrate on your work and make better creative decisions.
- Personalized Workflow: Customizing the placement of tools, panels, and menus through themes enables you to create a workspace that aligns with your specific editing workflow. You can tailor the UI to accommodate your preferences, making it easier to access the tools you use most frequently and organizing the interface to suit your editing style.
- Enhanced Inspiration: Changing the overall look and feel of GIMP with themes can spark inspiration and creativity. Using a theme that resonates with your creative vision can create an atmosphere conducive to exploring new ideas and pushing your artistic boundaries.
Customizing GIMP’s UI with themes is a simple yet effective way to personalize your editing environment and optimize your workflow. With the ability to modify the visual aspects and structure of the interface, you can create a workspace that not only looks appealing but also enhances your productivity and creativity. In the next section, we will explore how to install and find themes for GIMP.
Installing Themes in GIMP
GIMP provides a straightforward process for installing themes to customize its user interface. Here are the steps to install themes in GIMP:
- Start by finding a theme that you want to install. There are several websites and online communities dedicated to providing GIMP themes, both free and paid. Make sure to choose a theme compatible with your version of GIMP.
- Once you have found a theme you like, download the theme file to your computer. The theme file usually has an extension “.gtkrc” or “.gtkrc-2.0”.
- Open GIMP and go to “Edit” in the menu bar. From the drop-down menu, select “Preferences”.
- In the Preferences dialog box, navigate to the “Themes” tab. Here, you will find options to install, uninstall, and manage your GIMP themes.
- Click on the “Install Theme…” button. This will open a file explorer window.
- Browse to the location where you saved the downloaded theme file and select it. Click “Open” to proceed.
- GIMP will now install the selected theme. Once the installation is complete, you will see the newly installed theme listed under the “Installed themes” section in the Preferences dialog box.
- Select the newly installed theme by clicking on it. You can also click the “Preview” button to see how the theme will look before selecting it.
- Click “OK” to apply the selected theme. GIMP will update its user interface to reflect the new theme.
- Restart GIMP to ensure that the changes take effect.
After following these steps, you will have successfully installed a new theme in GIMP, allowing you to customize its user interface according to your preferences. You can repeat this process to install multiple themes and switch between them as desired.
Next, let’s explore how to find and download themes for GIMP, so you can further personalize your editing environment.
Finding and Downloading Themes for GIMP
There are numerous resources available online where you can find and download themes to customize the user interface of GIMP. Here are some ways to discover themes for GIMP:
- Websites: Various websites offer a collection of GIMP themes that you can browse and download. Some popular websites include gnome-look.org, deviantart.com, and xfce-look.org. These platforms often provide a rating system and user reviews to help you choose the most suitable themes.
- Online Communities: Participating in GIMP-related forums, groups, or communities can be a great way to find unique and personalized themes. These communities often share user-created themes and allow for discussions and collaboration, providing a thriving ecosystem for discovering new themes.
- Theme Packs: Some websites or individuals bundle multiple GIMP themes together into a theme pack. These packs can include themes for different versions of GIMP and offer a convenient way to access a variety of styles and designs in one download.
- Theme Repositories: GIMP also has its own repository of themes, which can be accessed through the official GIMP website or within the software itself. These repositories often showcase curated themes that are compatible with the latest GIMP versions, making it easy to find and download themes directly.
- GitHub: GitHub is a platform where developers share their code and projects. Searching for “GIMP themes” on GitHub can lead you to various repositories containing themes created by developers and enthusiasts. This can give you access to unique and experimental themes not found elsewhere.
When searching for themes, consider factors such as compatibility with your GIMP version, user reviews, and the visual style that suits your preferences. Take the time to explore different sources and options to find themes that resonate with your desired look and feel.
To download a theme, simply click on the download button or link provided by the source. Make sure to save the theme file to a location on your computer where you can easily locate it for installation in GIMP.
With these resources and methods, you can easily find and download a wide range of themes to personalize the user interface of your GIMP software. In the following sections, we will provide step-by-step guidance on changing different aspects of GIMP’s UI using themes.
Step-by-Step Guide to Changing GIMP’s UI with Themes
Customizing GIMP’s user interface with themes is a straightforward process that allows you to transform the look and feel of the software. Here is a step-by-step guide to changing GIMP’s UI with themes:
- Start by ensuring that you have a theme installed in GIMP. If you haven’t installed a theme yet, refer to the previous section on how to install themes in GIMP.
- Launch GIMP and go to “Edit” in the menu bar. From the drop-down menu, select “Preferences”.
- In the Preferences dialog box, navigate to the “Themes” tab.
- Under the “User Interface Theme” section, you will see a dropdown menu with a list of installed themes.
- Select the theme you want to apply to GIMP’s UI from the dropdown menu. You can also click the “Preview” button to see a preview of how the selected theme will look.
- Click “OK” to apply the selected theme.
- Restart GIMP to ensure that the changes take effect.
Once you have completed these steps, the chosen theme will be applied to GIMP’s user interface. Elements such as the color scheme, toolbar icons, menu appearance, and overall visual style will be modified according to the theme’s design.
Remember that you can always switch to a different installed theme by following the same steps. Experiment with different themes to find the one that best suits your preferences and workflow.
Additionally, if you want to further customize specific elements of GIMP’s UI beyond the themes, you can explore other customization options available in the Preferences dialog box. These options include modifying the icon theme, font settings, and keyboard shortcuts to create a truly personalized editing experience.
Now that you know how to change GIMP’s UI with themes, let’s dive into specific aspects of the user interface that can be customized, such as the menu bar, tool icons, color scheme, and toolbar. In the following sections, we will guide you through the process of customizing these elements using themes in GIMP.
Customizing GIMP’s Menu Bar with Themes
GIMP allows you to customize its menu bar, which contains various menus and options for accessing different tools and functionalities. By applying themes, you can modify the appearance and layout of the menu bar to suit your preferences and streamline your editing experience. Here’s how you can customize GIMP’s menu bar with themes:
- Ensure that you have installed a theme in GIMP. If you haven’t installed a theme yet, refer to the earlier sections for instructions on how to install themes.
- Launch GIMP and go to “Edit” in the menu bar. From the drop-down menu, select “Preferences”.
- In the Preferences dialog box, navigate to the “Themes” tab.
- On the left-hand side of the dialog box, you will notice several customization options. Look for the “Menu Theme” section.
- Click on the dropdown menu under “Menu Theme”. A list of installed themes that are specifically designed for the menu bar will appear.
- Select the theme you want to apply to the menu bar from the dropdown menu. You can also click the “Preview” button to see how the selected theme affects the menu bar’s appearance.
- Click “OK” to apply the selected theme.
- Restart GIMP to allow the changes to take effect.
After completing these steps, the menu bar in GIMP will be customized according to the theme you have applied. You may notice changes in the fonts, colors, icons, and overall layout of the menus and submenus.
By customizing the menu bar with themes, you can create an interface that aligns with your visual preferences and enhances your efficiency. Consider choosing a theme that offers clear and easy-to-read menu options, simplifies navigation, and organizes the tools in a logical manner to optimize your workflow.
Remember that you can switch between different menu themes at any time by following these steps and selecting a different theme from the dropdown menu. Explore different themes to find the one that best suits your editing style and workflow preferences.
In the next section, we will discuss how you can customize the tool icons in GIMP using themes.
Changing the Tool Icons in GIMP using Themes
GIMP provides the flexibility to customize the tool icons, allowing you to personalize the appearance and style of the icons to enhance your editing experience. By using themes, you can easily change the default icons of GIMP’s tools to ones that better suit your preferences. Here’s how you can change the tool icons in GIMP using themes:
- Make sure you have installed a theme in GIMP. If you haven’t installed a theme yet, refer to the earlier sections for instructions on how to install themes.
- Launch GIMP and go to “Edit” in the menu bar. From the drop-down menu, select “Preferences”.
- In the Preferences dialog box, navigate to the “Themes” tab.
- Look for the “Icon Theme” section within the dialog box.
- In the dropdown menu under “Icon Theme”, you will find a list of installed icon themes available.
- Select the theme that includes the desired set of tool icons from the dropdown menu. You can click the “Preview” button to get a visual preview of how the icons will look.
- Click “OK” to apply the selected icon theme.
- Restart GIMP to ensure that the changes take effect.
After following these steps, the tool icons in GIMP will be changed according to the theme you have selected. You will see a new set of icons representing the various tools available in GIMP’s toolbox.
Customizing the tool icons can improve your workflow by making it easier to identify and use the tools you frequently utilize. Consider selecting an icon theme that not only aligns with your visual preferences but also provides clear and recognizable icons for each tool.
Remember that you can switch between different icon themes at any time by following the same steps and selecting a new icon theme from the dropdown menu. Experiment with different themes to find the one that best suits your aesthetic preferences and enhances your productivity.
In the next section, we’ll explore how you can modify the color scheme in GIMP’s UI with themes.
Modifying the Color Scheme in GIMP’s UI with Themes
GIMP allows you to modify the color scheme of its user interface, enabling you to create a visually appealing and personalized editing environment. By using themes, you can change the colors used throughout GIMP’s UI, including the toolbar, panels, menus, and other elements. Here’s how you can modify the color scheme in GIMP’s UI using themes:
- Ensure that you have installed a theme in GIMP. If you haven’t installed a theme yet, refer to the earlier sections for instructions on how to install themes.
- Launch GIMP and go to “Edit” in the menu bar. From the drop-down menu, select “Preferences”.
- In the Preferences dialog box, navigate to the “Themes” tab.
- Look for the “Color Theme” section within the dialog box.
- In the dropdown menu under “Color Theme”, you will find a list of installed color themes available.
- Select the theme that includes the desired color scheme for GIMP’s UI from the dropdown menu. You can click the “Preview” button to get a visual preview of how the colors will look.
- Click “OK” to apply the selected color theme.
- Restart GIMP to ensure that the changes take effect.
After following these steps, the color scheme in GIMP’s UI will be modified according to the theme you have selected. The various elements, such as panels, menus, and dialog boxes, will now reflect the new color scheme.
Customizing the color scheme can have both aesthetic and functional benefits. By selecting colors that are comfortable for your eyes and align with your preferences, you can create a more pleasing and personalized editing experience. Consider choosing colors that have good contrast and legibility to ensure that the interface remains easy to navigate.
Remember that you can switch between different color themes at any time by following the same steps and selecting a new color theme from the dropdown menu. Experiment with different themes to find the one that best suits your visual preferences and enhances your editing workflow.
In the next section, we’ll guide you through the process of adjusting the toolbar and panels in GIMP with themes to further customize the UI according to your needs.
Adjusting the Toolbar and Panels in GIMP with Themes
GIMP offers flexibility in adjusting the toolbar and panels, allowing you to customize their arrangement and appearance in the user interface. By using themes, you can modify the toolbar and panels to better suit your workflow and optimize your editing experience. Here’s how you can adjust the toolbar and panels in GIMP with themes:
- Make sure you have installed a theme in GIMP. If you haven’t installed a theme yet, refer to the earlier sections for instructions on how to install themes.
- Launch GIMP and go to “Edit” in the menu bar. From the drop-down menu, select “Preferences”.
- In the Preferences dialog box, navigate to the “Themes” tab.
- Look for the “Extra Theme Tweaks” section within the dialog box.
- Enable the “Use custom icon size for the toolbox” option if you want to adjust the size of the icons in the toolbar.
- Enable the “Use small buttons in the toolbox” option if you want to make the buttons in the toolbar smaller.
- Click the “Configure” button next to the “Panel Options” to open the Panel Options dialog box.
- In the Panel Options dialog box, you can adjust the width, height, and arrangement of the panels in GIMP’s interface. You can also choose to display or hide specific panels based on your preferences.
- Make the desired adjustments to the toolbar and panels in the Panel Options dialog box.
- Click “OK” to save the changes.
- Click “OK” in the Preferences dialog box to apply the changes.
- Restart GIMP to ensure that the changes take effect.
After following these steps, the toolbar and panels in GIMP will be adjusted according to the customizations you made. The toolbar icons can be resized, and the buttons in the toolbar can be made smaller. The arrangement and visibility of the panels can also be modified to better suit your workflow and editing preferences.
By adjusting the toolbar and panels, you can optimize the layout of your editing environment, making it more intuitive and efficient. Organize the panels in a way that aligns with your workflow and group related panels together for easy access.
Remember that you can further enhance the visual appearance of the toolbar and panels by using themes. Choose themes that not only modify the colors but also offer visual enhancements to the toolbar and panel elements.
In the next section, we will discuss some common issues you may encounter when customizing GIMP’s UI with themes and provide troubleshooting tips to resolve them.
Troubleshooting Common Issues when Customizing GIMP’s UI with Themes
While customizing GIMP’s UI with themes, you may encounter some common issues that can affect the appearance or functionality of the software. Here are some troubleshooting tips to help you resolve these issues:
1. Incompatibility: Ensure that the theme you are trying to install is compatible with your version of GIMP. Themes designed for older or newer versions may cause issues or not function properly. Verify the compatibility of the theme before installation.
2. Missing or Incorrectly Displayed Elements: If certain UI elements, such as icons or panels, are missing or not displayed correctly after applying a theme, try restarting GIMP to see if it resolves the issue. Additionally, check if the theme’s installation instructions specify any additional steps or requirements for proper functionality.
3. Conflicting Themes or Settings: Conflicting themes or settings can cause visual inconsistencies or conflicts in GIMP’s UI. Disable or uninstall any other themes or customizations that may conflict with the theme you are trying to apply. If the issue persists, try resetting GIMP’s preferences to the default settings and reapplying the desired theme.
4. Theme Compatibility with Operating System: Some themes may be specifically designed for certain operating systems or desktop environments, such as Windows, macOS, or Linux. Ensure that the theme you are using is compatible with your operating system to avoid any compatibility issues.
5. Corrupted or Malformed Theme Files: If the theme file you have downloaded is corrupted or malformed, it may cause issues when trying to apply the theme. Re-download the theme file from a reliable source and ensure that it is not corrupted during the download process.
6. Limited Theme Customization Options: Themes can vary in terms of customization options available. Some themes may only offer limited customization options, while others may provide more extensive options. If you are unable to achieve the desired changes with a particular theme, consider exploring other themes or customization methods to meet your needs.
If you encounter a persistent issue when customizing GIMP’s UI with themes that cannot be resolved through troubleshooting, consider seeking help from the GIMP community or the theme’s developer for further assistance.
Remember to backup your GIMP settings before making any changes to the UI or installing new themes to ensure you can revert to your previous configuration if needed.
By following these troubleshooting tips, you can overcome common issues and enjoy a customized and visually pleasing user interface in GIMP.