
What is the Select by Color Tool in GIMP?
The Select by Color tool is a powerful feature in GIMP, the popular open-source image editing software. It allows you to quickly and accurately select specific colors or color ranges within an image, making it easier to manipulate or edit them. Whether you want to change the color of a specific object, remove a background, or apply a specific effect to certain areas, the Select by Color tool can be a valuable asset in your editing process.
The tool functions by analyzing the color values of individual pixels in an image and selecting all pixels that closely match the color you choose. This makes it especially useful in situations where you want to create a selection based on color similarity rather than precise shapes or boundaries. It saves you time and effort compared to manually selecting each element in your image, especially in cases where objects have complex or irregular shapes.
Another advantage of the Select by Color tool is its flexibility. You can adjust the color selection by modifying the tool’s options, such as the threshold, feathering, and selection mode. This allows you to fine-tune the selection to include or exclude specific shades of the chosen color, smooth the edges for a more natural transition, or even combine multiple color selections to create complex selections.
The Select by Color tool also supports a variety of selection modes, including adding to the existing selection, subtracting from it, or creating a new selection altogether. This makes it versatile for a wide range of editing scenarios.
GIMP’s Select by Color tool offers advanced functionality while remaining user-friendly and accessible, making it a valuable tool for both beginners and experienced users. With its precision and flexibility, it provides an efficient way to isolate and manipulate specific color areas within your images.
How to Access the Select by Color Tool in GIMP
Using the Select by Color tool in GIMP is simple and straightforward. Here’s a step-by-step guide on how to access this powerful feature:
- Step 1: Open your image in GIMP. To do this, launch GIMP and go to File > Open to browse and select the desired image file from your computer.
- Step 2: Select the Select by Color tool. You can find it in the toolbox on the left-hand side of the GIMP interface. It is represented by an icon of a dropper with a color swatch.
- Step 3: Adjust the tool options. On the tool options panel, usually located below the toolbox, you can customize the settings of the Select by Color tool. These options include the Threshold, Feather, and Selection Mode.
- Step 4: Click on a color in the image. Move your cursor over the image, and when you see the dropper, click on the color you want to select. GIMP will automatically select all pixels in the image that have a similar color value to the one you clicked.
- Step 5: Fine-tune the selection with the Threshold and Feather options. If necessary, adjust the Threshold slider to increase or decrease the range of colors that are included in the selection. Additionally, you can use the Feather slider to smooth out the edges of the selection for a more natural effect.
- Step 6: Add or subtract from the selection. To add more areas to the selection, hold down the Shift key and click on additional colors in the image. Conversely, to subtract from the selection, hold down the Ctrl key (Command key on Mac) and click on the colors you want to remove from the selection.
- Step 7: Refine the selection manually. GIMP’s Select by Color tool might not always capture the exact areas you want to select. In such cases, you can use other selection tools, like the Rectangle Select tool or the Free Select tool, to manually adjust the selection by adding or subtracting areas.
- Step 8: Apply your selection in various ways. Once you have made your desired selection, you can apply various edits or effects to the selected area, such as adjusting the colors, applying filters, or deleting the selected portion.
- Step 9: Save and export your edited image. After you have finished editing your image, remember to save your work. Go to File > Save or File > Export As to save your image in your desired format and location on your computer.
Now that you know how to access and use the Select by Color tool in GIMP, you can efficiently select and manipulate specific colors or color ranges within your images, allowing you to unleash your creativity and achieve stunning edits.
Understanding the Select by Color Tool Options
The Select by Color tool in GIMP provides several options that allow you to customize and refine your color selections. Let’s take a closer look at the different options available:
- Threshold: The Threshold option determines the range of colors that will be included in the selection. A higher threshold value will result in a broader selection, including more shades of the chosen color, while a lower value will limit the selection to only the closest matching colors. Adjusting this option allows you to fine-tune the sensitivity of the Select by Color tool based on your specific needs.
- Feather: The Feather option softens the edges of the selection, creating a smoother transition between the selected and non-selected areas. Increasing the Feather value will produce a more gradual blending effect, while decreasing it will create a sharper edge. This option is particularly useful for achieving natural-looking selections and ensuring seamless integration of edited elements into the image.
- Selection Mode: The Selection Mode option determines how the selection interacts with existing selections. There are three modes available:
- Replace: This mode replaces any existing selection with the new selection made with the Select by Color tool.
- Add: Selecting this mode allows you to add to an existing selection. By holding down the Shift key and selecting additional colors, you can expand the selection to cover multiple areas.
- Subtract: In this mode, selecting a color will subtract the corresponding area from the existing selection. By holding down the Ctrl key (Command key on Mac) and clicking on colors, you can remove unwanted areas from the selection.
Understanding and utilizing these options effectively can greatly enhance your ability to select and manipulate colors in GIMP. Experimenting with different threshold values, feathering settings, and selection modes will help you achieve precise and desired outcomes in your image editing process.
The Select by Color tool in GIMP offers a remarkable level of control and flexibility, allowing you to select colors with precision and make targeted edits to your images. With these options at your disposal, you can unlock countless creative possibilities and unleash your imagination in the world of digital image editing.
Step 1: Open Your Image in GIMP
Before you can begin using the Select by Color tool in GIMP, you’ll need to open the image you want to work on. Follow these steps to open your image in GIMP:
- Launch GIMP: Start by opening the GIMP software on your computer. You can typically find it in your applications menu or by searching for “GIMP” in your system’s search bar.
- Go to File: Once GIMP is open, navigate to the top-left corner of the interface and click on the “File” option in the menu bar.
- Select Open: A drop-down menu will appear when you click on “File.” Locate and click on the “Open” option from the menu. You can also press the “Ctrl” key and “O” key simultaneously as a shortcut.
- Browse for your image: A file explorer window will open, allowing you to browse your computer’s files and folders. Use this window to locate the image you want to work on. Click on the image file to select it.
- Click Open: After selecting your image, click the “Open” button in the file explorer window. GIMP will then load the image, and it will appear in a new tab within the GIMP interface.
By following these steps, you’ll successfully open your desired image in GIMP, preparing it for editing with the Select by Color tool and other features offered by this powerful software.
Ensure that your image file format is compatible with GIMP (such as JPEG, PNG, or TIFF) to avoid any issues or errors when opening the file. Additionally, make sure you have the necessary permissions to access the file, especially if it is located in a restricted directory.
GIMP’s ability to easily open and work with various image file formats makes it a versatile tool for any image editing project. Once your image is open, you can proceed to the next step in using the Select by Color tool to make accurate and targeted color selections.
Step 2: Select the Select by Color Tool
Once you have opened your image in GIMP, the next step is to select the Select by Color tool from the toolbox. Follow these instructions to choose the tool:
- Locate the Toolbox: The Toolbox is typically located on the left-hand side of the GIMP interface. It contains a range of tools and options for image editing.
- Identify the Select by Color Tool: Look for the icon in the Toolbox that resembles a dropper with a color swatch. This is the Select by Color tool.
- Select the Tool: Once you have found the Select by Color tool, click on it with your mouse to select it. The active tool will be highlighted or have a different appearance to indicate that it is selected.
By following these steps, you will have successfully chosen the Select by Color tool in GIMP and are now ready to start selecting colors within your image.
Alternatively, you can activate the Select by Color tool using a keyboard shortcut. In GIMP, the default keyboard shortcut for the Select by Color tool is the letter “O”. To activate the tool using the shortcut, simply press the “O” key on your keyboard. This can be a quicker method if you are familiar with the GIMP keyboard shortcuts.
The Select by Color tool is a valuable tool in GIMP that allows you to select specific colors or color ranges within your image. It provides a quick and efficient way to isolate and manipulate elements based on their color properties. With the Select by Color tool selected, you can proceed to the next step of adjusting the tool’s options to further refine your color selections.
Step 3: Adjust the Tool Options
After selecting the Select by Color tool in GIMP, the next step is to adjust the tool’s options according to your specific needs. These options allow you to customize the behavior and precision of the tool. Follow these instructions to modify the tool options:
- Locate the Tool Options: The Tool Options panel is usually located below the Toolbox in the GIMP interface. It displays various settings and parameters for the currently selected tool.
- Understand the Tool Options: The Select by Color tool options include the following:
- Threshold: This option controls the sensitivity of the tool. Higher threshold values will include more colors in the selection, while lower values will limit the selection to colors that closely match the chosen color. Adjusting the threshold can help refine your selection based on color similarity.
- Feather: The feather option softens the edges of the selection, creating a smoother transition between the selected and non-selected areas. Increasing the feather value will result in a more gradual blending effect, while decreasing it will produce sharper edges.
- Selection Mode: This option determines how the tool interacts with existing selections. The available modes include replace, add, and subtract. The replace mode replaces any existing selection with the new one made with the Select by Color tool. In add mode, you can expand the selection by clicking on additional colors while holding down the Shift key. The subtract mode allows you to remove areas from the selection by clicking on colors while holding down the Ctrl key (Command key on Mac).
- Adjust the Options: Modify the values of the threshold and feather sliders according to your requirements. You can experiment with different values to achieve the desired level of color selection and edge smoothness. Also, select the appropriate selection mode based on how you want the tool to interact with the existing selection.
By adjusting the tool options, you can refine the behavior of the Select by Color tool to suit your specific image editing needs. Customizing the threshold, feather, and selection mode allows you to achieve more precise and accurate color selections within your image.
It is important to note that the optimal values for the tool options may vary depending on the specific image and project requirements. Don’t hesitate to experiment with different settings to find the combination that produces the best results for your editing task.
Once you have adjusted the tool options, you are now ready to move on to the next step and begin selecting colors within your image using the Select by Color tool.
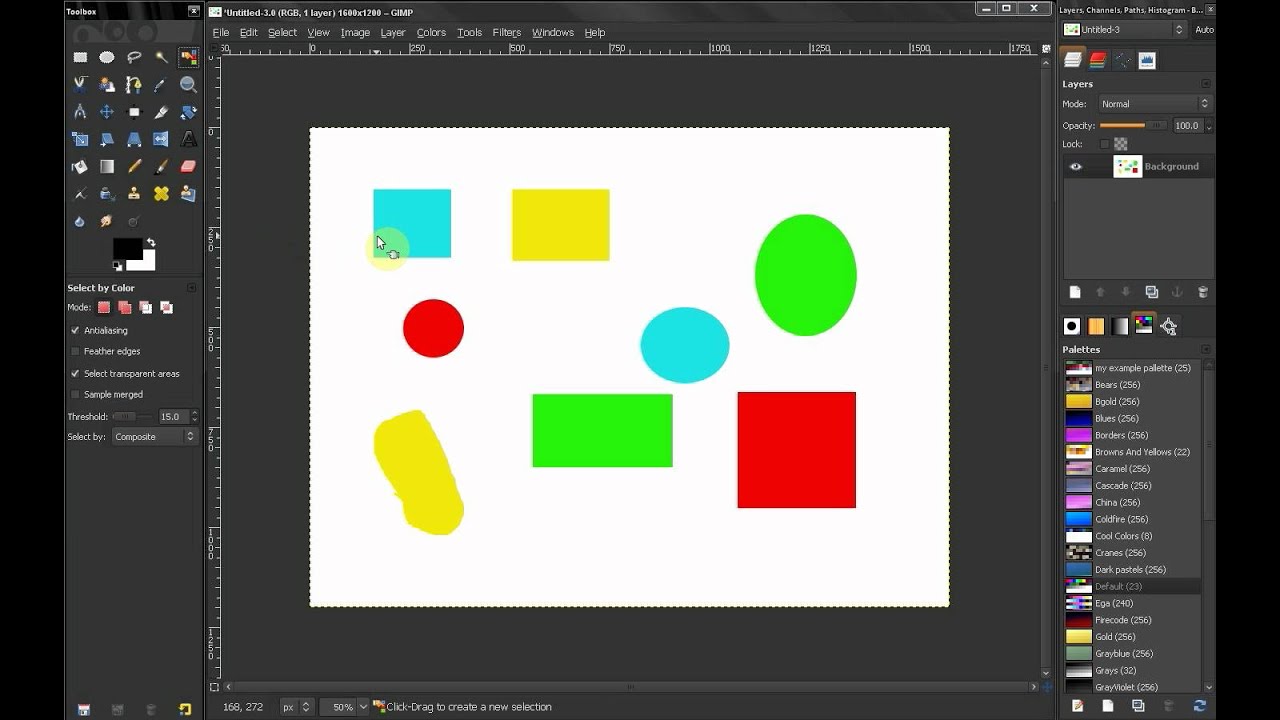
Step 4: Click on a Color in the Image
With the Select by Color tool options adjusted, you can now start selecting colors within your image. This step involves clicking on a specific color in the image to initiate the selection process. Follow these instructions to make your color selection:
- Position Your Cursor: Move your cursor over the image in the GIMP interface. As you hover the cursor, you will notice it changes to a dropper icon, indicating that you are in the color selection mode.
- Identify the Color: Locate the color in the image that you want to select. This can be any pixel or area that you want to include in your selection.
- Click on the Color: Once you have positioned your cursor over the desired color, click on it with your mouse. GIMP will instantly select all pixels with a similar color value to the one you clicked.
By clicking on a specific color in the image, you activate the Select by Color tool and initiate the color selection process. GIMP analyzes the color values of the pixels and creates a selection based on their similarity to the clicked color.
The Select by Color tool allows you to make precise selections based on color similarity, which can be particularly useful when you want to isolate specific elements or areas in an image based on their color properties.
If you wish to select multiple colors within the image, simply repeat the process by moving your cursor to the desired color and clicking on it. GIMP will add the new selection to the existing one based on your selection mode (replace, add, or subtract).
Continue to the next step to further refine your color selection using the threshold and feather options available with the Select by Color tool.
Step 5: Fine-tune the Selection with Threshold and Feather Options
Once you have made a color selection using the Select by Color tool in GIMP, the next step is to fine-tune the selection using the threshold and feather options. These options allow you to adjust the range of colors included in the selection and smooth the edges for a more refined look. Follow these instructions to further refine your selection:
- Adjust the Threshold: The threshold option controls the sensitivity of the Select by Color tool. By increasing the threshold value, GIMP will include a broader range of colors in the selection. Decreasing the threshold value will limit the selection to colors that closely match the initially selected color. Use the threshold slider in the tool options to experiment and find the ideal threshold value for your selection.
- Refine the Feather: The feather option allows you to soften the edges of the selection, creating a more natural transition between the selected and non-selected areas. Increasing the feather value will result in a smoother blending effect, while decreasing it will create sharper edges. Use the feather slider in the tool options to adjust the feathering effect according to your preference.
By adjusting the threshold and feather options, you can achieve greater control over the range of colors included in your selection and the smoothness of the selection’s edges. This level of fine-tuning ensures that your selections accurately represent your intended target area within the image.
Experiment with different threshold and feather values to find the best settings for your specific image and editing requirements. It is important to strike a balance between including enough colors in the selection and maintaining a clean and precise result.
Remember, the threshold and feather options are not set in stone, and you can always go back and readjust them even after making a selection. This flexibility allows you to iterate and refine your selection as you progress with your image editing process.
With the threshold and feather options fine-tuned, you have successfully refined your color selection using the Select by Color tool in GIMP. Continue to the next step to learn how to add or subtract from the selection as needed.
Step 6: Add or Subtract from the Selection
After making an initial color selection using the Select by Color tool in GIMP, you may find the need to fine-tune the selection further by adding or subtracting areas. This step allows you to expand or remove specific colors from the selection as needed. Follow these instructions to add or subtract from the selection:
- Add to the Selection: To add more areas to the existing selection, hold down the Shift key on your keyboard. As you move your cursor over the image, you will notice it changes to a plus (+) sign. Click on the additional colors that you want to include in the selection, and GIMP will expand the selection accordingly.
- Subtract from the Selection: Conversely, to subtract areas from the selection, hold down the Ctrl key (Command key on Mac) on your keyboard. As you move your cursor over the image, you will see it change to a minus (-) sign. Click on the colors that you want to remove from the selection, and GIMP will adjust the selection accordingly by excluding those areas.
By using the add and subtract methods, you can precisely control the areas included in or excluded from the selection. This level of flexibility allows you to refine your selection with accuracy, ensuring that only the colors you desire are selected.
It’s important to note that you can switch between adding to and subtracting from the selection as needed. Simply release the Shift or Ctrl key, and then press it again to switch to the desired mode. This allows you to fine-tune your selection by combining both methods to achieve the desired outcome.
Make sure to pay attention to the selection mode specified in the tool options panel. The default selection mode is usually set to add, but you can change it to replace or subtract based on your specific requirements. Adjusting the selection mode allows you to control how the tool interacts with the existing selection and ensures accurate results.
With the ability to add or subtract from the selection, you have the flexibility to perfect your color selection using the Select by Color tool in GIMP. Proceed to the next step to learn how to manually refine the selection for greater precision.
Step 7: Refine the Selection Manually
While the Select by Color tool in GIMP is an effective way to make accurate color selections, there may be instances where you want to further fine-tune the selection manually. Manual refinement allows you to adjust the selection by adding or subtracting specific areas in order to achieve greater precision. Follow these instructions to refine the selection manually:
- Select Additional Tools: In addition to the Select by Color tool, familiarize yourself with other selection tools available in GIMP, such as the Rectangle Select tool or the Free Select tool. These tools allow you to manually add or subtract areas from the selection.
- Activate the Desired Tool: Choose the appropriate selection tool based on your requirements. For example, if you want to add specific areas to the selection, select the Rectangle Select tool or the Free Select tool.
- Make Manual Adjustments: Using the selected tool, draw a selection outline around the areas you want to include or exclude from the existing selection. To add areas, ensure the selection tool is set to “Add to the selection.” Conversely, set the tool to “Subtract from the selection” to remove areas.
- Refine and Adjust: After making the manual adjustments, review and assess the selection. If necessary, make further adjustments by repeating the process or using different selection tools to achieve the desired outcome.
Manual refinement allows you to have more control over the selection process, especially in complex or intricate images with intricate color patterns and shapes. By combining the Select by Color tool with other selection tools, you can precisely define your target area and ensure the selection accurately represents the desired elements.
Remember to use the available selection modes, such as adding or subtracting, to seamlessly incorporate your manual adjustments with the existing selection made by the Select by Color tool. Utilizing a combination of automated and manual selection techniques will help you achieve the best possible outcome for your image editing project.
With the ability to refine the selection manually, you can fine-tune and optimize the selection process, ensuring accuracy and precision. Proceed to the next step to explore different ways to apply your selection in various editing tasks.
Step 8: Apply Your Selection in Various Ways
Once you have made an accurate color selection using the Select by Color tool in GIMP, you can proceed to apply the selection in various ways to accomplish your desired editing tasks. Here are some methods to consider:
- Color Adjustment: With your selection active, you can make color adjustments to the selected area. For example, you can modify the hue, saturation, brightness, or contrast to alter the appearance of the selected colors.
- Fill or Paint: Fill or paint the selected area with a different color or pattern. This can be achieved using GIMP’s Bucket Fill tool or the Paintbrush tool with the desired settings.
- Filters and Effects: Apply filters or effects to the selected area to add creative enhancements. GIMP offers a wide range of filters and effects, such as blur, sharpen, distort, or artistic effects, to transform the selected colors.
- Isolate and Edit: Use the selection to isolate specific elements for further editing. You can copy or cut the selection, create new layers, and work on them separately to fine-tune the appearance of the selected colors or objects. This allows for more precise control over individual elements within your image.
- Background Removal: If you have selected a specific color range to remove a background, apply techniques such as layer masks or the Eraser tool to delete the selected colors or blend them seamlessly with a new background.
The options for applying your selection are virtually limitless, depending on your creativity and the specific demands of your image editing project. Remember to explore the various tools and features available in GIMP to achieve the desired results.
Furthermore, it is essential to experiment and preview the changes you make to the selected area to ensure the desired effect. Undo and redo options, as well as working with layers, are invaluable for non-destructive editing, allowing you to make adjustments as needed without permanently altering the original image.
By applying your selection using the techniques mentioned above, you can harness the power of the Select by Color tool in GIMP to make targeted edits and achieve professional-looking results.
Step 9: Save and Export Your Edited Image
Once you have completed your editing tasks with the Select by Color tool in GIMP, it’s time to save and export your edited image. Follow these steps to finalize your work:
- Ensure your editing is complete: Before saving, review your edits and make sure you are satisfied with the changes you have made to the selected areas.
- Go to File: Click on the “File” option in the menu bar at the top of the GIMP interface.
- Select Save or Export As: In the drop-down menu, choose either “Save” or “Export As” to save your edited image, depending on your preference.
- Choose a file name and location: Provide a descriptive file name for your edited image and choose the location where you want to save it on your computer.
- Select the file format: Choose the appropriate file format for your edited image. GIMP supports a variety of file formats including JPEG, PNG, TIFF, and more. Select the file format that best suits your needs based on factors such as image quality and file size.
- Configure any additional settings: Depending on the chosen file format, you may have the option to configure additional settings, such as image quality or compression level. Adjust these settings according to your preferences.
- Click Save or Export: Once you have made your selections and adjustments, click the Save or Export button to save your edited image.
By following these steps, you will save and export your edited image, preserving the changes you made using the Select by Color tool in GIMP.
Remember to choose an appropriate file format that maintains the desired quality and compatibility for your intended use, whether it’s for web publishing, printing, or further editing in another software.
Additionally, it’s good practice to create a backup copy of your original image before making any edits. This ensures that you always have the original image in its unmodified state, should you need to revisit it or make different edits in the future.
Congratulations! You have successfully completed the final step of saving and exporting your edited image. Your newly edited image is now ready to be shared, printed, or used in any way that fulfills your creative vision.