
What is a Gradient?
A gradient is a gradual transition between two or more colors, creating a smooth blend from one shade to another. It is a popular design element used in various visual mediums, including graphic design, web design, and digital art. Gradients can add depth, dimension, and visual interest to an image or artwork.
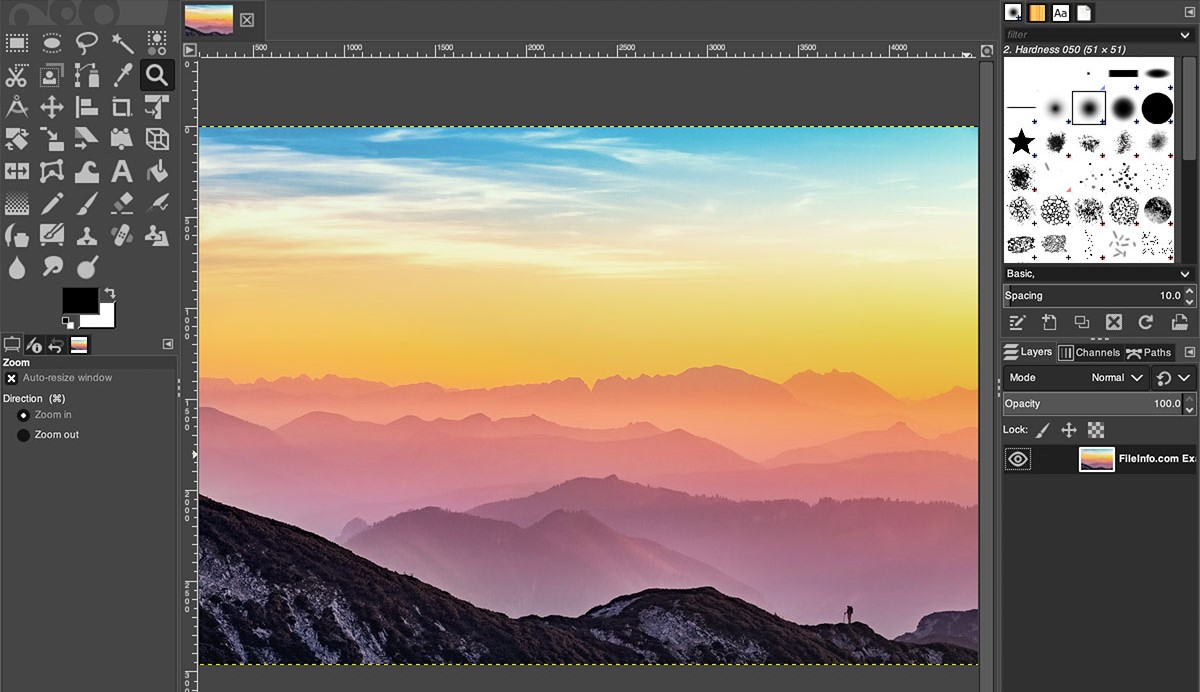
Imagine a sunset, where the sky changes colors from vibrant orange to deep purple. That’s an example of a gradient. The transition from one color to another is seamless and creates a visually pleasing effect. Gradients can be created with any combination of colors, allowing for endless possibilities in design.
In design software like GIMP, gradients can be customized and applied to images or elements to enhance their appearance. They can be linear, radial, or even shaped in any desired form. Whether you’re looking to add a subtle shading effect or a bold burst of color, gradients offer a versatile tool to elevate your designs.
Gradients can evoke various emotions and moods, depending on the color scheme and the way they are applied. A warm gradient with yellows and reds can create a cozy and inviting atmosphere, while a cool gradient with blues and purples can evoke a sense of calmness and serenity. Gradients also allow for the creation of unique and eye-catching visual compositions.
As an SEO writer, it’s important to understand the concept of gradients and their significance in design. Gradients are not just a visual element but also a way to enhance user experience, create brand recognition, and communicate messages effectively. By mastering the creation of custom gradients, you can unlock a powerful tool for captivating your audience and creating visually stunning designs.
How to Create a Custom Gradient in GIMP
GIMP, a popular free and open-source image editing software, offers several methods to create custom gradients. Whether you’re a beginner or an advanced user, these techniques can help you achieve the desired effects for your designs. Here are three methods to create custom gradients in GIMP:
Method 1: Using the Gradient Editor
The Gradient Editor in GIMP allows you to create and modify gradients with precision. To access it, go to the “Tools” menu, select “Paint Tools,” and choose the “Gradient” option. A dialog box will open, displaying the Gradient Editor.
Within the Gradient Editor, you can add, remove, and adjust color stops. Color stops define the colors and positions within the gradient. By dragging the stops, you can control the color transitions and create unique gradient effects. Additionally, you can choose various gradient types, such as linear, radial, or conical, to customize the gradient’s shape.
Method 2: Using the Blend Tool
The Blend Tool in GIMP provides a quick and easy way to create gradients. Select the Blend Tool from the toolbox, and in the tool options, choose the “Gradient” option. Click and drag on the canvas to create a gradient. The starting and ending points of the drag determine the gradient’s direction and length.
For more control, you can edit the gradient by right-clicking on the canvas and selecting “Edit Gradient.” This opens the Gradient Editor, where you can make adjustments to the colors, positions, and overall look of the gradient.
Method 3: Using a Gradient Map
A Gradient Map is another method to create custom gradients in GIMP. It applies a gradient to an image based on the tonal values of the image’s colors. To use this method, go to the “Colors” menu, select “Map,” and choose “Gradient Map.”
In the Gradient Map dialog box, you can select an existing gradient or create a new one. The gradient will be applied to the image, mapping the colors according to their brightness levels. This technique is particularly useful for adding dramatic or artistic effects to your images.
Once you’ve created your custom gradient, you can save it for future use by clicking the “Save” button within the Gradient Editor or selecting “Save…” from the gradient selector drop-down menu. This allows you to easily access and apply your custom gradients to any project.
Experiment with different techniques and combinations of colors to create gradients that enhance your designs. Don’t be afraid to explore and push the boundaries of creativity. Custom gradients can elevate your artwork or images, making them more visually appealing and engaging.
Method 1: Using the Gradient Editor
The Gradient Editor in GIMP is a powerful tool that allows you to create and customize gradients with precision. By using this method, you can achieve precise control over the appearance of your gradient.
To access the Gradient Editor, go to the “Tools” menu in GIMP, select “Paint Tools,” and then choose the “Gradient” option. This will open a dialog box displaying the Gradient Editor interface.
Within the Gradient Editor, you have the option to add, remove, and adjust color stops. Color stops are points along the gradient that define the colors and positions. By dragging the stops, you can control the transition from one color to another and create stunning gradient effects.
With each color stop, you can modify the color, transparency, and position. To change the color, click on the color preview next to the stop and select the desired color from the color picker. You can also adjust the opacity by moving the opacity slider or manually entering a value.
To add a new color stop, simply click anywhere along the gradient line. This will create a new stop at that position. You can then customize the color and position as needed. Similarly, to remove a color stop, select it and click the “Delete Stop” button.
The Gradient Editor also allows you to choose various gradient types to customize the shape of your gradient. The default gradient type is linear, where the colors transition in a straight line. However, you can select other options like radial, where the colors radiate from a central point, or conical, where the colors form a circular pattern.
Once you have created and customized your gradient, you can save it for future use. Click the “Save” button in the Gradient Editor window and give your gradient a name. This will save it in the gradients folder, allowing you to access and apply it to any project in the future.
With the Gradient Editor in GIMP, you have full control over the creation and customization of gradients. Take the time to experiment with different color combinations, positions, and types to achieve the perfect gradient for your design. Whether you’re creating a subtle shading effect or a bold and vibrant gradient, this method provides the flexibility and precision you need to achieve your desired results.
Method 2: Using the Blend Tool
The Blend Tool in GIMP offers a quick and straightforward method to create gradients. With this tool, you can easily apply gradients to your images or elements with just a few simple steps.
To access the Blend Tool, select it from the toolbox in GIMP. In the tool options, choose the “Gradient” option. This ensures that the tool creates a gradient effect as you use it.
With the Blend Tool selected, simply click and drag on the canvas to create a gradient. The starting point and ending point of your drag determine the direction and length of the gradient. This allows you to have full control over the placement and orientation of the gradient.
By default, the Blend Tool uses the currently selected gradient in the gradient editor. However, you can also change the gradient on the fly by right-clicking on the canvas while using the Blend Tool. This opens a context menu where you can select a different gradient or even edit the gradient using the Gradient Editor.
If you want to achieve more precise control over the gradient, you can adjust the opacity or hardness of the Blend Tool in the tool options. Lowering the opacity will create a more transparent blend, while increasing the hardness will create a sharper transition between colors.
In addition to dragging to create a linear gradient, you can also experiment with other techniques. For example, you can create a radial gradient by clicking and dragging from the center outward or even create custom shapes by using the paths or selection tools as a guide.
Furthermore, the Blend Tool provides the option to use a blending mode for the gradient. Blending modes determine how the colors of the gradient interact with the underlying layers. By selecting different blending modes, you can achieve various blending effects, such as overlay, multiply, screen, and more.
Once you have created your desired gradient, you can easily make adjustments. Right-click on the canvas while using the Blend Tool and select “Edit Gradient.” This opens the Gradient Editor, where you can further refine the colors and positions within the gradient to achieve the perfect result.
By utilizing the Blend Tool in GIMP, you can quickly apply gradients to your images or elements. This method is ideal for those who want a fast and intuitive way to create beautiful gradients without the need for extensive customization. Experiment with different colors, blending modes, and techniques to add depth and visual interest to your designs.
Method 3: Using a Gradient Map
The Gradient Map tool in GIMP is a powerful feature that allows you to apply a custom gradient to an image based on its tonal values. This method is particularly useful when you want to create artistic and dramatic effects by mapping colors to different brightness levels.
To use the Gradient Map tool, go to the “Colors” menu in GIMP, select “Map,” and choose “Gradient Map.” This will open the Gradient Map dialog box.
Within the Gradient Map dialog box, you can select an existing gradient or create a new one by clicking on the gradient preview. The gradient serves as the map that will assign colors to corresponding tonal values in the image.
Once you have selected a gradient, click the “OK” button to apply it to your image. The colors in the image will now be mapped according to their brightness levels, creating a unique and visually striking effect.
By default, the Gradient Map applies the gradient in a linear fashion, from dark to light. However, you can customize this by changing the gradient type to radial, conical, or other options available in the Gradient Map dialog box. Each type will produce a different mapping of colors, allowing you to experiment and find the desired result.
If you want to fine-tune the effect further, you can adjust the opacity of the Gradient Map layer. Lowering the opacity will make the effect more subtle, while increasing the opacity will make it more pronounced.
In addition to the standard grayscale to color mapping, you can also create custom gradient maps with multiple color stops. This opens up even greater possibilities for creative expression and allows you to achieve more intricate and complex effects.
The Gradient Map tool can be used to transform ordinary images into captivating pieces of art. It provides a unique way to interpret and reinterpret colors based on their tonal values, resulting in visually stunning compositions.
Experiment with different gradients, try mapping colors in unconventional ways, and push the boundaries of your creativity. The Gradient Map tool in GIMP offers a wealth of possibilities for creating unique and artistic effects that will truly make your images stand out.
Tips for Creating a Great Custom Gradient
Creating a custom gradient can be a fun and creative process. Whether you’re designing a logo, editing a photo, or working on a digital illustration, here are some tips to help you create a great custom gradient in GIMP:
1. Consider the Color Scheme: Think about the mood and message you want to convey with your gradient. Choose colors that complement each other and evoke the desired emotions. Consider color theory principles, such as harmonious or contrasting color combinations, to create visually pleasing gradients.
2. Start with a Base Color: Begin by selecting a primary color that will serve as the foundation for your gradient. This base color will often set the tone for the rest of the gradient. Experiment with different shades and variations of the base color to create depth and dimension.
3. Utilize Color Stops: Color stops help control the transition and distribution of colors in your gradient. Add and adjust color stops to achieve the desired gradient effect. Move them closer together for a smooth and subtle transition, or space them out for a more pronounced color variation.
4. Experiment with Opacity: Adjusting the opacity of the color stops can add transparency to your gradient, allowing the underlying elements or image to show through. Play with different opacity levels to create unique blending effects and enhance the overall visual impact.
5. Try Gradient Types: Explore different gradient types available in GIMP, such as linear, radial, or conical. Each type offers a distinct visual effect. Linear gradients are great for horizontal or vertical transitions, while radial gradients create a circular or radial placement of colors. Experiment with different types to find the one that best suits your design.
6. Use Custom Gradients: While GIMP offers a range of default gradients, don’t be afraid to create your own custom gradients. This allows you to have complete control over the colors, transitions, and overall aesthetic of the gradient. Build your own library of unique gradients that can be used across various projects.
7. Consider the Background: Think about the background or surrounding elements when creating your gradient. The colors and tones of the gradient should harmonize with the overall composition. Test your gradient against different backgrounds to ensure it complements and enhances the visual impact of the design.
8. Review and Refine: After creating your gradient, step back and evaluate the overall effect. Make necessary adjustments, such as fine-tuning color stops, adjusting opacity, or experimenting with different blending modes. Don’t be afraid to iterate and refine your gradient until you achieve the desired outcome.
By following these tips, you can create custom gradients that add depth, visual interest, and a touch of creativity to your designs. Whether you’re going for a subtle and smooth transition or a bold and vibrant effect, custom gradients allow you to truly customize and elevate your artwork or images.
Applying the Custom Gradient to Your Image
Once you have created a custom gradient in GIMP, it’s time to apply it to your image or artwork. Here are the steps to follow in order to apply your custom gradient:
1. Select the Image: Open the image you want to apply the gradient to in GIMP by going to File > Open and selecting the image file from your computer.
2. Create a New Layer: To apply the gradient non-destructively, it is recommended to create a new layer. You can do this by going to Layer > New Layer or by using the keyboard shortcut Shift+Ctrl+N (Shift+Cmd+N on a Mac). This will open the New Layer dialog box.
3. Name the New Layer: In the New Layer dialog box, give your layer a name, and select the layer fill type as “Transparent”. Click “OK” to create the new layer.
4. Apply the Gradient: Make sure the new layer is selected in the Layers panel. Then, choose the Gradient Tool from the toolbox or by using the keyboard shortcut Shift+L. In the tool options, select your custom gradient from the gradient picker.
5. Adjust the Gradient Tool Options: In the tool options, you can modify the gradient tool settings as needed. For example, you can adjust the blend mode to change how the gradient interacts with the underlying layers, or you can change the opacity to make the gradient more or less transparent.
6. Apply the Gradient: With the Gradient Tool and desired settings ready, click and drag on the canvas to apply the gradient. The starting and ending points of the drag will determine the direction and length of the gradient. Experiment with different directions and lengths to achieve the desired effect.
7. Refine the Gradient: After applying the gradient, you may want to further refine it. Use the Undo History panel or the Edit > Undo option to revert any undesired changes. You can then make adjustments to the gradient by repeating the previous steps or by editing the gradient itself in the Gradient Editor.
8. Save the Image: Once you are satisfied with the gradient application, save your modified image by going to File > Export or File > Save As. Choose the desired format and location to save your image.
Applying a custom gradient to your image can enhance its visual appeal, add depth and interest, and transform it into a unique piece of artwork. With GIMP’s versatile tools and customizable options, you have the flexibility to experiment and create gradients that perfectly complement your image or design.
Final Thoughts and Inspiration
Custom gradients in GIMP provide a versatile and creative tool for enhancing your designs. By using the various methods and techniques discussed, you can achieve beautiful and unique gradient effects that bring depth and visual interest to your artwork, photos, or digital creations.
As you explore the world of custom gradients, keep in mind that experimentation is key. Don’t be afraid to try different combinations of colors, adjust opacity and blending modes, and explore various gradient types. With each exploration, you open up new possibilities for creative expression.
Looking for inspiration? Let your imagination soar as you draw inspiration from the world around you. Take a walk in nature, observe the beauty of sunsets, or study the color palettes and gradients in artwork or photography. Inspiration can strike from unexpected sources, so always keep your eyes open and be ready to capture ideas when they come.
Additionally, don’t forget to save and organize your custom gradients. Building a library of unique gradients allows you to easily access and apply them to future projects. You can also share your gradients with others or find inspiration in existing gradient libraries within the GIMP community.
Lastly, never underestimate the impact of a carefully crafted gradient. It has the power to transform the ordinary into the extraordinary, to add depth and dimension to your designs, and to captivate the viewer’s attention. So, embrace the world of custom gradients and let your creativity shine.
Remember, through practice and exploration, you will continue to refine your skills and develop your own unique style. So, let your creativity flow, and enjoy the process of creating stunning custom gradients that bring life to your designs in GIMP.