
What is a Text Watermark?
A text watermark is a translucent overlay of text that is applied to an image to protect its copyright, add branding, or provide information about the image. It can be a name, logo, copyright symbol, or any other text that you want to include on your image. Text watermarks are commonly used by photographers, designers, and artists to ensure that their work is not used without permission and to maintain their professional identity.
With the advancement of technology, it has become even easier to copy and distribute digital images without proper attribution. By adding a text watermark to your images, you can create a visual signature that is difficult to remove, providing you with a layer of protection against unauthorized use.
In addition to protecting your work, text watermarks also help in establishing brand recognition and promoting your online presence. By consistently applying a text watermark to your images shared on social media platforms or websites, you can increase visibility, create a distinctive visual identity, and attract potential clients or followers.
Text watermarks can take various forms, including simple text, stylized fonts, or customized logos. You can choose the location, size, opacity, and color of the watermark to ensure it does not overshadow the main image while still being clearly visible.
While there are multiple software programs and online tools available to apply text watermarks, one popular and user-friendly option is GIMP.
Installing GIMP
GIMP (GNU Image Manipulation Program) is a free and open-source image editing software that provides a wide range of features and functionalities, including the ability to apply text watermarks to photos. Before you can start using GIMP, you need to install it on your computer. Follow the steps below to install GIMP:
- Visit the official GIMP website at www.gimp.org.
- Navigate to the Downloads section of the website.
- Choose the appropriate version of GIMP based on your operating system (Windows, macOS, or Linux) and click on the download link.
- Once the download is complete, locate the installation file and double-click on it to launch the installer.
- Follow the on-screen instructions to proceed with the installation.
- Select the desired options during the installation process, such as the destination folder and additional plugins.
- Click on the “Install” or “Finish” button to complete the installation.
After the installation process is complete, you can launch GIMP by locating the application icon on your desktop or in the start menu. GIMP has a user-friendly interface that provides easy access to its various tools and features.
It’s important to keep GIMP updated to ensure that you have the latest features and bug fixes. You can check for updates within the program or visit the official GIMP website to download the latest version.
Now that you have GIMP installed on your computer, you’re ready to open an image and begin applying a text watermark.
Opening an Image in GIMP
Once you have GIMP installed on your computer, you can easily open an image to start applying a text watermark. Here’s how:
- Launch GIMP by locating the application icon on your desktop or in the start menu.
- Go to the “File” menu and select “Open” or use the keyboard shortcut Ctrl + O.
- Navigate to the folder where your image is located.
- Select the image file and click on the “Open” button.
After following these steps, your chosen image will open in the GIMP workspace, ready for editing.
GIMP supports various file formats, including JPEG, PNG, TIFF, and GIF. This flexibility allows you to work with images from different sources and in different formats.
If you don’t have an image to work with, you can download free stock photos from websites like Unsplash or Pixabay, or take your own photos using a camera or smartphone.
Remember to choose an image that you have the rights to use or that is in the public domain to avoid any copyright infringement issues.
Now that you have an image opened in GIMP, you can proceed to the next step of adding a text watermark.
Adding Text to the Image
Once you have opened the desired image in GIMP, you can proceed to add a text watermark to it. Follow these steps to add text to your image:
- Select the “Text” tool from the Toolbox, which is located on the left side of the GIMP interface. It looks like a capital letter “A”.
- Click and drag on the image canvas to create a text box. This will define the area where the text will appear.
- Type in the desired text into the text box. You can customize the font, size, and color of the text using the options available in the “Text” window.
- Position the text box by clicking and dragging it to the desired location on the image.
By default, GIMP creates a new layer for the text, allowing you to make further adjustments and apply effects independently from the rest of the image.
When adding text to an image, consider the placement and size of the text. Ensure that the text is legible and does not obstruct any important elements of the image. You can experiment with different fonts and sizes to find the perfect combination that suits the image and conveys your desired message.
GIMP also offers additional features such as text effects, including drop shadows, outlines, and gradients. These effects can enhance the visibility and style of your text watermark.
Once you are satisfied with the text watermark, you can proceed to adjust the properties, position, and apply effects to further refine the appearance of the watermark on your image.
Adjusting the Text Properties
After adding text to your image in GIMP, you have the flexibility to adjust various properties of the text to achieve the desired look for your text watermark. Here’s how you can modify the text properties:
- With the text layer selected in the Layers panel, go to the “Text” menu and select “Text Tool Options”.
- In the Text Tool Options window, you can modify the font, font size, alignment, color, and other formatting options for your text.
- Choose a font that aligns with your brand or the style you want to convey. GIMP offers a variety of fonts to choose from, or you can install additional fonts on your computer for more options.
- Adjust the font size to ensure that the text is legible but not overpowering. You can also make the text bold or italicized if desired.
- Experiment with different colors to find the one that complements your image and stands out without distracting from the main subject.
- Consider adding effects such as shadows, borders, or gradients to enhance the visibility or add a touch of creativity to your text watermark.
By adjusting the text properties, you can create a unique and visually appealing text watermark that resonates with your brand or personal style.
Remember to strike the right balance between the text and the image. The text should be clearly visible but not overpowering, allowing the main image to shine and convey its intended message.
Once you are satisfied with the text properties, you can proceed to position the text watermark on your image.
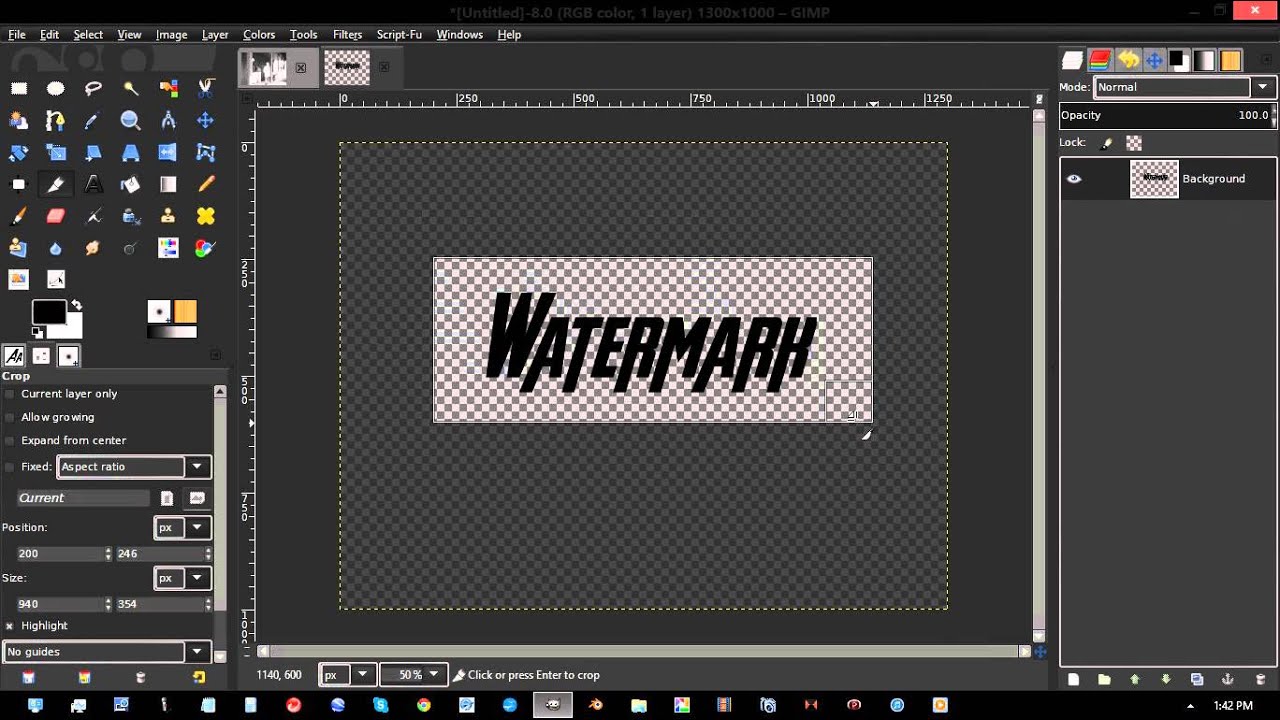
Positioning the Text Watermark
After adjusting the properties of the text in your image, the next step is to position the text watermark in a strategic location. Here’s how you can position the text watermark in GIMP:
- Select the Move tool from the Toolbox, which looks like a four-sided arrow.
- Click and hold the left mouse button on the text layer in the Layers panel.
- Drag the text layer to the desired location on the image.
You can experiment with different positions to find the one that works best for your image and the purpose of your text watermark. Some common placement options include the bottom right or left corner, centered along the bottom or top, or diagonally across the image.
When positioning the text watermark, make sure it doesn’t obscure any important elements or detract from the overall composition of the image. The text should be clearly visible without overwhelming the visual impact of the photo.
GIMP also provides alignment options to help you precisely position the text. You can use the Align tool to align the text vertically or horizontally or distribute multiple text layers evenly across the image.
If needed, you can further adjust the size of the text watermark by selecting the text layer and using the Scale tool. This can help you achieve a better balance between the text and the image.
Once you are satisfied with the position of the text watermark, you can move on to applying effects or making any final adjustments before saving the watermarked image.
Applying Effects to the Text Watermark
To enhance the visual impact of your text watermark, you can apply various effects in GIMP. These effects can add style, depth, and creativity to the text, making it more visually appealing. Here are some effects you can apply to your text watermark:
- Drop Shadow: Adding a subtle drop shadow to the text can make it stand out and give it a three-dimensional appearance. This effect can provide depth and make the text appear more prominent.
- Outline: Applying an outline to the text can create a clear separation between the text and the background image. You can choose the color and thickness of the outline to make the text more legible and visually appealing.
- Gradient: Applying a gradient to the text can add a dynamic and gradient transition of colors. This effect can make the text more visually interesting and eye-catching.
- Opacity: Adjusting the opacity of the text layer can make the text more translucent or blend it more naturally with the background image. This effect can help create a more subtle and seamless integration of the text with the image.
To apply these effects in GIMP, you can use various tools such as Layer Styles, Layer Masks, and the Filters menu. Experiment with different combinations of effects to achieve the desired look for your text watermark.
While applying effects, it’s essential to strike a balance. The effects should enhance the text and make it more visually appealing without overpowering the image or diminishing its original quality.
Remember to consider the purpose of the watermark when applying effects. If the text serves a copyright or identification purpose, ensuring its clarity and legibility should be the priority.
Once you are satisfied with the effects on the text watermark, you can proceed to save the watermarked image.
Saving the Watermarked Image
After adding the text watermark and applying any desired effects in GIMP, the final step is to save the watermarked image. Here’s how you can save your watermarked image in GIMP:
- Ensure that the watermarked image is selected in the Layers panel.
- Go to the “File” menu and select “Export As” or use the keyboard shortcut Ctrl + Shift + E.
- In the Export Image window, choose the file format you want to save the image as. JPEG is a commonly used format for web usage, while PNG is recommended when a higher quality image with transparency is needed.
- Select the destination folder where you want to save the watermarked image.
- Enter a suitable file name for the watermarked image.
- Adjust any additional export options as needed, such as image quality or compression settings.
- Click on the “Export” button to save the watermarked image.
By saving the watermarked image as a new file, you preserve the original image with its watermark intact, allowing you to use the watermarked version while keeping the original for future use or further editing.
It’s recommended to keep a high-resolution version of the watermarked image for your records or if you plan to use it in print media. However, when sharing or uploading the watermarked image online, consider resizing it to a smaller dimension to optimize loading speeds and maintain web compatibility.
Remember to keep a backup of both the watermarked image and the original image in a secure location to protect your work and ensure its availability in case of accidental loss or damage.
Now that you have saved the watermarked image, you can confidently share it online, use it in your portfolio, or protect it from unauthorized use.