
Choosing the Right Image for the Color Effect
When it comes to creating a striking black and white photo with a color effect, choosing the right image is crucial. Not every photo will lend itself well to this technique, so selecting one with the right elements is important for a successful result.
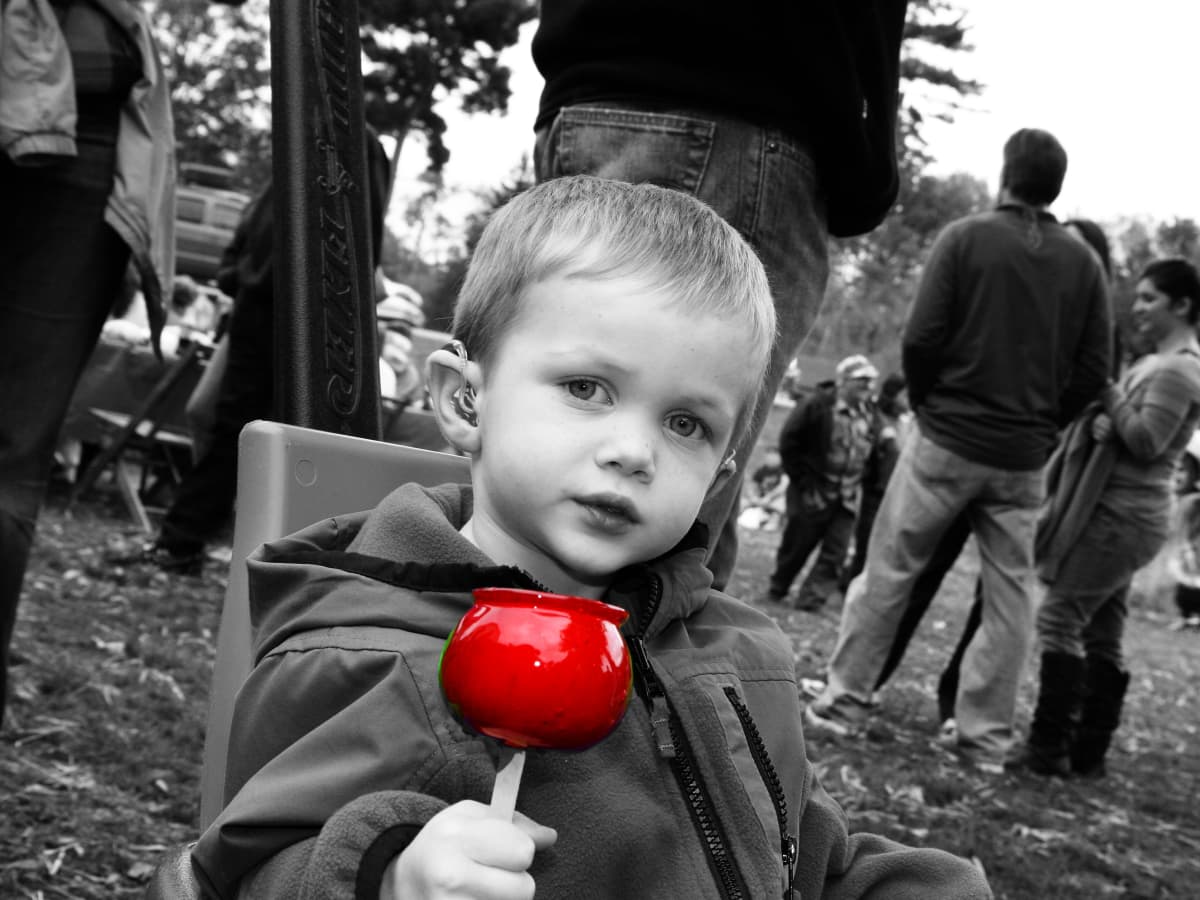
First and foremost, you’ll want to pick an image that has a clear focal point or subject. This will be the element you want to highlight with a pop of color amidst the black and white tones. Whether it’s a person, an object, or a specific area of the photo, the subject should stand out prominently.
Next, consider the overall composition of the image. Are there any leading lines, shapes, or patterns that draw the viewer’s attention? These can further enhance the visual impact of the color effect. Look for interesting contrasts or juxtapositions within the photo that will make the colorized areas truly stand out.
Additionally, take into account the colors present in the original image. While the majority of the photo will be converted to black and white, the colors you choose to retain should complement and harmonize with each other. Consider the color wheel and opt for contrasting or complementary colors that will create a visually appealing effect.
Furthermore, keep in mind the emotional or narrative effect you want to convey through the colorized areas. Think about how specific colors can evoke certain feelings or add depth to the story within the photo. For instance, warm colors like red or orange can create a sense of energy or passion, while cool colors like blue or green can evoke a sense of calm or tranquility.
Lastly, don’t be afraid to experiment and try different images with various elements. Play around with different subjects, compositions, and color combinations to find the perfect image that will create a captivating black and white photo with a color effect.
Opening the Image in GIMP
GIMP (GNU Image Manipulation Program) is a powerful and free software that allows you to edit and enhance your images. To begin the process of creating a black and white photo with a color effect, the first step is to open your desired image in GIMP.
Open GIMP on your computer and navigate to the “File” menu. Select “Open” to access the file explorer and locate the image you want to work with. Once you’ve found the image, click “Open” to import it into GIMP.
Upon opening the image, you will see it displayed in the main GIMP workspace. The image will appear as it originally is, with full color and detail.
At this stage, it’s important to save the image with a different name or as a copy. This way, you can preserve the original image and have a backup in case anything goes wrong during the editing process. To do this, go to the “File” menu, select “Save As,” and choose a new name for the file.
Now that your image is open and safely saved, you can proceed to the next step of converting it to black and white, which is essential for creating the desired effect.
Before moving on, it’s worth mentioning that GIMP offers a wide range of tools and features to enhance your editing experience. Take some time to familiarize yourself with the various tools available, such as the selection tools, brushes, and layers. Exploring these features will allow you to have more control over the colorizing process and achieve the desired results.
Now that you’ve successfully opened your image in GIMP, you are ready to begin converting it to black and white.
Converting the Image to Black and White
Converting the image to black and white is a crucial step in the process of creating a black and white photo with a color effect. This step sets the foundation for the colorization process and allows the selective color areas to stand out.
To convert your image to black and white in GIMP, first, make sure the image is selected in the main workspace. Then, navigate to the “Colors” menu and choose the “Desaturate” option. This will remove the color information from the image, turning it into a grayscale representation.
GIMP offers different options for desaturating the image, such as “Desaturate,” “Desaturate Lightness,” and “Desaturate Average.” Each option produces a slightly different result, so it’s worth experimenting with them to see which one best suits your image.
Once you’ve chosen a desaturation method, GIMP will apply it to the entire image, converting it to black and white. However, be aware that this step is irreversible unless you have created a separate layer for the original color image.
Converting the image to black and white is not only important for achieving the desired effect but also helps in creating a visually coherent and harmonious composition. By removing the distractions of color, the viewers’ attention is drawn to the areas that will be selectively colored, creating a more impactful and focused image.
While your image is now in black and white, it’s essential to note that the conversion may not always result in the exact monochromatic tones you had in mind. Adjustments to the brightness, contrast, and individual channel levels may be necessary to fine-tune the black and white effect. This can be achieved using the various adjustment tools and options in GIMP, such as the “Levels” or “Curves” adjustments.
Remember that the goal is to create a visually appealing black and white base that serves as a canvas for the colorized areas. Take your time to experiment with different settings until you are satisfied with the overall black and white conversion of your image.
With the image successfully converted to black and white, you are now ready to move on to the next step of selecting the specific areas that will be colored.
Selecting the Parts of the Image to Be Colored
Once you have converted your image to black and white, the next step in creating a black and white photo with a color effect is selecting the specific parts of the image that you want to colorize. This step allows you to highlight certain elements and create a visually striking contrast between the black and white tones and the selectively colored areas.
In GIMP, you can use various selection tools to choose the parts of the image that you want to color. The selection tools include the Rectangle Select Tool, the Free Select Tool (also known as the Lasso Tool), and the Fuzzy Select Tool (also known as the Magic Wand Tool).
The Rectangle Select Tool allows you to create rectangular selections, ideal for selecting areas with well-defined shapes or straight edges. Simply click and drag to define the rectangular area you want to select.
The Free Select Tool is more versatile and allows you to create custom shapes by freehand drawing around the elements you want to select. It is especially useful for selecting irregular or complex shapes.
The Fuzzy Select Tool automatically selects contiguous areas based on their color values. It is handy for selecting areas with a solid color or areas with similar color tones. Adjust the tool’s threshold to control the sensitivity of the selection.
Once you have made a selection, you can further refine it by using the “Select” menu and choosing options such as “Invert” to select the opposite areas or “Feather” to create a smoother transition between the colored and non-colored regions.
Remember to use the selection tools carefully and precisely to ensure that you capture the desired parts of the image accurately. Take your time and zoom in to check the selection edges for any irregularities or rough edges.
It’s worth noting that you can make multiple selections within an image, allowing you to colorize different parts with different colors. This provides endless creative possibilities to make your image truly unique and captivating.
By selecting and isolating specific elements in your image, you can enhance their visual impact by adding vibrant colors amidst the black and white backdrop. This technique creates a focal point and draws the viewer’s attention to the colorized areas, resulting in a striking and artistic effect.
With the desired parts of the image successfully selected, you are now ready to proceed with the next step of creating selection masks to apply the color effects.
Creating Selection Masks
After selecting the parts of the image you want to colorize, the next step in creating a black and white photo with a color effect is creating selection masks. Selection masks allow you to apply color effects to the specific areas you have chosen while keeping the rest of the image unaffected.
In GIMP, you can create selection masks by utilizing layers and layer masks. Layers allow you to work on different elements of the image independently, while layer masks determine which parts of a layer are visible or hidden.
To create a selection mask, start by duplicating the original image layer. This will serve as the base layer on which you will apply the black and white effect. To duplicate the layer, right-click on the layer in the Layers panel and choose “Duplicate Layer.”
Next, select the duplicated layer, go to the “Colors” menu, and click “Desaturate” to convert it to black and white, similar to what you did during the initial conversion process. This step ensures that the areas outside of your selected regions remain in black and white.
Once you have the black and white layer, create a layer mask by selecting the duplicated layer in the Layers panel and clicking on the “Add Layer Mask” button at the bottom of the panel. Choose “Selection” as the layer mask source in the dialog box that appears.
The selection you made earlier will now be applied as a layer mask, revealing the black and white layer through the selected areas and hiding it in the non-selected regions.
At this point, you can refine the selection mask further. Select the layer mask thumbnail in the Layers panel and use the brush tool with a soft edge to touch up any rough edges or to add more intricate details to the mask. This step helps in achieving a seamless transition between the colorized and non-colorized areas.
You can also adjust the opacity of the layer mask to control the strength of the black and white effect. Lowering the opacity will allow some color to show through in the non-selected areas, creating a subtle blending effect.
By creating selection masks, you can precisely control where the color effect is applied, ensuring that it is limited to the specific regions you want to highlight. This technique adds depth, visual interest, and artistic flair to your black and white photo, making it truly captivating.
With the selection masks in place, you are now ready to move on to the next step of applying color to the selected areas.
Applying Color to the Selected Areas
Now that you have created selection masks, it’s time to add color to the selected areas of your black and white photo. This step is where the magic happens, as the color effects you apply will contrast with the grayscale backdrop, creating a visually striking and attention-grabbing result.
In GIMP, you can apply color to the selected areas by using various techniques, such as the Paintbrush tool, the Gradient tool, or even applying solid color overlays.
If you want to manually apply color using the Paintbrush tool, select the desired color from the color palette and ensure that the color is set to the foreground color. Then, choose an appropriate brush size and hardness for the effect you want to achieve. With the selected areas still active, begin painting over the desired regions, watching as the color fills in the selected areas while the rest of the image remains in black and white.
If you prefer a more gradual color transition, you can use the Gradient tool. Choose a gradient that suits your vision and select the “Foreground to Transparent” option. Then click and drag across the selected areas to apply the gradient effect, creating a smooth transition from color to black and white.
Alternatively, you can use solid color overlays to apply a specific color to the selected regions. Create a new layer, choose the desired color, and fill the layer with that color. Then, change the layer’s blending mode to “Color” or “Soft Light” to blend the color with the underlying black and white layer.
Remember that you can apply multiple colors to different selected areas for a more dynamic and eye-catching effect. Explore different color combinations and experiment with opacity levels to find the perfect balance.
When applying color, pay attention to the overall visual balance of the image. Consider the color theory and how different colors interact with each other. Complementary or contrasting colors can create a more striking impact, while harmonious color schemes can provide a more cohesive look.
Keep in mind that the goal is to enhance the selected areas without overpowering the rest of the image. The color should draw attention and create emphasis, but it should not distract or detract from the overall composition.
With color applied to the selected areas, step back and assess the results. Make any necessary adjustments to ensure the colorization appears seamless, vibrant, and visually appealing.
Once you are satisfied with the color application, you can move on to fine-tuning the color settings to achieve the desired look for your black and white photo with a color effect.
Adjusting the Color Settings
After applying color to the selected areas of your black and white photo, it’s time to fine-tune the color settings to achieve the desired look and overall aesthetic. Adjusting the color settings allows you to control the saturation, hue, brightness, and contrast of the colorized regions, ensuring they blend seamlessly with the black and white backdrop.
In GIMP, there are several tools and adjustments you can use to tweak the color settings. One of the most commonly used is the “Hue-Saturation” adjustment. This allows you to modify the hue and saturation of the selected colors. By adjusting the sliders, you can find the perfect balance of color intensity and vibrancy.
The “Levels” adjustment is another powerful tool for refining the color settings. It allows you to adjust the brightness, contrast, and tonal range of the colorized areas. You can make the colors more vibrant, darken or lighten them, or enhance the overall tonal range for a more dramatic effect.
Experimenting with the “Curves” adjustment can also yield interesting results. It allows you to manipulate the tone and contrast of the colorized regions, creating more depth and dimension. Use the curve graph to adjust the highlights, midtones, and shadows to achieve the desired look.
Additionally, you may want to consider using the “Color Balance” adjustment to fine-tune the overall color tone of the colorized areas. This adjustment allows you to adjust the balance between the different color channels (red, green, and blue), allowing for more precise control over the color palette.
Remember that the adjustments should complement the overall composition and narrative of the photo. Take into account the intended mood or emotion you want to convey and make adjustments that align with your artistic vision.
Keep in mind that subtlety is often key when adjusting the color settings. Aim to enhance the natural beauty of the colorized areas without overpowering them or sacrificing the harmony of the composition. Strive for a cohesive and balanced integration of color and black and white elements.
As you make adjustments, it’s essential to periodically zoom out and view the image at a smaller size to see how the colorization looks in the context of the entire photo. This will help you ensure that the color settings are visually pleasing and work well with the composition as a whole.
Remember to save your progress regularly to preserve your edits and have the flexibility to make further adjustments if needed. Once you are satisfied with the color settings, you can move on to adding multiple colors to different parts of the image for a more dynamic and captivating visual effect.
Adding Multiple Colors to Different Parts of the Image
One of the exciting aspects of creating a black and white photo with a color effect is the ability to add multiple colors to different parts of the image. This technique can bring depth, visual interest, and a dynamic element to your composition, making it even more captivating to viewers.
In GIMP, you can add multiple colors to different parts of the image by creating additional layers and selection masks. Each layer will correspond to a different color, allowing you to control the hue, saturation, and placement of each colorized area.
To add multiple colors, start by creating a new layer for each color you want to introduce. For each layer, duplicate the black and white layer and apply a different color to it using the techniques mentioned earlier, such as the Paintbrush tool or Gradient tool.
With each color layer created, activate the corresponding selection mask for each color by clicking on the layer mask thumbnail. Use the selection tools and techniques described earlier to select the specific areas where you want the color to be applied. Refine the selection as needed using the brush tool or other selection adjustment options.
Adjust the blending mode and opacity of each color layer to create the desired effect. Experiment with different blending modes such as “Color,” “Overlay,” or “Soft Light,” and adjust the opacity to achieve the right balance of color and black and white.
When adding multiple colors, consider the composition and visual balance of the image. Think about how the colors interact with each other and the overall mood or narrative you want to convey. Complementary or contrasting colors can create a visually striking effect, while harmonious color schemes can provide a more cohesive and balanced look.
Take your time to fine-tune the placement, intensity, and interaction of the multiple colors. Use layers and layer masks to easily make adjustments and experiment with different color combinations until you achieve the desired result.
Remember that adding multiple colors should enhance the visual impact of your image without overwhelming it or distracting from the overall composition. Use color sparingly and purposefully, focusing on the key elements and areas you want to highlight.
With the addition of multiple colors, your black and white photo with a color effect will come to life, grabbing the viewer’s attention and creating a visually engaging experience.
Once you have successfully added multiple colors to different parts of the image, you can proceed to the next step of blending the colors with the black and white effect for a seamless and cohesive visual outcome.
Blending the Colors with the Black and White Effect
Blending the colors with the black and white effect is a crucial step in the process of creating a cohesive and visually appealing black and white photo with a color effect. This step ensures that the colorized areas seamlessly integrate with the grayscale backdrop, creating a harmonious and balanced composition.
In GIMP, there are several techniques you can use to blend the colors with the black and white effect. One of the most effective methods is adjusting the blending mode and opacity of the color layers.
Experiment with different blending modes such as “Color,” “Overlay,” “Soft Light,” or “Hue” to find the one that best suits your image. Each blending mode has a distinct effect on how the colors interact with the black and white areas, and the result can vary depending on your image and the specific colors you have chosen.
Adjusting the opacity of the color layers is another important aspect of blending. Lowering the opacity reduces the intensity of the color in the selected areas, allowing the grayscale tones to show through more prominently. This can create a subtle and nuanced effect, adding depth and dimension to your composition.
While blending the colors, be mindful of maintaining a coherent visual flow. Pay attention to the transitions between the colorized and black and white areas, ensuring they are smooth and seamless. Use soft brushes, gradients, or feathered selections to create gradual transitions between the two elements, avoiding harsh edges or abrupt changes.
If you find that the colors still appear too vibrant or overpowering, you can further fine-tune the color settings, such as saturation and brightness, to achieve a more balanced integration. The goal is to create a harmonious balance between the vivid colors and the grayscale tones, ensuring that both elements work together to enhance the overall impact of the image.
Regularly zoom out and view the image at its actual size to assess how the colors blend with the black and white effect. Pay attention to the overall visual harmony and balance, making any necessary adjustments to achieve your desired aesthetic.
Remember that the key to successful blending is experimentation and exploring different options. Don’t be afraid to try different blending modes, opacities, and adjustments until you achieve the desired result. The blending process is an essential part of bringing your black and white photo with a color effect to life.
Once you are satisfied with the blending of colors and black and white elements, you can proceed to apply any final touches and enhancements to perfect the overall look of your colorized image.
Final Touches and Enhancements
As you near the completion of creating a black and white photo with a color effect in GIMP, it’s time to add the final touches and enhancements to perfect the overall look of your image. These final adjustments can elevate the visual impact and make your composition truly captivating.
One of the essential final touches is sharpening the image. Sharpening enhances the details and crispness of the image, making it appear more polished and professional. In GIMP, you can use the “Sharpen” filter or the “Unsharp Mask” tool to sharpen the image selectively, focusing on the important areas while preserving the overall quality.
If desired, you can also consider applying additional effects or filters to enhance the mood or atmosphere of the image. GIMP offers a wide range of filters, such as vignette, grain, or vintage effects, that can add a unique and artistic look to your black and white photo with a color effect. However, use these effects sparingly and purposefully to avoid overwhelming the composition.
Furthermore, you may want to experiment with adjusting the overall brightness and contrast of the image to achieve the desired tonal range. GIMP provides tools like the “Brightness-Contrast” adjustment that allows you to fine-tune the overall look and feel of the image and ensure it matches your artistic vision.
Consider the overall composition and pay attention to any distracting elements or imperfections that may detract from the impact of the image. Use the retouching tools in GIMP to remove any unwanted spots, blemishes, or distractions, ensuring a clean and polished final result.
Last but not least, it’s important to save your work in an appropriate file format. Consider saving a high-resolution version for print purposes and a web-friendly version for online sharing. Choose a file format such as JPEG or PNG that preserves the quality of your black and white photo with a color effect while keeping the file size manageable.
Remember, the final touches and enhancements should complement the overall composition and emphasize the visual impact without overpowering the main subject or distracting from the colorized areas. Aim for a balanced and cohesive image that tells a story and captures viewers’ attention.
With the final touches and enhancements complete, take a step back and admire your finished black and white photo with a color effect. Congratulations on your artistic achievement!
Saving and Exporting the Colorized Image
Once you have perfected your black and white photo with a color effect in GIMP, it’s time to save and export your final creation. Saving and exporting the colorized image ensures that you preserve your work and have a high-quality file ready for sharing or printing.
In GIMP, go to the “File” menu and select the “Save” or “Export” option. If you choose “Save,” you can save the image in GIMP’s native XCF format, which preserves all the layers, masks, and adjustments in your project. This is useful if you wish to make further edits or modifications to the image in the future.
If you prefer to save or share the colorized image in a more widely compatible format, such as JPEG or PNG, select the “Export” option. When exporting the image, you can specify the file name, location, and file format to use.
Choosing the appropriate file format depends on your intended use for the image. JPEG is a common format suitable for online sharing and printing, as it offers good compression while maintaining decent image quality. PNG, on the other hand, preserves higher image quality but tends to result in larger file sizes.
Consider the resolution and image size when exporting. If you intend to share the image online, a resolution of 72 pixels per inch (PPI) is usually sufficient. For printing purposes, opt for a higher resolution, such as 300 PPI, to ensure optimal print quality.
Before finalizing the export, review the export options available in GIMP. You may have the choice to specify additional parameters, such as color profiles or metadata, depending on your requirements.
Once all the settings are in place, click “Export” to save the colorized image in your desired format and location on your computer.
After exporting the image, take the opportunity to double-check the saved file to ensure it matches your expectations. Open the file in an image viewer or editor to confirm that the colors, details, and overall presentation are as desired.
Remember to keep a backup copy of your colorized image in a secure location. This ensures that you can easily access and share your masterpiece in the future, without any risk of losing your hard work.
Congratulations! You have now successfully saved and exported your black and white photo with a color effect. It’s time to proudly share your creation with others and showcase your artistic talent.