
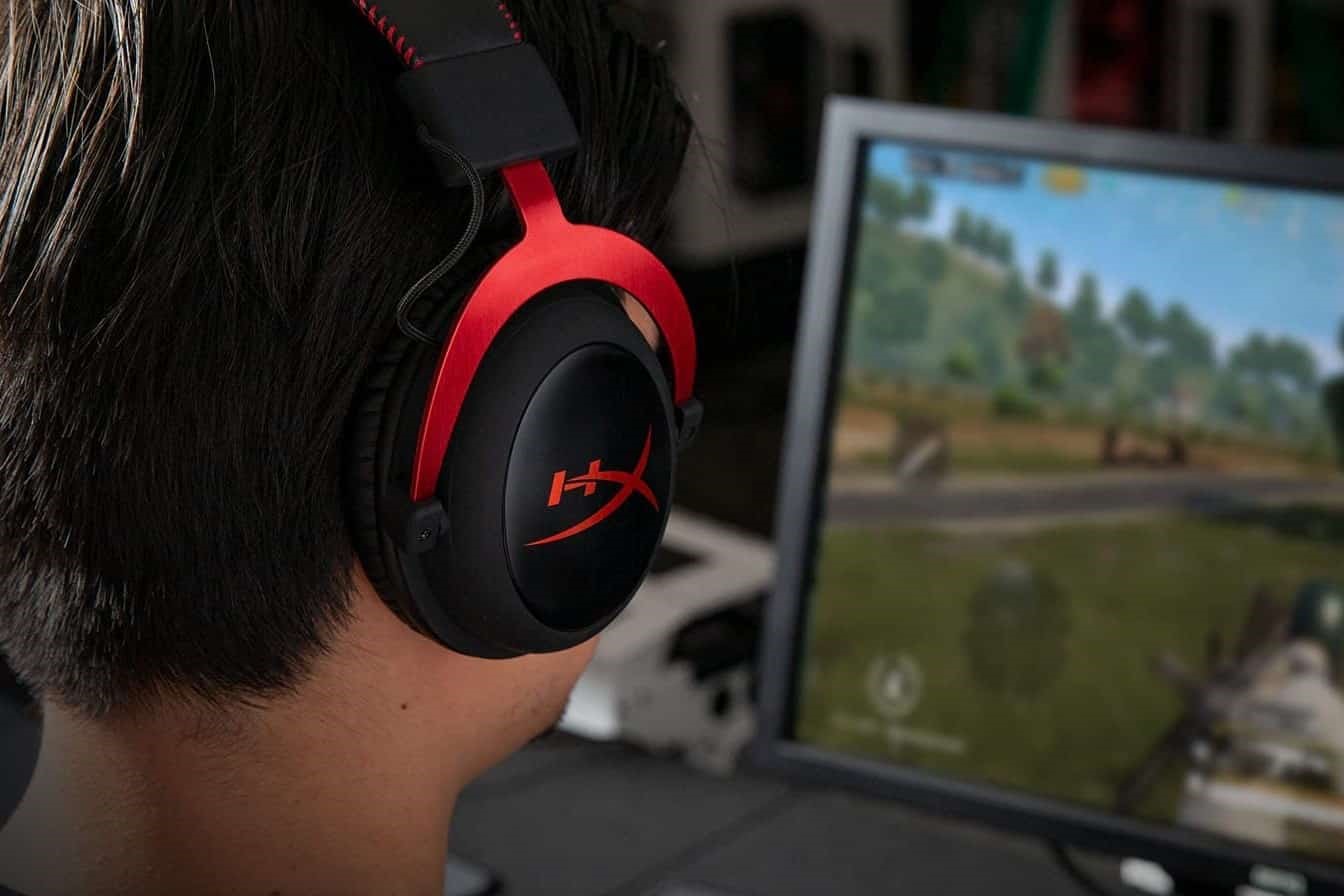
Choosing the Right Headset
When it comes to setting up your headset with OBS, selecting the right headset is crucial for ensuring optimal audio quality and compatibility with the software. Here are some essential factors to consider when choosing the perfect headset for your needs:
1. Headset Type
-
Wired or Wireless: Determine whether you prefer the freedom of wireless connectivity or the reliability of a wired connection. Wireless headsets offer greater mobility, while wired headsets ensure consistent audio transmission without the need for recharging.
-
Over-Ear or In-Ear: Consider the comfort and immersive experience offered by over-ear headsets versus the portability and minimalistic design of in-ear options.
2. Microphone Quality
-
Noise Cancellation: Opt for a headset with noise-canceling microphones to minimize background noise and ensure clear vocal transmission during your OBS recordings and streams.
-
Microphone Sensitivity: Look for a headset with adjustable microphone sensitivity to cater to different recording environments and voice volumes.
3. Compatibility
-
Platform Compatibility: Ensure that the headset is compatible with your computer's operating system and any specific hardware requirements, such as USB or audio jack connectivity.
-
OBS Integration: Some headsets are optimized for seamless integration with OBS, offering dedicated software or hardware features that enhance the streaming and recording experience.
4. Comfort and Durability
-
Adjustable Headband and Ear Cups: Prioritize comfort during extended recording or streaming sessions by choosing a headset with adjustable headbands and cushioned ear cups.
-
Build Quality: Invest in a durable headset that can withstand regular use and provide long-term reliability.
5. Budget Considerations
- Value for Money: Balance your budget with the features and quality offered by the headset, ensuring that you obtain the best value for your investment without compromising essential functionalities.
By carefully evaluating these factors, you can select a headset that aligns with your recording and streaming requirements while seamlessly integrating with OBS for a superior audiovisual experience.
Installing OBS Software
Before diving into the world of streaming and recording with OBS, you need to install the software on your computer. Follow these step-by-step instructions to seamlessly set up OBS:
1. Downloading OBS
Begin by visiting the official OBS Project website and navigating to the download section. Choose the appropriate version of OBS Studio based on your operating system, whether it’s Windows, macOS, or Linux. Click on the download link and save the installation file to your computer.
2. Installing OBS
Locate the downloaded OBS Studio installation file and initiate the installation process. Follow the on-screen prompts, including accepting the software license agreement and selecting the destination folder for installation. Once the installation is complete, launch OBS Studio to begin the initial setup.
3. Software Updates
Upon launching OBS Studio, check for any available software updates to ensure that you are running the latest version of the software. Regular updates often include bug fixes, new features, and performance enhancements, contributing to a more stable and efficient streaming and recording experience.
4. Setting Preferences
Explore the preferences and settings within OBS Studio to customize the software according to your specific requirements. This includes configuring video and audio settings, hotkeys, streaming platforms, and recording formats. Pay attention to the audio settings, as they are particularly relevant to integrating your headset with OBS.
5. Plugins and Extensions
Enhance the functionality of OBS Studio by exploring the available plugins and extensions. These add-ons can introduce advanced features, scene transitions, audio filters, and additional tools that elevate the quality and creativity of your streams and recordings.
By following these steps, you can successfully install OBS Studio and prepare the software for seamless integration with your headset, laying the foundation for immersive and professional-grade streaming and recording experiences.
Connecting Your Headset to Your Computer
Once you have chosen the ideal headset and installed OBS Studio, the next crucial step is to connect your headset to your computer. This process involves physical connections and configuration settings to ensure that your headset is recognized and ready for use with OBS. Here’s a step-by-step guide to seamlessly connect your headset to your computer:
1. Wired Headsets
If you have opted for a wired headset, locate the appropriate audio jack on your computer or audio interface. Plug the headset’s audio cable into the corresponding headphone and microphone jacks, ensuring a secure connection. For headsets with USB connectivity, simply insert the USB plug into an available USB port on your computer.
2. Wireless Headsets
For wireless headsets, begin by charging the headset and its transmitter or receiver, if applicable. Follow the manufacturer’s instructions to pair the headset with its wireless receiver or directly with your computer via Bluetooth. Once paired, your computer should recognize the wireless headset as an available audio input and output device.
3. Device Recognition
After connecting your headset, navigate to your computer’s audio settings to verify that the headset is recognized as an audio input and output device. This step is essential for ensuring that OBS Studio can access and utilize your headset for recording and streaming purposes.
4. OBS Audio Settings
Launch OBS Studio and access the audio settings within the software. Configure the audio input and output devices to correspond with your headset, ensuring that OBS is set to capture audio from the headset’s microphone and deliver audio output through the headset’s speakers or earphones.
5. Testing Audio
Before proceeding with your recordings or streams, conduct a thorough audio test within OBS Studio to confirm that your headset is functioning as intended. Speak into the headset’s microphone and monitor the audio levels to ensure that your voice is being captured clearly. Additionally, play back audio or monitor a live stream to confirm that the headset’s speakers or earphones are delivering sound accurately.
By carefully following these steps, you can effectively connect your headset to your computer and configure it for seamless integration with OBS Studio, setting the stage for high-quality audio recordings and captivating streams.
Configuring Audio Settings in OBS
Once your headset is connected to your computer, it’s essential to configure the audio settings within OBS Studio to optimize the recording and streaming experience. Customizing these settings ensures that your headset’s microphone and audio output are seamlessly integrated with OBS, resulting in professional-grade audio capture and playback. Here’s a comprehensive guide to configuring the audio settings in OBS Studio:
1. Accessing Audio Settings
Launch OBS Studio and navigate to the settings menu. Within the settings window, locate the “Audio” tab, which contains the configuration options for audio input and output devices, sample rates, and audio monitoring preferences.
2. Selecting Audio Devices
Under the “Audio” tab, designate your headset’s microphone as the preferred audio input device. This ensures that OBS captures audio directly from your headset’s microphone, allowing for clear and accurate voice recordings. Additionally, specify your headset’s speakers or earphones as the primary audio output device for monitoring and playback.
3. Sample Rate and Format
Adjust the sample rate and format settings to align with the specifications of your headset. Common sample rates include 44.1 kHz and 48 kHz, while the format may be set to 16-bit or 24-bit. Matching these settings with your headset’s capabilities ensures optimal audio quality and compatibility.
4. Audio Monitoring
Enable audio monitoring within OBS Studio to listen to the audio input from your headset’s microphone in real time. This feature allows you to monitor the quality of your voice input and make adjustments as necessary, ensuring that your recordings and streams maintain consistent audio levels and clarity.
5. Advanced Audio Settings
Explore the advanced audio settings within OBS Studio to access additional customization options, such as audio filters, noise suppression, and audio channel configurations. These settings empower you to fine-tune the audio output and enhance the overall quality of your recordings and streams.
6. Testing Audio Configuration
After configuring the audio settings, conduct a comprehensive test within OBS Studio to verify that your headset’s microphone and audio output are functioning as intended. Speak into the microphone, monitor the audio levels, and listen to the playback to ensure that the audio configuration meets your expectations.
By meticulously configuring the audio settings in OBS Studio to accommodate your headset, you can elevate the quality of your recordings and streams, delivering immersive and professional audio experiences to your audience.
Testing Your Headset with OBS
After connecting your headset and configuring the audio settings in OBS Studio, it’s crucial to conduct thorough testing to ensure that your headset functions seamlessly with the software. Testing your headset with OBS allows you to verify audio input and output, assess recording quality, and make any necessary adjustments before engaging in live streams or recording sessions. Here’s a comprehensive guide to effectively test your headset with OBS:
1. Audio Input Test
Initiate an audio input test by speaking into your headset’s microphone while monitoring the audio levels within OBS Studio. Observe the microphone’s sensitivity and clarity, ensuring that your voice is captured accurately and without distortion. Adjust the microphone input levels within OBS if necessary to optimize audio quality.
2. Audio Output Test
Play back audio or a sample recording within OBS Studio to confirm that the headset’s speakers or earphones deliver sound accurately. Evaluate the audio output for clarity, volume, and fidelity, ensuring that your audience will experience high-quality audio during live streams or recorded content.
3. Recording Simulation
Simulate a short recording session within OBS Studio to capture test footage while utilizing your headset for audio input and output. Review the recorded content to assess the overall audio-visual synchronization, ensuring that the headset’s audio performance aligns with the visual elements of your streams or recordings.
4. Live Monitoring
If applicable, engage in live monitoring of your audio input and output while using your headset with OBS Studio. This real-time assessment allows you to make immediate adjustments to audio levels, microphone positioning, and headset volume, ensuring optimal performance during live streaming sessions.
5. Integration with Visual Elements
During testing, pay attention to the integration of your headset’s audio with the visual elements of your streams or recordings. Confirm that the audio synchronization aligns with video content, transitions, and on-screen actions, creating a cohesive and immersive experience for your audience.
6. Audience Feedback
If possible, seek feedback from a trusted source or audience members regarding the audio quality of your headset within OBS Studio. External feedback provides valuable insights into the overall impact and effectiveness of your headset’s performance, allowing you to make informed adjustments based on real-world observations.
By diligently testing your headset with OBS Studio, you can fine-tune the audio configuration, identify potential issues, and ensure that your headset delivers exceptional audio performance for your streaming and recording endeavors.
Adjusting Audio Levels
Optimizing audio levels is essential for ensuring balanced sound and clear voice transmission when using your headset with OBS Studio. Properly adjusted audio levels contribute to a professional and engaging streaming or recording experience. Here’s a comprehensive guide to effectively adjust audio levels within OBS:
1. Microphone Input Levels
Begin by adjusting the microphone input levels within OBS Studio to achieve an optimal balance between audio sensitivity and background noise suppression. Test your microphone by speaking at varying volumes and distances to gauge its performance. Aim to set the input levels to capture clear and consistent voice recordings while minimizing ambient noise.
2. Audio Output Levels
Verify that the audio output levels from your headset are appropriately adjusted within OBS Studio. Ensure that the volume is set to a comfortable and audible level for both monitoring and playback. Avoid excessively high output levels that may lead to audio distortion or discomfort for your audience.
3. Peak Meter Monitoring
Utilize the peak meters within OBS Studio to monitor audio levels in real time. Keep an eye on the peak meters while speaking into the microphone and playing back audio to prevent audio clipping or distortion. Adjust input and output levels to maintain a healthy audio range without exceeding peak levels.
4. Noise Suppression and Filters
Explore the noise suppression and audio filters available within OBS Studio to further refine your audio levels. Apply noise suppression filters to reduce background noise and enhance the clarity of your voice recordings. Experiment with other filters, such as equalization and compression, to fine-tune your audio output for optimal quality.
5. Balance with Other Audio Sources
If incorporating additional audio sources, such as music, sound effects, or external microphones, ensure that the overall audio levels are balanced within OBS Studio. Adjust the volume and relative levels of each audio source to create a cohesive and harmonious audio mix that complements your streaming or recording content.
6. Real-Time Monitoring and Adjustment
During live streaming or recording sessions, continuously monitor and adjust audio levels in real time. Keep an ear on the audio output from your headset and make immediate adjustments as needed to maintain consistent and high-quality audio throughout your content.
By diligently adjusting audio levels within OBS Studio, you can achieve a well-balanced and professional audio experience, enhancing the overall quality of your streams and recordings while delivering engaging and immersive content to your audience.
Troubleshooting Common Issues
While setting up your headset with OBS, you may encounter common issues that can affect audio performance and integration with the software. Identifying and resolving these issues is crucial for maintaining a seamless and professional streaming or recording experience. Here’s a comprehensive guide to troubleshooting common issues when using your headset with OBS:
1. Audio Device Recognition
If OBS Studio fails to recognize your headset as an audio input or output device, begin by checking the physical connections. Ensure that wired headsets are securely plugged into the appropriate audio jacks, while wireless headsets should be correctly paired with the computer. If recognition issues persist, restart OBS Studio and your computer to refresh the audio device detection.
2. Driver and Firmware Updates
Verify that your headset’s drivers and firmware are up to date. Visit the manufacturer’s website to download and install the latest drivers and firmware updates for your headset. Outdated drivers or firmware can lead to compatibility issues with OBS Studio, impacting audio functionality and performance.
3. Audio Configuration Conflicts
Review the audio configuration settings within OBS Studio to ensure that the correct input and output devices are selected. Verify that the sample rates and formats align with your headset’s specifications. Conflicting audio settings can result in distorted sound, microphone malfunctions, or audio playback errors.
4. USB Port Selection
If you are using a USB headset, try connecting it to different USB ports on your computer. Some USB ports may have limited power output or connectivity issues, leading to inconsistent headset performance. Testing different USB ports can help identify and resolve potential connectivity issues.
5. Background Noise and Interference
If you notice persistent background noise or interference during audio recordings, consider the environment in which you are using your headset. Minimize ambient noise and sources of interference, such as electronic devices or appliances, to improve audio clarity. Additionally, consider using noise suppression filters within OBS Studio to mitigate background noise.
6. Hardware Compatibility
Ensure that your headset is fully compatible with your computer’s operating system and hardware specifications. Some headsets may require specific drivers or software for seamless integration with OBS Studio. Check the manufacturer’s recommendations for hardware compatibility and any additional software requirements.
By effectively troubleshooting common issues related to headset integration with OBS Studio, you can resolve audio challenges and optimize the performance of your headset for high-quality streaming and recording experiences.