
What is HTC Vive?
The HTC Vive is a virtual reality (VR) headset developed by HTC and Valve Corporation. It was released in April 2016 and quickly gained popularity as one of the leading VR devices on the market. The Vive offers an immersive and interactive VR experience, allowing users to step into virtual worlds and explore them in a whole new way.
With its high-resolution display, precise tracking, and intuitive controllers, the HTC Vive creates a sense of presence and immersion like no other. The headset uses room-scale tracking technology, which enables users to move around freely in a designated area while wearing the device. This feature adds an extra layer of realism to VR experiences, as users can physically walk, duck, and interact with objects in the virtual environment.
The Vive’s tracking system consists of two base stations that emit infrared signals, which are detected by sensors on the headset and controllers. This allows for accurate and responsive tracking, resulting in a seamless and natural VR experience. Additionally, the Vive can be paired with compatible accessories, such as the Vive Tracker, to enhance interaction and add even more realism to VR interactions.
HTC Vive is not only a device for gaming and entertainment but also has applications across various industries such as architecture, education, healthcare, and training simulations. Its immersive capabilities have made it a valuable tool for professionals in fields that require visualization and hands-on experiences.
Overall, the HTC Vive is a cutting-edge VR headset that provides users with an unparalleled level of immersion and interactivity. Whether for gaming, education, or professional applications, the Vive offers a gateway into a world of virtual experiences that truly capture the imagination.
Why Stream HTC Vive?
Streaming HTC Vive gameplay has become increasingly popular among gamers and VR enthusiasts. It offers several advantages and opportunities for both streamers and viewers alike.
One of the main reasons to stream HTC Vive is the ability to share your virtual reality experiences with others. By streaming your gameplay, you can bring your viewers into the world of VR, allowing them to see what you see and share in the excitement. This not only enables you to showcase your skills and creativity but also fosters a sense of community and camaraderie with your audience.
Streaming HTC Vive can also serve as a platform for showcasing new VR games and experiences. As the VR gaming industry continues to grow, being able to provide firsthand impressions and live demonstrations of new titles can be valuable for both developers and players. By streaming your VR gameplay, you contribute to the promotion and adoption of VR technology, helping to expand its reach and popularity.
In addition to entertainment, streaming HTC Vive can also have educational value. Many educational and training applications have been developed for VR, and by streaming your experiences, you can provide insights and lessons to your audience. This is particularly useful for tutorials, walkthroughs, and skill demonstrations, allowing viewers to learn and engage with the content in an immersive and interactive way.
Furthermore, streaming HTC Vive can be a source of income for content creators. As streaming platforms continue to grow and monetization options become more accessible, gamers and VR enthusiasts have the opportunity to turn their passion into a sustainable career. Through sponsorships, donations, and ad revenue, you can generate income while doing what you love and sharing it with others.
Overall, streaming HTC Vive offers a unique and captivating way to engage with an audience, promote VR technology, educate, and potentially earn income. Whether you are a gamer, a VR enthusiast, or a content creator, streaming HTC Vive can open up new opportunities and provide an immersive and interactive experience for both you and your viewers.
Hardware and Software Requirements
Streaming HTC Vive requires a combination of hardware and software to ensure a smooth and immersive experience. Here are the essential requirements you need to consider:
1. PC or Laptop: To stream HTC Vive, you’ll need a powerful computer or laptop that meets the recommended specifications for both VR gaming and streaming. This includes a high-performance processor, sufficient RAM, and a capable graphics card. Make sure your system is compatible with the hardware requirements of the HTC Vive headset and streaming software.
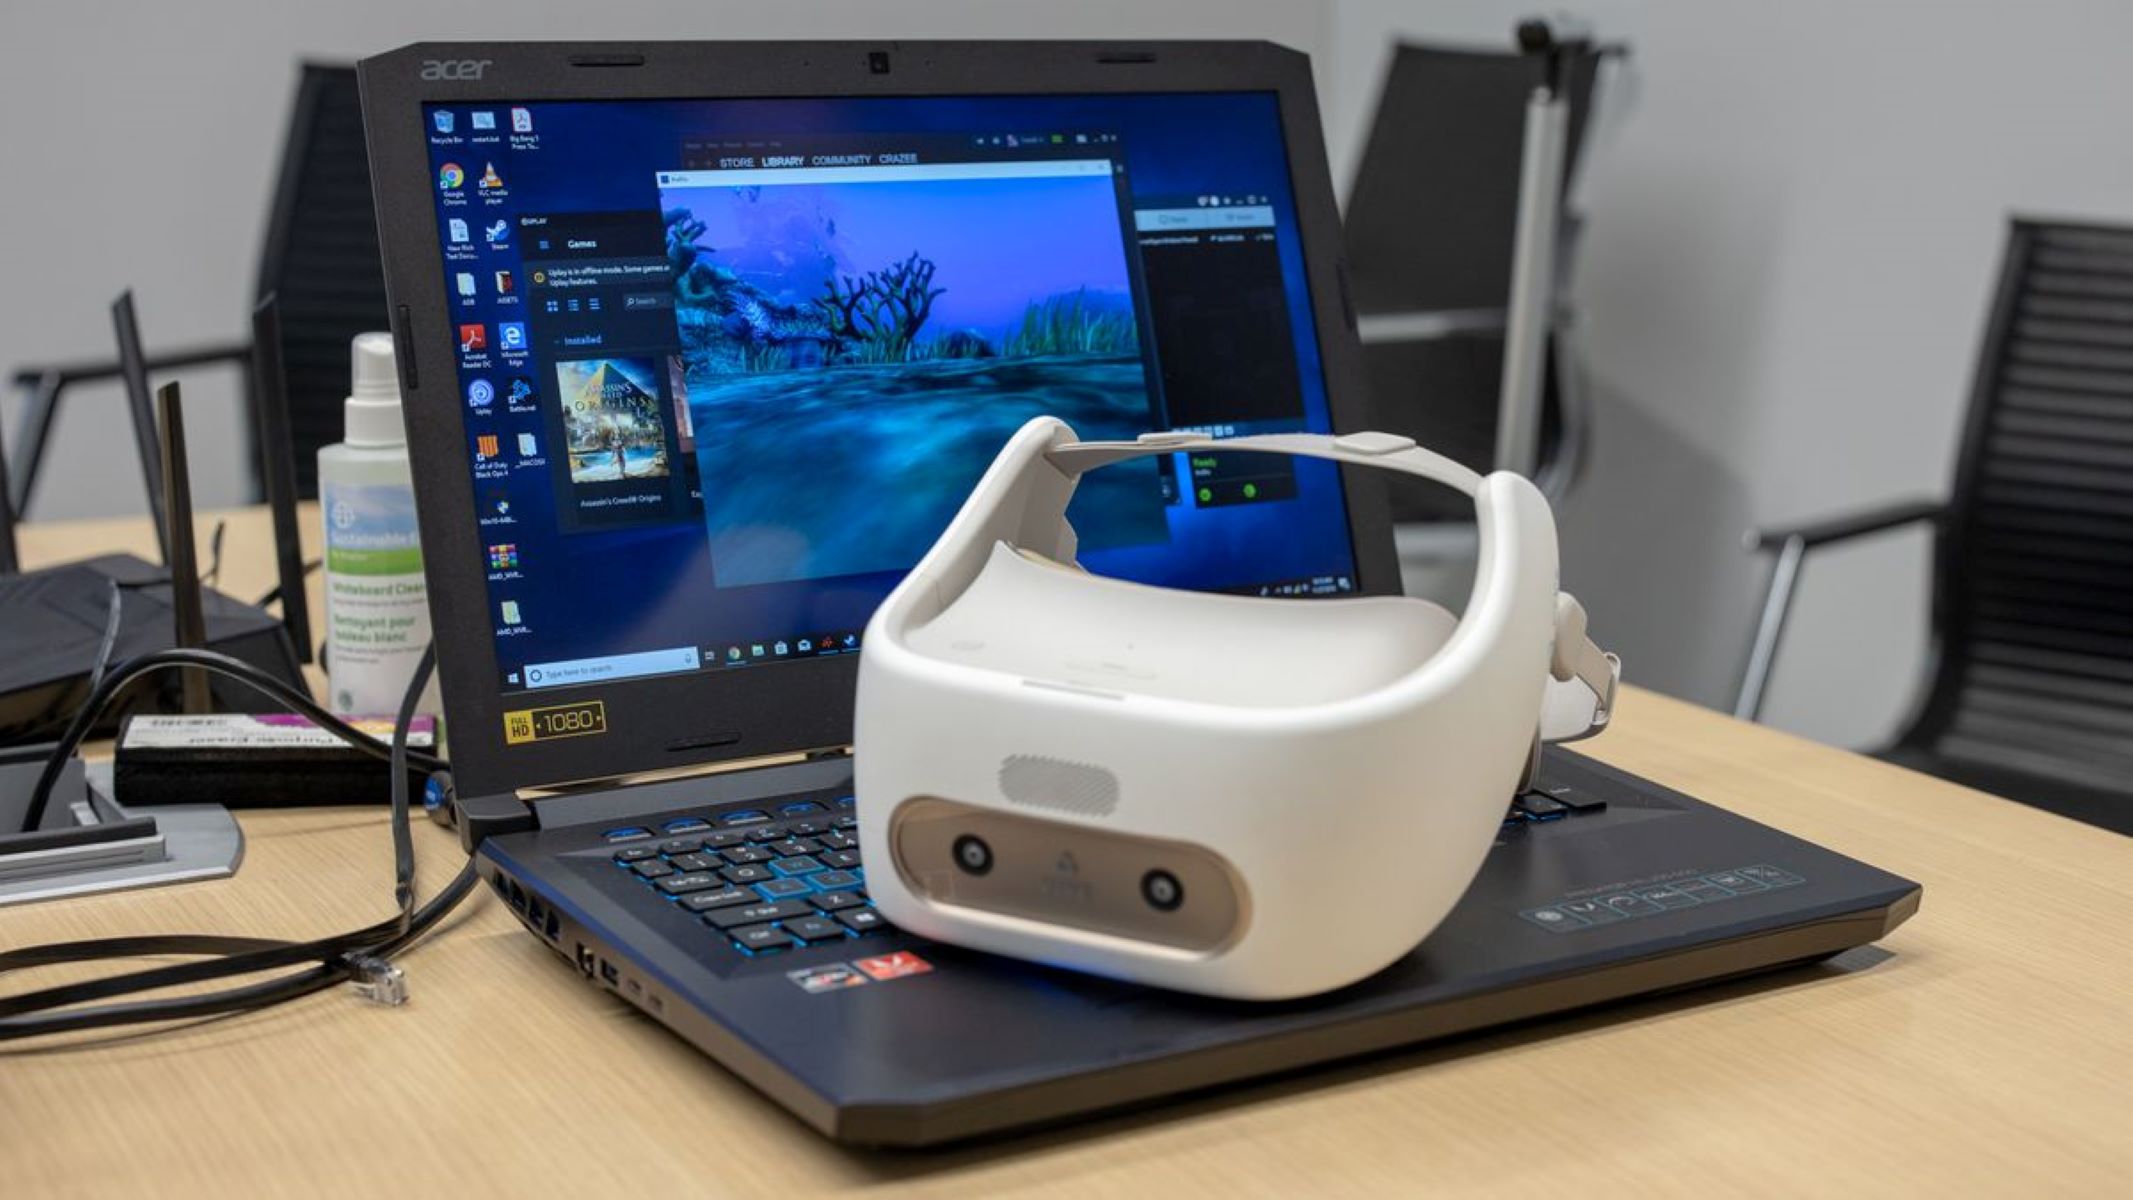
2. HTC Vive Headset: Of course, you’ll need the HTC Vive headset itself, which includes the head-mounted display (HMD), two motion controllers, and the base stations for tracking. Ensure that your headset is set up properly, calibrated, and functioning correctly before attempting to stream.
3. Internet Connection: A stable and high-speed internet connection is crucial for streaming HTC Vive. It’s recommended to have a minimum upload speed of at least 5 Mbps for a quality streaming experience. A wired internet connection is typically more reliable than Wi-Fi, so if possible, connect your PC directly to the router using an Ethernet cable.
4. Streaming Software: Choose a reliable streaming software that supports HTC Vive streaming. Popular options include OBS Studio, XSplit, and Streamlabs OBS. These software programs allow you to capture and stream your HTC Vive gameplay to various streaming platforms like Twitch, YouTube, or Facebook Live.
5. Microphone and Webcam: To engage with your viewers, it’s important to have a good quality microphone for clear voice communication. A webcam is optional but can be useful for adding a face cam overlay to your stream and creating a more personal connection with your audience.
6. Additional Accessories: Consider any additional accessories that can enhance your streaming experience, such as a green screen for background removal, a capture card for higher quality streaming, and lighting equipment to improve the visual quality of your stream.
Before streaming, ensure that you have installed all necessary drivers and updates for both your HTC Vive headset and streaming software. It’s also essential to optimize your PC settings for streaming, such as closing unnecessary background programs and adjusting graphics settings to prioritize performance.
By meeting these hardware and software requirements, you’ll be well on your way to streaming HTC Vive and providing an immersive and enjoyable experience for your viewers.
How to Set Up HTC Vive for Streaming
Setting up your HTC Vive for streaming involves a few essential steps to ensure optimal performance and seamless integration with your streaming software. Here’s a step-by-step guide to help you get started:
Step 1: Hardware Setup: Begin by setting up your HTC Vive hardware. This involves connecting the base stations to the power source and positioning them in opposite corners of your play space. Make sure they have a clear line of sight to each other and are mounted securely. Next, connect the HTC Vive headset to your PC using the provided cables. Ensure that all connections are secure and that the headset is properly calibrated.
Step 2: Install VR and Streaming Software: Download and install the necessary VR and streaming software on your PC. This includes the SteamVR software for HTC Vive and your preferred streaming software, such as OBS Studio or XSplit. Follow the instructions provided by the software to complete the installation process.
Step 3: Configure SteamVR Settings: Open the SteamVR software and navigate to the settings menu. Here, you can customize various settings to optimize your streaming experience. Adjust the resolution, refresh rate, and render quality based on your PC’s capabilities and streaming requirements. You can also configure the audio and microphone settings to ensure clear communication during your stream.
Step 4: Set Up Your Streaming Software: Launch your streaming software and configure the settings specifically for HTC Vive streaming. Select the HTC Vive as your video input device and set the desired resolution and frame rate for your stream. Enable any additional features you wish to use, such as overlays or alerts, and test the audio and microphone settings to ensure they are working correctly.
Step 5: Test Your Setup: Before starting your stream, it’s crucial to test your setup to ensure everything is working as expected. Put on your HTC Vive headset and launch a VR game or application. Check if the game appears correctly in your headset and if your streaming software captures the VR content. Verify that the audio and microphone levels are balanced and that viewers can hear you clearly.
Step 6: Start Streaming: Once you have verified that everything is set up correctly, you’re ready to start streaming! Open your streaming software and select the desired streaming platform. Configure any additional settings, such as the stream title and description. Start your stream and engage with your audience as you immerse yourself in the virtual world of HTC Vive.
Remember to regularly update your HTC Vive and streaming software to ensure you have the latest features and bug fixes. Experiment with different settings and configurations to find the optimal setup that suits your streaming style and requirements.
By following these steps, you can set up your HTC Vive for streaming and provide an immersive and captivating experience for your viewers.
Choosing the Right Streaming Software
When it comes to streaming HTC Vive, choosing the right streaming software is crucial to ensure a smooth and high-quality streaming experience. There are several factors to consider when making this decision:
1. Compatibility: Ensure that the streaming software you choose is compatible with HTC Vive. Not all software programs support VR streaming, so it’s important to select one that specifically caters to VR content. Popular options include OBS Studio, XSplit, and Streamlabs OBS, which offer dedicated features and settings for VR streaming.
2. Ease of Use: Look for a streaming software that is user-friendly and intuitive. You want to spend your time creating content and interacting with your audience, not struggling with complicated software settings. Consider the user interface, ease of setup, and the availability of tutorials or community support to help you get started.
3. Streaming Features: Assess the features offered by the streaming software. Look for options such as overlays, alerts, and chat integration to enhance your stream. Some software programs also allow you to customize your layout, add animations, and use green screens for professional-looking streams. Consider the features you need to engage and interact with your audience effectively.
4. Performance and Stability: Streaming software should be optimized to minimize lag and ensure a stable streaming experience. Check user reviews and feedback to determine the performance and stability of the software under different conditions. It’s crucial to choose a software that can handle the resource-intensive demands of streaming VR content without sacrificing performance.
5. Customization Options: Look for streaming software that allows you to customize your stream to reflect your branding or personal style. This includes the ability to add your logo, personalize overlays, and customize alerts. The more control you have over the visual elements of your stream, the more you can create a unique and engaging viewer experience.
6. Multiplatform Support: Consider whether the streaming software supports multiple streaming platforms, such as Twitch, YouTube, or Facebook Live. This flexibility allows you to reach a wider audience and choose the platform that best suits your content and target viewers.
7. Integration with other Tools: Some streaming software programs offer integration with other popular tools and services. Check if the software integrates with chatbots, donation platforms, or analytics services to enhance your stream’s functionality and viewer engagement.
Ultimately, the choice of streaming software will depend on your specific needs and preferences. Consider your budget, technical expertise, and the features that are most important to you. It may be helpful to try out different software programs before committing to one, so you can assess their performance and suitability for streaming HTC Vive.
By carefully selecting the right streaming software, you can provide a seamless and immersive streaming experience that captivates your audience and showcases the best of HTC Vive content.
Configuring Settings for HTC Vive Streaming
Configuring the right settings for HTC Vive streaming is crucial to ensure optimal performance and deliver a high-quality streaming experience. Here are the key settings you need to consider:
1. Video Output: Set the resolution and frame rate of your stream. It’s recommended to stream at a resolution of 720p or higher for clear visuals. Choose a frame rate that matches the capabilities of your PC and provides smooth motion in your stream.
2. Bitrate: The bitrate determines the quality of your stream. Higher bitrates result in better video quality but require a faster internet connection. Experiment with different bitrates to find the balance between video quality and viewer accessibility.
3. Audio Settings: Configure the audio settings for your stream, including the microphone and game audio levels. Ensure that your microphone is set to an appropriate volume, allowing your viewers to hear you clearly. Consider enabling noise suppression or filters to reduce background noise.
4. Camera Overlay: If you choose to use a webcam for a face cam overlay, configure the camera settings to position it within your stream layout. Adjust the resolution and frame rate of the camera to match your stream’s video settings.
5. Streaming Platform Integration: Link your streaming software with your chosen streaming platform, such as Twitch or YouTube. Enter your streaming key or account details to enable a seamless connection between your software and the platform. This allows you to start and manage your stream directly from the software.
6. Overlays and Alerts: Customize your stream with overlays and alerts. These visual elements can enhance the viewer experience and provide information such as chat messages, donation notifications, or subscriber alerts. Configure these overlays according to your branding and personal preferences.
7. Test and Monitor: Before going live, conduct a thorough test of your stream setup. Use the preview or test mode in your streaming software to ensure that all settings are functioning correctly. Monitor the stream quality, audio levels, and visual elements to resolve any issues before broadcasting to your audience.
8. Backup and Save Settings: Once you have configured your settings, consider saving them as a profile or backup file. This allows you to quickly restore your preferred settings if you need to reinstall the software or make changes in the future.
9. Monitor Performance: Keep an eye on your PC’s performance during the stream. Use monitoring tools provided by your streaming software or third-party applications to track CPU, GPU, and network usage. Adjust your settings accordingly if you encounter performance issues or dropped frames.
10. Learn and Adapt: As you stream and gain experience, continually monitor and adjust your settings based on viewer feedback and personal preferences. Experiment with different configurations to find the optimal setup that enhances your stream quality and engagement with your audience.
Remember, the specific settings may vary depending on your chosen streaming software. Therefore, it’s vital to explore the documentation and resources provided by your software to determine the appropriate configuration for HTC Vive streaming. Regularly update your software and stay informed about new features and settings that can further enhance your stream.
By configuring the right settings for HTC Vive streaming, you can provide a high-quality and immersive experience for your viewers, ensuring an enjoyable and captivating VR stream.
Tips for a Smooth Streaming Experience
Streaming HTC Vive can be an exciting and immersive experience for both you and your viewers. To ensure a smooth and enjoyable streaming session, here are some important tips to keep in mind:
1. Optimize Your PC: Prioritize performance by optimizing your PC for streaming. Close unnecessary background applications, clear up disk space, and update your drivers to ensure your system is running smoothly.
2. Stable Internet Connection: A stable and high-speed internet connection is essential for seamless streaming. Use a wired connection whenever possible to minimize latency and reduce the risk of disconnections or interruptions.
3. Test Stream Settings: Before going live, test your stream settings to ensure the audio, video, and overlays are appearing as intended. Use the preview or test mode in your streaming software to make any necessary adjustments before broadcasting to your audience.
4. Stream at Optimal Settings: Find a balance between video quality and performance by adjusting your stream settings. Experiment with different bitrates, resolutions, and frame rates to achieve the best possible streaming quality within the limitations of your internet connection and PC hardware.
5. Engage with your Viewers: Interact with your viewers and build a sense of community by responding to chat messages and questions. Engage in meaningful conversations and create a positive and inclusive environment for your viewers to feel connected and appreciated.
6. Promote Your Stream: Promote your stream on social media and gaming communities to attract a larger audience. Utilize relevant hashtags, create eye-catching thumbnails or promotions, and leverage the power of networking to expand your reach.
7. Monitor Stream Performance: Keep an eye on your streaming software’s performance metrics, such as dropped frames or network usage. Monitor your PC’s temperature and usage to ensure it doesn’t overheat or experience performance bottlenecks during your stream.
8. Experiment with Overlays and Alerts: Customize your stream with overlays and alerts to enhance the viewer experience. Test different designs, animations, and notifications to find the ones that resonate with your audience.
9. Collaborate and Network: Collaborate with other streamers and content creators to cross-promote each other’s streams. Networking with like-minded individuals can help you reach a larger audience and discover new opportunities for growth.
10. Learn and Adapt: Continuously learn from your streaming experiences and don’t be afraid to make changes. Experiment with different games, content styles, and stream formats to find what resonates best with your audience.
11. Interact with the HTC Vive Community: Engage with the HTC Vive community by joining forums, attending VR events, or participating in online discussions. Collaborating with other HTC Vive enthusiasts can provide valuable insights and help you stay up-to-date with the latest VR trends and developments.
By following these tips, you can create a smooth and engaging streaming experience that keeps viewers coming back for more. Remember, streaming is not just about showcasing your gameplay, but also about building connections and providing a memorable experience for your audience.
Troubleshooting Common Streaming Issues
While streaming HTC Vive, you may encounter various issues that can disrupt the smooth flow of your stream. Here are some common streaming issues and troubleshooting tips to help you overcome them:
1. Low Stream Quality: If your stream appears pixelated or blurry, consider adjusting the streaming settings. Increase the resolution, bitrate, or frame rate to improve the quality. Ensure that your internet connection is stable and capable of handling the increased data transfer.
2. High Latency or Lag: Experiencing latency or lag can create a frustrating viewing experience. To reduce latency, consider reducing the stream delay in your streaming software and close any unnecessary applications running in the background on your PC that may be consuming resources.
3. Audio and Video Sync Issues: Audio and video sync issues can be distracting for viewers. Try adjusting the audio settings in your streaming software to sync with the video feed. You may also need to adjust settings on your HTC Vive headset to ensure proper synchronization between audio and visual elements.
4. Network Congestion: If you’re experiencing network congestion or dropped frames in your stream, check for any bandwidth-intensive applications or downloads running on your network. Consider limiting their usage or pausing them during your stream to ensure a smoother streaming experience.
5. Hardware Compatibility Issues: If you encounter compatibility issues between your HTC Vive and streaming software, ensure that both are updated to the latest versions. Additionally, check if there are any known compatibility issues or updates available for your PC’s hardware drivers.
6. Stream Disconnects: A sudden stream disconnect can be frustrating for both you and your viewers. Ensure that all cables and connections between your HTC Vive headset and PC are secure. If the issue persists, try restarting your streaming software or even your PC if necessary.
7. Audio Quality: If you’re experiencing poor audio quality, check the microphone settings in your streaming software. Ensure that the microphone is correctly connected and positioned, and adjust the audio levels and filters as necessary to improve the clarity and remove any background noise.
8. Software Performance Issues: If you notice frequent crashes, freezes, or performance issues with your streaming software, ensure that you are using the latest version. Additionally, check for any conflicting software or background processes that might be impacting the performance of your streaming software.
9. Viewer Interaction Problems: Troubleshoot any issues that may prevent you from interacting with your viewers effectively. Ensure that chat overlays and alert notifications are working correctly, and test your ability to read and respond to viewer messages throughout your stream.
10. Test and Iterate: Regardless of the issue you are facing, conducting regular tests and iterating on your settings and configurations is crucial. Keep a log of any issues encountered and document the steps taken to resolve them. This will allow you to troubleshoot more efficiently in the future.
Remember, troubleshooting streaming issues requires patience and persistence. By following these tips and adapting them to your specific circumstances, you can overcome common streaming problems and provide a smooth and enjoyable viewing experience for your audience.
Best Practices for HTC Vive Streaming
Streaming HTC Vive offers a unique and immersive experience for both streamers and viewers. To make the most of your HTC Vive stream, here are some best practices to consider:
1. Engage with Your Audience: Interact with your audience and build a community around your stream. Respond to chat messages, ask for feedback, and make your viewers feel involved. This engagement creates a more enjoyable and interactive experience for everyone involved.
2. Plan and Prepare: Before starting your stream, plan and prepare the content you want to showcase. Have a game or VR experience in mind and familiarize yourself with it beforehand. This will help you provide a more structured and engaging experience for your viewers.
3. Provide Clear and Concise Explanations: When playing a VR game or experiencing a virtual environment, provide clear and concise explanations of your actions and surroundings. This will help viewers understand what you’re doing and immerse themselves in the experience along with you.
4. Experiment with Different VR Games and Experiences: Keep your content fresh and exciting by exploring a variety of VR games and experiences. Experimenting with different genres and styles will attract a broader audience and keep your stream dynamic and engaging.
5. Show Your Enthusiasm: Let your enthusiasm and passion for VR shine through during your stream. Share your genuine excitement and reactions to create a more immersive experience for your viewers. Your enthusiasm is contagious and will keep viewers coming back for more.
6. Use a Second Camera: Consider using a second camera to show your real-world reactions during your VR gameplay. This adds a personal touch to your stream and allows viewers to see your facial expressions and reactions as you navigate virtual environments.
7. Make Use of Green Screens: Utilize a green screen setup to remove the background behind you and create a more professional-looking stream. This can enhance the immersion and focus on the VR content without distractions.
8. Customize Your Stream Layout: Take advantage of overlay features provided by your streaming software to personalize your stream layout. Add widgets or overlays that showcase your social media handles, recent followers, or current donation goals. This adds visual appeal and promotes viewer engagement.
9. Create a Schedule: Establish a consistent streaming schedule that allows your audience to know when to expect your HTC Vive streams. Consistency helps attract and retain viewers, as they can plan to tune in at specific times.
10. Continually Learn and Improve: Regularly evaluate your stream and learn from both success and challenges. Take feedback from your audience and make adjustments to enhance your stream quality, content choices, and overall viewer experience.
Remember, streaming HTC Vive is not just about showcasing gameplay; it’s about creating a community and delivering an immersive experience for your viewers. By following these best practices, you can provide an engaging and enjoyable HTC Vive streaming experience that will keep viewers coming back for more.