
Check Compatibility
Before you begin the process of pairing your Apple Watch with your iPhone, it’s important to ensure that they are compatible with each other. Apple Watch models are designed to work with specific iPhone models, so it’s essential to confirm that your devices are compatible. Here’s how:
- Check the Apple website: Visit the Apple website or the Apple Watch product page to find detailed information about device compatibility. Look for the specific iPhone models that are compatible with your Apple Watch model.
- Software compatibility: Make sure that your iPhone is running the latest version of iOS. Apple Watch models often require a specific version of iOS to be compatible. You can check for software updates by going to Settings > General > Software Update on your iPhone.
- Size compatibility: Consider the size of your Apple Watch and ensure that it is suitable for your wrist. Apple offers various sizes, including 38mm, 40mm, 42mm, and 44mm. It’s important to choose a size that fits comfortably on your wrist.
- Compatibility with watchOS: Apple Watch models require specific versions of watchOS to function properly. Check if your iPhone supports the required watchOS version for your Apple Watch. You can do this by going to the Apple Watch app on your iPhone, tapping on the “My Watch” tab, and selecting “General” > “Software Update.”
If your iPhone and Apple Watch meet the compatibility requirements, you’re ready to proceed with the pairing process. It’s important to note that older models of the Apple Watch may have limitations in terms of compatibility, so double-check the specific requirements for your device.
Update Your iPhone and Apple Watch
Before you begin the pairing process, it’s crucial to ensure that both your iPhone and Apple Watch are running the latest software versions. Updating the software on your devices can help resolve compatibility issues and ensure a smoother pairing experience. Follow these steps to update your iPhone and Apple Watch:
- Update your iPhone: Go to the “Settings” app on your iPhone and tap on “General.” Next, select “Software Update” to check for any available updates. If an update is available, tap “Download and Install” and follow the on-screen instructions to complete the update. Ensure that your iPhone is connected to a stable Wi-Fi network and has at least 50% battery life.
- Update your Apple Watch: Make sure your Apple Watch is connected to its charger and placed near your iPhone. Open the “Apple Watch” app on your iPhone and tap on the “My Watch” tab. Next, select “General” and then “Software Update.” If an update is available, tap “Download and Install.” Follow the prompts to complete the update, ensuring that your Apple Watch remains connected to its charger throughout the process.
Updating your devices may take some time, so ensure that you have sufficient time available to complete the process. It’s recommended to keep your iPhone and Apple Watch connected to their chargers during the updates to avoid any interruptions due to low battery. Once both devices are updated, you can proceed with the pairing process.
Put Your Apple Watch Into Pairing Mode
Before you can pair your Apple Watch with your iPhone, you’ll need to put your Apple Watch into pairing mode. Pairing mode allows your Apple Watch to be discoverable by your iPhone for the initial setup process. Here’s how you can put your Apple Watch into pairing mode:
- Turn on your Apple Watch: Press and hold the side button on your Apple Watch until you see the Apple logo appear on the screen. It may take a few seconds for your Apple Watch to turn on.
- Swipe up on the watch face: Once your Apple Watch turns on, swipe up from the bottom of the watch face to access the Control Center.
- Tap on the “Settings” icon: In the Control Center, locate and tap on the “Settings” icon. The Settings icon resembles a gear.
- Scroll down and select “General”: Scroll down the settings menu and tap on “General.”
- Tap on “Reset”: In the General settings, scroll down and tap on “Reset.”
- Select “Erase All Content and Settings”: Within the Reset menu, choose “Erase All Content and Settings.” This action will remove all data and settings from your Apple Watch, preparing it for the pairing process.
- Confirm the action: A warning message will appear, informing you that all content and settings will be erased. Tap on “Erase All” to confirm the action.
Your Apple Watch will now go into pairing mode. The screen will display the Apple logo and show “Hello” in various languages. At this point, your Apple Watch is ready to be paired with your iPhone.
Open the Apple Watch app on Your iPhone
Once your Apple Watch is in pairing mode, the next step is to open the Apple Watch app on your iPhone. The Apple Watch app allows you to seamlessly connect and configure your Apple Watch with your iPhone. Here’s how you can open the Apple Watch app:
- Unlock Your iPhone: If your iPhone is locked, unlock it using your passcode, Touch ID, or Face ID.
- Find the Apple Watch App: Locate the Apple Watch app on your iPhone home screen. The app icon features a silhouette of an Apple Watch.
- Tap on the Apple Watch App Icon: Tap on the Apple Watch app icon to launch the app.
By opening the Apple Watch app on your iPhone, you’ll be able to access all the necessary settings and options to pair and customize your Apple Watch. The app serves as the central hub for managing your Apple Watch’s features and configurations.
If you cannot find the Apple Watch app on your iPhone, it may be because you are using an older version of iOS. Ensure that your iPhone is running the latest version of iOS and try searching for the app again. If you still can’t find it, check if you have accidentally hidden it in a folder or if it is restricted by parental controls.
Once you have successfully opened the Apple Watch app on your iPhone, you’re ready to proceed with the pairing process and set up your Apple Watch to your desired preferences.
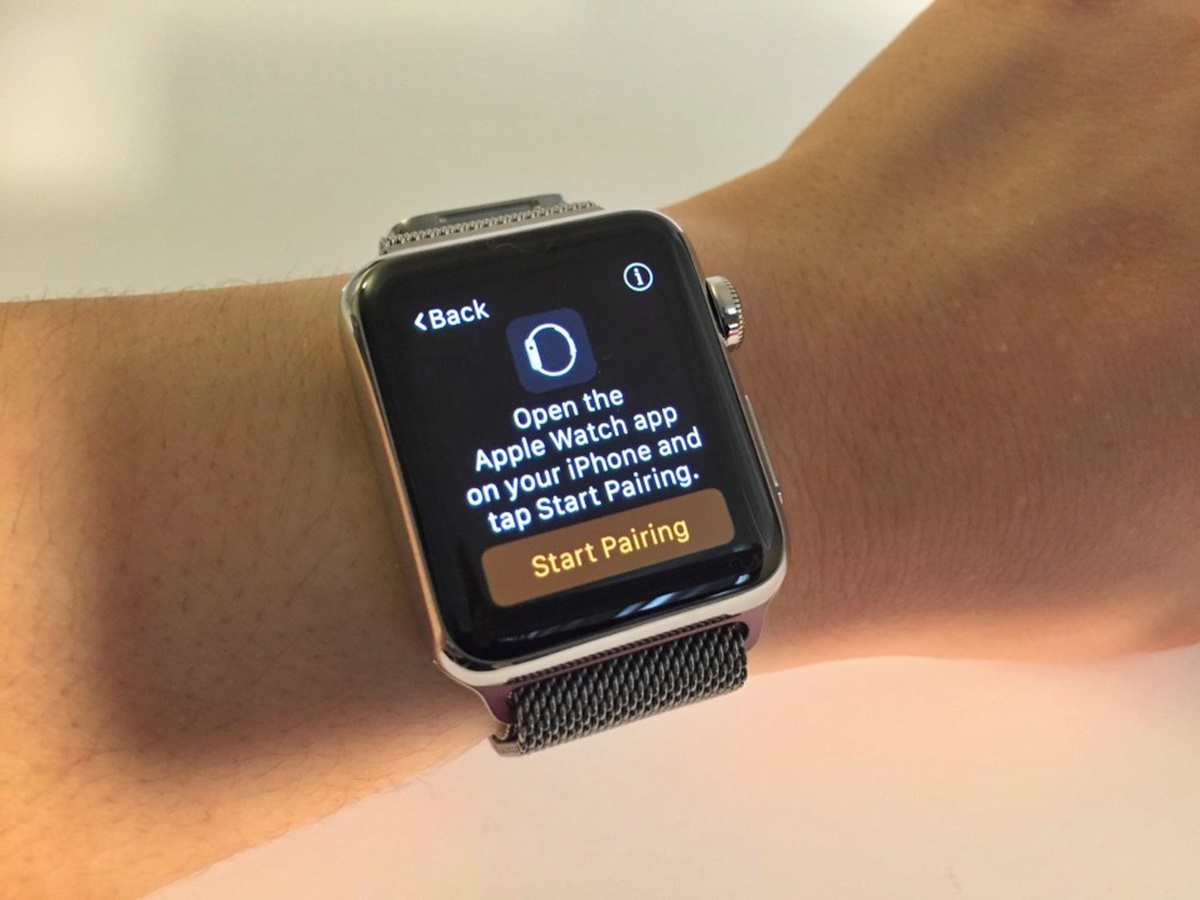
Tap “Start Pairing” on Your iPhone
After opening the Apple Watch app on your iPhone, the next step is to initiate the pairing process by tapping “Start Pairing.” This will prompt your iPhone to search for nearby Apple Watches and establish a connection. Here’s how you can start pairing your iPhone with your Apple Watch:
- Launch the Apple Watch App: Make sure you have opened the Apple Watch app on your iPhone.
- Tap “Start Pairing”: Within the Apple Watch app, you will see the “Start Pairing” option. Tap on it to begin the pairing process.
Once you tap “Start Pairing,” your iPhone will use Bluetooth to search for nearby Apple Watches. Make sure that your Apple Watch is close to your iPhone and in pairing mode. You may need to wait a few moments for your iPhone to discover your Apple Watch.
If your iPhone does not detect your Apple Watch, ensure that both devices have sufficient battery life and ensure that Bluetooth is enabled on your iPhone. If the issue persists, try restarting both your iPhone and Apple Watch and attempt the pairing process again.
Upon successful detection, your iPhone will display a pairing animation on the screen. You will need to align your iPhone’s camera with the animation on your Apple Watch to establish a connection.
Note: For some Apple Watch models, an alternative method called “Automatic Setup” may be available. This allows for a more seamless pairing process by transferring settings from your iPhone directly to your Apple Watch. If the Automatic Setup option appears, you can proceed with it by following the on-screen instructions.
Once the pairing process is underway, you can proceed to the next steps to complete the setup process and configure your Apple Watch based on your preferences.
Position Your iPhone Over the Apple Watch
Once you have tapped “Start Pairing” on your iPhone, the next step is to position your iPhone over your Apple Watch. This allows the devices to establish a connection and complete the pairing process. Follow these steps to position your iPhone correctly:
- Ensure both devices are powered on: Make sure that your iPhone and Apple Watch are both turned on and have sufficient battery life.
- Open the Camera app on your iPhone: Locate and open the Camera app on your iPhone. The Camera app is usually found on the home screen of your iPhone.
- Align your iPhone’s viewfinder with the animation on your Apple Watch: Within the Apple Watch app on your iPhone, a pairing animation will be displayed. Position your iPhone’s camera so that the viewfinder encompasses the animation on your Apple Watch’s screen.
- Wait for the visual confirmation: Keep your iPhone steady and wait for your Apple Watch’s screen to display a message confirming that pairing is in progress.
During this process, your iPhone will utilize the camera to capture the animation displayed on your Apple Watch’s screen. This step enables the devices to securely pair and establish a connection.
It’s important to ensure that your iPhone’s camera is directly above the animation on your Apple Watch’s screen. Keep both devices steady and aligned until you receive the visual confirmation on your Apple Watch.
If you encounter any difficulties in aligning the devices or initiating the pairing process, try adjusting the position of your iPhone, ensuring there is ample lighting, and double-checking that both devices are in the correct mode.
Once the pairing is successful, you can proceed to the next steps to set up cellular connection (if applicable) and customize your Apple Watch according to your preferences.
Use Your iPhone to Scan the Apple Watch’s Display
After positioning your iPhone over your Apple Watch and receiving the visual confirmation, the next step is to use your iPhone to scan the display of your Apple Watch. This step ensures the accurate pairing of the devices. Follow these steps to complete the scanning process:
- Keep your iPhone steady and aligned: Ensure that your iPhone remains steady and aligned with the animation on your Apple Watch’s screen.
- Wait for the scanning process to begin: The Apple Watch app on your iPhone will automatically detect the animation on your Apple Watch and initiate the scanning process. This may take a few moments.
- Follow the on-screen instructions: The Apple Watch app will guide you through the scanning process with on-screen instructions. Depending on the model of your Apple Watch and your iPhone, you may be asked to input a code or confirm a pairing request.
- Continue with the setup process: Once the scanning process is complete and the pairing is successful, you can proceed with the setup process, which includes configuring various settings and preferences on your Apple Watch.
The scanning process is crucial to ensure a secure and accurate pairing of your iPhone and Apple Watch. It establishes a unique connection between the devices, allowing for seamless communication and synchronization.
If you encounter any issues with the scanning process, ensure that both devices are in close proximity, the screens are clean and unobstructed, and that you are following the on-screen instructions accurately.
Once the scanning is complete, you can move forward with setting up cellular connection (if applicable), choosing your wrist preference, creating a passcode, customizing app installations, and configuring the various features and settings according to your preferences.
Set Up Cellular Connection (If Applicable)
If you have an Apple Watch model with cellular capabilities, you have the option to set up a cellular connection. With a cellular connection, your Apple Watch can independently make calls, send messages, stream music, and access certain apps without the need for your iPhone to be nearby. Here’s how you can set up a cellular connection on your Apple Watch:
- Confirm cellular compatibility: Check if your Apple Watch model supports cellular connectivity. Some models have GPS-only or GPS + Cellular versions. Cellular capability allows you to use your Apple Watch independently, even when your iPhone is not nearby. Confirm with your wireless carrier if your Apple Watch can be activated on their network.
- Ensure your iPhone and Apple Watch are close: Place your iPhone and Apple Watch near each other during the setup process.
- Follow on-screen instructions: Open the Apple Watch app on your iPhone and navigate to the Cellular option. Depending on your carrier and location, you may be prompted to set up cellular service, transfer your existing plan, or purchase a new plan.
- Contact your carrier (if necessary): If prompted, contact your wireless carrier to add your Apple Watch to your existing plan or set up a new plan. They will guide you through the process and provide any necessary information.
- Activate your cellular plan: Follow the instructions provided by your carrier to activate the cellular plan on your Apple Watch. This may involve scanning a QR code, entering specific codes, or confirming your plan details.
- Complete the setup: Once your cellular plan is activated, continue with the setup process in the Apple Watch app on your iPhone. You can configure other settings, such as emergency SOS, app notifications, and more, according to your preferences.
Please note that cellular connectivity may incur additional fees from your carrier. Make sure to review your carrier’s terms and conditions and choose a plan that suits your needs. Setting up a cellular connection provides the convenience of using your Apple Watch independently, even when your iPhone is not within range.
If you encounter any issues during the setup process, reach out to your wireless carrier for assistance. They will be able to troubleshoot and guide you through the activation process, ensuring a smooth and successful setup of the cellular connection on your Apple Watch.
Choose Your Wrist Preference
When setting up your Apple Watch, you have the option to choose your preferred wrist. This selection determines the orientation of the display and adjusts the interface accordingly. Here’s how you can choose your wrist preference:
- Launch the Apple Watch app on your iPhone: Open the Apple Watch app on your iPhone to access the settings for your Apple Watch.
- Tap on the “My Watch” tab: Once you’re in the Apple Watch app, tap on the “My Watch” tab at the bottom of the screen. This tab allows you to customize various aspects of your Apple Watch.
- Select “General”: In the “My Watch” tab, scroll down and select “General.” This option is where you’ll find general settings for your Apple Watch.
- Choose “Orientation”: Within the General settings, you’ll find the “Orientation” option. Tap on it to access the wrist preference settings.
- Select your wrist preference: On the Wrist Preference screen, you’ll see options for Left Wrist and Right Wrist. Choose the option that corresponds to the wrist on which you plan to wear your Apple Watch.
- Confirm your selection: After selecting your preferred wrist, your Apple Watch’s display orientation will change accordingly. Verify that the orientation aligns with your chosen wrist.
Choosing your wrist preference ensures that the Apple Watch’s display is correctly oriented when you wear it. This way, you can easily read notifications, interact with apps, and access features without any inconvenience. Remember, you can change the wrist preference settings at any time by following the same steps.
By customizing the wrist preference, you enhance your overall experience with the Apple Watch, as the device will adapt to your preferred wrist orientation. This personalization allows for seamless interaction and ensures optimal comfort while using your Apple Watch.
Create a Passcode
Creating a passcode for your Apple Watch is an essential security measure to protect your personal information and ensure that only authorized individuals can access your device. Setting up a passcode adds an extra layer of security, preventing unauthorized access and safeguarding your data. Follow these steps to create a passcode for your Apple Watch:
- Access the “Settings” app: On your Apple Watch, locate and tap the “Settings” app. It can be identified by the gear icon.
- Scroll down and select “Passcode”: Within the Settings menu, scroll down to find the “Passcode” option and tap on it.
- Tap on “Turn Passcode On”: On the Passcode screen, toggle the switch to the “On” position to enable passcode protection.
- Enter a 4 to 6-digit passcode: On the Set Passcode screen, you will be prompted to enter a numeric passcode. Use the on-screen keypad to enter your desired passcode. You can choose a 4 to 6-digit combination.
- Re-enter your passcode to confirm: To ensure accuracy, you will be asked to re-enter your passcode to confirm it. Make sure to enter the same passcode you chose earlier.
Once you have successfully created a passcode, your Apple Watch will be locked, and you will need to enter the passcode every time you put it on or remove it from your wrist. This adds an extra layer of security to protect your personal information, such as health data, notifications, and sensitive app data on your Apple Watch.
It’s important to choose a passcode that is easy for you to remember but not easily guessed by others. Avoid using common passcodes like “123456” or repetitive numbers (e.g., “111111”). Consider using a combination that is memorable to you but not obvious to others.
By creating a passcode, you ensure that your Apple Watch remains secure and your personal data stays protected. It’s a simple yet effective way to safeguard your device and maintain your privacy.
Choose Your Privacy Settings
When setting up your Apple Watch, it’s important to review and adjust your privacy settings to ensure that you have control over the information shared and the apps that have access to it. Here’s how you can choose your privacy settings:
- Open the Apple Watch app on your iPhone: Launch the Apple Watch app on your iPhone to access the settings for your Apple Watch.
- Tap on the “My Watch” tab: In the Apple Watch app, navigate to the “My Watch” tab located at the bottom of the screen. This tab allows you to customize various aspects of your Apple Watch.
- Select “Privacy”: Within the “My Watch” tab, scroll down until you find the “Privacy” option. Tap on it to access the privacy settings.
- Review and adjust privacy settings: In the Privacy settings, you will see options to control various aspects, such as Location Services, Contacts, Calendars, Health, and more. Tap on each option to review the settings and make adjustments according to your preferences.
- Enable or disable specific permissions: Depending on your preferences, you can enable or disable specific permissions for each category. For example, you can choose whether an app has access to your location or health data.
Reviewing and adjusting your privacy settings allows you to maintain control over your personal information and improve the security of your Apple Watch. It ensures that only the apps and services you trust have access to your data.
Consider your comfort level and the specific functionality you want from your Apple Watch when choosing your privacy settings. Keep in mind that adjusting certain privacy settings may impact the functionality or features of specific apps. Review the descriptions provided for each setting to understand the implications before making any changes.
By customizing your privacy settings, you can tailor your Apple Watch experience to align with your privacy preferences and have peace of mind knowing that your personal information is being managed according to your wishes.
Sign in with Apple ID
Signing in with your Apple ID on your Apple Watch allows you to access and sync your iCloud data, such as contacts, calendars, messages, and more. It also enables features like Apple Pay and the ability to download apps from the App Store directly onto your Apple Watch. Here’s how you can sign in with your Apple ID:
- Open the Apple Watch app on your iPhone: Launch the Apple Watch app on your iPhone to access the settings for your Apple Watch.
- Tap on the “My Watch” tab: In the Apple Watch app, navigate to the “My Watch” tab located at the bottom of the screen. This tab allows you to customize various aspects of your Apple Watch.
- Select “General”: Within the “My Watch” tab, scroll down and tap on “General.” This option is where you’ll find general settings for your Apple Watch.
- Tap on “Apple ID”: In the General settings, you’ll see an option for “Apple ID.” Tap on it to proceed with signing in.
- Enter your Apple ID credentials: On the Apple ID screen, you’ll be prompted to enter your Apple ID email address and password. Enter the credentials associated with your Apple ID.
- Complete the sign-in process: Once you enter your Apple ID credentials, follow the on-screen instructions to complete the sign-in process. This may include verifying your identity through two-factor authentication or other security measures.
Signing in with your Apple ID allows you to seamlessly access and synchronize your data across multiple Apple devices. It provides a unified experience and ensures that your information is readily available on your Apple Watch.
If you don’t have an Apple ID, you can create one during the sign-in process by tapping on “Don’t have an Apple ID or forgot it?” and following the prompts to create a new Apple ID.
By signing in with your Apple ID, you can enjoy the full range of features and services available on your Apple Watch, personalized to your preferences and connected to your iCloud account.
Enable Location Services (If Desired)
Enabling Location Services on your Apple Watch allows you to take advantage of location-based features and apps. By granting access to your location, you can use apps like Maps, Weather, and fitness tracking apps to provide more accurate and personalized information. If you wish to enable Location Services on your Apple Watch, follow these steps:
- Access the “Settings” app: On your Apple Watch, locate and tap the “Settings” app. It can be identified by the gear icon.
- Scroll down and select “Privacy”: Within the Settings menu, scroll down to find the “Privacy” option and tap on it.
- Tap on “Location Services”: In the Privacy settings, you will find the “Location Services” option. Tap on it to access the location settings.
- Enable Location Services: On the Location Services screen, toggle the switch to the “On” position to enable Location Services for your Apple Watch.
- Configure additional settings: You can further customize how your Apple Watch uses Location Services by adjusting the settings for individual apps listed on the same screen. You can choose to allow access to your location all the time, only while using the app, or deny location access entirely.
Enabling Location Services on your Apple Watch provides a range of benefits. It allows apps to provide you with accurate location-based information, such as the current weather conditions, turn-by-turn directions, or tracking your workouts more accurately. However, it’s essential to carefully consider which apps you grant access to your location to protect your privacy and conserve battery life.
Keep in mind that enabling Location Services on your Apple Watch may slightly impact battery life due to the constant use of GPS. However, Apple Watch is designed to optimize battery usage and allow you to adjust location settings based on your needs.
By enabling Location Services on your Apple Watch and selecting the appropriate settings for individual apps, you can enhance your overall experience and make the most of the location-based features available to you.
Customize App Installations
When setting up your Apple Watch, you have the ability to customize which apps are installed on your device. This allows you to have a tailored experience, ensuring that only the apps you find most useful and relevant are available on your Apple Watch. Follow these steps to customize your app installations:
- Launch the Apple Watch app on your iPhone: Open the Apple Watch app on your iPhone to access the settings for your Apple Watch.
- Tap on the “My Watch” tab: In the Apple Watch app, navigate to the “My Watch” tab located at the bottom of the screen. This tab allows you to customize various aspects of your Apple Watch.
- Select “App Store”: Within the “My Watch” tab, scroll down and tap on “App Store.” This is where you’ll find settings related to app installations.
- Toggle on “Automatic Downloads”: On the App Store screen, you’ll see an option for “Automatic Downloads.” Toggle the switch to the “On” position if you want apps from your iPhone to automatically install on your Apple Watch based on your iPhone’s app settings.
- Customize individual app installations: To manually choose which apps are installed on your Apple Watch, scroll down to the “Available Apps” section. Here you will see a list of compatible apps. Toggle the switch next to each app to select or deselect it for installation on your Apple Watch.
Customizing your app installations allows you to control the apps that take up space on your Apple Watch and appear on the app grid. By selecting only the most essential and frequently used apps, you can maintain a clutter-free and efficient user experience.
It’s important to note that not all apps on your iPhone may have a corresponding Apple Watch app. Only apps that have been developed or updated to include Apple Watch compatibility will appear in the “Available Apps” list. Additionally, some apps may have limited functionality or remove certain features when running on the Apple Watch.
By customizing your app installations, you can optimize the storage and usability of your Apple Watch, ensuring that you have quick access to the apps that matter most to you on your wrist.
Choose to Install Apps Automatically or Manually
When setting up your Apple Watch, you have the option to choose how apps are installed on your device. You can select between automatic or manual installation, depending on your preferences. Here’s how you can choose whether apps are installed automatically or manually:
- Launch the Apple Watch app on your iPhone: Open the Apple Watch app on your iPhone to access the settings for your Apple Watch.
- Tap on the “My Watch” tab: In the Apple Watch app, navigate to the “My Watch” tab located at the bottom of the screen. This tab allows you to customize various aspects of your Apple Watch.
- Select “App Store”: Within the “My Watch” tab, scroll down and tap on “App Store.” This is where you’ll find settings related to app installations.
- Choose automatic or manual installations: On the App Store screen, you’ll see an option to select either “Automatic Downloads” or “Manually”:
- Automatic Downloads: Toggle the switch to the “On” position if you want apps on your iPhone to automatically install on your Apple Watch. This means that if you download an app on your iPhone that also has a compatible Apple Watch version, it will automatically install on your Apple Watch as well.
- Manually: Toggle the switch to the “Off” position if you prefer to manually choose which apps to install on your Apple Watch. With this option, you will need to manually select and install apps from the App Store on your Apple Watch.
Choosing between automatic and manual app installations allows you to have control over which apps are installed on your Apple Watch. Automatic installations can be convenient, ensuring that apps you frequently use on your iPhone are readily available on your wrist. On the other hand, manual installations provide a more personalized and selective approach, allowing you to choose only the apps that you find most useful on your Apple Watch.
Keep in mind that not all apps on your iPhone will have compatible versions for the Apple Watch. Some apps may have limited functionality on the Apple Watch, while others may not have a corresponding Apple Watch app at all.
By choosing whether apps are installed automatically or manually, you can customize your Apple Watch experience and ensure that you have the apps you need, easily accessible on your wrist.
Set Up Apple Pay (If Desired)
If you wish to make payments using your Apple Watch, you can set up Apple Pay. Apple Pay allows you to securely add and use your credit or debit cards directly from your Apple Watch, making contactless payments quick and convenient. Here’s how you can set up Apple Pay on your Apple Watch:
- Open the Apple Watch app on your iPhone: Launch the Apple Watch app on your iPhone to access the settings for your Apple Watch.
- Tap on the “Wallet & Apple Pay” option: In the Apple Watch app, tap on the “Wallet & Apple Pay” option. It can usually be found in the list of settings on the “My Watch” tab.
- Add your credit or debit card: On the “Wallet & Apple Pay” screen, tap “Add Card” to begin the process of adding your credit or debit card.
- Follow the on-screen instructions: The Apple Watch app will guide you through the process of adding your card. You can choose to add the card manually by entering the card details or use the camera on your iPhone to scan and auto-fill the card information.
- Verify your card: After entering your card information, your bank may require additional verification. The verification process may involve receiving a verification code via SMS or by contacting your bank directly.
- Set your default card: Once your card is verified, you can choose to set it as the default card for Apple Pay. This makes it the card that is used for contactless payments unless you select a different card during the transaction.
Setting up Apple Pay on your Apple Watch allows you to make secure, contactless payments conveniently from your wrist. You can use Apple Pay wherever contactless payments are accepted, eliminating the need to carry physical cards or cash.
It’s important to note that not all banks and financial institutions support Apple Pay. Ensure that your bank supports Apple Pay and that your card is compatible before attempting to set it up on your Apple Watch.
By configuring Apple Pay on your Apple Watch, you gain the convenience and security of making quick and seamless payments with just a tap of your wrist.
Complete Setup and Start Using Your Apple Watch
Once you have finished configuring your settings and preferences, it’s time to complete the setup process and start using your Apple Watch. Follow these final steps to get started:
- Review your settings: Take a moment to review all the settings you have customized during the setup process, such as wrist preference, passcode, app installations, and more. Make any necessary adjustments before proceeding.
- Tap “Continue” or “Finish”: The Apple Watch app will prompt you to review your settings and confirm that you are ready to complete the setup process. Tap on “Continue” or “Finish” to proceed.
- Wait for synchronization: Your Apple Watch will now synchronize with your iPhone, transferring over your selected apps, settings, and other data. This process may take a few minutes, so be patient.
- Put on your Apple Watch: Once synchronization is complete, put on your Apple Watch and securely fasten it to your wrist. Adjust the band for comfort and a good fit.
- Unlock your Apple Watch: If you have set a passcode, enter it to unlock your Apple Watch. If you haven’t set a passcode, swipe right on the watch face to access the Home screen.
- Explore your Apple Watch: Take some time to familiarize yourself with the features and functionalities of your Apple Watch. Swipe up, down, left, and right on the watch face to navigate through the various screens, complications, and apps.
- Customize your watch face: Press and hold on the watch face to enter the watch face customization mode. From here, you can select different watch faces, customize the complications and layout, and personalize the appearance of your Apple Watch.
- Start using your Apple Watch: Now that you have completed the setup process, you are ready to start using your Apple Watch. Explore the various apps, features, and functionalities available to you, and make the most of your wearable device.
Congratulations! You have successfully completed the setup process for your Apple Watch. From this point forward, you can enjoy the convenience, functionality, and personalized experience that your Apple Watch offers, right on your wrist.
Keep in mind that there is a learning curve when using a new device, so take your time to explore and discover all the capabilities and features of your Apple Watch. Experiment with different apps, complications, and settings to make your Apple Watch truly yours.
Remember, if you have any questions or need assistance with your Apple Watch, refer to the Apple support website or consult the user manual for further guidance.