
Before Erasing Your Apple Watch
Erasing an Apple Watch is a process that permanently deletes all data, settings, and personalized content from the device. Before proceeding with this procedure, it is essential to consider a few important factors to ensure that you have completed all necessary preparations. Here are some key steps to follow before erasing your Apple Watch.
1. Backup Your Apple Watch: Before erasing your Apple Watch, it is crucial to create a backup of your data. This will allow you to restore your settings, apps, and personal information onto a new device or when you re-pair your Apple Watch.
2. Check iCloud and Find My: Ensure that your Apple Watch is not associated with an iCloud account and that Find My Apple Watch is turned off. This will prevent any activation lock issues when setting up the device on a different account.
3. Disable Activation Lock: If you have enabled Activation Lock on your Apple Watch, make sure to disable it before erasing the device. This will ensure that you can set up and use the Apple Watch without any restrictions.
4. Remove Credit and Debit Cards: If you have added any credit or debit cards to Apple Pay on your Apple Watch, remove them before erasing the device. This will prevent any unauthorized transactions from occurring after the erase process.
5. Store Your Charger and Accessories: Before performing the erase procedure, safely store your Apple Watch charger and any other accessories. This will prevent any damage or loss to these items during the process.
6. Disconnect Your Apple Watch: To ensure a seamless resetting process, disconnect your Apple Watch from your iPhone. Open the Apple Watch app on your iPhone, go to the My Watch tab, and tap on your watch’s name. Then, tap the “i” icon next to your Apple Watch and select “Unpair Apple Watch.
7. Disable any Fitness or Healthcare Features: If you have enabled any fitness or healthcare features, such as Activity or ECG, make sure to disable them before erasing your Apple Watch. This will prevent any data loss or discrepancies in your health and fitness records.
Taking these precautions will help ensure a smooth and hassle-free erasure process for your Apple Watch. By following these steps, you can minimize the risk of losing important data and ensure that your Apple Watch is ready for a fresh start.
Back Up Your Apple Watch
Before proceeding with erasing your Apple Watch, it is crucial to create a backup of your device. This will allow you to easily restore your settings, apps, and data onto a new Apple Watch or when you re-pair your current one. Here’s how you can back up your Apple Watch.
1. Ensure iCloud Backup is Enabled: To back up your Apple Watch, you need to have iCloud Backup enabled on your paired iPhone. Open the Settings app on your iPhone, tap on your Apple ID at the top, select “iCloud,” and then “iCloud Backup.” Ensure the “iCloud Backup” toggle is switched on.
2. Connect to Wi-Fi and Power Source: Make sure your iPhone and Apple Watch are connected to a Wi-Fi network with a stable internet connection. Additionally, ensure both devices are connected to a power source to prevent any interruptions during the backup process.
3. Open the Apple Watch App: On your paired iPhone, launch the Apple Watch app, which resembles a green icon with a white side view of the Apple Watch. Tap on the “My Watch” tab at the bottom of the screen to access your watch’s settings.
4. Start the Backup: Scroll down and locate the “General” option. Tap on it and then select “Reset.” Next, tap on “Erase Apple Watch Content and Settings.” A prompt will appear asking if you want to create a backup. Tap on “Create a New Backup” to initiate the backup process.
5. Wait for the Backup to Complete: The backup process may take some time, depending on the amount of data on your Apple Watch. Ensure that both your iPhone and Apple Watch remain connected to power and Wi-Fi until the backup is finished.
6. Verify the Backup: Once the backup process is complete, you can verify its success by going to your iPhone’s iCloud Backup settings. Under the “Backup Now” option, you should see the time and date of your most recent backup, which should reflect the backup you just created.
7. Restoring Your Apple Watch: In the future, if you need to restore your Apple Watch from the backup, you can do so during the pairing process. Simply follow the on-screen instructions on your iPhone and select the backup you wish to restore from.
Backing up your Apple Watch ensures that you have a copy of your data and settings, providing you with peace of mind before proceeding with the erasure process. Remember, it’s always better to be safe than sorry when it comes to preserving your Apple Watch’s valuable information.
Disconnect Your Apple Watch from Your iPhone
Before erasing your Apple Watch, it is important to disconnect it from your iPhone to ensure a smooth and seamless process. This will prevent any potential issues and ensure that the erasure is completed correctly. Here’s how you can disconnect your Apple Watch from your iPhone:
1. Open the Apple Watch app: On your iPhone, locate and open the Apple Watch app. It has a green icon with a white side view of the Apple Watch.
2. Access your Apple Watch settings: Once you’re in the Apple Watch app, tap on the “My Watch” tab at the bottom of the screen. This will bring you to the settings for your Apple Watch.
3. Tap on your Apple Watch: In the “My Watch” tab, you will see a list of connected devices. Tap on the name of your Apple Watch to access its settings.
4. Tap the “i” icon: On the next screen, you will see detailed information about your Apple Watch. Look for the small “i” icon, usually located next to the name of your device, and tap on it.
5. Select “Unpair Apple Watch”: Within the device info screen, you will find various options. Scroll down until you see the “Unpair Apple Watch” button and tap on it.
6. Confirm the unpairing process: A pop-up message will appear, warning you about the consequences of unpairing your Apple Watch. Read the message carefully and select “Unpair [your Apple Watch name]” to confirm the action.
7. Enter your Apple ID password: To complete the unpairing process, you will be prompted to enter your Apple ID password. This is a security measure to ensure that only you can disconnect your Apple Watch from your iPhone. Enter your password and tap “Unpair” to proceed.
Once you have completed these steps, your Apple Watch will disconnect from your iPhone. This will allow you to proceed with the erase process or set up the Apple Watch on a different device without any issues. It’s important to note that unpairing your Apple Watch will also remove any saved data or settings specific to your device, so make sure you have backed up your data beforehand if necessary.
Unpair Your Apple Watch
When you’re ready to erase your Apple Watch, the next step is to unpair it from your iPhone. Unpairing your Apple Watch is a necessary step to ensure a clean disconnection and prepare the device for erasure. Follow these steps to unpair your Apple Watch:
1. Open the Apple Watch app: Launch the Apple Watch app on your paired iPhone. You can recognize it by its green icon with a white side view of the Apple Watch.
2. Go to the My Watch tab: In the app, tap on the “My Watch” tab located at the bottom of the screen. This will take you to the settings for your Apple Watch.
3. Select your Apple Watch: Under the “My Watch” tab, you will see a list of connected devices. Tap on the name of your Apple Watch to access its specific settings.
4. Tap on the “i” icon: Within the Apple Watch settings, you will find detailed information about your device. Look for the small “i” icon, usually located next to the name of your Apple Watch, and tap on it.
5. Choose “Unpair Apple Watch”: On the device info screen, you will see various options. Scroll down until you find the “Unpair Apple Watch” button and tap on it to initiate the unpairing process.
6. Confirm the unpairing: A pop-up message will appear, informing you about the consequences of unpairing your Apple Watch. Read the message carefully, then tap on “Unpair [your Apple Watch name]” to confirm the action.
7. Enter your Apple ID password: To complete the unpairing process, you will be prompted to enter your Apple ID password. This is a security measure to ensure that only you can unpair your Apple Watch from your iPhone. Enter your password and tap “Unpair” to proceed.
Once you have successfully unpaired your Apple Watch, it is now ready for the erase process. The unpairing process will also remove any custom settings, apps, and personalized content from your Apple Watch, ensuring a clean disconnection from your iPhone. Remember to back up any important data if needed before moving forward.
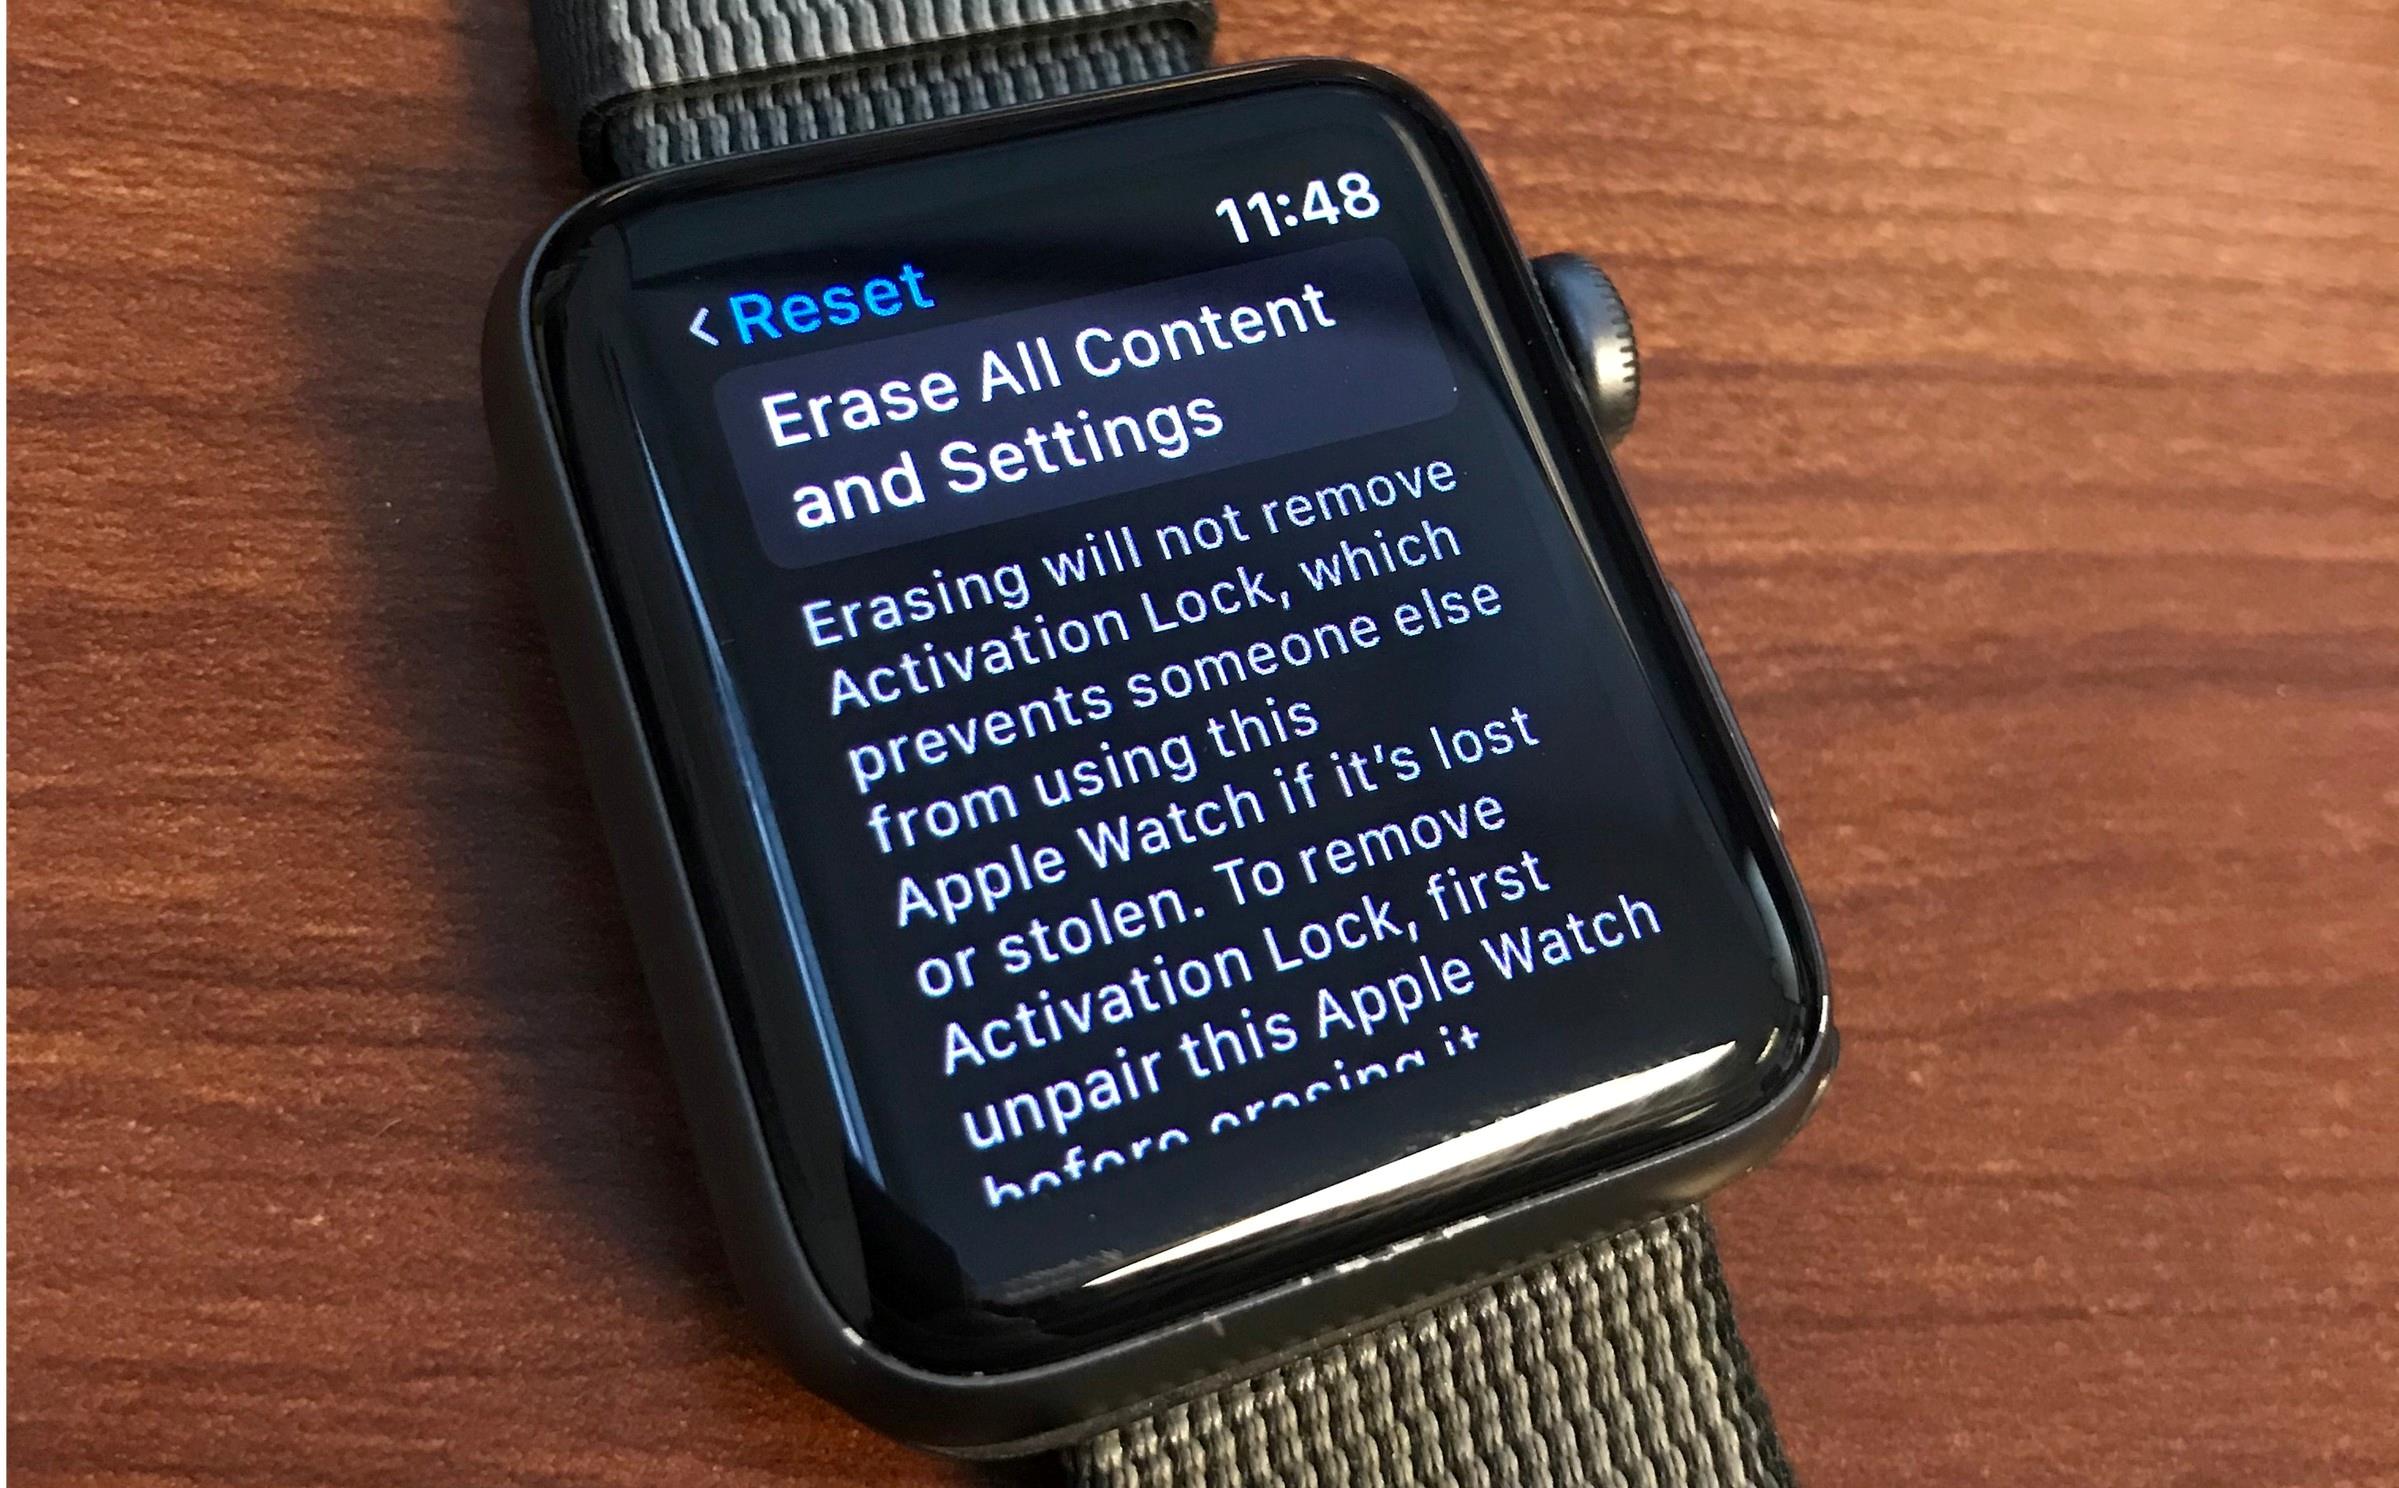
Erase All Content and Settings
After unpairing your Apple Watch, the next step to fully reset the device is to erase all of its content and settings. This process will permanently delete all data and restore the Apple Watch to its factory settings. Follow these steps to erase your Apple Watch:
1. On your Apple Watch, open the Settings app: Locate and launch the Settings app on your Apple Watch. You can recognize it by the gear icon.
2. Scroll down and tap on “General”: Within the Settings app, scroll down and tap on the “General” option.
3. Select “Reset”: In the General settings, scroll down and tap on “Reset” to access the reset options.
4. Tap on “Erase All Content and Settings”: Among the reset options, locate and tap on “Erase All Content and Settings.” A warning message will appear, informing you that this action will delete all data and settings on your Apple Watch.
5. Confirm the erasure: To proceed with the erasure, tap on “Erase All” and enter your passcode if prompted. The erasure process will begin, and you should see a progress bar indicating the status of the reset.
6. Wait for the erasure to complete: The erasure process may take a few minutes to complete, depending on the amount of data on your Apple Watch. During this time, ensure that your Apple Watch is connected to a power source to prevent any interruptions.
7. Set up your Apple Watch: Once the erasure is complete, your Apple Watch will restart and display the setup screen. Follow the on-screen instructions to set up your Apple Watch as if it were new. You can restore from a backup or set it up as a new device.
By completing these steps, you have successfully erased all content and settings on your Apple Watch. It is now ready for a fresh start, whether you are setting it up on a different iPhone or preparing it for sale or gift. Remember, this action cannot be undone, so ensure that you have backed up any important data before performing the erase.
Erase Apple Watch When You Don’t Have It
If you no longer have physical access to your Apple Watch, there are still steps you can take to ensure that your data and personal information remain secure. Here’s what you can do to erase your Apple Watch when you don’t have it:
1. Use Find My iPhone: If you’ve enabled the Find My feature on your iPhone and have linked your Apple Watch to it, you can erase your Apple Watch remotely. Open the Find My app on your iPhone or access the iCloud website on a computer. Locate your Apple Watch on the map and select it. Then, choose the “Erase Apple Watch” option to initiate the erasure remotely.
2. Change Your Apple ID Password: To add an extra layer of security, change your Apple ID password. This will prevent anyone from accessing your Apple Watch or its connected features, even if they manage to remove the device from your iCloud account.
3. Contact Apple Support: If you are unable to erase your Apple Watch using the Find My feature or changing your Apple ID password, reach out to Apple Support for further assistance. They can help you take additional steps to protect your personal information and ensure the device is disconnected from your iCloud account.
4. Deregister Your Apple Watch from Apple Pay: If you have added your credit or debit cards to Apple Pay on your Apple Watch, it is crucial to remove them from your iCloud account. You can do this by accessing your iCloud settings on an authorized device and selecting “Remove All” under the Apple Pay section.
5. Activate Lost Mode: If you believe your Apple Watch is lost or stolen, you can activate Lost Mode via the Find My app or iCloud website. This will lock your Apple Watch remotely, display a message with contact information, and prevent anyone from using the device without your permission.
By following these steps, you can take proactive measures to protect your personal data and account information associated with your Apple Watch, even if you no longer have physical possession of the device. It is important to act swiftly to ensure the security and privacy of your data.