
Checking Compatibility
Before diving into the exciting process of activating your new iPhone 13, it's crucial to ensure that your device is compatible with the activation process. This step is essential to guarantee a smooth and hassle-free transition to your new device.
First and foremost, verify that your current device is compatible with the iPhone 13. The iPhone 13 is compatible with a wide range of devices, including those running iOS 14 or later. If your current device meets this requirement, you're well on your way to a seamless activation process.
Next, ensure that your current device has ample storage space to accommodate the backup of your data. It's recommended to have sufficient free space on your device to facilitate the smooth transfer of your data to the new iPhone 13. This step is crucial in safeguarding your valuable data and ensuring that it seamlessly migrates to your new device.
Additionally, it's important to check the compatibility of your current device's operating system with the latest version of the iOS software. This ensures that your data can be seamlessly transferred to the new iPhone 13 without any compatibility issues. Keeping your device's operating system up to date is essential for a seamless transition to your new iPhone.
Furthermore, if you plan to use any accessories or peripherals with your new iPhone 13, such as headphones, chargers, or cases, it's essential to ensure that they are compatible with the new device. This proactive approach can save you time and frustration during the activation process, allowing you to seamlessly integrate your preferred accessories with your new iPhone 13.
By meticulously checking the compatibility of your current device and its accessories with the iPhone 13, you can proactively address any potential issues and streamline the activation process. This proactive approach sets the stage for a seamless and stress-free transition to your new iPhone 13, ensuring that you can fully enjoy the exciting features and capabilities of your new device without any compatibility hiccups.
Backing Up Your Old Device
Backing up your old device is a critical preparatory step before activating your new iPhone 13. This process ensures that your valuable data, including photos, videos, contacts, and settings, is securely preserved and ready for seamless transfer to your new device. By following these essential steps, you can safeguard your data and embark on a worry-free transition to your new iPhone 13.
iCloud Backup
One of the most convenient methods to back up your old device is through iCloud. To initiate an iCloud backup, ensure that your device is connected to a stable Wi-Fi network. Then, navigate to "Settings," tap on your Apple ID, select "iCloud," and click on "iCloud Backup." From here, you can enable the "iCloud Backup" option and initiate the backup process. It's crucial to ensure that your device is plugged in and connected to Wi-Fi throughout the backup process to prevent any interruptions.
iTunes Backup
Alternatively, you can opt for an iTunes backup to securely store your data. To perform an iTunes backup, connect your device to a computer and launch the latest version of iTunes. Select your device within iTunes and choose the "Back Up Now" option. This method allows you to create a local backup on your computer, providing an additional layer of security for your data.
Data to Back Up
When backing up your old device, it's essential to include a comprehensive range of data to ensure a seamless transition to your new iPhone 13. This includes contacts, photos, videos, app data, device settings, and any other pertinent information that you wish to preserve. By encompassing all relevant data in your backup, you can rest assured that your new iPhone 13 will mirror your old device's content accurately.
Verification of Backup
After initiating the backup process, it's prudent to verify that the backup was successful. You can do this by navigating to "Settings," tapping on your Apple ID, selecting "iCloud," and clicking on "iCloud Backup." Here, you can confirm the time and date of the last successful backup, providing peace of mind that your data is securely stored and ready for the transition to your new iPhone 13.
By diligently backing up your old device using iCloud or iTunes and ensuring the inclusion of all pertinent data, you can embark on the activation of your new iPhone 13 with confidence. This proactive approach safeguards your valuable data and sets the stage for a seamless transition, allowing you to fully embrace the exciting features and capabilities of your new device without any data-related concerns.
Turning on Your New iPhone 13
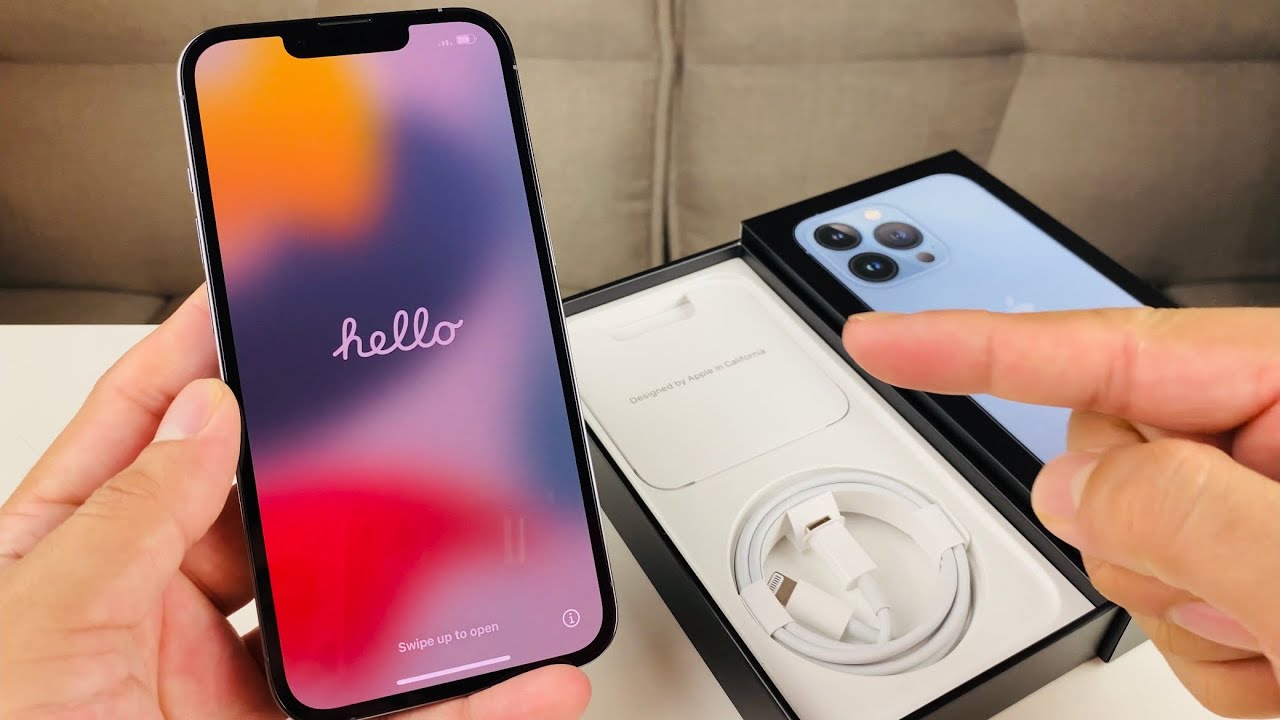
Upon unboxing your new iPhone 13, the anticipation of exploring its cutting-edge features and capabilities is palpable. The initial step in this exhilarating journey is to power on your new device and commence the activation process. This pivotal moment marks the beginning of your seamless transition to the innovative world of the iPhone 13.
To turn on your new iPhone 13, locate the power button, which is situated on the right side of the device. Gently press and hold the power button until the iconic Apple logo illuminates the screen, signaling the device's activation. As the device powers on, you are greeted by the vibrant display, heralding the start of your immersive iPhone 13 experience.
As the device initializes, you are prompted to select your preferred language and region, setting the stage for a personalized and tailored user experience. This initial setup process allows you to customize your device to align with your linguistic and geographical preferences, ensuring a seamless and intuitive interaction with your new iPhone 13.
Subsequently, you are guided through the setup wizard, which encompasses essential steps such as connecting to a Wi-Fi network and enabling location services. These foundational configurations lay the groundwork for a connected and location-aware user experience, empowering you to leverage the full spectrum of features offered by the iPhone 13.
As the setup wizard progresses, you have the opportunity to establish a secure and personalized passcode, fortifying the security of your device and safeguarding your sensitive information. This proactive measure ensures that your new iPhone 13 remains protected, allowing you to explore its features with peace of mind.
Furthermore, the setup process presents the option to enable or disable features such as Siri, Apple Pay, and app analytics, granting you full control over the functionalities and privacy settings of your device. This level of customization empowers you to tailor your iPhone 13 experience according to your preferences and privacy considerations.
In essence, turning on your new iPhone 13 marks the inception of a captivating journey into the realm of cutting-edge technology and seamless connectivity. This pivotal moment sets the stage for a personalized and immersive user experience, laying the foundation for the seamless activation and customization of your new device. As the vibrant display comes to life, you are poised to embark on an exhilarating exploration of the myriad features and capabilities offered by the iPhone 13, embracing a new era of innovation and connectivity.
Connecting to Wi-Fi and Cellular Network
Upon powering on your new iPhone 13, the next pivotal step in the activation process is establishing a seamless connection to both Wi-Fi and the cellular network. This fundamental stage ensures that your device is primed for comprehensive connectivity, enabling you to leverage a spectrum of online services, communication platforms, and app functionalities.
To initiate the connection process, navigate to the "Settings" app on your iPhone 13 and select the "Wi-Fi" option. Here, you are presented with a list of available Wi-Fi networks. Choose your preferred network from the list and enter the corresponding password if prompted. Once the correct credentials are entered, your iPhone 13 seamlessly connects to the designated Wi-Fi network, fostering a robust and high-speed internet connection.
In parallel, it is essential to ensure that your iPhone 13 is seamlessly integrated with the cellular network. To achieve this, navigate to the "Cellular" section within the "Settings" app. Here, you can verify that your device is successfully connected to the cellular network, enabling you to harness the full potential of mobile data services.
By establishing a seamless connection to both Wi-Fi and the cellular network, your iPhone 13 becomes a versatile hub of connectivity, empowering you to engage in seamless communication, access online resources, and leverage a myriad of app functionalities. This comprehensive connectivity framework forms the bedrock of your iPhone 13 experience, facilitating uninterrupted access to a diverse array of digital services and resources.
Furthermore, the seamless integration with Wi-Fi and the cellular network lays the foundation for a seamless data transfer process, ensuring that your device remains in sync with online services, cloud-based platforms, and communication channels. This synchronization fosters a cohesive and integrated user experience, allowing you to effortlessly transition between Wi-Fi and cellular data based on your connectivity needs and preferences.
In essence, the process of connecting your iPhone 13 to Wi-Fi and the cellular network is a pivotal step that underpins the device's comprehensive connectivity and seamless integration with online services. By establishing a robust connection to both Wi-Fi and the cellular network, you unlock the full potential of your iPhone 13, enabling a seamless and immersive digital experience characterized by uninterrupted connectivity and versatile access to a myriad of online resources and services.
Setting Up Face ID or Touch ID
Setting up Face ID or Touch ID on your new iPhone 13 is a pivotal step in enhancing the security and convenience of your device. These advanced biometric authentication features offer a seamless and secure method of unlocking your device, authorizing app purchases, and safeguarding your sensitive data. Whether you opt for the facial recognition capabilities of Face ID or the fingerprint authentication of Touch ID, the setup process is straightforward and empowers you to personalize the security measures of your device according to your preferences.
Face ID Setup
If you choose to utilize Face ID, the setup process begins by navigating to the "Settings" app on your iPhone 13 and selecting "Face ID & Passcode." Here, you are prompted to enroll your facial features by positioning your face within the designated frame on the screen. As you follow the on-screen instructions, your iPhone 13 captures and analyzes your facial contours, creating a secure biometric profile that serves as the foundation for Face ID authentication.
During the setup process, you are guided through a series of facial movements to ensure comprehensive facial recognition, including turning your head in various directions. This meticulous calibration process ensures that Face ID can accurately authenticate your identity from a multitude of angles, enhancing the reliability and security of the feature.
Upon successful enrollment, your iPhone 13 is equipped with the sophisticated capability to recognize your face with precision, allowing you to effortlessly unlock your device and authorize secure transactions with a simple glance.
Touch ID Setup
Alternatively, if you opt for the convenience of Touch ID, the setup process commences by accessing the "Settings" app and selecting "Touch ID & Passcode." Here, you are prompted to register your fingerprint by gently placing your finger on the designated Touch ID sensor. As you repeat this process, your iPhone 13 captures and stores a detailed fingerprint profile, enabling seamless and secure authentication through Touch ID.
The setup process includes multiple fingerprint registrations to ensure comprehensive coverage of your fingerprint, enhancing the accuracy and reliability of Touch ID authentication. This meticulous approach guarantees that your iPhone 13 can swiftly and securely authenticate your identity with a simple touch of your finger.
By setting up Face ID or Touch ID on your new iPhone 13, you fortify the security of your device while streamlining the authentication process. These advanced biometric features not only enhance the security of your device but also elevate the overall user experience by offering a seamless and intuitive method of unlocking your device and authorizing secure transactions. Whether you opt for the facial recognition capabilities of Face ID or the fingerprint authentication of Touch ID, the setup process empowers you to personalize the security measures of your iPhone 13 according to your preferences, ensuring a secure and personalized user experience.
Transferring Data from Your Old Device
Transferring data from your old device to your new iPhone 13 is a pivotal step that ensures a seamless transition and preserves your valuable information. This process enables you to effortlessly migrate your photos, videos, contacts, messages, and app data from your previous device to your new iPhone 13, ensuring continuity and familiarity in your digital ecosystem.
iCloud Migration
One of the most convenient methods to transfer data is through iCloud. By leveraging iCloud, you can seamlessly sync a myriad of data, including photos, videos, contacts, calendars, and more. To initiate the iCloud migration, ensure that your old device is connected to a stable Wi-Fi network and plugged in to a power source. Navigate to the "Settings" app, tap on your Apple ID, select "iCloud," and enable the relevant data categories for synchronization. Once enabled, your old device begins uploading the selected data to iCloud, facilitating a smooth transition to your new iPhone 13.
Quick Start
The Quick Start feature offers a streamlined method to transfer data from your old device to your new iPhone 13. By placing your old device near your new iPhone 13, you can initiate the data transfer process seamlessly. This feature leverages Bluetooth and Wi-Fi connectivity to establish a secure connection between the devices, enabling the swift transfer of data, settings, and preferences. The Quick Start feature simplifies the migration process, ensuring that your new iPhone 13 mirrors the content and configurations of your old device accurately.
iTunes Backup Restoration
If you previously created a backup of your old device using iTunes, you can seamlessly restore this backup to your new iPhone 13. By connecting your new device to a computer with the latest version of iTunes, you can select the option to restore from a previous backup. This method allows you to transfer a comprehensive range of data, including app data, device settings, messages, and more, ensuring a seamless transition to your new device.
By meticulously transferring data from your old device to your new iPhone 13, you can seamlessly preserve your digital footprint and embark on a new chapter with your device. This proactive approach ensures that your photos, videos, contacts, messages, and app data seamlessly transition to your new iPhone 13, empowering you to continue your digital journey with familiarity and continuity.
Activating Your New iPhone 13 with Your Carrier
Activating your new iPhone 13 with your carrier is a pivotal step that ensures seamless connectivity and access to essential mobile services. This process establishes a direct link between your device and your carrier's network, enabling you to harness the full spectrum of cellular capabilities and services offered by your chosen carrier. By following the prescribed activation process, you can unlock the comprehensive functionality of your iPhone 13, ensuring uninterrupted communication, data access, and mobile services.
To initiate the activation process, ensure that your iPhone 13 is powered on and connected to a stable Wi-Fi or cellular network. Once the device is online, navigate to the "Settings" app and select the "Cellular" or "Mobile Data" option. Here, you can initiate the activation process by following the carrier-specific instructions provided by your chosen network provider.
In many cases, carriers offer a dedicated activation portal or a toll-free number to facilitate the seamless activation of your device. By accessing the carrier's activation portal or contacting their customer support, you can input the required details, such as your device's IMEI number and SIM card information, to initiate the activation process. This step ensures that your iPhone 13 is uniquely identified and provisioned within the carrier's network, enabling comprehensive access to cellular services and functionalities.
During the activation process, it is essential to follow the carrier's instructions meticulously and provide accurate information to expedite the activation of your device. Once the activation request is submitted, your carrier processes the request and provisions your iPhone 13 with a unique mobile identity within their network infrastructure. This pivotal step ensures that your device is seamlessly integrated with the carrier's network, enabling you to make calls, send messages, and access mobile data services without interruption.
Upon successful activation, your iPhone 13 is equipped to leverage the full spectrum of services offered by your carrier, including voice calls, text messaging, mobile data, and additional carrier-specific features. This comprehensive activation process ensures that your device is fully aligned with your carrier's network, empowering you to harness the complete suite of mobile services and functionalities seamlessly.
In essence, activating your new iPhone 13 with your carrier is a fundamental step that establishes a robust and seamless connection between your device and your chosen network provider. By following the prescribed activation process and providing accurate information, you can ensure that your iPhone 13 seamlessly integrates with your carrier's network, unlocking the full potential of cellular connectivity and mobile services.
Setting Up Apple ID and iCloud
Setting up your Apple ID and iCloud on your new iPhone 13 is a pivotal step that lays the foundation for seamless access to a myriad of Apple services, secure data storage, and comprehensive device synchronization. By meticulously configuring your Apple ID and iCloud settings, you can harness the full potential of Apple's ecosystem, ensuring a cohesive and integrated user experience across your devices.
Apple ID Configuration
To initiate the setup process, navigate to the "Settings" app on your iPhone 13 and select the "Sign in to your iPhone" option. Here, you can either sign in with your existing Apple ID or create a new one if you are new to the Apple ecosystem. Your Apple ID serves as a unique identifier that grants access to a spectrum of Apple services, including the App Store, iCloud, Apple Music, and more.
Upon signing in or creating your Apple ID, you have the opportunity to customize your account settings, including security preferences, payment methods, and communication preferences. This level of customization empowers you to tailor your Apple ID according to your privacy considerations and usage patterns, ensuring a personalized and secure account configuration.
iCloud Setup
Simultaneously, the setup process prompts you to configure your iCloud settings, which serve as a cornerstone for seamless data synchronization and secure cloud storage. By enabling iCloud, you can seamlessly sync your photos, videos, contacts, calendars, and documents across your devices, fostering a cohesive and integrated digital ecosystem.
Within the iCloud settings, you have the option to enable specific data categories for synchronization, such as iCloud Photos, iCloud Drive, iCloud Backup, and more. This granular control over data synchronization empowers you to tailor your iCloud settings according to your storage requirements and data accessibility preferences, ensuring a personalized and efficient cloud storage configuration.
Device Synchronization
Upon configuring your Apple ID and iCloud settings, your iPhone 13 seamlessly integrates with the broader Apple ecosystem, ensuring comprehensive device synchronization and data continuity. This synchronization extends to your other Apple devices, such as Mac, iPad, and Apple Watch, fostering a seamless and integrated user experience characterized by synchronized data, app preferences, and device settings.
By meticulously setting up your Apple ID and iCloud on your new iPhone 13, you establish a robust and interconnected digital framework that empowers you to seamlessly access Apple services, safeguard your data with secure cloud storage, and synchronize your devices effortlessly. This proactive approach ensures that your iPhone 13 seamlessly integrates with the broader Apple ecosystem, enabling a cohesive and personalized user experience across your devices.
Customizing Settings and Preferences
Customizing the settings and preferences on your new iPhone 13 is a pivotal step that empowers you to tailor the device according to your unique usage patterns, privacy considerations, and personal preferences. This comprehensive customization process encompasses a myriad of settings and features, allowing you to fine-tune the device to align with your individual needs and enhance your overall user experience.
Display and Brightness
The iPhone 13 offers a range of display and brightness settings that enable you to personalize the visual characteristics of the device. By accessing the "Display & Brightness" section within the Settings app, you can adjust parameters such as brightness level, text size, and display zoom to optimize the visual comfort and legibility of the screen according to your preferences.
Sounds and Haptics
Customizing the sounds and haptics settings allows you to tailor the auditory and tactile feedback of your iPhone 13. Within the "Sounds & Haptics" section, you can configure ringtones, notification sounds, and haptic feedback intensity, ensuring that the device's audio and tactile responses align with your preferences and usage scenarios.
Privacy and Security
The iPhone 13 offers robust privacy and security settings that empower you to safeguard your sensitive information and control the device's data access permissions. By navigating to the "Privacy" and "Security" sections within the Settings app, you can manage app permissions, configure privacy settings, and enable security features such as Face ID or Touch ID, ensuring comprehensive protection of your personal data.
Accessibility
The accessibility settings on the iPhone 13 cater to diverse user needs, offering a range of features to enhance usability for individuals with specific requirements. Within the "Accessibility" section, you can customize settings such as display accommodations, voiceover functionality, and touch accommodations, ensuring an inclusive and tailored user experience for all users.
App-Specific Settings
Many apps installed on your iPhone 13 offer individual settings that allow you to personalize the app's behavior and features. By accessing the settings within each app, you can customize parameters such as notifications, data storage, and account preferences, ensuring that each app aligns with your specific usage requirements and preferences.
General Device Settings
The "General" section within the Settings app encompasses a plethora of device-wide settings that enable you to customize the overall behavior and functionality of your iPhone 13. Here, you can configure features such as software updates, background app refresh, and device management, ensuring that the device operates according to your preferences and usage patterns.
By meticulously customizing the settings and preferences on your new iPhone 13, you can tailor the device to align with your unique needs and preferences, ensuring a personalized and optimized user experience. This proactive approach empowers you to harness the full potential of the device while ensuring that it seamlessly integrates with your individual usage patterns and preferences.