
Setting Up iTunes
Setting up iTunes is a straightforward process that allows you to organize and enjoy your music, movies, TV shows, and more. Whether you’re a seasoned user or a newcomer to the iTunes world, here are the essential steps to get started:
- Download and Install iTunes: Visit the official Apple website and download the latest version of iTunes for your operating system. Once the download is complete, run the installer and follow the on-screen instructions to install iTunes on your computer.
- Create an Apple ID: If you don’t already have an Apple ID, you’ll need to create one. This ID will act as your login credentials for all Apple services, including iTunes. Make sure to provide accurate and valid information during the registration process.
- Sign in to iTunes: Launch the iTunes application and sign in using your Apple ID and password. This will give you access to the full range of iTunes features, including the iTunes Store and Apple Music.
- Set Up Your Library: Before you start adding content to your iTunes library, it’s important to organize your media files. Create specific folders on your computer for different types of media (e.g., Music, Movies, TV Shows) to make it easier to manage and import them into iTunes.
- Import Media: To add your existing music, movies, or other media files to iTunes, go to the “File” menu and select “Add File to Library” or “Add Folder to Library.” Browse your computer’s files and select the media you want to import. iTunes will automatically organize and categorize the imported media.
- Adjust iTunes Preferences: Customize your iTunes experience by navigating to the “Edit” menu and selecting “Preferences.” Here, you can modify settings such as the default media folder location, playback options, and the appearance of the iTunes interface to suit your preferences.
- Connect Devices: To sync your iPhone, iPad, or iPod with iTunes, connect the device to your computer using a USB cable. iTunes will recognize the device and display it in the top left corner of the screen. From there, you can manage and sync various types of media between your computer and the device.
- Back up Your Library: Protect your iTunes library by creating regular backups. You can do this by going to the “File” menu and selecting “Library” or “Playlist” > “Export Library” to save a backup copy of your library as an XML file. It’s a good practice to keep these backups stored on an external hard drive or a cloud storage service.
By following these steps, you’ll have a solid foundation for using iTunes and enjoying all the features and functionalities it has to offer. Remember to regularly update your iTunes software to access the latest enhancements and bug fixes.
Navigating the iTunes Interface
Once you have set up iTunes, it’s time to familiarize yourself with the interface for easy navigation and efficient use. Here are the key components of the iTunes interface:
- Menu Bar: The menu bar is located at the top of the iTunes window and provides access to various iTunes functions. It includes menu options like File, Edit, View, Controls, and Help.
- Sidebar: The sidebar is located on the left side of the iTunes window and displays different sections of your library, such as Music, Movies, TV Shows, and Podcasts. It also includes playlists, connected devices, and the iTunes Store.
- Main Window: The main window is where you’ll find the content of the selected section, such as your music library or the iTunes Store. It displays information like album artwork, song titles, and artist names.
- Player Controls: At the top of the main window, you’ll find the player controls, including play, pause, skip, and repeat buttons. These controls allow you to manage playback of your media files.
- Search Bar: The search bar is located in the top-right corner of the iTunes window. It enables you to quickly search for specific songs, artists, albums, or other content within your library or the iTunes Store.
- Mini Player: The Mini Player is a compact version of the iTunes window that can be accessed by clicking the small rectangular button in the top-right corner of the main window. It allows you to control playback and access basic features while conserving screen space.
- Album View: Selecting the “Albums” tab in the top-center of the main window displays your music library in an album-centric view. It shows album artwork, along with the option to view songs in each album individually.
- Grid View: In the top-right corner of the main window, you can switch to the “Grid” view, which displays your music library as a grid of album covers. This view provides a visually appealing way to browse your music collection.
- Up Next: Using the Up Next feature, located in the top-right corner of the main window, you can create a temporary playlist of songs to play next. Simply drag and drop songs or albums from your library to the Up Next queue.
Explore each section of the iTunes interface to discover more features and functions to enhance your music listening and media management experience. Take the time to experiment and customize the interface settings according to your preferences.
Managing Your iTunes Library
Your iTunes library is where you store and organize your entire collection of music, videos, podcasts, and other media files. Managing your iTunes library efficiently will help you locate and enjoy your favorite content easily. Here are some tips for effectively managing your iTunes library:
- Adding and Removing Content: To add content to your library, simply drag and drop files or folders into the main iTunes window. You can also use the “Add File to Library” or “Add Folder to Library” options under the “File” menu. To remove content, right-click on it and select “Delete from Library” or “Move to Trash.”
- Organizing with Metadata: iTunes automatically retrieves metadata, such as song titles, album names, and artist information, for most media files. However, if certain files are missing or incorrect metadata, you can manually edit it by selecting the media file, right-clicking, and choosing “Get Info.”
- Creating Playlists: Playlists allow you to group and organize your favorite songs based on your preferences. To create a playlist, click on the “+” button in the bottom-left corner of the iTunes window and select “New Playlist.” Give it a name and drag and drop songs from your library into the playlist.
- Smart Playlists: Smart playlists are dynamic playlists that update based on specific criteria you set. To create a smart playlist, go to “File” > “New” > “Smart Playlist.” You can define criteria such as genre, play count, last played date, and more to create a personalized playlist that automatically updates.
- Sorting and Filtering: To quickly find specific content, use the sorting and filtering options in iTunes. In the music section, click on the column headers to sort your library by criteria such as artist, album, genre, or time. You can also use the search bar to filter your library based on specific keywords.
- Backing up Your Library: It’s essential to regularly back up your iTunes library to avoid losing your entire collection. One way to do this is by copying the iTunes Media folder, which stores all your media files, to an external hard drive or cloud storage service. You can find the location of your iTunes Media folder in the iTunes preferences.
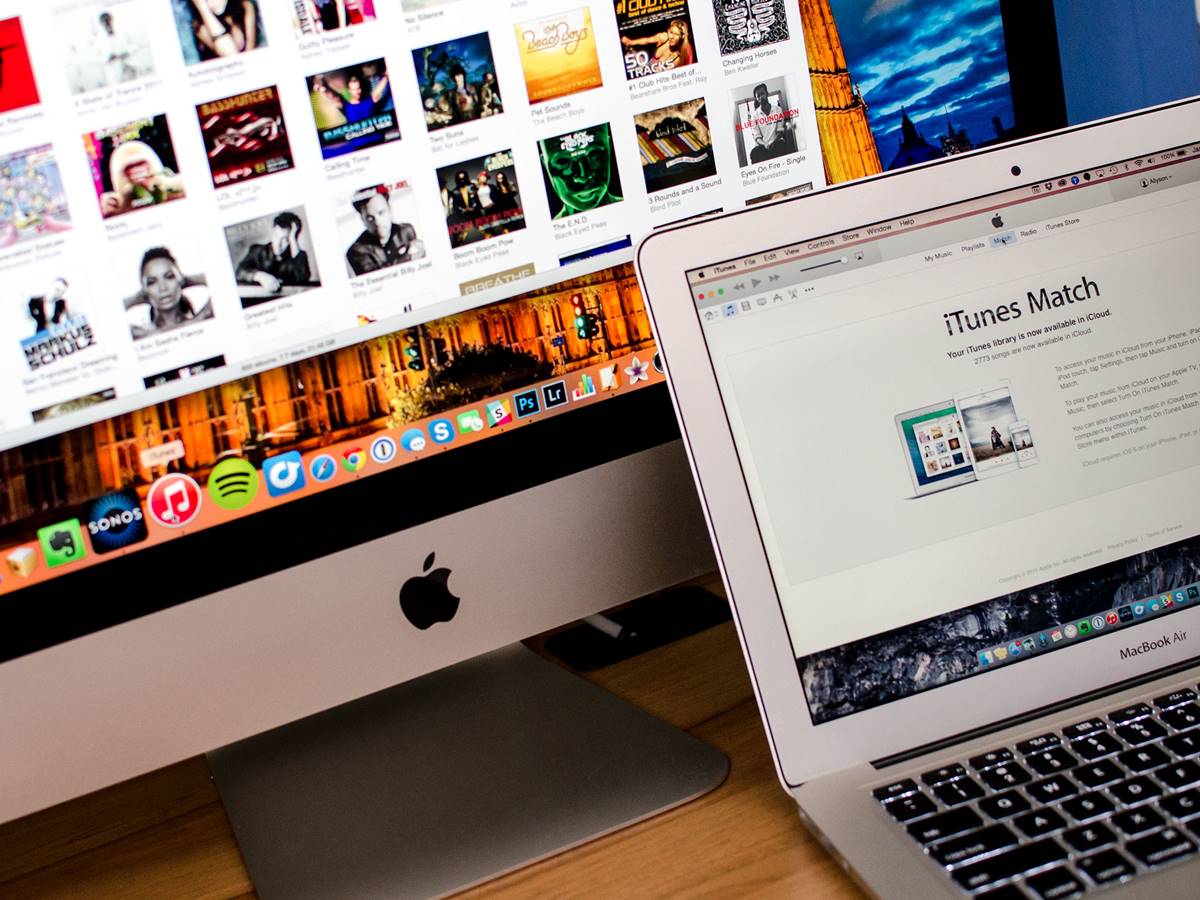
- Using iTunes Match: iTunes Match is a subscription service provided by Apple that lets you access your entire music library across all your devices. It scans your library and matches your songs with those available in the iTunes Store, providing high-quality versions that don’t require large amounts of storage on your devices.
- Managing Multiple Libraries: If you have multiple users sharing a computer or want to keep different libraries for different purposes, you can create and manage multiple iTunes libraries. Hold down the Option key (Mac) or Shift key (Windows) while launching iTunes, and a dialog box will appear to help you create or choose a different library.
- Updating iTunes Library: It’s always essential to keep your iTunes software up to date to access the latest features and improvements. Apple periodically releases updates for iTunes, which you can download and install from the App Store on macOS or the iTunes webpage on Windows.
By implementing these strategies, you can effectively manage and maintain your iTunes library, ensuring a seamless experience as you navigate and enjoy your extensive collection of music, videos, and more.
Importing Music and Other Media
Importing music and other media into your iTunes library allows you to centralize and organize your entire collection in one place. Whether you have CDs, downloaded files, or music from other sources, iTunes provides a straightforward process for importing various types of media. Here’s how to import music and other media into iTunes:
- Importing CDs: To import music from CDs, insert the CD into your computer’s CD/DVD drive. iTunes will recognize the CD and display it in the sidebar under the “Devices” section. Click on the CD name to view the track listing and select the songs you want to import. Click the “Import CD” button in the top-right corner to begin the import process. iTunes will retrieve album information and save the songs to your library.
- Importing Digital Files: If you have digital music files stored on your computer, you can easily import them into iTunes. Go to the “File” menu and select “Add File to Library” or “Add Folder to Library.” Navigate to the location of the music files, select them, and click “Open.” iTunes will import the selected files and add them to your library.
- Importing from External Drives: If your music collection is stored on an external hard drive or USB drive, connect the drive to your computer. In iTunes, go to the “File” menu and select “Add File to Library” or “Add Folder to Library.” Navigate to the external drive, select the files or folders you want to import, and click “Open.” iTunes will copy the files to your computer and add them to your library.
- Importing Videos, Podcasts, and Audiobooks: iTunes supports various types of media beyond music. To import videos, podcasts, or audiobooks, follow a similar process as importing music files. Use the appropriate option under the “File” menu to add the files or folders to your library, and iTunes will organize them accordingly.
- Automatic Downloads: If you have an Apple device (such as an iPhone, iPad, or iPod touch) connected to your iTunes account, you can enable automatic downloads. This feature allows music and other media purchased or downloaded on your device to be automatically added to your iTunes library. To enable automatic downloads, go to “iTunes” > “Preferences” > “Store” and check the relevant options.
- Using Home Sharing: Home Sharing allows you to access and import media from other computers on your local network. To enable Home Sharing, go to “File” > “Home Sharing” > “Turn On Home Sharing” and sign in with your Apple ID. You can then access media libraries from other computers by selecting the shared library in the sidebar under “Shared.”
- Manually Adding Artwork: iTunes automatically retrieves album artwork for most music files. However, if artwork is missing or incorrect, you can manually add it. Right-click on the song, album, or artist, select “Get Info,” and then click on the “Artwork” tab. You can then add the appropriate image file or search the web for album artwork.
- Organizing Metadata: After importing music and other media, it’s important to check and organize the metadata. Select a file or group of files, right-click, and choose “Get Info.” Here, you can edit the file information, including the title, artist, album, genre, and more. Correct metadata ensures accurate organization and easy searching within your iTunes library.
Follow these steps to import your music and other media into iTunes, keeping all your favorite content organized and easily accessible within one comprehensive library.
Organizing and Creating Playlists
Organizing and creating playlists in iTunes allows you to curate tailored collections of music for different moods, occasions, or personal preferences. It provides a convenient way to group your favorite songs together for easy access. Here’s how you can effectively organize and create playlists in iTunes:
- Creating a Playlist: To create a new playlist, click on the “+” button in the bottom-left corner of the iTunes window and select “New Playlist.” Give it a descriptive name that represents the purpose or theme of the playlist.
- Adding Songs: To add songs to a playlist, you can simply drag and drop them from your library into the playlist. Alternatively, you can right-click on a song, choose “Add to Playlist,” and select the desired playlist.
- Reordering Songs: To change the order of songs within a playlist, click and hold on a song, then drag it to the desired position. This flexibility allows you to create a seamless flow of music within your playlist.
- Removing Songs: If you want to remove a song from a playlist, right-click on the song within the playlist and select “Remove from Playlist” or simply press the “Delete” key on your keyboard while the song is selected.
- Playlist Folder: To keep your playlists organized, you can create playlist folders. Right-click on a playlist in the sidebar and select “New Playlist Folder.” Give the folder a name and drag and drop playlists into it. This is particularly useful when you have numerous playlists related to specific genres, moods, or occasions.
- Smart Playlists: In addition to manually creating playlists, you can create dynamic playlists called “Smart Playlists.” These playlists automatically update based on specific criteria you set. To create a smart playlist, go to “File” > “New” > “Smart Playlist.” You can set criteria such as genre, play count, rating, and release date to create a playlist that updates dynamically as your library changes.
- Playlist Artwork: To add artwork to a playlist, right-click on the playlist, choose “Get Info,” and go to the “Info” tab. Here, you can add or change the artwork for the playlist by dragging and dropping an image file or searching the web for playlist artwork.
- Sharing Playlists: iTunes allows you to share your playlists with others. To share a playlist, right-click on the playlist, select “Share Playlist,” and choose the desired sharing method, such as email, AirDrop, or social media. This feature is especially handy for creating and exchanging curated playlists with friends and family.
- Organizing Playlists on Devices: When syncing your iOS devices with iTunes, you can organize the order and appearance of playlists. In the device’s settings within iTunes, go to the “Music” tab and select “Sync Music.” From there, you can choose to sync your entire library or specific playlists. You can also reorder playlists using the “Playlist Order” field.
By organizing and creating playlists in iTunes, you can easily access your favorite songs, create personalized mixes, and set the mood for any occasion. Take advantage of the various features and functionalities iTunes offers to enhance your music listening experience.
Syncing Your Devices with iTunes
Syncing your iOS devices, such as iPhones, iPads, and iPods, with iTunes allows you to transfer media, apps, and other content between your computer and your device. Whether you want to add new music, update apps, or backup your device, iTunes provides a simple and efficient syncing process. Here’s how to sync your devices with iTunes:
- Connect Your Device: Use a USB cable to connect your device to your computer. iTunes will automatically detect the connected device and display its icon in the top-left corner of the iTunes window.
- Device Summary: Click on the device icon to access the device summary page. Here, you’ll find an overview of your device, including its storage capacity, software version, and available options for syncing.
- Syncing Options: Select the tabs in the device summary page to choose the specific content you want to sync with your device. The available options include music, movies, TV shows, podcasts, books, photos, apps, and more.
- Syncing Content: To sync content from your computer to your device, check the corresponding checkboxes for the content types you want to sync. For example, if you want to sync music, check the “Sync Music” box. You can choose to sync your entire library or specific playlists, albums, or artists.
- Backup Options: It is highly recommended to back up your device regularly to protect your data. Under the “Backups” section on the device summary page, you can choose to manually back up your device or enable automatic backups. Automatic backups will occur whenever your device is connected to your computer and charging.
- Syncing Process: Once you have selected the content and backup options, click the “Apply” or “Sync” button to initiate the syncing process. iTunes will start transferring the selected content to your device. During the sync, you can monitor the progress in the iTunes status bar at the top of the window.
- Managing Apps: With iTunes, you can also manage your apps on your iOS devices. Under the “Apps” tab in the device summary page, you can choose to manually select and install specific apps from your computer to your device. You can also reorder your app icons or organize them in folders.
- Eject Your Device: Once the syncing process is complete, you can safely disconnect your device from your computer. To do this, click the eject icon next to your device’s name in the top-left corner of the iTunes window. This ensures that all data has finished transferring before disconnecting your device.
- Wireless Syncing: If you prefer to sync your device wirelessly, you can enable Wi-Fi syncing. Connect your device to your computer using a USB cable and go to the device summary page in iTunes. Under the “Options” section, check the “Sync with this device over Wi-Fi” box. After that, you can sync your device wirelessly whenever it is on the same Wi-Fi network as your computer.
By syncing your devices with iTunes, you can easily transfer content, keep your device up to date, and backup your important data. Take advantage of the syncing options available in iTunes to ensure a seamless experience between your computer and your iOS devices.
iTunes Store: Buying and Downloading Content
The iTunes Store provides a vast selection of music, movies, TV shows, books, and more that you can purchase and download directly to your iTunes library. It offers a convenient way to expand your digital media collection and enjoy the latest releases. Here’s how you can buy and download content from the iTunes Store:
- Accessing the iTunes Store: To access the iTunes Store, open iTunes and click on the “iTunes Store” button in the top-right corner of the window. This will take you to the main page of the iTunes Store, where you can explore different categories and featured content.
- Browsing and Searching: Use the navigation bar at the top of the iTunes Store to browse different categories, such as Music, Movies, TV Shows, Books, and Podcasts. You can also use the search bar to find specific content by entering keywords, artists, titles, or genres.
- Previewing Content: Click on an album, song, movie, or TV show to view more details about it. You can listen to song previews or watch movie and TV show trailers to get a feel for the content before making a purchase decision.
- Buying Music and Videos: To purchase a song or album, click the “Buy” or “Pre-Order” button next to the item. For movies and TV shows, click the “Buy” or “Rent” button. You will be prompted to enter your Apple ID and password to complete the purchase. Once purchased, the content will be added to your iTunes library.
- Downloading Previous Purchases: If you have previously purchased content from the iTunes Store, you can download it to your iTunes library. Go to the “Purchased” section in the iTunes Store, located under the “Quick Links” heading. Here, you can view a list of all your previous purchases and download them to your library.
- Syncing Purchases to Devices: After purchasing and downloading content from the iTunes Store, you can sync it to your iOS devices. Connect your device to your computer, go to the device summary page in iTunes, and select the “Music,” “Movies,” or “TV Shows” tab, depending on the content you want to sync. Check the checkboxes for the content you want to sync and click “Apply” to transfer it to your device.
- Sharing Purchases with Family: If you have a Family Sharing group set up, you can share your iTunes Store purchases with other members of your family. This allows each member to access and download your purchased content to their respective devices. To set up Family Sharing, go to “Account” > “Family Sharing” in the iTunes Store.
- Redeeming Gift Cards and Codes: If you have iTunes gift cards or promotional codes, you can redeem them in the iTunes Store to add store credit to your account. Click on your Apple ID in the top-right corner of the iTunes Store, select “Redeem,” and follow the prompts to enter the gift card or code.
- Managing Account and Payment Information: You can manage your Apple ID, payment information, and purchase settings in your iTunes account settings. Click on your Apple ID in the top-right corner of the iTunes Store and select “Account Info” to access these settings.
Enjoy the convenience of the iTunes Store by exploring and purchasing a wide range of digital media. With a secure transaction process and an extensive library, the iTunes Store provides a seamless way to enhance your entertainment collection.
iTunes Match: Cloud Music Library
iTunes Match is a cloud-based music library service provided by Apple. It allows you to access your entire music collection across all your devices, regardless of where your music is stored. With iTunes Match, you can enjoy high-quality, ad-free music without taking up significant storage space on your devices. Here’s what you need to know about iTunes Match:
iTunes Match Subscription and Setup:
To use iTunes Match, you’ll need an active iTunes Match subscription. The subscription is available for an annual fee and provides access to the service on all your Apple devices. To set up iTunes Match:
- Open iTunes on your computer and sign in with your Apple ID.
- Go to the “Account” menu and select “iTunes Match” or “iTunes Store.” Follow the prompts to subscribe to iTunes Match.
- Once your subscription is active, go to the “iTunes” menu and select “Preferences.” Click on the “General” tab and enable the “iTunes Match” option.
- iTunes will then scan your music library to determine which songs are available in the iTunes Store and which need to be uploaded to your iCloud Music Library.
Benefits of iTunes Match:
Expanded Music Library: iTunes Match scans your local music library and matches your songs with those available in the iTunes Store. This allows you to access a vast catalog of songs, including rare or hard-to-find tracks, even if you didn’t purchase them from the iTunes Store.
High-Quality Music: Once iTunes Match has matched your songs, it provides high-quality versions of those songs from the iTunes Store, which are typically encoded at 256 kbps AAC format. This ensures that your music sounds great, regardless of the quality of your original files.
Ad-Free Listening: When you play songs from your iTunes Match library, you can enjoy ad-free listening. This means you won’t be interrupted by advertisements while enjoying your favorite tracks.
iCloud Music Library:
One of the key features of iTunes Match is the iCloud Music Library. This cloud-based library syncs your music collection across all your devices, including your iPhone, iPad, Mac, and Apple TV. Here’s how it works:
- After iTunes Match has matched or uploaded your songs, they become available in your iCloud Music Library.
- You can then access your entire music collection on any device signed in with your Apple ID by enabling iCloud Music Library in the settings.
- Your music will be stored in the cloud, and you can stream or download songs for offline listening.
- Any changes you make to your music library, like adding or removing songs or creating playlists, will be automatically synced across all your devices.
iTunes Match provides a seamless and convenient way to access your music library from anywhere. With the iCloud Music Library and high-quality matched songs, you can enjoy your favorite music on all your Apple devices without worrying about storage constraints or the hassle of manual syncing.
iTunes Radio: Streaming Music
iTunes Radio is a streaming music service offered by Apple that allows you to discover and listen to a wide range of songs and genres. With iTunes Radio, you can enjoy radio-like stations tailored to your musical tastes, create your own stations, and discover new artists and tracks. Here’s what you need to know about iTunes Radio:
Accessing iTunes Radio:
To access iTunes Radio, follow these steps:
- Open iTunes on your computer or launch the Music app on your iOS device.
- Click on the “Radio” tab at the top of the iTunes window or at the bottom of the Music app on your iOS device.
- Select from the predefined stations or create your own custom station.
Listening to Predefined Stations:
iTunes Radio offers a wide range of predefined stations across various genres and moods. Here’s how to listen to these stations:
- Click on the Radio tab in iTunes or the Music app on iOS.
- Browse through the categories or genres to find a station that matches your preferences.
- Click on the station to start listening. iTunes Radio will continuously play songs based on the selected station.
- As you listen, you can give feedback by liking or disliking songs to help iTunes Radio better understand your music preferences.
Creating Custom Stations:
One of the standout features of iTunes Radio is the ability to create custom stations based on your favorite artists, songs, or genres. Follow these steps to create your own station:
- Click on the Radio tab in iTunes or the Music app on iOS.
- Click on the “+” button to create a new station.
- Enter the name of a song, artist, or genre in the search bar and select the desired option from the suggestions.
- iTunes Radio will generate a station based on your selection and start playing similar songs.
- Customize your station further by refining it with options like “Play More Like This” or “Never Play This Song.”
Exploring New Music:
iTunes Radio is an excellent platform to discover new artists and songs. As you listen to predefined or custom stations, iTunes Radio introduces and recommends tracks that align with your musical preferences. You can explore new music by doing the following:
- Take note of the artists and songs you enjoy while listening to stations.
- Click on the song or artist name to explore their entire discography.
- Consider purchasing music from the iTunes Store if you find something you particularly enjoy.
iTunes Radio provides an immersive streaming music experience with endless listening possibilities. Whether you prefer predefined stations or creating custom ones, iTunes Radio offers a platform to enjoy your favorite genres and discover new music that suits your tastes.
Troubleshooting Common Issues
While using iTunes, you may encounter some common issues that can hinder your experience. Fortunately, there are solutions to these problems which can help you get back on track. Here are some troubleshooting tips for common issues you may encounter when using iTunes:
- iTunes Not Opening: If iTunes does not open when you click on it, try restarting your computer. If the issue persists, ensure that you have the latest version of iTunes installed. You can update iTunes by going to the Apple website or using the software update feature on your computer.
- Unable to Sync Devices: If you are experiencing difficulty syncing your device with iTunes, try the following steps:
- Ensure that you are using a certified USB cable to connect your device to your computer.
- Make sure that you have the latest version of iTunes installed on your computer.
- Restart your device and computer, then try syncing again.
- If syncing still fails, try resetting your device’s settings by going to “Settings” > “General” > “Reset” > “Reset All Settings.” Please note that this will reset all your device settings, so make sure to backup your data before proceeding.
- Mislabeled or Missing Album Artwork: If you notice that your album artwork is mislabeled or missing, try the following troubleshooting steps:
- Right-click on the mislabeled song or album, go to “Get Info,” and manually add or correct the artwork in the “Artwork” tab.
- To automatically fetch missing or correct artwork for your songs, select the desired tracks, right-click, and choose “Get Album Artwork.” iTunes will attempt to find and apply the appropriate artwork from its database.
- If album artwork is still not displaying correctly, ensure that your iTunes preferences are set to show album artwork. Go to “Edit” > “Preferences” > “General” and make sure the “Show Artwork” option is checked.
- Slow Performance: If iTunes is running sluggish or freezing, try these troubleshooting steps:
- Ensure that you have sufficient free space on your computer’s hard drive. Delete any unnecessary files or programs to free up space.
- Close any other apps or processes running in the background that might be using system resources.
- Disable any iTunes plugins or extensions that might be causing compatibility issues. Go to “Preferences” > “General” and uncheck any unnecessary plugins or extensions.
- If all else fails, consider reinstalling iTunes. Uninstall the current version of iTunes from your computer, restart your computer, and then download and install the latest version of iTunes from the Apple website.
- Missing or Corrupted Media Files: If you discover that some of your media files are missing or corrupted within iTunes, try the following steps:
- Check your computer’s file system to ensure the files have not been accidentally moved or deleted.
- If you have a backup of your iTunes library, restore the missing or corrupted files from your backup.
- If the media files were purchased from the iTunes Store, you can re-download them by going to the “Purchased” section in the iTunes Store.
- If all else fails, right-click on the missing or corrupted file within iTunes, select “Delete from Library,” and then re-import the file into iTunes by dragging it from its original location or using the “Add File to Library” option.
By following these troubleshooting tips, you can overcome common issues that may arise when using iTunes. Remember to ensure you have the latest version of iTunes, maintain backups of your media files, and consult official Apple support resources if needed.
Tips and Tricks for Maximizing iTunes Experience
iTunes offers a comprehensive range of features and functionalities to enhance your music listening and media management experience. To help you make the most out of iTunes, here are some useful tips and tricks:
- Keyboard Shortcuts: Familiarize yourself with keyboard shortcuts to navigate iTunes more efficiently. Use “Space” to play or pause a song, “Command + Right Arrow” to skip to the next song, and “Command + Left Arrow” to go to the previous song, just to name a few. Explore the full list of keyboard shortcuts in the iTunes menu.
- iTunes Equalizer: Customize your audio experience with the iTunes Equalizer. Go to “Window” > “Equalizer” to access the equalizer settings. Adjust the levels according to your preference or choose from the built-in presets to enhance the audio output for different music genres.
- Smart Playlists: Take advantage of Smart Playlists to create dynamic playlists that automatically update based on specific criteria. Use filters such as genre, play count, rating, or last played date to create a playlist that always reflects your changing musical preferences. To create a Smart Playlist, go to “File” > “New” > “Smart Playlist.”
- Customizing the iTunes Library View: Tailor the appearance of your iTunes library by customizing the view options. Right-click on the column headers in the iTunes library and select the columns you want to display, rearrange them by dragging, or adjust their width for a personalized view that best suits your needs.
- Sorting and Filtering: Use the sorting and filtering options in iTunes to quickly find specific content. Click on the column headers to sort your library by criteria such as artist, album, genre, or time. Use the search bar to filter your library based on specific keywords, making it easier to locate your favorite songs or albums.
- Creating Custom Ringtones: iTunes allows you to create custom ringtones for your iPhone. Choose a song from your library, right-click on it, and select “Song Info.” Go to the “Options” tab and set the start and stop times for the desired ringtone segment. Right-click on the song again and choose “Create AAC Version.” Convert it to a ringtone format by changing the file extension from .m4a to .m4r, and then sync it to your iPhone.
- Genius Playlist: Utilize the Genius feature in iTunes to create instant playlists of songs that go well together. Select a song, right-click on it, and choose “Create Genius Playlist.” iTunes will generate a playlist based on the selected song and recommend other tracks that complement it.
- iTunes DJ: Use the iTunes DJ feature to create a dynamic playlist for your parties or gatherings. Enable iTunes DJ by going to “Preferences” > “Playback” and selecting the “iTunes DJ” option. Guests can request songs, vote for their favorites, and get involved in the music selection process to create a fun and interactive atmosphere.
- Customizing Notification Center: Customize the notifications you receive from iTunes in the Notification Center on your Mac or iOS device. Go to “System Preferences” > “Notifications” on Mac or “Settings” > “Notifications” on iOS to configure the specific types of notifications you want to receive from iTunes, such as new song releases or updates from your favorite artists.
- Multiple iTunes Libraries: If you have multiple users sharing the same computer or want to keep different libraries for specific purposes, you can create and manage multiple iTunes libraries. Hold down the Option key (Mac) or Shift key (Windows) while launching iTunes, and a dialog box will appear to help you create or choose a different library.
- Stay Updated: To ensure you have access to the latest features and bug fixes, keep iTunes updated. Check for updates regularly by going to “Help” > “Check for Updates” on Windows, or “iTunes” > “Check for Updates” on Mac.
By implementing these tips and tricks, you can maximize your iTunes experience and fully enjoy the wide range of features and functionalities that iTunes has to offer. Explore and experiment with different options to personalize your music library and make listening to your favorite songs a more enjoyable and seamless experience.