
Sign up for Dropbox
Signing up for Dropbox is the first step towards gaining access to this powerful file storage and sharing service on your Mac. To create your account, follow these simple steps:
- Go to the Dropbox website (https://www.dropbox.com) using your Mac’s web browser.
- Click on the “Sign up for free” button located on the home page.
- Enter your full name, email address, and a secure password in the designated fields.
- Agree to the Terms of Service and Privacy Policy by checking the respective checkboxes.
- Click on the “Sign up” button to proceed.
At this point, Dropbox will send a confirmation email to the email address you provided. Check your inbox, locate the email, and click on the verification link within to confirm your account.
Once your account is confirmed, you can start benefiting from the myriad features that Dropbox offers. It’s worth noting that Dropbox offers a free Basic plan with limited storage space, as well as paid plans with larger storage capacities and additional features. You can choose the plan that best suits your needs and upgrade later if necessary.
After signing up, you can proceed to download and install the Dropbox desktop app on your Mac to enjoy seamless synchronization with your files and folders. The next section will guide you through the installation process.
Download and install the Dropbox desktop app
To take full advantage of Dropbox on your Mac, you’ll want to download and install the Dropbox desktop app. Follow these steps to get started:
- Open your preferred web browser on your Mac and visit the Dropbox website (https://www.dropbox.com).
- Click on the “Download Dropbox” button located on the home page.
- Once the download is complete, locate the downloaded file in your Downloads folder.
- Double-click on the file to start the installation process.
- Follow the prompts in the installer to complete the installation. You may be asked to enter your administrative password.
- After installation, the Dropbox app will launch automatically.
Next, sign in to your Dropbox account using the email address and password you used during the sign-up process. If you don’t have an account yet, you can create one by clicking on the “Sign up for free” option within the app.
Once you’ve signed in, the Dropbox app will create a folder named “Dropbox” in your Mac’s Finder. This folder is where you can store and manage all your Dropbox files and folders.
By default, the Dropbox app will start syncing your files and folders to your Mac so you can access them even when you’re offline. This synchronization process may take some time depending on the size of your Dropbox storage and the speed of your internet connection.
Once the syncing is complete, you’ll notice a green tick mark on each file and folder indicating that it has been successfully synced to your Mac.
With the Dropbox desktop app installed and running on your Mac, you can enjoy seamless file synchronization and access your Dropbox files from your Mac’s Finder. In the next section, we’ll delve into signing in to your Dropbox account within the app and customizing your preferences.
Sign in to your Dropbox account
Once you have installed the Dropbox desktop app on your Mac, the next step is to sign in to your Dropbox account. Follow these simple steps:
- Launch the Dropbox app on your Mac by locating it in your Applications folder or clicking on the Dropbox icon in your system toolbar.
- Enter the email address and password associated with your Dropbox account in the designated fields.
- Click on the “Sign in” button to proceed.
If you have enabled two-factor authentication for your Dropbox account, you will be prompted to enter the verification code sent to your registered mobile device or authentication app.
After successfully signing in, the Dropbox app will sync with your account and display your Dropbox files and folders. You can now start managing your files, uploading new ones, and accessing your content seamlessly from your Mac.
It’s important to note that if you have multiple Dropbox accounts, you can sign in to all of them and easily switch between them within the Dropbox app.
By default, the Dropbox app will start syncing your files and folders automatically. However, you can customize the sync settings and preferences according to your needs. We will discuss this further in the next section.
If you ever encounter any issues while signing in, ensure that you have a stable internet connection and double-check your email address and password. You can also click on the “Forgot your password?” link to reset your password if necessary.
Now that you have successfully signed in to your Dropbox account, you can explore the various features and functionalities available to help you manage and collaborate on your files. The next section will guide you through customizing your Dropbox preferences on your Mac.
Customize your Dropbox preferences
Customizing your Dropbox preferences allows you to tailor the Dropbox app on your Mac to suit your specific needs. Here’s how you can do it:
- Open the Dropbox app on your Mac by locating it in your Applications folder or clicking on the Dropbox icon in your system toolbar.
- Click on the Dropbox icon in the top-left corner of the app window, then select “Preferences” from the drop-down menu.
- In the Preferences window, you’ll find several tabs, each containing different settings you can customize.
Let’s explore some of the key preferences you can adjust:
General
In the “General” tab, you can choose to launch Dropbox automatically when you start your Mac and enable or disable the notifications for various events, such as file updates and shared folder invitations.
Account
In the “Account” tab, you can view and manage your account details, including the email address associated with your Dropbox account and the available storage space.
Sync
The “Sync” tab allows you to control how Dropbox syncs your files and folders. You can choose whether to sync all files or only specific folders, as well as specify excluded file types or file sizes.
Bandwidth
Under the “Bandwidth” tab, you can adjust the upload and download rates for syncing. This can be useful if you want to allocate more bandwidth to other tasks while using Dropbox in the background.
Proxies
If your network requires a proxy server to connect to the internet, you can configure the proxy settings in the “Proxies” tab.
Notifications
In the “Notifications” tab, you can further customize the types of notifications you receive from Dropbox, such as new file notifications or shared folder activity alerts.
Once you have made the desired changes to your preferences, simply close the Preferences window, and the changes will take effect immediately.
By customizing your Dropbox preferences, you can optimize your user experience and ensure that Dropbox functions in a way that aligns with your workflow and preferences on your Mac.
Now that you have personalized the Dropbox app to your liking, it’s time to explore the Dropbox interface and understand how to navigate and use its features effectively. The next section will guide you through the Dropbox interface on your Mac.
Understand the Dropbox interface
Once you’re signed in and have customized your Dropbox preferences on your Mac, it’s important to familiarize yourself with the Dropbox interface. Understanding the various elements of the interface will help you navigate and utilize Dropbox efficiently. Here’s an overview:
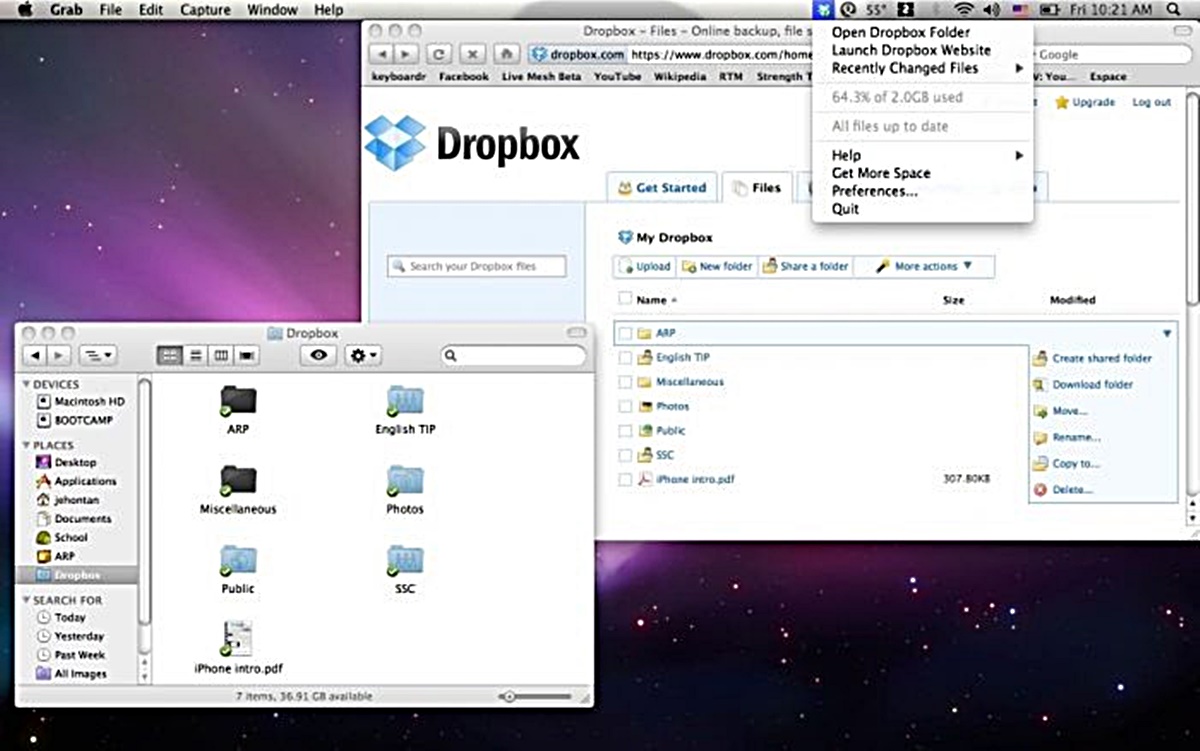
Dropbox Menu Bar
The Dropbox menu bar is located at the top of your Mac screen and provides quick access to essential Dropbox features. You can find options to access your files, view recent activity, share files, and adjust preferences. Clicking on the Dropbox icon in the menu bar will also display the syncing status and provide a shortcut to open the Dropbox folder in Finder.
Dropbox Folder
The Dropbox folder is a dedicated folder on your Mac where you can store and organize your files and folders. By default, it is located in your Home directory and is named “Dropbox”. Any changes made within this folder will be automatically synced with your Dropbox account.
File Icons
Files and folders within your Dropbox folder are represented by various icons that provide visual cues. For example, a green checkmark indicates that the file or folder has been successfully synced, while a blue syncing icon indicates that the file is currently being synced.
File Context Menu
Right-clicking on a file or folder within the Dropbox folder will open a context menu where you can find options to perform various actions such as sharing, moving, copying, renaming, and deleting files.
File Activity and Notifications
When someone shares a file or folder with you, or when changes are made to files within shared folders, you will receive notifications in the Dropbox interface. These notifications help you stay up to date with the latest activity and ensure efficient collaboration.
Search Functionality
Locating specific files within your Dropbox folder is made easy with the search functionality. The search bar is located at the top of the Dropbox interface, allowing you to quickly find files based on their name or content.
Understanding the Dropbox interface on your Mac will enable you to navigate the app effortlessly and take full advantage of its features. Now that you have a grasp of the interface, it’s time to start syncing files and folders to your Dropbox account. The next section will guide you through the process of syncing files and folders to Dropbox.
Sync files and folders to Dropbox
One of the key benefits of using Dropbox on your Mac is the ability to sync files and folders to your Dropbox account, allowing you to access them from any device with the Dropbox app or through the web interface. Follow these steps to sync files and folders to Dropbox:
- Open the Finder on your Mac.
- Navigate to the file or folder that you want to sync to Dropbox.
- Right-click on the file or folder and select “Move to Dropbox” from the context menu.
Alternatively, you can simply drag and drop the file or folder into the Dropbox folder in your Finder to initiate the syncing process.
Once you’ve moved or copied the file or folder to the Dropbox folder, the Dropbox app will immediately start syncing it to your Dropbox account. You can monitor the progress by checking the file or folder icon in the Dropbox folder. A green checkmark indicates that the file or folder has been successfully synced.
It’s important to note that larger files or folders may take more time to sync, especially if you have a slow internet connection. You can track the syncing progress in the Dropbox app’s status bar icon or by hovering over the file or folder in the Dropbox folder.
If you want to sync multiple files or folders at once, you can create a new folder within your Dropbox folder and move or copy the desired files and folders into it.
Furthermore, any changes you make to the files or folders within your Dropbox folder will automatically sync with your Dropbox account. This ensures that you always have the most up-to-date versions of your files across all devices.
By harnessing the power of file synchronization, Dropbox allows you to have seamless access to your important files and folders from anywhere, ensuring productivity and convenience.
Now that you have successfully synced files and folders to your Dropbox account, it’s time to learn how to share your files and folders with others using Dropbox. The next section will guide you through the process of sharing files and folders with ease.
Share files and folders with others
Sharing files and folders with others is a powerful feature of Dropbox that allows you to collaborate and exchange information effortlessly. Here’s how you can share files and folders with others using Dropbox on your Mac:
- Open the Dropbox app on your Mac and navigate to the file or folder you want to share.
- Right-click on the file or folder and select “Share” from the contextual menu.
- In the sharing options window that appears, enter the email addresses or Dropbox usernames of the people you want to share with.
- You can choose the permission level for the recipients – whether they can view, edit, or comment on the shared file or folder.
- Add an optional message to provide further context or instructions.
- Click on the “Share” button to send the invitation to the selected recipients.
Once the recipients receive the invitation, they can access the shared file or folder through their own Dropbox accounts. They can also view, edit, or comment on the files, depending on the permission level you assigned to them.
Additionally, you can generate a shareable link for files or folders and send it to others via email, chat, or any other communication method. This allows anyone with the link to access the shared content, even if they don’t have a Dropbox account.
In the Dropbox app, you can track the status of the shared files or folders and see who has accessed them or made changes. This provides transparency and facilitates collaboration with your teammates, clients, or friends.
If you ever need to revoke access to a shared file or folder, simply navigate to the item in your Dropbox and click on the “Share” option again. From there, you can manage permissions, remove specific recipients, or disable the shareable link.
Sharing files and folders with others using Dropbox ensures seamless collaboration, enhances productivity, and simplifies the process of exchanging information. Now that you know how to share files and folders, let’s explore how you can access your files from any device using the Dropbox app.
Access your files from any device with the Dropbox app
With the Dropbox app installed on your Mac, you can easily access your files and folders from any device, ensuring that your important documents, photos, and other files are always at your fingertips. Here’s how you can access your files using the Dropbox app:
- Download and install the Dropbox app on your other devices, such as your smartphone or tablet, if you haven’t done so already.
- Launch the Dropbox app on your device and sign in using the same Dropbox account credentials you used on your Mac.
- Once you’re signed in, you’ll see the same files and folders synced to your Dropbox account, ensuring consistency across all devices.
- You can browse through your files and folders, search for specific items, and open them directly from the Dropbox app on your device.
- Any changes made to files on one device will automatically sync to your Dropbox account and reflect on all other devices where you have the Dropbox app installed.
Whether you need to access an important document during a meeting on your smartphone or show a photo slideshow on your tablet, the Dropbox app provides the flexibility and convenience of accessing your files from anywhere, at any time.
In addition to the mobile apps, you can also access your files and folders through the web interface. Simply open a web browser on any device, navigate to the Dropbox website, and sign in to your account. From there, you can browse through your files, preview documents, download files, and perform other file management tasks.
Having access to your files across multiple devices ensures efficient collaboration, seamless workflow, and the ability to work on the go without limitations. Whether you’re at your Mac, on your smartphone, or using a different computer, the Dropbox app empowers you to stay productive wherever you are.
Now that you understand how to access your files from any device using the Dropbox app, let’s explore some additional features that can enhance your Dropbox experience. In the next section, we’ll discuss how to enable selective sync to manage your storage space effectively.
Enable selective sync
If you have limited storage space on your Mac or want to conserve bandwidth, enabling selective sync in Dropbox can be a useful feature. Selective sync allows you to choose which files and folders to sync to your Mac, freeing up storage space and reducing the amount of data being downloaded. Here’s how to enable selective sync:
- Open the Dropbox app on your Mac.
- Click on the Dropbox icon in the menu bar, then select “Preferences” from the drop-down menu.
- In the Preferences window, navigate to the “Sync” tab.
- Click on the “Selective Sync” button.
- A list of all the files and folders in your Dropbox account will be displayed.
- Uncheck the boxes next to the files and folders that you don’t want to sync to your Mac. Only the selected files and folders will be synced to your local Dropbox folder.
- Click on “Update” to save your changes.
After enabling selective sync, the unchecked files and folders will still be accessible on the Dropbox website or through other devices where you have the Dropbox app installed. However, they will not take up valuable storage space on your Mac.
If you ever need to access a file or folder that is not currently synced to your Mac, you can simply check the box next to it in the Selective Sync settings. Dropbox will then start syncing the file or folder to your Mac, allowing you to access it locally.
Enabling selective sync gives you greater control over your Dropbox storage and allows you to prioritize the files and folders you need most. This is particularly useful if you have a large Dropbox account with lots of data but limited local storage.
By enabling selective sync, you can optimize your storage space and ensure that the files you need are readily available on your Mac. Now that you’re familiar with selective sync, let’s explore another useful feature of Dropbox called Smart Sync, which helps save local storage on your Mac.
Use Smart Sync to save local storage
Smart Sync is a feature offered by Dropbox that helps you save local storage space on your Mac by allowing you to choose which files and folders to store locally and which ones to keep only online. It effectively manages your files by syncing metadata and providing on-demand access when needed. Here’s how to use Smart Sync:
- Open the Dropbox app on your Mac.
- Click on the Dropbox icon in the menu bar, then select “Preferences” from the drop-down menu.
- In the Preferences window, navigate to the “Sync” tab.
- Click on the “Smart Sync” button.
- You will see two options: “Local” and “Online Only”.
- Select “Local” to store the selected files and folders on your Mac.
- Select “Online Only” to keep the selected files and folders only in the cloud.
- To set a file or folder to “Local” or “Online Only”, right-click on it in the Dropbox folder and select the respective option from the context menu.
- Files set to “Online Only” will appear as placeholders on your Mac, taking up minimal local storage space. When you need to access them, simply double-click on the file, and Dropbox will download it on-demand.
- Files set to “Local” will be fully accessible and synced to your Mac, taking up local storage space.
Using Smart Sync can be beneficial if you have limited local storage or a sizable Dropbox account. It allows you to have quick access to critical files while keeping less frequently accessed files safely stored in the cloud.
Since files set to “Online Only” consume minimal storage, you can have a larger Dropbox library without worrying about running out of local disk space. This is particularly useful for large files, infrequently used documents, or projects that don’t require immediate access.
With Smart Sync, you can optimize your Mac’s storage usage, ensuring that the files you need are readily accessible while saving valuable space. If you ever need to work with files marked as “Online Only”, Dropbox will transparently download them on-demand, allowing you to seamlessly access and edit them from your Mac.
Now that you know how to use Smart Sync, you can manage your local storage effectively and keep your important files easily accessible. The next section will guide you on how to recover deleted files from Dropbox in case you accidentally delete something.
Recover deleted files from Dropbox
Accidentally deleting files can be a frustrating experience, but Dropbox provides a built-in feature that allows you to recover deleted files and restore them to their original location. Here’s how you can recover deleted files from Dropbox:
- Open a web browser on your Mac and navigate to the Dropbox website (https://www.dropbox.com).
- Sign in to your Dropbox account using your credentials.
- In the left-hand sidebar, click on “Files” to access your file browser.
- At the top of the file browser, click on “Deleted files” to view a list of all the files you recently deleted.
- Browse through the list to find the file you want to recover. You can use the search bar to search for specific files.
- Once you’ve located the file, right-click on it and select “Restore” from the context menu.
- The file will be restored to its original location in your Dropbox folder.
It’s important to note that deleted files are stored in Dropbox’s “Deleted files” section for a limited period of time. The duration may vary depending on your Dropbox plan.
If you can’t find the deleted file in the “Deleted files” section, it may have passed the retention period and can no longer be recovered via the Dropbox website. In such cases, you can try using the Dropbox desktop app’s “Rewind” feature.
The “Rewind” feature allows you to restore your entire Dropbox account or specific folders to a previous state within the last 30 days. This can be useful if you accidentally delete a large number of files or if you need to revert to an earlier version of your files.
To use the “Rewind” feature:
- Click on the Dropbox icon in the menu bar and select “Rewind…” from the drop-down menu.
- Follow the prompts to select the date and time you want to revert to.
- Dropbox will restore your account or selected folders to the chosen state, including any deleted files.
By utilizing the “Deleted files” section and the “Rewind” feature, you can effectively recover deleted files from Dropbox and restore them to their original locations, minimizing data loss and ensuring the safety of your important files.
Now that you know how to recover deleted files from Dropbox, you can have peace of mind knowing that accidental deletions can easily be reversed. The next section will explore Dropbox Paper, a collaborative document editor that integrates seamlessly with Dropbox.
Collaborate on files with Dropbox Paper
Dropbox Paper is a powerful collaborative document editor that allows multiple users to work together in real-time, providing a seamless integration with Dropbox for efficient collaboration. Here’s how you can collaborate on files using Dropbox Paper:
- Open the Dropbox website (https://www.dropbox.com) on your Mac and sign in to your account.
- In the left-hand sidebar, click on “Paper” to access the Dropbox Paper interface.
- Create a new Paper document or select an existing document to collaborate on.
- Invite collaborators by clicking on the “Invite” button and entering their email addresses. You can also generate a shareable link to share the document with others.
- Collaborators can edit the document simultaneously, leave comments, and make revisions in real-time.
- You can use various formatting options, including headings, lists, tables, and images, to structure and enhance your document.
- Dropbox Paper also supports the embedding of files, images, videos, and even code snippets for a more interactive and rich experience.
- Use the “@” symbol followed by a collaborator’s name to mention and tag specific individuals, notifying them of important updates or assigning tasks.
- Track changes and revisions using the document’s version history, which allows you to view previous iterations and restore previous versions if needed.
- When collaborating on a document, you can add due dates, create to-do lists, and assign tasks to team members to streamline workflow and keep everyone on track.
Dropbox Paper provides a collaborative environment that fosters productivity and cohesion among team members, making it ideal for group projects, brainstorming sessions, meeting agendas, and more.
Furthermore, with Dropbox Paper’s seamless integration with Dropbox, you can easily attach files from your Dropbox account directly into your Paper documents, ensuring that all relevant content remains in one centralized location.
Collaboration becomes effortless with Dropbox Paper, allowing you to harness the collective knowledge and expertise of your team, while providing a seamless workflow and easy access to your documents from anywhere, at any time.
Now that you understand how to collaborate on files using Dropbox Paper, you can leverage this powerful tool to enhance teamwork and streamline your document collaboration process.
The next section will delve into increasing your storage space with referrals and other methods, ensuring that you have ample room to store your files and documents.
Increase your storage space with referrals and other methods
If you find that you’re running out of storage space on your Dropbox account, there are a few methods you can use to increase your storage capacity. Here are some ways to expand your storage space:
Referrals
Dropbox offers a referral program that allows you to earn additional storage space by inviting others to join Dropbox. When your referral signs up and installs Dropbox, both you and your referral will receive extra storage as a reward. You can share your referral link through email, social media, or other communication channels to maximize your referral benefits.
Paid Plans
If you need more storage right away or want to unlock additional features, you can upgrade to one of Dropbox’s paid plans. Dropbox offers various subscription options with larger storage capacities, advanced collaboration tools, and enhanced security features. Explore the available plans on the Dropbox website and choose the one that best suits your needs.
Connecting Social Media Accounts
Dropbox offers extra storage space for connecting your Dropbox account to your social media profiles, such as Facebook and Twitter. By connecting your accounts, you can instantly earn additional storage, allowing you to store more files and documents without any additional cost.
Complete the Getting Started Checklist
New Dropbox users can earn some extra storage space by completing the Getting Started checklist. This checklist includes simple tasks like taking a tour of Dropbox’s features, installing the desktop app, and sharing a folder. By completing these tasks, you can quickly expand your storage capacity.
Participate in Dropbox Events and Promotions
Dropbox occasionally runs events or promotions that offer opportunities to earn additional storage space. Keep an eye on the Dropbox blog, social media accounts, and email newsletters for any announcements regarding special promotions or events.
By utilizing these methods, you can increase your Dropbox storage space, allowing you to store more files, collaborate effectively, and have peace of mind knowing that you have ample room for your important documents and media.
Make sure to check the Dropbox website or reach out to their customer support for the most up-to-date information on available storage expansion options.
Now that you know how to increase your storage space, let’s move on to the next section, which focuses on strengthening the security of your Dropbox account through two-factor authentication.
Enable two-factor authentication for added security
To enhance the security of your Dropbox account, it is highly recommended to enable two-factor authentication (2FA). Two-factor authentication adds an extra layer of protection to your account by requiring a second verification step in addition to your password. Here’s how you can enable two-factor authentication for your Dropbox account:
- Sign in to your Dropbox account on the Dropbox website using your Mac’s web browser.
- Click on your profile picture or initials in the top-right corner of the screen, then select “Settings” from the drop-down menu.
- In the “Account” tab, scroll down to the “Two-step verification” section.
- Click on the “Enable” button to start the setup process.
- You will be guided through the setup wizard, which will ask you to choose a 2FA method.
- One option is to use a mobile app like Google Authenticator or Authy, which generates a secure temporary code on your device that you’ll need to enter during login.
- Another option is to receive text messages with verification codes.
- Follow the instructions provided by your chosen authentication method to complete the setup.
- Once two-factor authentication is enabled, you’ll need to enter the verification code from your mobile app or text message whenever you sign in to your Dropbox account.
- This additional layer of security helps protect your account even if your password is compromised.
Enabling two-factor authentication ensures that even if someone gains access to your password, they still won’t be able to log in to your Dropbox account without the second verification step.
Remember to keep your mobile device secure and keep a backup of your recovery codes in a safe place in case you lose access to your primary authentication method.
By enabling two-factor authentication, you add an extra barrier against unauthorized access and bolster the security of your Dropbox account and the sensitive files and data stored within it.
Now that you have enhanced the security of your Dropbox account, it’s important to manage your account settings effectively. The next section will guide you on how to manage your Dropbox account settings to optimize your experience and ensure privacy.
Manage your Dropbox account settings
Managing your Dropbox account settings allows you to customize various aspects of your account, ensuring that it functions according to your preferences and meets your specific needs. Here’s how you can manage your Dropbox account settings:
- Sign in to your Dropbox account on the Dropbox website using your Mac’s web browser.
- Click on your profile picture or initials in the top-right corner of the screen, then select “Settings” from the drop-down menu.
- You’ll see several tabs in the Settings window, each containing specific settings you can modify.
Account
In the “Account” tab, you can view and manage your account details, such as your email address, Dropbox referral status, connected devices, and the option to unlink any devices you no longer use.
Security
The “Security” tab allows you to review and update your security settings. Here, you can enable two-factor authentication, view active web sessions, and enable/disable app access to your Dropbox account.
Notifications
In the “Notifications” tab, you can manage the types of email notifications you receive from Dropbox. Customize the notification settings to ensure you stay informed about file updates, shared folder activity, and other events based on your preferences.
Connected apps
The “Connected apps” tab displays a list of third-party applications that have access to your Dropbox account. You can review and control which apps are connected and revoke access for any app you no longer wish to have access to your account.
Plan
The “Plan” tab provides an overview of your current Dropbox plan, including the available storage space, plan details, and the option to upgrade or downgrade your plan, if needed.
Preferences
In the “Preferences” tab, you can customize various settings related to your Dropbox web experience, including language preferences, paper settings, and proxy settings.
Take the time to review and update your Dropbox account settings regularly to ensure that they align with your requirements and reflect any changes you may need to make.
By managing your account settings, you can optimize your Dropbox experience, enhance security, and tailor the functionality to suit your specific needs on your Mac and other devices.
Now that you know how to manage your Dropbox account settings, you have the tools to shape your Dropbox experience according to your preferences. The next section will address some common troubleshooting issues with Dropbox on Mac and how to resolve them.
Troubleshooting common issues with Dropbox on Mac
While Dropbox is generally reliable, you may encounter some issues while using it on your Mac. Here are some common problems users face, along with troubleshooting steps to help resolve them:
Syncing Issues
If files and folders are not syncing properly between your Dropbox folder and the cloud, try restarting the Dropbox app by clicking on the Dropbox icon in the menu bar and selecting “Quit Dropbox” and then reopening it. Additionally, ensure that you have a stable internet connection and enough available storage space on your Mac. If the issue persists, you can unlink and relink your Dropbox account to the app.
Slow Performance
If Dropbox is running slow on your Mac, it could be due to high CPU usage or insufficient memory resources. Close any unnecessary applications or processes running in the background to free up system resources. It may also help to restart your computer and ensure that you are using the latest version of the Dropbox app.
Unlinking and Relinking Dropbox
If you are experiencing persistent issues with Dropbox, unlinking and relinking your account can often resolve the problem. To do this, navigate to the Dropbox app’s preferences, select the “Account” tab, and click on the “Unlink This Dropbox” button. Afterward, sign in again to relink your account.
Conflicting File Modifications
If you are collaborating on a file and encounter conflicting modifications, where multiple users have made changes simultaneously, Dropbox will create a “conflicted copy” of the file. You can manually merge the changes from the conflicted copy with the original file or work with your collaborators to resolve any conflicts and consolidate the changes.
Unsupported Characters in File Names
Dropbox does not support certain characters or symbols in file names. If you experience issues with syncing or accessing specific files, check for any unsupported characters in the file name, such as slashes (“/”), colons (“:”), or question marks (“?”). Rename the file to exclude these characters, and it should sync correctly.
If you encounter other issues or these troubleshooting steps do not resolve your problem, check the Dropbox Help Center for additional guidance or contact Dropbox support for further assistance. They can provide specialized support to address the specific issue you’re facing.
By troubleshooting common issues with Dropbox on your Mac, you can ensure a smooth and seamless experience when working with your files and collaborating with others.
Now that you’re equipped with troubleshooting knowledge, you’re ready to overcome any obstacles you may encounter while using Dropbox on your Mac.