
Backup Your Photos
Backing up your photos is an essential step before deleting them from your iPhone 13. It ensures that your precious memories are safely stored and can be retrieved whenever needed. There are several methods to back up your photos, each offering its own advantages. Let's explore these options to find the best fit for you.
iCloud Photo Library
iCloud Photo Library is a convenient and seamless way to back up your photos. By enabling this feature, your entire photo library is automatically uploaded to iCloud, making it accessible from any Apple device linked to your iCloud account. To enable iCloud Photo Library on your iPhone 13, navigate to Settings > [Your Name] > iCloud > Photos, and toggle the iCloud Photos option to the on position. This ensures that all your photos are securely stored in the cloud, ready to be retrieved whenever necessary.
Use iTunes or Finder on Mac
If you prefer to back up your photos to your computer, using iTunes or Finder on a Mac is a viable option. Connect your iPhone 13 to your Mac using a USB cable, and open iTunes or Finder. Select your device, navigate to the Photos tab, and choose the option to sync your photos to your computer. This method provides a local backup of your photos, giving you the flexibility to manage and organize your photo library on your Mac.
Use Third-Party Apps
There are numerous third-party apps available on the App Store that offer photo backup services. These apps often provide additional features such as advanced photo organization, editing tools, and cross-platform accessibility. Popular options include Google Photos, Dropbox, and Amazon Photos. Simply install the app of your choice, follow the setup instructions, and let the app automatically back up your photos to the cloud.
By backing up your photos using one or more of these methods, you can proceed with confidence knowing that your memories are securely stored. Once you have ensured that your photos are safely backed up, you can proceed to delete them from your iPhone 13 without the fear of losing them permanently.
Use iCloud Photo Library
The iCloud Photo Library is a powerful tool that seamlessly syncs your photos and videos across all your Apple devices. By enabling this feature on your iPhone 13, you can ensure that your entire photo library is securely stored in the cloud, ready to be accessed whenever and wherever you need it.
To enable iCloud Photo Library on your iPhone 13, follow these simple steps:
-
Navigate to Settings: Open the Settings app on your iPhone 13.
-
Access Your Apple ID: Tap on your name at the top of the Settings menu to access your Apple ID settings.
-
Open iCloud Settings: Select the "iCloud" option from the list of available settings.
-
Enable iCloud Photos: Scroll down to find the "Photos" option and tap on it. Then, toggle the "iCloud Photos" switch to the on position.
Once iCloud Photo Library is enabled, your iPhone 13 will automatically start uploading your photos and videos to iCloud. This process may take some time, depending on the size of your photo library and your internet connection speed. You can monitor the progress of the upload by navigating to the Photos app and selecting the "Library" tab, where you'll see the status of the upload at the bottom of the screen.
One of the key benefits of using iCloud Photo Library is the seamless integration with other Apple devices linked to your iCloud account. This means that once your photos are uploaded to iCloud, they will be accessible from your iPad, Mac, or any other Apple device using the same iCloud account. This level of accessibility ensures that your photos are never out of reach, even if you don't have your iPhone 13 with you.
Furthermore, iCloud Photo Library provides a level of security and peace of mind. Your photos and videos are encrypted and securely stored in iCloud, protecting them from loss or unauthorized access. This means that even if something were to happen to your iPhone 13, your precious memories would remain safe in the cloud.
In addition to storage and accessibility, iCloud Photo Library also offers features such as the ability to create shared albums, organize your photos into albums and memories, and utilize advanced search capabilities to quickly find specific photos or videos.
By leveraging the power of iCloud Photo Library, you can ensure that your photos and videos are not only backed up but also easily accessible and well-organized across all your Apple devices. This seamless integration and robust feature set make iCloud Photo Library a compelling choice for iPhone 13 users who value the security and accessibility of their photo library.
Use iTunes or Finder on Mac
Using iTunes or Finder on a Mac provides a reliable and flexible method to back up your photos from your iPhone 13. This approach allows you to create a local backup of your photo library on your Mac, providing an additional layer of security and accessibility. Here's a detailed guide on how to utilize iTunes or Finder to back up your photos:
-
Connect Your iPhone 13: Start by connecting your iPhone 13 to your Mac using a USB cable. Ensure that your Mac is powered on and unlocked, allowing the devices to establish a connection.
-
Open iTunes or Finder: If you are using macOS Catalina or later, you will use Finder to back up your iPhone 13. For earlier versions of macOS, iTunes will be the designated application. Open the respective application on your Mac.
-
Select Your Device: In iTunes or Finder, your connected iPhone 13 should appear as a device. Click on the device to access its settings and options.
-
Navigate to the Photos Tab: Once you have selected your iPhone 13, navigate to the Photos tab within iTunes or Finder. This is where you can manage the synchronization of your photos between your iPhone and your Mac.
-
Choose Sync Options: In the Photos tab, you will find various options for syncing your photos. You can select to sync your entire photo library or specific albums. Choose the sync options that best suit your backup needs.
-
Initiate the Backup: After selecting your sync options, initiate the backup process. This will prompt iTunes or Finder to start copying your photos from your iPhone 13 to your Mac. The time it takes to complete the backup will depend on the size of your photo library and the speed of your USB connection.
-
Monitor the Progress: While the backup is in progress, you can monitor the status and progress of the sync within iTunes or Finder. This allows you to ensure that the backup is proceeding as expected.
By following these steps, you can effectively back up your photos from your iPhone 13 to your Mac using iTunes or Finder. This method provides a local copy of your photo library, giving you the flexibility to manage and organize your photos on your Mac. Additionally, having a local backup ensures that your photos are accessible even without an internet connection, providing an extra layer of security for your precious memories.
Use Third-Party Apps
In addition to built-in solutions like iCloud and iTunes, third-party apps offer a diverse range of features and benefits for backing up your photos from the iPhone 13. These apps provide seamless integration, advanced organizational tools, and cross-platform accessibility, making them a popular choice for users seeking a comprehensive photo backup solution.
One of the most widely used third-party apps for photo backup is Google Photos. This app offers free, unlimited storage for high-quality photos and videos, making it an attractive option for users with large photo libraries. Google Photos automatically syncs with your iPhone 13, ensuring that all your photos are securely backed up to the cloud. The app also provides powerful search functionality, allowing you to quickly locate specific photos based on objects, people, or locations.
Another popular choice is Dropbox, which offers seamless photo backup and synchronization across devices. By installing the Dropbox app on your iPhone 13, you can set it to automatically upload your photos to your Dropbox account, providing a convenient and reliable backup solution. Additionally, Dropbox offers features such as file recovery and version history, giving you peace of mind knowing that your photos are protected and easily retrievable.
Amazon Photos is another compelling option for backing up your iPhone 13 photos. This app provides unlimited photo storage for Amazon Prime members, making it a cost-effective solution for users who are already subscribed to Amazon's premium service. Amazon Photos also offers intelligent organization features, including automatic tagging and album creation, simplifying the management of your photo library.
Furthermore, third-party apps like Microsoft OneDrive and Adobe Creative Cloud provide robust photo backup solutions with seamless integration into their respective ecosystems. These apps offer advanced editing tools, collaborative features, and cross-device synchronization, making them ideal for users who require more than just basic photo backup functionality.
By leveraging third-party apps for photo backup, iPhone 13 users can take advantage of a wide array of features and benefits, including enhanced storage options, advanced organization tools, and cross-platform accessibility. These apps provide a seamless and reliable way to ensure that your photos are securely backed up and readily accessible whenever and wherever you need them.
Delete All Photos from iPhone 13
Deleting all photos from your iPhone 13 can be a necessary step to free up storage space, declutter your photo library, or prepare the device for a fresh start. However, it's essential to approach this process with caution to avoid accidental deletion of precious memories. Here's a comprehensive guide on how to safely delete all photos from your iPhone 13.
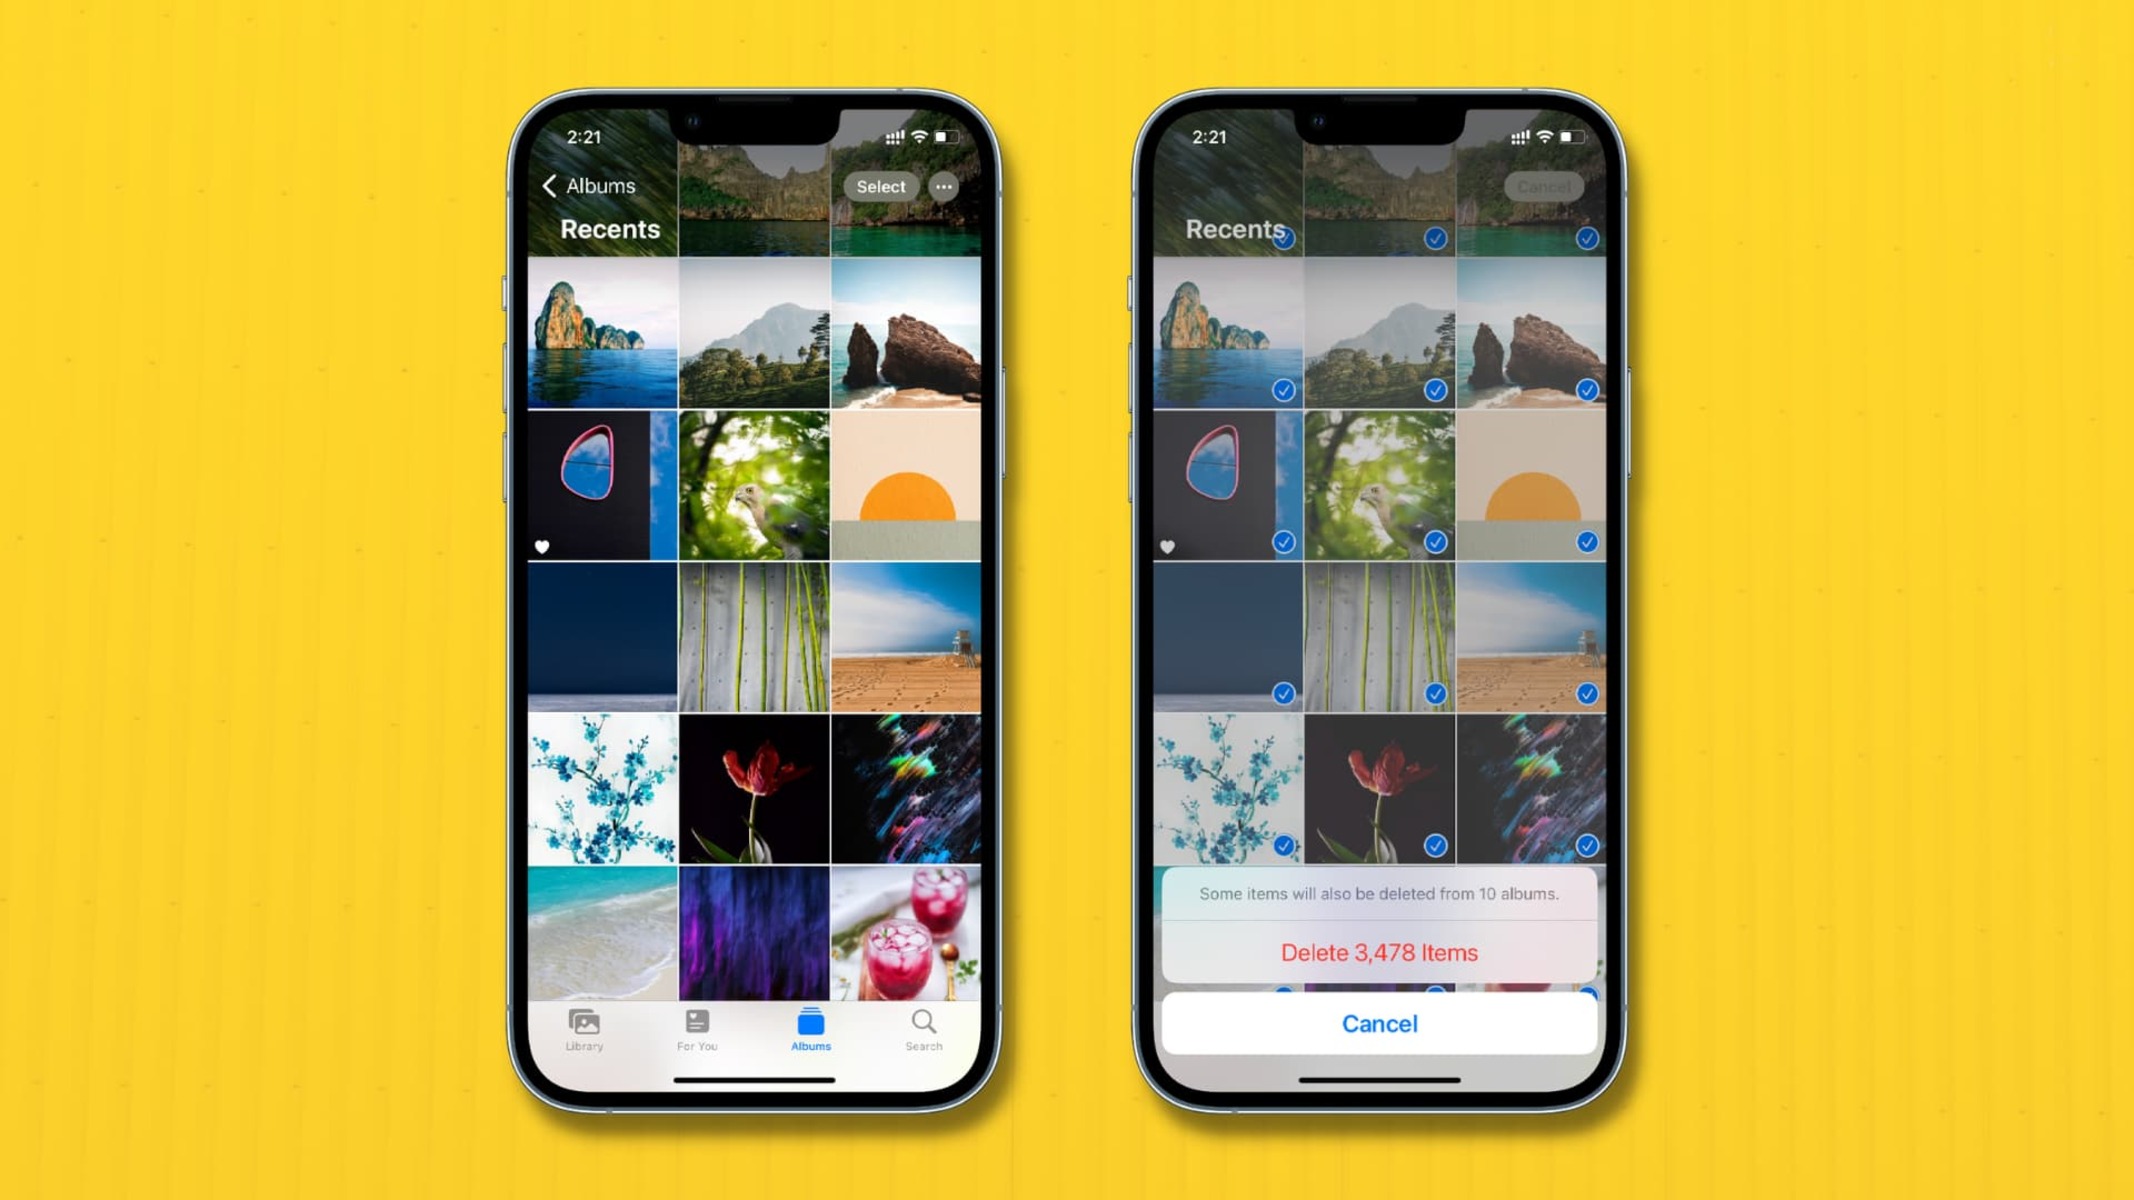
Using the Photos App
- Open the Photos app on your iPhone 13.
- Navigate to the "Albums" tab at the bottom of the screen.
- Scroll down and select the "Recently Deleted" album.
- Tap "Select" in the upper right corner of the screen.
- Tap "Delete All" to permanently remove all photos from the "Recently Deleted" album.
Using iCloud Photos
- If you use iCloud Photos, deleting photos from your iPhone 13 will also remove them from your iCloud Photo Library and other synced devices.
- To delete all photos from your iPhone 13 while keeping them in iCloud, disable iCloud Photos by going to Settings > [Your Name] > iCloud > Photos, and toggle off "iCloud Photos."
Using a Computer
- Connect your iPhone 13 to your computer using a USB cable.
- Open the Photos app on your Mac or the File Explorer on your Windows PC.
- Select your iPhone 13 from the list of devices.
- Choose the option to import all photos from your iPhone 13 to your computer.
- Once the photos are safely imported, you can delete them from your iPhone 13 using the Photos app or File Explorer.
Using Third-Party Apps
- If you use third-party apps such as Google Photos or Dropbox to back up your photos, ensure that your photos are safely backed up before deleting them from your iPhone 13.
- Open the respective app and verify that all your photos are successfully backed up to the cloud.
- Once you have confirmed the backup, you can proceed to delete all photos from your iPhone 13 using the Photos app.
By following these methods, you can confidently delete all photos from your iPhone 13, knowing that your precious memories are safely backed up and protected. Always double-check your backup before proceeding with the deletion to avoid any unintended loss of important photos.