
Understanding Excel and CSV Files
When it comes to importing contacts into Outlook, it’s important to understand the two most common file formats used: Excel and CSV (Comma Separated Values).
Excel files, often in the .xlsx or .xls format, are created using spreadsheet software like Microsoft Excel. These files can contain multiple sheets, each consisting of rows and columns of data. Excel is a powerful tool that allows you to organize and manipulate data with various formulas, formatting, and calculations.
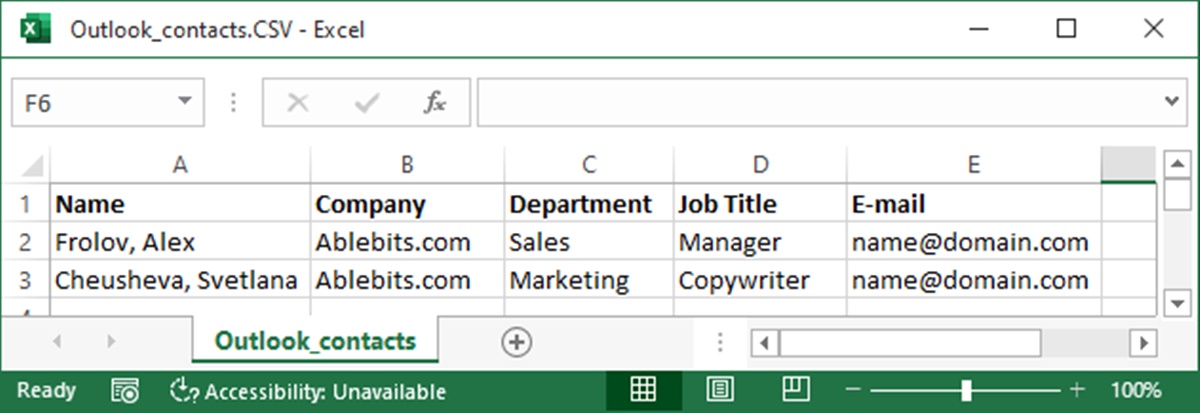
On the other hand, CSV files are plain text files that store data in a tabular format. Each column is separated by a comma, hence the name “Comma Separated Values.” CSV files are commonly used for data exchange between different programs and can be easily edited using a text editor or spreadsheet software.
When it comes to importing contacts, both Excel and CSV files can be used. However, it’s important to note that CSV files are generally more compatible and easier to work with in most applications, including Outlook.
Unlike Excel files, CSV files do not contain any formatting or formulas. Instead, they focus purely on data, making them lightweight and ideal for data migration and import tasks. Due to their simplicity, CSV files are often the preferred format for importing contacts into Outlook from other platforms or applications.
Whether you have an Excel or CSV file, the process of importing contacts into Outlook remains relatively similar. However, when working with Excel files, it’s crucial to properly format and save them as CSV files before importing into Outlook to ensure compatibility and a smooth importing process.
Now that you have a better understanding of Excel and CSV files, let’s move on to the next step – preparing your file for import into Outlook.
Preparing Your Excel or CSV File for Import
Before importing your Excel or CSV file into Outlook, there are a few important steps to follow to ensure a successful import process.
1. Review and clean up your data: Take a moment to review your contact data and ensure it is accurate and up to date. Remove any unnecessary columns or data that is not relevant to your contacts, as this will make the importing process smoother.
2. Format your Excel file: If you’re working with an Excel file, it’s crucial to properly format it before saving it as a CSV file. To do this, make sure your data is organized into columns with clear headers at the top. Each column should represent a specific contact field such as name, email, phone number, etc. Additionally, ensure that the data is consistent and follows a proper format (e.g., phone numbers should have a consistent number of digits, dates should be in a standard format).
3. Save as CSV: Once your Excel file is properly formatted, save it as a CSV file. In Excel, you can do this by selecting “Save As” and choosing the “CSV (Comma delimited)” file format. Give the file a descriptive name and save it to a location on your computer where you can easily access it.
4. Use UTF-8 encoding: When saving your CSV file, it’s recommended to use UTF-8 encoding. This ensures that special characters or non-English characters are properly encoded and preserved during the import process.
5. Ensure proper column headers: Check that your CSV file has the correct column headers, matching the field names in Outlook. This is crucial for mapping the columns correctly during the import process. If needed, you can refer to Outlook’s documentation or interface to determine the correct field names.
6. Clean up special characters: Remove any special characters or symbols that are not recognized by Outlook. These can cause issues during the import process or display incorrectly in the contact details.
By following these steps and properly preparing your Excel or CSV file, you are setting a solid foundation for a smooth import process. Now, let’s move on to the next section, where we’ll explore the process of importing contacts into Outlook.
Importing Excel or CSV Contacts Into Outlook
Now that you have a properly formatted Excel or CSV file ready, it’s time to import your contacts into Outlook. Follow the steps below to complete the import process:
1. Open Outlook: Launch Outlook on your computer and make sure you are signed in to the correct email account where you want to import the contacts.
2. Go to the File tab: In the Outlook interface, click on the “File” tab located at the top left corner of the window. This will open the File menu.
3. Select “Open & Export” option: From the File menu, select the “Open & Export” option. This will open a list of import and export options.
4. Choose “Import/Export” option: In the Open & Export menu, select the “Import/Export” option. This will launch the Import/Export wizard.
5. Select “Import from another program or file” option: In the Import/Export wizard, choose the “Import from another program or file” option and click “Next.”
6. Choose “Comma Separated Values” option: In the next screen, select the “Comma Separated Values” option and click “Next.” This will open the Import a File wizard.
7. Browse for your CSV file: Click on the “Browse” button and navigate to the location where you saved your CSV file. Select the file and click “OK.”
8. Choose an Outlook folder: In the Import a File wizard, choose the Outlook folder where you want to import the contacts. This can be your Contacts folder or a custom folder you’ve created. Click “Next.”
9. Map the columns: The Import a File wizard will display a list of columns from your CSV file. Map each column to the corresponding Outlook contact field. This ensures that the data is imported correctly. Review the column mapping and make any necessary adjustments.
10. Complete the import: Once you’ve mapped all the columns, click “Finish” to start the import process. Outlook will process the file and import the contacts into the chosen folder.
11. Verify the contacts: After the import process is complete, double-check your contact list in Outlook to ensure that all the contacts were imported accurately. Cross-reference with the original file to confirm the data integrity.
By following these steps, you can successfully import your Excel or CSV contacts into Outlook. Now, let’s move on to the next section, where we’ll discuss how to handle errors and deal with duplicate contacts.
Mapping Columns During Import
When importing Excel or CSV contacts into Outlook, it’s crucial to map the columns from your file to the corresponding contact fields in Outlook. This ensures that the data is imported correctly and organized in the right places. Here’s how you can map the columns during the import process:
1. Review the column mapping screen: During the import process, Outlook will display a screen where you can map the columns from your file to the contact fields in Outlook. Take a moment to carefully review this screen before proceeding.
2. Match the contact fields: For each column in your file, identify the corresponding Outlook contact field that matches the data. This can include fields like name, email, phone number, address, etc. Select the appropriate contact field from the drop-down menu next to each column.
3. Handle unmapped fields: If there are any columns in your file that do not have a corresponding Outlook contact field, you can choose to ignore or skip those columns during the import process. This can be useful for columns containing additional or non-essential data.
4. Customize field mappings: If your file includes custom fields or additional information that is not included in the default set of contact fields in Outlook, you can create new custom fields or map them to existing custom fields in Outlook. This allows you to preserve and import all the necessary data.
5. Verify the column mapping: Once you have mapped all the columns, take a moment to review the column mapping summary. Ensure that each column from your file is correctly mapped to the corresponding Outlook contact field. Double-check for any errors or discrepancies.
6. Adjust mappings if needed: If you spot any mistakes or want to make changes to the column mapping, you can easily modify them by selecting a different contact field from the drop-down menu. Make the necessary adjustments to ensure the right data is imported to the correct fields in Outlook.
7. Complete the import: Once you are satisfied with the column mapping, click “Finish” or “Next” to start the import process. Outlook will process the file and import the contacts according to the mapping you have defined.
By carefully mapping the columns during the import process, you can ensure that the data from your Excel or CSV file is accurately imported into the correct contact fields in Outlook. This helps to maintain the integrity of your contact information and allows for seamless organization and management within Outlook. Now, let’s move on to the next section, where we’ll explore how to handle errors and deal with duplicate contacts.
Dealing with Errors and Duplicate Contacts
During the process of importing Excel or CSV contacts into Outlook, you may encounter errors or come across duplicate contacts. It’s important to address these issues to ensure a clean and organized contact list. Here are some strategies for dealing with errors and duplicate contacts:
1. Error handling: If you encounter any errors during the import process, such as missing or invalid data, Outlook will notify you and provide options to handle these errors. Review the error messages and follow the prompts to resolve the issues. This could involve correcting the data in your file or making adjustments to the column mapping.
2. Verify data integrity: After the import process is complete, it’s essential to verify the integrity of the imported data. Check for any missing or incorrect information and cross-reference with the original file. If you notice any discrepancies, you can update the contact details in Outlook manually to ensure accurate and up-to-date information.
3. Handling duplicate contacts: Duplicate contacts can be a common issue when importing contacts from different sources. Outlook provides tools to handle duplicates automatically. During the import process, you can choose to automatically detect and merge duplicate contacts based on criteria like name, email address, or phone number. This helps to consolidate duplicate entries and maintain a clean contact list.
4. Manual duplicate resolution: If Outlook is unable to automatically detect and merge duplicate contacts, you may need to manually resolve duplicates. To do this, carefully review your contact list and identify any duplicate entries. Compare the information and decide which details to keep or merge. Delete the duplicate entries and update the remaining contact with the necessary information.
5. Use third-party tools: If you have a large number of duplicate contacts or want more advanced features for managing and resolving duplicates, consider using third-party tools. There are various applications and add-ins available that can help you efficiently identify and remove duplicate contacts in Outlook.
6. Regularly review and update: Importing contacts into Outlook is not a one-time task. As your contact list grows and evolves, it’s essential to regularly review and update your contacts. Regularly check for duplicates, resolve any errors or inconsistencies, and keep your contact information accurate and up-to-date.
By addressing errors and managing duplicate contacts, you can maintain a well-organized and accurate contact list in Outlook. This ensures that you can easily access and utilize your contacts without confusion or inaccuracies. Now, let’s move on to the next section, where we’ll provide some tips for a successful importing process.
Tips for Successful Importing
Importing Excel or CSV contacts into Outlook can be a smooth and efficient process by following these tips:
1. Organize and clean up your data: Before importing, take the time to organize and clean up your contact data. Remove any unnecessary columns or data that is not relevant to your contacts. This will make the import process more efficient and ensure a clutter-free contact list.
2. Use consistent formatting: Ensure that your Excel or CSV file follows consistent formatting. For example, use a standard format for dates, phone numbers, and addresses. This will help Outlook recognize and import the data accurately.
3. Backup your data: Before performing the import, make a backup of your contact data. This will provide a safety net in case of any unexpected issues during the import process. You can export your current contacts as a CSV file or use Outlook’s built-in backup feature.
4. Test with a small sample: If you’re importing a large number of contacts, test the import process with a small sample first. This allows you to identify and resolve any potential issues or errors before importing the entire contact list.
5. Double-check column mapping: Pay close attention to the column mapping process during the import. Verify that each column in your file is correctly mapped to the corresponding Outlook contact field. This ensures that the data is imported into the right places.
6. Use UTF-8 encoding: When saving your CSV file, use UTF-8 encoding to properly preserve special characters or non-English characters. This helps to avoid any character encoding issues during the import process.
7. Update contact details as needed: After the import, review your contacts in Outlook and update any missing or incorrect information. This will ensure that your contact list is accurate and up to date. It’s also a good opportunity to add any additional details or notes to your contacts.
8. Regularly maintain your contact list: Importing contacts into Outlook is not a one-time task. Regularly review and maintain your contact list by removing duplicates, updating contact information, and organizing your contacts into relevant categories or groups.
9. Consider using third-party tools: If you frequently import and manage contacts, consider using third-party tools or plugins that offer advanced features for contact management. These tools may provide additional options for handling duplicates, automatic formatting, or bulk editing.
By following these tips, you can ensure a successful importing process and maintain a well-organized and up-to-date contact list in Outlook. Now, let’s move on to the final section, where we’ll answer some frequently asked questions about importing contacts into Outlook.
Frequently Asked Questions
Here are answers to some frequently asked questions about importing contacts into Outlook:
Q: Can I import contacts from other email clients or platforms?
A: Yes, Outlook allows you to import contacts from various sources, including other email clients, platforms, or CSV files. You can typically export contacts from your current email client or platform in CSV format and then import them into Outlook using the steps outlined earlier.
Q: Can I import contacts into specific contact folders in Outlook?
A: Yes, during the import process, you can choose the contact folder where you want to import your contacts. This can be your existing Contacts folder or a custom folder that you have created in Outlook. Simply select the desired folder during the import wizard, and your contacts will be imported into that specific folder.
Q: Can I import multiple Excel or CSV files at once?
A: Yes, Outlook allows you to import multiple Excel or CSV files at once. Simply select the option to import from another program or file and follow the prompts to select and import multiple files. This can be useful if you have contacts stored in separate files or if you want to merge contact lists from different sources.
Q: What happens if there are conflicts or errors during the import?
A: If there are conflicts or errors during the import process, Outlook will notify you and provide options to resolve them. You can review the error messages and follow the prompts to fix any issues, such as missing or invalid data. Make sure to review and update your original file if necessary before attempting the import again.
Q: Can I undo an import if I made a mistake?
A: Unfortunately, Outlook does not have a built-in undo feature for imports. However, you can manually delete the imported contacts or use the backup file that you created before the import to restore your previous contact list. Regularly backing up your contacts is a good practice to maintain a safety net in case of any mistakes or issues during the import process.
Q: Can I import contacts into Outlook on my mobile device?
A: Yes, you can import contacts into Outlook on your mobile device. The process may vary depending on the specific mobile platform and Outlook app version. Generally, you can export the contacts from your source as a CSV file, transfer the file to your mobile device, and use the import function within the Outlook app to import the contacts.
These are just a few commonly asked questions regarding the importing of contacts into Outlook. If you have any specific questions or concerns, it’s helpful to refer to the Outlook documentation or support resources for further guidance.