
Setting Up Your Trezor Wallet
Setting up your Trezor wallet is the first step towards securing your cryptocurrency. Trezor is a hardware wallet that provides an extra layer of protection by keeping your private keys offline and away from potential online threats. Follow these simple steps to get started:
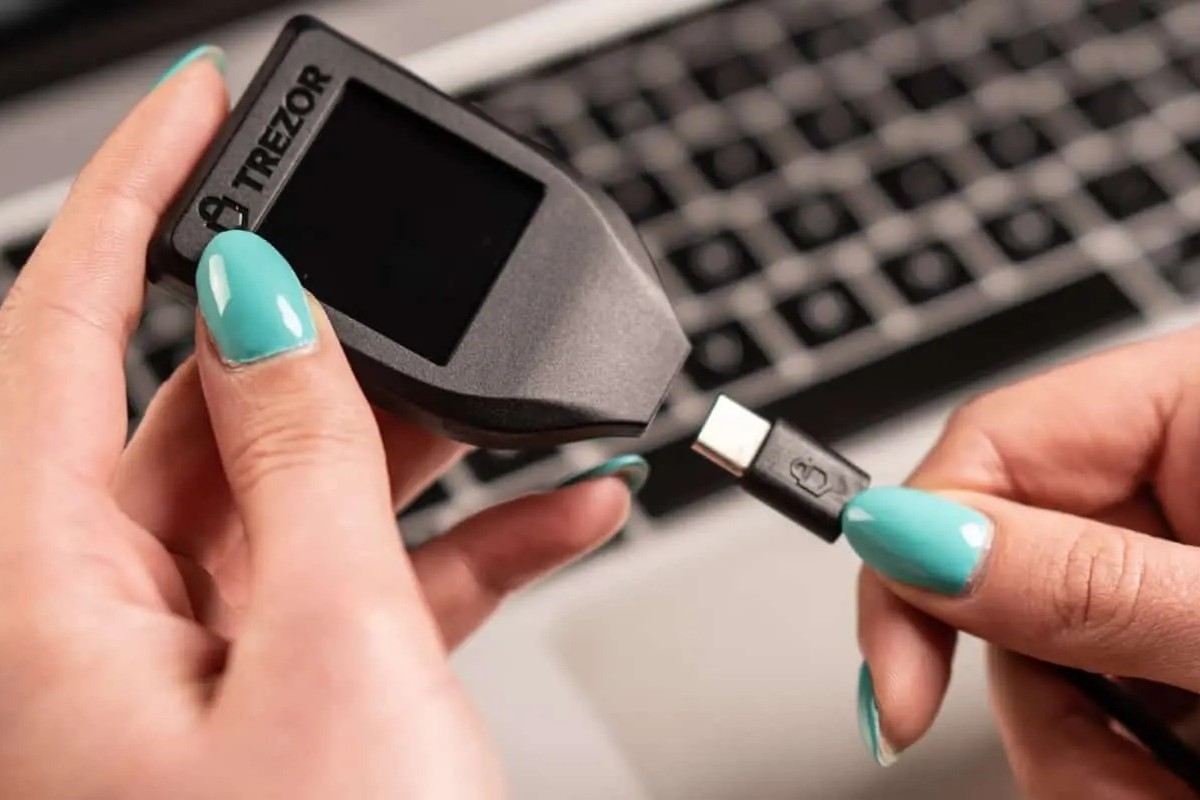
1. Unboxing and connecting your Trezor:
When you receive your Trezor device, carefully unbox it and connect it to your computer using the USB cable provided. Make sure to only use the official Trezor website (trezor.io) to download any necessary software.
2. Setting up a new wallet:
Once your Trezor is connected, you’ll be prompted to initialize a new wallet. Follow the instructions on the screen to set up a unique PIN code and create a recovery seed. Write down the recovery seed on the piece of paper provided and keep it in a safe place.
3. Confirming the recovery seed:
After writing down your recovery seed, Trezor will ask you to confirm it by selecting the words in the correct order. This step ensures that you have accurately recorded the recovery seed and can access your wallet in case of any mishap.
4. Installing wallet software:
Next, you’ll need to install the appropriate wallet software on your computer or mobile device. Trezor supports a range of popular cryptocurrencies like Bitcoin, Ethereum, and more. Download the necessary wallet applications from the Trezor website and follow the installation instructions.
5. Connecting your wallet to the software:
Once the wallet software is installed, connect your Trezor device to your computer using the USB cable. Open the software and select the option to connect your Trezor wallet. Follow the on-screen instructions to complete the connection process.
6. Setting up additional security features:
Trezor offers additional security features like password manager integration, U2F authentication, and more. Explore the settings of your wallet software to enable these features and enhance the security of your Trezor wallet.
7. Making a small test transaction:
Before storing a significant amount of cryptocurrency in your Trezor wallet, it’s a good practice to make a small test transaction. Send a small amount of cryptocurrency to your Trezor address and ensure that the transaction is successful. This step helps you familiarize yourself with the process and ensures that your wallet is functioning correctly.
By following these steps, you can successfully set up your Trezor wallet and start securely managing your cryptocurrency. Remember to regularly update the firmware on your Trezor device to benefit from the latest security enhancements and features.
Creating a New Wallet
Creating a new wallet on your Trezor device is a straightforward process that allows you to securely store and manage your cryptocurrencies. Follow these steps to create a new wallet on your Trezor:
1. Connect your Trezor device:
Plug in your Trezor device using the USB cable provided. Make sure to use the official Trezor website (trezor.io) to download and install the necessary software. This ensures you are using the authentic and secure software for setting up your wallet.
2. Choose a PIN code:
During the setup process, you will be prompted to choose a PIN code for your Trezor device. Follow the instructions on the screen to select a unique PIN code that you can easily remember but is not easily guessable by others. This PIN code will be required each time you want to access your wallet.
3. Write down your recovery seed:
After setting up your PIN code, Trezor will generate a recovery seed consisting of 24 words. Carefully write down these words on the recovery card provided with your device. It is crucial to keep this card in a safe and secure location, as it can be used to restore your wallet in case your Trezor device is lost, stolen, or damaged.
4. Confirm your recovery seed:
To ensure that you have correctly written down your recovery seed, Trezor will ask you to verify it. It will display the words randomly, and you need to select them in the correct order as they appear on your recovery card. Double-check each word to confirm their accuracy.
5. Label and finalize your wallet:
Once you have confirmed your recovery seed, you will be prompted to label your wallet. This is an optional step that allows you to assign a name to your wallet, making it easier to identify if you have multiple wallets on your device. Choose a descriptive label or leave it blank.
6. Wallet created successfully:
After completing the labeling step, your new wallet has been successfully created on your Trezor device. You can now start managing your cryptocurrencies, securely storing your digital assets, and performing transactions using your new wallet.
Creating a new wallet on your Trezor device gives you peace of mind, knowing that your digital assets are protected by the latest security measures. Remember to keep your Trezor device and recovery seed card in a safe and secure place, away from prying eyes, to ensure the long-term security of your cryptocurrencies.
Recovering an Existing Wallet
If you have misplaced or lost your Trezor device, don’t panic! You can easily recover your existing wallet using the recovery seed that you generated when you initially set up your Trezor device. Follow these steps to recover your wallet:
1. Obtain a new Trezor device:
To recover your existing wallet, you will need to obtain a new Trezor device. Make sure to purchase it from an authorized retailer or the official Trezor website (trezor.io) to ensure its authenticity and security.
2. Install the Trezor wallet software:
Download and install the appropriate Trezor wallet software for your computer or mobile device from the official Trezor website. It is important to use genuine and up-to-date software to ensure the security of your wallet.
3. Connect your new Trezor device:
Connect your new Trezor device to your computer using the provided USB cable. Follow the on-screen instructions on the wallet software to set up the device.
4. Select “Recover wallet” option:
In the wallet software, select the option to recover an existing wallet. Choose the appropriate cryptocurrency from the list and proceed to the next step.
5. Enter your recovery seed:
You will be prompted to enter your recovery seed. Carefully input the 24 words in the exact order as they appear on your recovery card. Take your time to ensure the accuracy of each word.
6. Confirm your recovery seed:
To ensure that you have correctly entered the recovery seed, Trezor will ask you to confirm certain words from the seed. Select the requested words from the given options in the correct order. This step verifies that you have the accurate recovery seed for your existing wallet.
7. Set a new PIN code:
After confirming your recovery seed, you will be prompted to set a new PIN code for your new Trezor device. Choose a PIN code that you can easily remember but is secure and not easily guessable.
8. Successfully recover your wallet:
Once you have completed the steps above, congratulations! You have successfully recovered your existing wallet on the new Trezor device. You can now access and manage your cryptocurrencies just as you did before.
Keep in mind that recovering your wallet using the recovery seed overrides any previous settings or configurations on your previous Trezor device. It is crucial to keep your recovery seed safe and secure, as it is the key to accessing your wallet in case of any unforeseen circumstances.
Understanding the Trezor Interface
The Trezor interface provides a user-friendly and intuitive platform for managing your cryptocurrency securely. By familiarizing yourself with the various elements and features of the Trezor interface, you can efficiently navigate and utilize your Trezor device. Here’s a breakdown of the key components of the Trezor interface:
1. Device display:
The device display on your Trezor device consists of a small screen that shows important transaction details and prompts. It allows you to verify and confirm actions directly on the device, enhancing the security of your transactions.
2. Navigation buttons:
The Trezor device features two physical buttons located below the display. These buttons enable you to navigate through different options on the device interface, making it easy to select and confirm actions.
3. Wallet software:
The wallet software is the graphical interface you access on your computer or mobile device to manage your cryptocurrencies. It allows you to view your account balances, send and receive transactions, and access advanced wallet settings.
4. Account overview:
Within the wallet software, you will find an account overview section that provides a summary of your cryptocurrency holdings. It displays the total balance of each supported cryptocurrency and any recent transactions.
5. Receive and send tabs:
The receive and send tabs are essential for managing your cryptocurrency transactions. The receive tab displays your unique wallet address, which you can share with others to receive funds. The send tab allows you to input the recipient’s address and the amount you wish to send.
6. Transaction history:
The transaction history section within the wallet software shows a log of all the transactions made with your Trezor wallet. It provides details such as date, time, amount, and transaction status, allowing you to track the flow of your funds.
7. Settings:
The settings section grants you access to personalized configurations and advanced features. Here, you can manage security settings, enable two-factor authentication (2FA), update firmware, select language preferences, and configure wallet notifications.
8. Help and support:
If you encounter any issues or have questions related to your Trezor device, the help and support section is your go-to resource. It provides access to a comprehensive knowledge base, FAQs, and customer support channels where you can seek assistance.
By understanding the Trezor interface, you can confidently navigate your device and manage your cryptocurrency transactions with ease. Take the time to explore the different sections and features offered, ensuring that you have full control over your digital assets while maintaining the highest level of security.
Sending Cryptocurrency with Trezor
Sending cryptocurrency with your Trezor device is a simple and secure process that allows you to transfer your digital assets to other wallet addresses. Whether you want to send Bitcoin, Ethereum, or any other supported cryptocurrency, follow these steps to make a successful transaction:
1. Connect your Trezor and open the wallet software:
Connect your Trezor device to your computer using the provided USB cable. Open the wallet software on your computer or mobile device and enter your PIN code to access your wallet.
2. Select the cryptocurrency to send:
In the wallet software, navigate to the appropriate cryptocurrency’s account or tab. For example, if you want to send Bitcoin, select the Bitcoin account.
3. Click on the “Send” button:
Find and click on the “Send” or “Send funds” button within the wallet software. This will lead you to the page where you can enter the necessary transaction details.
4. Enter the recipient’s wallet address:
Provide the recipient’s wallet address in the designated field. Double-check the address to ensure its accuracy, as sending funds to the wrong address can result in permanent loss of your cryptocurrency.
5. Specify the amount to send:
Enter the amount of cryptocurrency you wish to send to the recipient. Keep in mind that some wallet software may allow you to select a specific currency value or its equivalent in fiat currency.
6. Confirm transaction details on your Trezor:
Your Trezor device will display the transaction details, including the recipient’s address and the amount being sent. Verify the information on your device’s screen and confirm that it matches the details you provided on the wallet software.
7. Confirm the transaction:
Once you have verified the transaction details on your Trezor device, confirm the transaction by pressing the appropriate button or following the on-screen instructions. This action will digitally sign the transaction and authorize the funds to be sent.
8. Transaction confirmation:
After confirming the transaction, the wallet software will display a confirmation message or transaction ID. This indicates that your transaction has been successfully processed and broadcasted to the blockchain network.
It’s important to note that cryptocurrency transactions can take some time to be confirmed on the blockchain, depending on the network traffic and the cryptocurrency you are sending. Be patient and monitor the status of your transaction on the respective blockchain explorer.
By following these steps, you can confidently send cryptocurrency using your Trezor device, ensuring that your digital assets are securely transferred to the intended recipient. Remember to review transaction details carefully to prevent any errors and always keep your Trezor device and recovery seed in a safe place to maintain the security of your funds.
Receiving Cryptocurrency with Trezor
Receiving cryptocurrency with your Trezor device is a secure and straightforward process. When someone wants to send you funds, they can transfer them to your unique wallet address associated with your Trezor. Follow these steps to receive cryptocurrency with your Trezor:
1. Connect your Trezor and open the wallet software:
Connect your Trezor device to your computer using the provided USB cable. Open the wallet software on your computer or mobile device and enter your PIN code to access your wallet.
2. Select the cryptocurrency to receive:
In the wallet software, navigate to the appropriate cryptocurrency’s account or tab. For example, if you want to receive Bitcoin, select the Bitcoin account.
3. Generate a receiving address:
Within the wallet software, click on the “Receive” or “Receive funds” button. This will generate a unique receiving address associated with your Trezor device.
4. Share the receiving address:
Copy the generated receiving address or display the QR code associated with it. Share the receiving address or the QR code with the person who wants to send you cryptocurrency. They can then enter this address as the recipient when sending the funds.
5. Monitor incoming transactions:
Once the sender initiates the transaction and it is broadcasted to the blockchain network, you can monitor the progress of the incoming transaction on the respective blockchain explorer. It may take some time for the transaction to be confirmed and reflected in your wallet’s balance.
6. Verify the transaction:
When the transaction is confirmed and reflected in your wallet balance, you can verify the details on your Trezor device’s screen. Ensure that the sender’s address, transaction amount, and other transaction details match your expectations.
7. Transaction completion:
Once you have verified the transaction details on your Trezor device, the received funds are now securely stored in your Trezor wallet. You can keep them stored for investment purposes or make additional transactions using your Trezor device.
Remember to provide your unique receiving address that is generated for each transaction to ensure the utmost security and privacy. Generating a new receiving address for each transaction adds an additional layer of anonymity and prevents others from easily tracking your transaction history.
Receiving cryptocurrency with your Trezor is a safe and straightforward process, allowing you to securely collect funds from others without worrying about potential security risks. Always double-check transaction details and keep your Trezor device and recovery seed in a secure location to protect your digital assets.
Managing Your Wallet with Trezor Suite
Trezor Suite is a powerful and user-friendly software platform that allows you to effectively manage your cryptocurrency wallet. With Trezor Suite, you can easily access and control your digital assets, track your transactions, and explore advanced features. Here’s a closer look at some key features and functionalities of managing your wallet with Trezor Suite:
1. User-friendly interface:
Trezor Suite provides an intuitive and user-friendly interface, making it easy for both beginners and experienced users to navigate and manage their wallets. The clean and organized layout allows you to quickly access different features and options.
2. Account portfolio overview:
In the Suite, you can view a comprehensive overview of your cryptocurrency portfolio. It displays the balances of your different accounts and provides a summary of your overall holdings. This feature allows you to have a clear picture of your assets at a glance.
3. Sending and receiving transactions:
Trezor Suite enables you to send and receive cryptocurrency with ease. You can initiate transactions by entering the recipient’s address and the amount to send. Similarly, you can share your receiving address to receive funds from others, ensuring a seamless flow of cryptocurrencies.
4. Transaction history and details:
The Suite keeps a record of all your transaction history, making it convenient to track your previous transfers. You can view details such as the date, time, transaction ID, and specific amounts involved in each transaction. This helps you keep an organized record of your cryptocurrency activities.
5. Advanced account settings:
Trezor Suite offers a range of advanced settings for enhancing the security and functionality of your wallet. You can enable features such as multi-signature support, custom fee selection, and label management. These settings give you more control over your transactions and the overall management of your wallet.
6. Cross-platform compatibility:
Trezor Suite supports various operating systems, including Windows, macOS, and Linux. Additionally, it is compatible with popular web browsers such as Google Chrome, Mozilla Firefox, and Microsoft Edge. This ensures that you can access and manage your wallet from your preferred device and platform.
7. Enhanced privacy and security:
With Trezor Suite, you can enjoy enhanced privacy and security features. You have full control over your private keys, ensuring that your sensitive information is stored securely offline on your Trezor device. Additionally, Trezor’s open-source technology adds an additional layer of transparency and trust.
8. Regular updates and improvements:
Trezor Suite is continuously updated and refined to provide users with the best experience and security. Regular updates ensure that you have access to the latest features, bug fixes, and security enhancements, keeping your wallet up to date.
By utilizing Trezor Suite, you can effectively manage and control your cryptocurrency wallet with ease. Whether you are sending and receiving transactions, exploring advanced settings, or keeping track of your portfolio, Trezor Suite offers a comprehensive and secure platform for managing your digital assets.
Backing Up Your Trezor Device
Backing up your Trezor device is a crucial step in securing your cryptocurrency investments. By creating a backup, you can protect your funds from potential loss or damage. Here’s a guide on how to effectively back up your Trezor device:
1. Write down your recovery seed:
During the initial setup of your Trezor device, you were provided with a recovery seed. This seed consists of a series of 12, 18, or 24 words that act as a backup for your wallet. Write down this recovery seed on a piece of paper or use a compatible offline backup device, such as a Cryptosteel or Billfodl.
2. Store the recovery seed securely:
It is crucial to store your recovery seed in a safe and secure location. Consider using a fireproof and waterproof safe, a safety deposit box, or an off-site location. Avoid storing your recovery seed digitally or in a location that could be easily accessed by unauthorized individuals.
3. Make multiple copies:
To ensure redundancy and minimize the risk of losing your backup, it is recommended to make multiple copies of your recovery seed. Create additional copies and store them in separate secure locations. This way, if one backup is lost or damaged, you will still have access to your funds with the other backups.
4. Test your backup:
It is essential to test your backup to verify its accuracy and functionality. Connect your Trezor device to a computer, enter your PIN code, and select the option to recover your wallet using the recovery seed. Follow the on-screen instructions to enter your recovery seed and ensure that your wallet is successfully restored.
5. Update your backup periodically:
Regularly update your backup to include any new wallet addresses or changes in your Trezor device. If you generate new cryptocurrency addresses or make changes to your Trezor setup, ensure that you update your backup accordingly to include the latest information.
6. Consider using a passphrase:
In addition to the recovery seed backup, you can add an extra layer of security by utilizing a passphrase. A passphrase is an additional word or phrase that acts as an encryption to your recovery seed. Make sure to write down your passphrase separately from your recovery seed and store it securely.
7. Keep your backup offline:
Ensure that your backup remains offline and is not exposed to potential online threats. By keeping your backup completely offline, you minimize the risk of unauthorized access or theft of your recovery seed.
8. Update firmware and software:
Regularly update the firmware on your Trezor device and keep the wallet software up to date. Firmware updates often include security enhancements and bug fixes, ensuring that your device remains protected against potential vulnerabilities.
By following these steps and diligently backing up your Trezor device, you can safeguard your cryptocurrency investments and be prepared for any unforeseen circumstances. Remember to keep your backup secure and confidential, as it is the key to accessing your funds in case of device loss, damage, or other emergencies.
Updating the Firmware on Trezor
Updating the firmware on your Trezor device is an essential step in maintaining the security and functionality of your wallet. Trezor regularly releases firmware updates that include bug fixes, new features, and important security enhancements. Here’s a guide on how to update the firmware on your Trezor:
1. Ensure a stable internet connection:
Before you begin the firmware update process, ensure that you have a stable and reliable internet connection. This will help ensure a smooth and uninterrupted update process.
2. Connect your Trezor device:
Using the provided USB cable, connect your Trezor device to your computer or mobile device. Make sure it is securely connected and recognized by your operating system.
3. Access the Trezor website:
Open your web browser and visit the official Trezor website (trezor.io). This is the trusted source for firmware updates and other essential resources.
4. Download and install Trezor Bridge (if necessary):
If you haven’t installed Trezor Bridge on your computer, you may need to do so to enable the firmware update process. Trezor Bridge acts as a communication bridge between your Trezor device and the web browser.
5. Go to the “Firmware” section:
Navigate to the “Firmware” section on the Trezor website. This section typically provides the latest firmware version available for your Trezor device.
6. Follow the update instructions:
Read and follow the instructions provided for updating the firmware on your Trezor device. The process may vary slightly depending on your operating system, web browser, and the specific Trezor model you are using.
7. Confirm the firmware update on your device:
Once you have followed the instructions on the website, your Trezor device will prompt you to confirm the firmware update. Carefully read the details displayed on your device screen and confirm the update by following the on-screen instructions.
8. Wait for the update to complete:
Allow the firmware update process to complete. This may take a few minutes, during which your Trezor device will display a progress bar or other indicators to show the update’s status. Avoid disconnecting your device or interrupting the update process.
9. Verify the firmware version:
After the update is complete, verify that your Trezor device now has the latest firmware version installed. You can do this by navigating to the firmware section on the Trezor website or by checking the device status through the wallet software.
10. Keep your firmware updated:
It is crucial to regularly check for firmware updates and keep your Trezor device’s firmware updated. Firmware updates often include important security fixes and new features that enhance the overall security and functionality of your wallet.
By following these steps and keeping your Trezor device’s firmware updated, you can ensure that your wallet remains secure and up to date. Regular firmware updates help protect your digital assets and provide you with the latest features and improvements offered by Trezor.
Advanced Features and Security Settings
Trezor provides advanced features and security settings that allow you to customize and enhance the security of your cryptocurrency wallet. These features offer additional layers of protection and control over your digital assets. Here are some of the advanced features and security settings available with Trezor:
1. Passphrase:
Trezor supports the use of a passphrase, also known as a “25th word”, to encrypt and protect your recovery seed. This feature adds an extra layer of security by requiring you to enter a passphrase along with your PIN code during the device’s initialization. The passphrase acts as an additional encryption, making your wallet more resistant to unauthorized access.
2. Multi-signature (multisig) support:
Trezor devices are compatible with multi-signature functionality, allowing you to set up multi-sig wallets. Multi-signature wallets require multiple private keys to authorize a transaction, providing increased security and reducing the risk of a single point of failure.
3. U2F authentication:
Trezor devices can be used as a U2F (Universal 2nd Factor) authentication device for securing online accounts such as email, social media, and exchanges. U2F adds an additional layer of protection by requiring physical device verification in addition to a username and password.
4. Custom transaction fees:
Trezor allows you to set custom transaction fees for your cryptocurrency transactions. By manually adjusting the fee, you can prioritize the speed of your transactions or save on fees during times of network congestion.
5. Label management:
You can label your accounts, addresses, and transactions within the Trezor wallet software. This feature allows you to organize and categorize your transactions for easier tracking and management.
6. Password manager integration:
Trezor integrates with popular password manager applications, allowing you to securely store and manage your passwords. This feature eliminates the need to remember multiple passwords and ensures that your sensitive login information is kept safe.
7. Limited USB access:
Trezor’s limited USB interface ensures that it can only communicate with authorized sources. This feature prevents potential malware or unauthorized access from compromising the security of your device.
8. Hidden wallets:
Trezor supports the concept of hidden wallets, allowing you to create multiple wallets on a single device. Hidden wallets are accessed by using a different passphrase, providing an extra layer of privacy and security. This feature can be particularly useful in situations where you may be forced to reveal your passphrase.
By utilizing these advanced features and security settings, you can customize and enhance the security of your Trezor wallet. It is important to familiarize yourself with these options and consider implementing them based on your specific security requirements and preferences.
Troubleshooting Common Issues
While using your Trezor device, you may encounter some common issues that can be resolved with simple troubleshooting steps. Here are some common issues that users face and their possible solutions:
1. Connectivity issues:
If your Trezor device is not connecting to your computer or mobile device, try the following steps:
– Ensure that the USB cable is securely connected to both the device and your computer or mobile device.
– Try using a different USB port or cable to rule out any issues with the current connection.
– Restart your computer or mobile device and try reconnecting the Trezor device.
– Check if you have the latest version of the Trezor Bridge or firmware installed and update it if necessary.
2. Recovery seed issues:
If you are having trouble restoring your wallet using the recovery seed, consider the following steps:
– Ensure that you are entering the recovery seed words in the correct order and double-check for any misspellings or mistakes.
– Confirm that the recovery seed words are from the same backup that corresponds to the specific Trezor device you are trying to recover.
– If you are using a passphrase, make sure you are entering it correctly along with the recovery seed.
3. Firmware update issues:
If you are encountering issues while updating the firmware on your Trezor device, consider these troubleshooting steps:
– Verify that your internet connection is stable and not experiencing any interruptions.
– Ensure that you have downloaded the latest version of the Trezor Bridge or other required software for the firmware update.
– Try using a different web browser or computer to perform the firmware update.
– If the firmware update fails, try disconnecting and reconnecting the Trezor device and attempt the update again.
4. Unresponsive device:
If your Trezor device becomes unresponsive or freezes, try the following steps:
– Disconnect the Trezor device from your computer or mobile device and then reconnect it.
– Restart your computer or mobile device and try connecting the Trezor device again.
– If the issue persists, try using a different USB port or cable to connect the device.
– If none of the above steps work, consider contacting Trezor support for further assistance.
5. Forgotten PIN code or lost device:
If you have forgotten your Trezor PIN code or have lost your device, take the following steps:
– If you have the recovery seed, you can recover the wallet on a new Trezor device and set up a new PIN code.
– If you don’t have the recovery seed, it may not be possible to recover your wallet. In such cases, contact Trezor support for further assistance.
Remember, if you encounter any issues while using your Trezor device, it is always recommended to refer to the official Trezor documentation or reach out to the Trezor support team for help. They can provide specific instructions and guidance based on your situation.
Frequently Asked Questions (FAQs)
Here are some frequently asked questions about using Trezor and managing your cryptocurrency wallet:
1. Is Trezor compatible with all cryptocurrencies?
Trezor supports a wide range of cryptocurrencies, including popular ones like Bitcoin, Ethereum, Litecoin, and many others. You can check the official Trezor website for the full list of supported cryptocurrencies.
2. Can I use Trezor with multiple devices?
Yes, you can use your Trezor wallet with multiple devices. Simply connect your Trezor to any computer or mobile device that has the compatible wallet software installed, and you will have access to your wallet and funds.
3. What happens if my Trezor device is lost or stolen?
If your Trezor device is lost or stolen, your funds are still secure. As long as you have your recovery seed, you can recover your wallet on a new Trezor device and regain access to your cryptocurrencies. It is crucial to keep your recovery seed safe and private.
4. Can I use Trezor on a compromised computer?
Trezor is designed to provide security even on potentially compromised computers. Since all the sensitive operations take place on the Trezor device itself, your private keys are kept offline and away from potential threats.
5. Can I store non-cryptocurrency data on my Trezor?
No, Trezor is specifically designed to securely store cryptocurrency private keys and cannot be used for storing general data.
6. How often should I update the firmware on my Trezor?
It is important to keep the firmware on your Trezor device up to date to benefit from the latest security enhancements and features. Check for firmware updates regularly, and if a new version is available, consider updating your device.
7. Can I use Trezor with mobile devices?
Yes, Trezor is compatible with mobile devices. You can connect your Trezor to your mobile device using a USB OTG cable or via Bluetooth (for supported mobile wallets) to securely manage your cryptocurrency wallet on the go.
8. Is it safe to use Trezor with third-party wallet software?
Trezor is designed to work seamlessly with a variety of third-party wallet software. However, it is crucial to verify the authenticity and reputation of the software you choose to ensure it is secure and not compromised.
9. Can I recover my wallet if I forget my PIN?
If you forget your PIN code, you can still recover your wallet using your recovery seed. Once you recover your wallet on a new Trezor device, you can set up a new PIN code.
10. Is Trezor waterproof or fireproof?
No, Trezor devices are not waterproof or fireproof. It is essential to protect your Trezor device from potential physical damage, such as water damage or exposure to extreme temperatures.
These are just a few common questions about Trezor and managing your cryptocurrency wallet. If you have any further inquiries, refer to the official Trezor documentation or contact Trezor support for personalized assistance.