
Setting Up Your Trezor Hardware Wallet
Setting up your Trezor hardware wallet is the first step towards securing your cryptocurrencies. The process is straightforward and ensures that your private keys remain offline, inaccessible to hackers and potential online threats. Here’s how to get started:
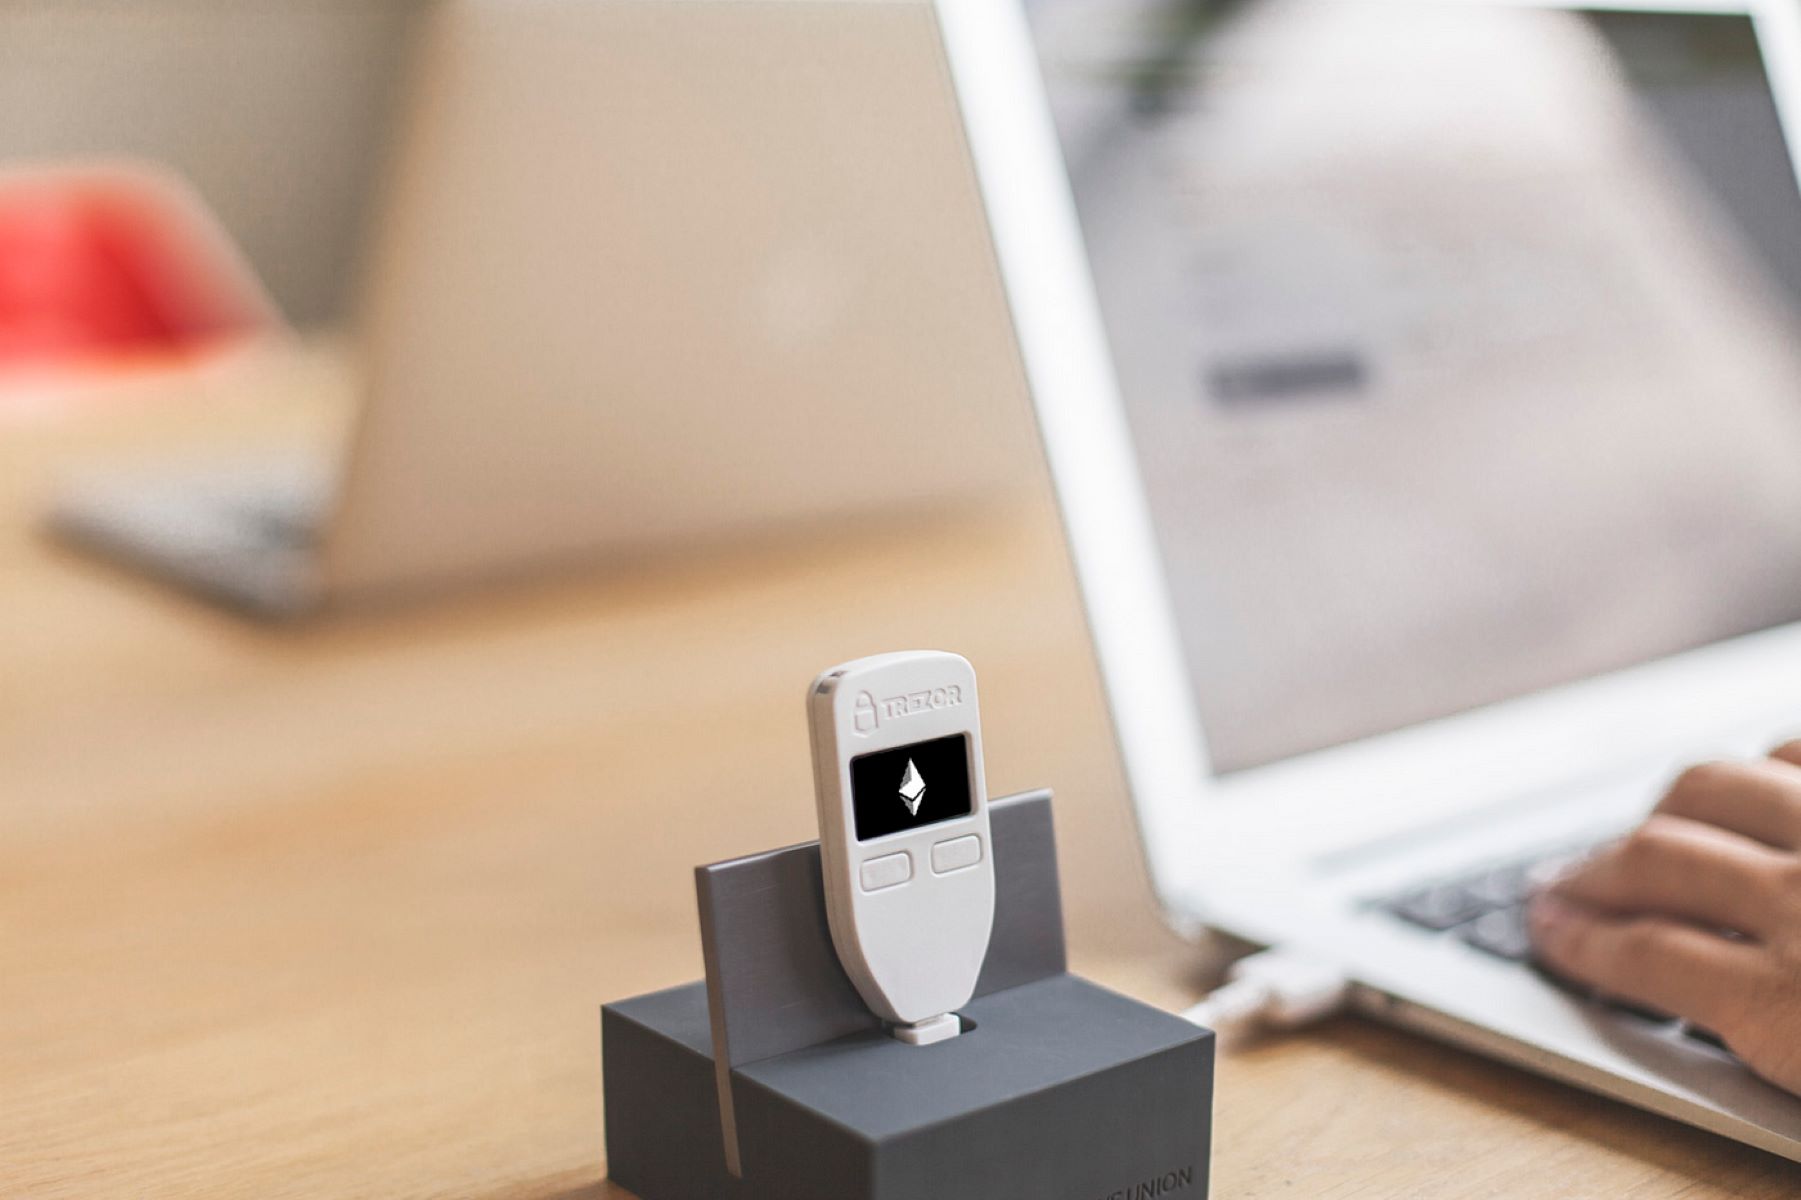
1. Unbox and connect: Begin by unboxing your Trezor hardware wallet and connecting it to your computer using the supplied USB cable. Ensure that the device is securely connected and powered on.
2. Access the Trezor website: Open a web browser and visit the official Trezor website at https://trezor.io. It’s recommended to bookmark this site for future reference to avoid fake phishing websites.
3. Install the Trezor Bridge: On the website, find the “Downloads” section and click on the appropriate link to download and install the Trezor Bridge software. This software allows communication between your Trezor device and the web wallet interface.
4. Launch the web wallet: Once the Trezor Bridge is installed, return to the Trezor website and click on the “Web Wallet” option. This will launch the web wallet interface where you can interact with your Trezor hardware wallet.
5. Create a new wallet: Follow the on-screen instructions to create a new wallet. You will be prompted to choose a unique name for your device and set a strong password. Be sure to choose a password that is difficult to guess and avoid reusing passwords from other accounts.
6. Backup your recovery seed: After creating your wallet, you will be presented with a recovery seed. This seed is a crucial backup that allows you to recover your funds in case your device is lost, stolen, or damaged. Carefully write down the seed on the provided recovery card and keep it in a secure location.
7. Verify the recovery seed: Trezor will then ask you to verify your recovery seed by selecting the correct words in the given order. This step ensures that you have correctly written down the seed and that it can be used to restore your wallet if needed.
8. Set up a PIN: Next, you will be prompted to set up a PIN for your Trezor device. Choose a unique PIN that is easy for you to remember but difficult for others to guess. This PIN will be required every time you want to access your wallet or confirm transactions.
9. Finalize the setup: After setting up your PIN, the Trezor web wallet interface will display a confirmation message indicating that your device is ready to use. You can now safely disconnect your Trezor and begin managing your cryptocurrencies securely.
By following these steps, you can easily set up your Trezor hardware wallet and start safeguarding your digital assets. Remember to keep your recovery seed and PIN safe and never share them with anyone. Regularly update your Trezor’s firmware to benefit from the latest security enhancements and features.
Creating a New Wallet with Trezor
Creating a new wallet with your Trezor hardware wallet is a vital step in securing your cryptocurrencies. Trezor offers a user-friendly interface and robust security measures to ensure the safety of your funds. Here’s a step-by-step guide on how to create a new wallet:
1. Connect your Trezor: Start by connecting your Trezor hardware wallet to your computer using the provided USB cable. Make sure the device is properly connected and turned on.
2. Access the Trezor web wallet: Open your web browser and go to the official Trezor website at https://trezor.io. Bookmark this site to prevent falling victim to phishing attempts on fake websites.
3. Install the Trezor Bridge: Locate the “Downloads” section on the Trezor website and download the Trezor Bridge software. Follow the instructions to install the software, which facilitates communication between your Trezor device and the web wallet interface.
4. Launch the web wallet: After installing the Trezor Bridge, return to the Trezor website and click on the “Web Wallet” option. This will open the web wallet interface, where you can interact with your Trezor hardware wallet.
5. Create a new wallet: On the web wallet interface, click on the “Create New Wallet” button. Follow the on-screen instructions to choose a unique name for your device and set a strong password. Ensure that your password is secure and unrelated to other accounts.
6. Backup your recovery seed: Upon creating a new wallet, Trezor will provide you with a recovery seed, which consists of a series of words. This is a critical backup that enables you to recover your funds if your device is lost, stolen, or damaged. Carefully write down the recovery seed on the supplied recovery card and keep it in a safe place.
7. Verify your recovery seed: Trezor will prompt you to verify your recovery seed by selecting the correct words in the given order. This step ensures that you have accurately recorded the seed and can use it to restore your wallet if necessary.
8. Set up a PIN: Next, you’ll be asked to set up a PIN for your Trezor device. Choose a unique, memorable PIN that would be difficult for others to guess. This PIN will be required every time you want to access your wallet or confirm transactions.
9. Finalize the setup: After setting up your PIN, the Trezor web wallet interface will display a confirmation message, indicating that your new wallet is ready for use. You can now disconnect your Trezor hardware wallet and start managing your cryptocurrencies securely.
Creating a new wallet with your Trezor is a straightforward process, ensuring the utmost security for your digital assets. Remember to safeguard your recovery seed and PIN, as they are crucial for accessing and restoring your wallet. Regularly update your Trezor’s firmware to benefit from the latest security enhancements.
Recovery Seed and Backup Process
The recovery seed and backup process are vital components of securing your assets with a Trezor hardware wallet. The recovery seed is a list of words that serves as a backup for accessing your wallet in case your device gets lost, stolen, or damaged. It is crucial to understand the importance of the recovery seed and follow the backup process carefully. Here’s what you need to know:
1. Understanding the recovery seed: When you set up your Trezor wallet, you will be provided with a recovery seed. This seed consists of a series of 12, 18, or 24 randomly generated words. Each word represents a specific part of your wallet’s private key, allowing you to recreate it if needed.
2. Writing down the recovery seed: It is crucial to write down the recovery seed accurately. Trezor provides a recovery card for this purpose. Use a pen or pencil to write the words in the correct order on the card. Take care not to take a picture or store your recovery seed digitally, as this could expose it to potential hacking or unauthorized access.
3. Keeping the recovery seed secure: Store the recovery card in a safe and secure place, away from prying eyes, fire, water damage, and other potential threats. Consider using a fireproof and waterproof safe or a secure location outside your home. It is vital to protect your recovery seed as it is the key to accessing your wallet and your funds.
4. Reviewing and verifying the recovery seed: After writing down the recovery seed, take the time to review and verify each word’s accuracy. Mistakes or omissions in recording the seed may lead to permanent loss of access to your funds. Verify the seed by using the Trezor device to display the words one by one and match them with your recorded seed.
5. Creating additional backups: It is highly recommended to create additional backups of your recovery seed. Consider making copies of the recovery card and storing them in different secure locations. This provides an extra layer of protection in case of unforeseen circumstances or damage to the original backup.
6. Test the backup: To ensure that your recovery seed is accurate and functional, you can perform a backup test. Use the recovery seed to restore your wallet on a separate Trezor device or the recovery tool provided by Trezor. This test ensures that you can successfully recover your wallet, providing peace of mind and reassurance.
Remember, losing your recovery seed may result in permanent loss of access to your funds. Treat it with the utmost care and keep it separate from your device to minimize risks. Regularly review and update your backup process to maintain the security of your Trezor hardware wallet.
Transferring Cryptocurrencies to Your Trezor Wallet
One of the key benefits of owning a Trezor hardware wallet is the ability to securely store and manage your cryptocurrencies. To begin using your Trezor wallet, you’ll need to transfer your cryptocurrencies from exchanges or other wallets to your Trezor device. Here’s how to do it:
1. Connect your Trezor: Start by connecting your Trezor hardware wallet to your computer using the provided USB cable. Ensure that the device is properly connected and powered on.
2. Access the Trezor web wallet: Open a web browser and visit the official Trezor website at https://trezor.io. Bookmark this site to prevent falling victim to phishing attempts on fake websites.
3. Launch the web wallet: Once on the Trezor website, click on the “Web Wallet” option to launch the Trezor web wallet interface. You’ll be prompted to enter your Trezor password and unlock the wallet.
4. Select the cryptocurrency: In the web wallet interface, you’ll see a list of supported cryptocurrencies. Choose the specific cryptocurrency that you want to transfer to your Trezor wallet.
5. Generate a receive address: Click on the “Receive” tab in the web wallet for the chosen cryptocurrency. This will generate a unique receive address associated with your Trezor hardware wallet.
6. Copy the receive address: Copy the generated receive address by clicking on the “Copy” button next to it. Ensure that you are copying the correct address for the specific cryptocurrency you’re transferring.
7. Initiate the transfer: Return to the exchange or wallet from which you want to transfer your cryptocurrency. Locate the “Send” or “Withdraw” option and paste the Trezor receive address into the appropriate field.
8. Verify and confirm: Double-check that you’ve entered the correct Trezor receive address and specify the amount of cryptocurrency you wish to transfer. Review the transaction details and confirm the transfer.
9. Wait for confirmation: Depending on the blockchain network and transaction congestion, it may take some time for the transfer to be confirmed. Monitor the transaction status on the blockchain explorer using the transaction ID provided.
10. Confirm in the Trezor wallet: Once the transfer is confirmed on the blockchain, you will see the received amount in your Trezor web wallet. The transferred cryptocurrency is now securely stored in your Trezor device.
By following these steps, you can easily transfer your cryptocurrencies to your Trezor hardware wallet. Remember to double-check all transaction details and ensure that you are sending the correct cryptocurrency to the designated Trezor receive address. Safely disconnect your Trezor after completing the transfer, knowing that your funds are protected by the security features of your hardware wallet.
Managing Multiple Cryptocurrencies on Trezor
Trezor hardware wallets support a wide range of cryptocurrencies, allowing you to manage multiple digital assets in one secure device. Whether you hold Bitcoin, Ethereum, or other popular cryptocurrencies, Trezor provides a user-friendly interface to easily manage and track your holdings. Here’s how to effectively manage multiple cryptocurrencies on your Trezor:
1. Connect your Trezor: Start by connecting your Trezor hardware wallet to your computer using the provided USB cable. Ensure that the device is properly connected and powered on.
2. Access the Trezor web wallet: Open a web browser and visit the official Trezor website at https://trezor.io. Bookmark this site to prevent falling victim to phishing attempts on fake websites.
3. Launch the web wallet: Once on the Trezor website, click on the “Web Wallet” option to launch the Trezor web wallet interface. Enter your Trezor password to unlock the wallet.
4. Choose the cryptocurrency: In the web wallet interface, you’ll see a list of supported cryptocurrencies. Select the specific cryptocurrency you want to manage or view the balance for.
5. View the balance and transaction history: After selecting a cryptocurrency, the web wallet will display your balance for that particular coin. You can also review the transaction history for that specific cryptocurrency.
6. Send or receive cryptocurrencies: To send or receive the selected cryptocurrency, use the “Send” or “Receive” tab in the web wallet. Follow the on-screen instructions to initiate transactions or generate receive addresses.
7. Enable additional cryptocurrencies: If you hold multiple cryptocurrencies and they are not visible in the web wallet interface, you may need to enable them. Click on the “Coins” tab and select the desired cryptocurrencies to add them to your web wallet.
8. Organize your wallets: Trezor allows you to create separate wallets for each supported cryptocurrency. This feature enables you to keep your different assets segregated and easily accessible. Consider creating individual wallets for each cryptocurrency you hold.
9. Customize the wallet display: In the web wallet interface, you have the option to customize the display of your wallets. You can assign specific names or labels to each wallet, making it easier to identify and manage your various cryptocurrencies.
10. Stay up to date: Keep yourself informed about the latest developments and updates for the cryptocurrencies you hold. Stay updated on price movements, new features, and security enhancements by following reliable sources of news and information.
By following these steps, you can effectively manage multiple cryptocurrencies on your Trezor hardware wallet. Take advantage of the features and customization options provided by the Trezor web wallet to maintain organized and secure access to your digital assets. Always double-check transaction details and practice good security measures to protect your cryptocurrencies.
Sending Cryptocurrencies from Your Trezor Wallet
Trezor hardware wallets provide a secure and convenient way to send cryptocurrencies to other wallets or exchanges. Whether you’re sending Bitcoin, Ethereum, or any other supported cryptocurrency, the process is straightforward. Here’s how to send cryptocurrencies from your Trezor wallet:
1. Connect your Trezor: Begin by connecting your Trezor hardware wallet to your computer using the provided USB cable. Ensure that the device is securely connected and powered on.
2. Access the Trezor web wallet: Open a web browser and visit the official Trezor website at https://trezor.io. Make sure to bookmark this site to avoid falling victim to phishing attempts on fake websites.
3. Launch the web wallet: Once on the Trezor website, click on the “Web Wallet” option to launch the Trezor web wallet interface. Enter your Trezor password to unlock the wallet.
4. Select the cryptocurrency: In the web wallet interface, choose the specific cryptocurrency that you wish to send from your Trezor hardware wallet. Ensure that you have a sufficient balance of that cryptocurrency for the transfer.
5. Click on “Send”: Within the web wallet interface, locate and click on the “Send” tab or button. This will open a form where you can enter the recipient’s address and the amount of cryptocurrency you want to send.
6. Enter the recipient’s address: In the “Recipient” or “To” field, copy and paste the wallet address of the recipient. Be extremely careful to enter the correct and valid address to prevent any loss of funds.
7. Specify the amount: Enter the amount of cryptocurrency that you want to send in the designated field. Double-check the entered amount to ensure it matches your intention.
8. Review transaction details: Take a moment to review the transaction details, including the recipient’s address, the amount being sent, and any associated transaction fees. Ensure that everything is accurate before proceeding.
9. Confirm and sign the transaction: Once you have reviewed the details, click on the “Send” or “Confirm” button to authorize and sign the transaction using your Trezor device. Follow the on-screen prompts to complete the process.
10. Monitor the transaction: After confirming the transaction, you can monitor its progress by checking the transaction ID on the blockchain explorer. Once the transaction is confirmed by the network, the recipient will receive the transferred funds.
By following these steps, you can easily send cryptocurrencies from your Trezor hardware wallet. Remember to double-check all transaction details, especially the recipient’s address, to avoid any irreversible errors. Trezor’s secure environment and user-friendly interface ensure that your funds are protected during the transaction process.
Updating the Firmware on Your Trezor
Regularly updating the firmware on your Trezor hardware wallet is essential to ensure that you have the latest security enhancements and features. Firmware updates often address potential vulnerabilities and improve the overall performance of your device. Here’s how to update the firmware on your Trezor:
1. Connect your Trezor: Begin by connecting your Trezor hardware wallet to your computer using the provided USB cable. Make sure the device is properly connected and powered on.
2. Access the Trezor website: Open a web browser and visit the official Trezor website at https://trezor.io. Bookmark this site to prevent falling victim to phishing attempts on fake websites.
3. Install the Trezor Bridge: On the Trezor website, locate the “Downloads” section and download the Trezor Bridge software. Follow the instructions to install the software, which enables communication between your Trezor device and the web wallet interface.
4. Launch the web wallet: After installing the Trezor Bridge, return to the Trezor website and click on the “Web Wallet” option. This will launch the web wallet interface, where you can interact with your Trezor hardware wallet.
5. Update firmware: In the web wallet interface, you will receive a notification if a firmware update is available for your Trezor. Click on the prompt or navigate to the “Settings” or “Device” tab to initiate the firmware update process.
6. Follow instructions: The web wallet will guide you through the firmware update process. Follow the on-screen instructions carefully, paying attention to any specific actions required for your device model.
7. Confirm update on your Trezor: During the firmware update process, your Trezor device may prompt you to confirm the update. Follow the device’s instructions and verify the update by using the device’s buttons or touchscreen.
8. Wait for the update to complete: The update process may take a few minutes, during which your Trezor hardware wallet will restart and display the progress on its screen. Do not disconnect your device until the update is fully completed.
9. Verify the firmware version: Once the update is complete, check the firmware version on your Trezor device or the web wallet interface. Ensure that the firmware version matches the latest available version provided by Trezor.
10. Resume normal use: After successfully updating the firmware, you can resume using your Trezor hardware wallet as usual. Take advantage of the new features and enhanced security provided by the updated firmware.
Regularly updating the firmware on your Trezor hardware wallet is vital for maintaining the highest level of security for your digital assets. Stay proactive and check for firmware updates periodically to ensure that your device is up to date and protected against potential vulnerabilities.
Using Passphrase/Hidden Wallets with Trezor
Trezor hardware wallets offer an additional layer of security through the use of passphrase and hidden wallets. By utilizing these features, you can further protect your cryptocurrencies and add an extra level of privacy to your transactions. Here’s how to use passphrase/hidden wallets with your Trezor:
1. Connect your Trezor: Begin by connecting your Trezor hardware wallet to your computer using the provided USB cable. Ensure that the device is securely connected and powered on.
2. Access the Trezor web wallet: Open a web browser and visit the official Trezor website at https://trezor.io. Remember to bookmark this site to avoid falling victim to phishing attempts on fake websites.
3. Launch the web wallet: Once on the Trezor website, click on the “Web Wallet” option to launch the Trezor web wallet interface. Enter your Trezor password to unlock the wallet.
4. Enable passphrase: In the web wallet interface, go to the “Settings” or “Device” tab. Look for the option to enable the passphrase feature. This allows you to add an additional passphrase to your wallet.
5. Set your passphrase: Follow the instructions to set a unique and strong passphrase. Be sure to choose a passphrase that is not easily guessed and consider using a combination of uppercase and lowercase letters, numbers, and special characters.
6. Access the hidden wallet: By entering a passphrase that differs from your regular wallet, you can create a hidden wallet. To access it, select the “Passphrase” option on the web wallet interface and enter the passphrase you set earlier.
7. Transfer funds to the hidden wallet: You can send funds to your hidden wallet by generating a new receive address within the hidden wallet interface. Use this address to receive cryptocurrencies from exchanges, wallets, or other sources.
8. Keep your passphrase secure: The security of your hidden wallet relies on the secrecy of your passphrase. Make sure to store it in a secure place, such as a password manager or written down and stored separately from your other wallet backup materials.
9. Accessing the regular wallet: To switch back to your regular wallet, simply disconnect and reconnect your Trezor device. Enter your main PIN and leave the passphrase field blank to access your regular wallet and its associated funds.
10. Additional considerations: It’s important to note that if you forget or lose the passphrase, you may permanently lose access to the funds in your hidden wallet. Take extra precautions to remember or securely store your passphrase.
By utilizing the passphrase and hidden wallet features offered by Trezor, you can enhance the security and privacy of your cryptocurrencies. These features provide an additional layer of protection against unauthorized access, making it more challenging for potential attackers to gain access to your assets.
Securing Your Trezor Wallet with PIN and Passphrase
Securing your Trezor hardware wallet is crucial to protect your cryptocurrencies from unauthorized access and potential threats. Trezor offers two important security features to safeguard your wallet: the PIN (Personal Identification Number) and passphrase. By utilizing these features effectively, you can add layers of protection and ensure the safety of your digital assets. Here’s how to secure your Trezor wallet with a PIN and passphrase:
1. Set up a strong PIN: When setting up your Trezor hardware wallet, you will be prompted to create a PIN. Choose a unique PIN that is difficult for others to guess but easy for you to remember. Avoid common, sequential, or easily guessable combinations.
2. Enable the PIN: In the Trezor web wallet interface, go to the “Settings” or “Device” tab and enable the PIN feature. This ensures that every time you connect and access your Trezor, you’ll need to enter the PIN to authenticate and unlock the wallet.
3. Keep your PIN secret: Treat your PIN as a sensitive piece of information and never share it with anyone. Memorize it instead of writing it down, as written documentation can be lost or accessed by unauthorized individuals. Avoid using the same PIN for other accounts or devices.
4. Use a passphrase: In addition to the PIN, Trezor supports the use of a passphrase. The passphrase is an extra layer of security for your wallet and helps protect against physical theft or unauthorized access to your device.
5. Enable the passphrase feature: In the Trezor web wallet interface, go to the “Settings” or “Device” tab and enable the passphrase feature. This allows you to assign a unique passphrase to your wallet, adding an additional layer of protection.
6. Create a strong passphrase: When setting a passphrase, choose a strong and memorable combination of words, numbers, and special characters. Avoid using easily guessable or personal information that can be associated with you.
7. Memorize or securely store the passphrase: Treat your passphrase with the same level of security as your PIN. Memorize it if possible, or store it securely in a password manager, encrypted digital file, or written format, separate from your device.
8. Utilize unconventional characters: When creating a passphrase, consider using unconventional characters or substituting letters with symbols or numbers to add an extra layer of complexity.
9. Double protection: By combining a strong PIN with a unique passphrase, you create a more robust security defense. This makes it significantly harder for attackers to gain unauthorized access to your Trezor wallet.
10. Regularly update your PIN and passphrase: It is recommended to periodically change your PIN and passphrase to maintain the security of your Trezor wallet. This practice mitigates the risks associated with potential security breaches or compromises.
By implementing a strong PIN and passphrase on your Trezor wallet, you enhance the security of your cryptocurrencies and significantly reduce the risk of unauthorized access. Remember to keep your PIN and passphrase secret, avoid sharing them with anyone, and periodically update them to stay ahead of potential security threats.
Troubleshooting and FAQs for Trezor Hardware Wallets
Trezor hardware wallets are designed to be user-friendly and secure, but occasionally, you may encounter issues or have questions about their operation. Here are some common troubleshooting steps and frequently asked questions for Trezor hardware wallets:
Troubleshooting:
1. Connection issues: If your Trezor is not connecting to the web wallet interface, try using a different USB cable or port. Ensure that the Trezor Bridge software is installed and running correctly on your computer.
2. Firmware update problems: If you encounter issues while updating the firmware of your Trezor, try refreshing the web wallet page, clearing your browser cache, or using a different browser. Restarting your computer or trying a different computer can also help resolve firmware update problems.
3. Unresponsive device: If your Trezor becomes unresponsive, try disconnecting and reconnecting it. If that doesn’t work, perform a restart by holding down both buttons on your Trezor until the device restarts.
4. Forgotten PIN or passphrase: If you forget your PIN, you can use the Trezor Wallet Recovery feature to regain access to your wallet. If you forget your passphrase, there is no way to recover it, and your funds may be permanently inaccessible. Ensure you have a secure backup of your recovery seed to restore your wallet.
5. Unknown or unsupported cryptocurrencies: If you don’t see a specific cryptocurrency in the web wallet interface, make sure it is supported by Trezor. Check the Trezor website for a list of supported cryptocurrencies and ensure that you have the latest firmware installed.
FAQs:
1. Can I use my Trezor wallet with multiple computers?
Yes, you can use your Trezor hardware wallet with multiple computers. The wallet’s functions are performed on the device itself, and the computer is used as a bridge for communication.
2. Can I store multiple cryptocurrencies on my Trezor?
Yes, Trezor supports a wide range of cryptocurrencies. You can store and manage multiple cryptocurrencies within the same Trezor device and web wallet interface.
3. Can I recover my Trezor wallet if it’s lost or damaged?
Yes, you can recover your Trezor wallet using the recovery seed. The recovery seed is a backup that allows you to restore your wallet and access your funds on a new or replacement device.
4. Is it possible to use my Trezor wallet on a mobile device?
Yes, Trezor supports mobile device compatibility through the Trezor Wallet mobile app. You can connect your Trezor to your mobile device using an OTG adapter or via Bluetooth connection with select models.
5. Are my funds at risk if my Trezor is lost or stolen?
Your funds remain secure even if your Trezor is lost or stolen, as long as you have your recovery seed and passphrase (if enabled). Without these, access to your funds would be nearly impossible.
These troubleshooting steps and FAQs should help address common issues and answer frequently asked questions about Trezor hardware wallets. If you encounter persistent problems or have further inquiries, it is recommended to reach out to the official Trezor support for assistance.