Setting Up Discord and Oculus Rift
Discord and Oculus Rift are two powerful platforms that can greatly enhance your gaming experience. Discord is a communication platform specifically designed for gamers, while Oculus Rift is a virtual reality headset that allows you to immerse yourself in virtual worlds. In this section, we will guide you through the process of setting up Discord and Oculus Rift so you can seamlessly integrate them and enjoy a more immersive gaming experience.
Step 1: Downloading and Installing Discord
The first step in setting up Discord is to download and install the Discord application on your computer. You can visit the official Discord website and click on the “Download” button to get the latest version of the app. Once the download is complete, run the installer and follow the on-screen instructions to install Discord on your computer.
Step 2: Creating a Discord Account
After installing Discord, you will need to create an account. Launch the Discord application and click on the “Register” button to start the registration process. Fill in the required information, including your email address, username, and password. Once you have completed the registration process, you will be logged into Discord.
Step 3: Adding Friends on Discord
Discord allows you to connect and communicate with your friends in different ways. To add friends on Discord, you can either search for their username directly or share your unique Discord ID with them. You can also join Discord servers that cater to specific communities or games to meet new people with similar gaming interests.
Step 4: Navigating the Discord Interface
Once you have added friends and joined servers on Discord, you can start exploring the various features and functionalities offered by the platform. The Discord interface is intuitive and user-friendly, with a sidebar on the left-hand side displaying your friends list and servers. You can click on these options to navigate and interact with different channels and voice chat rooms.
Step 5: Joining and Creating Servers on Discord
Discord allows you to join existing servers or create your own. Servers act as virtual spaces where you can chat, voice call, and share media with other members who have a common interest. To join a server, you will need an invitation link from the server owner. To create your own server, simply click on the “+” button in the sidebar and follow the prompts to set up your server.
Step 6: Voice Chatting on Discord
One of the main features that make Discord popular among gamers is its high-quality voice chat capability. To start a voice chat on Discord, simply join a voice channel in a server or create your own voice channel. You can then invite your friends to join the voice chat, allowing for seamless communication while gaming.
Step 7: Text Chatting on Discord
In addition to voice chat, Discord also offers text chat features. Each server has multiple text channels where you can interact with other members by sending text messages, images, and even videos. Text chats provide a convenient way to share information, arrange gaming sessions, and discuss various topics related to your favorite games.
Setting up Oculus Rift is a separate process from setting up Discord. Please refer to the next section for instructions on how to set up your Oculus Rift headset and link it with Discord to enhance your gaming experience.
Step 1: Downloading and Installing Discord
Downloading and installing Discord is the first step in setting up this powerful communication platform for gamers. By following these steps, you will have Discord up and running on your computer in no time.
To start, visit the official Discord website at www.discord.com. On the homepage, you will find a prominent “Download” button. Click on it to initiate the download process.
Once you click the download button, Discord will automatically detect the operating system of your computer and provide the appropriate version for your system. Discord is compatible with Windows, macOS, Linux, iOS, and Android, so make sure to select the correct version for your device.
After the download is complete, locate the installation file in your Downloads folder or wherever you have saved it. Double-click on the file to run the installer.
The installation process will guide you through a series of prompts. Follow the on-screen instructions to install Discord on your computer and choose any additional preferences, such as the installation location and language settings.
Once the installation is complete, you will see the Discord icon on your desktop or in your applications folder, depending on your operating system. Double-click on the Discord icon to launch the application.
Upon launching Discord, you will be greeted with the login screen. If you already have a Discord account, enter your email and password to log in. If you are new to Discord, click on the “Register” button to create a new account.
To register a new account, you will need to provide a valid email address, username, and password. Consider choosing a username that reflects your gaming identity or interests. Once you have filled in the required information, click on the “Continue” button.
An email verification code will be sent to the email address you provided during registration. Check your inbox and enter the code in the verification window that appears. This step ensures the security of your Discord account and helps prevent unauthorized access.
After verifying your email, you will be prompted to set a profile picture and customize your account. You can choose to upload a picture from your computer or use one of the default avatars provided by Discord. Additionally, you can add a description to your profile, showcasing your gaming preferences or other interests.
With your Discord account created and set up, you are now ready to start using Discord and connecting with friends. You can search for friends directly using their Discord usernames or share your unique Discord ID with them to add you as a friend.
Now that you have successfully downloaded and installed Discord and created an account, you are on your way to seamless communication with your gaming community. The next step is to add friends on Discord and discover the various features and functionalities that make this platform so popular among gamers.
Step 2: Creating a Discord Account
To fully experience the features and benefits of Discord, you need to create an account. Follow these steps to create your own Discord account and start connecting with friends and communities.
After launching Discord on your computer, you will be greeted with the login screen. If you already have a Discord account, simply enter your email and password to log in. However, if you are new to Discord, click on the “Register” button to create a new account.
When registering a new account, Discord will ask for some basic information. Start by providing a valid email address, which will serve as your login credential. Choose an email address that you have easy access to and can remember.
Next, you need to create a unique username. Your username is how you will be identified on Discord. It can be anything you like, as long as it is not already taken by another user. Take some time to think of a memorable and fitting username that represents your gaming persona.
After entering your username, you will need to choose a strong password to secure your Discord account. Create a password that is unique and not easily guessable. Including a combination of uppercase and lowercase letters, numbers, and symbols will increase the security of your account.
Once you have entered your email, username, and password, click on the “Continue” or “Register” button to proceed. Discord may prompt you to verify that you are not a robot by completing a simple captcha or other verification process.
After successfully registering, a verification email will be sent to the email address you provided during registration. Check your inbox and click on the verification link to confirm your email. If you cannot find the email in your inbox, make sure to check your spam or junk folder.
Once your email is verified, you can return to the Discord login screen and enter your email and password to log into your newly created account. Congratulations! You now have access to the full range of Discord features.
To personalize your Discord account, you can set a profile picture. Click on your account name in the bottom left corner of the Discord window and select “Settings” from the menu. In the settings menu, navigate to the “My Account” tab, where you can upload a profile picture from your computer or choose one from the available options.
Additionally, you can customize your account by adding a description or bio. This is a great opportunity to showcase your gaming preferences, favorite games, or anything else you would like other Discord users to know about you. Simply click on the “Edit” button next to the “About Me” section and enter a brief description.
With your Discord account created and customized, you are now ready to start adding friends and exploring the various servers and communities available on the Discord platform. Whether you want to connect with existing friends or make new ones, Discord provides a vibrant and active community for gamers to interact and communicate.
Step 3: Adding Friends on Discord
One of the key features of Discord is the ability to connect and communicate with friends. Adding friends on Discord allows you to stay connected, join their gaming sessions, and communicate seamlessly. Follow these steps to add friends on Discord and start building your gaming community.
The first method to add friends on Discord is by searching for their username. Ask your friends for their Discord usernames, which typically consist of a username followed by a unique four-digit code. Once you have their Discord username, you can easily search for them within the Discord application.
To search for a friend, click on the search bar located at the top left corner of the Discord window. Enter your friend’s Discord username, including the four-digit code, and Discord will display a list of matching results. Select the correct user from the list and click on the “Add Friend” button next to their name.
Alternatively, you can share your unique Discord ID with your friends and have them add you as a friend. Your Discord ID is a unique identifier that consists of your username followed by a hashtag and a unique four-digit code. You can find your Discord ID by clicking on your account name in the bottom left corner of the Discord window and selecting “Copy ID” from the menu.
Once your friend adds you or you add them as a friend, you will see their name appearing in your friends list on the left-hand side of the Discord window. You can click on their name to open a direct messaging window where you can chat privately with your friend.
In addition to adding friends directly, you can join Discord servers to connect with communities and meet new people with similar gaming interests. Discord servers act as virtual gathering places where you can chat, voice call, and share media with other members. Joining a server allows you to interact with a larger group of gamers and expand your gaming network.
To join a server, you will need an invitation link from the server owner or an existing member. Invite links can be shared through various channels such as websites, forums, or social media platforms. Once you have the invitation link, simply click on it and Discord will prompt you to confirm your decision to join the server.
If you prefer to create your own server and invite friends to join, you can do so by clicking on the “+” button located in the sidebar of the Discord window. Follow the prompts to set up your server, customize its settings, and invite your friends to join. You can create multiple servers for different groups or gaming communities.
Adding friends on Discord is a fundamental step in building a strong gaming community. Whether you connect with existing friends or make new ones through Discord servers, having a network of friends and fellow gamers enhances your gaming experience and presents opportunities for collaboration and shared enjoyment.
Step 4: Navigating the Discord Interface
Once you have added friends and joined servers on Discord, it’s important to familiarize yourself with the Discord interface to navigate and interact with its various features. Discord offers a streamlined and user-friendly interface that allows for seamless communication and collaboration. Follow these steps to navigate the Discord interface like a pro.
The Discord interface is divided into different sections to help you efficiently manage your friends, servers, and conversations. On the left-hand side of the Discord window, you will find the sidebar which displays your friends list and the servers you have joined. From here, you can access and interact with different channels and voice chat rooms.
Click on the “Friends” icon at the top of the sidebar to view your friends list. This list will display all the friends you have added on Discord. You can click on a friend’s name to initiate a direct messaging conversation or see if they are currently online.
Beneath the “Friends” section, you will find the “Servers” section. Servers act as virtual spaces where you can join communities, participate in discussions, and voice chat with other members. Click on a server name to expand it and see the channels available within that server.
Discord channels are where conversations happen. Within each server, there are different text channels and voice chat rooms. Text channels are represented by a hashtag symbol (#) followed by the channel name. Click on a text channel to enter it and start participating in the conversation by sending text messages, images, or videos.
Voice chat rooms, on the other hand, allow for real-time voice communication with other members. To join a voice chat room, click on the speaker icon next to the voice channel name. Once you are connected to a voice chat room, you can communicate with other members using your microphone.
At the top of the Discord window, you will find the main navigation menu. This menu allows you to access additional features of Discord, including your account settings and search functionality. The search bar allows you to search for messages, users, and servers, making it easy to find specific conversations or locate particular users.
Discord also offers keyboard shortcuts to enhance navigation and accessibility. Pressing the “Ctrl” and “/” keys simultaneously will bring up a list of available keyboard shortcuts, allowing you to perform common actions without having to navigate through menus manually.
Furthermore, Discord provides different customization options to tailor the interface to your preferences. You can change the theme, adjust notification settings, and modify other visual and audio preferences in the settings menu. To access your account settings, click on your account name in the bottom left corner of the Discord window and select “Settings” from the menu.
Navigating the Discord interface effectively will allow you to stay connected with friends, engage in conversations, and maximize your gaming experience. Take the time to explore the various features and functionalities offered by Discord, and customize the interface to suit your needs and preferences.
Step 5: Joining and Creating Servers on Discord
Discord servers are virtual spaces where communities gather to chat, voice call, and share media. Joining servers allows you to connect with like-minded individuals and participate in discussions related to your gaming interests. Additionally, you have the option to create your own server and invite others to join. Here’s how you can join and create servers on Discord.
To join a server on Discord, you will need an invitation link. This link can be obtained from friends, online communities, or gaming forums. The server owner or another member of the server typically shares the invitation link.
Once you have received an invitation link, you can join the server by clicking on it. Discord will open a webpage displaying information about the server, including its name, description, and member count. You will also have the option to preview the server’s channels before joining.
If you decide to join the server, click on the “Join Server” button. Discord will confirm your decision and add the server to your server list. You can now access the server’s channels and start connecting with other members.
If you want to create your own server, Discord provides a straightforward process to set it up. On the left-hand side of the Discord interface, click on the “+” button located in the server section of the sidebar. This will open the server creation window.
In the server creation window, you will be prompted to choose a server name. Select a name that represents the purpose or theme of your server. It could be related to a specific game, a community interest, or any other topic you wish to center your server around.
After entering the server name, you can choose an icon or image to represent your server. This can be an image that reflects the topic or purpose of the server, or you can choose a default icon provided by Discord. The server icon will be displayed next to the server name in the server list.
Next, you have the option to select a region for your server. Discord has servers located in multiple regions worldwide to provide optimal performance. Choosing the appropriate region ensures a better voice chat experience for you and your server members.
Finally, you can customize the default roles and permissions for your server members. Roles and permissions determine what actions users can perform within the server, such as deleting messages or managing channels. You can create different roles with specific permissions to assign to different members.
Once you have completed the server creation process, click on the “Create” button. Discord will create your server and add it to your server list. You will then see your new server listed in the sidebar, and you can start customizing its channels, inviting friends, and building your community.
Joining and creating servers on Discord is a great way to connect with others who share your gaming interests. It allows for collaboration, discussion, and building lasting relationships within the gaming community.
Step 6: Voice Chatting on Discord
Discord is well-known for its high-quality voice chat feature, which allows gamers to communicate with each other in real-time. Voice chatting on Discord is an essential part of multiplayer gaming and coordinating with your team. Here’s how you can make the most of the voice chat feature on Discord.
To start a voice chat on Discord, you have two options. You can join an existing voice channel in a server or create your own voice channel. Voice channels are typically found within servers and are designed for specific purposes, such as team-based games or general discussions.
To join a voice channel, locate the server in your server list and expand it by clicking on the server name. Within the server, you will see a list of text and voice channels. Voice channels are denoted by a megaphone icon. Click on the voice channel you wish to join, and Discord will automatically connect you to the voice chat room.
If you want to create your own voice channel, select the server where you want to create the channel and click on the “+” button next to the voice channel section in the server window. Give your voice channel a name that reflects its purpose or the game you will be playing, and click on the “Create Channel” button. You will then be connected to the newly created voice chat room.
Once you are in a voice chat room, you can start communicating with other members. By default, your microphone will be enabled, allowing you to speak to others in the voice channel. Simply press and hold the assigned push-to-talk key to transmit your voice. This key can be customized in the Discord settings to your preference.
Discord also offers an option for voice activation, which allows your microphone to transmit automatically when it detects your voice. You can enable this feature in the voice settings of Discord. However, it is important to adjust the sensitivity settings to avoid unintentionally transmitting background noise.
In addition to voice chat, Discord provides useful features to enhance your communication experience. For example, you can adjust the volume levels of individual users to ensure everyone’s voice is clear and audible. To adjust a user’s volume, simply right-click on their username in the voice chat room and select the “Adjust Volume” option.
Discord also offers noise suppression and echo cancellation features to improve voice clarity. These features can be enabled in the voice settings of Discord, ensuring a more pleasant and immersive voice chat experience.
If you prefer a more private voice chat, you can initiate direct voice calls with individual friends. Simply click on their username in the friends list, open a direct messaging window, and click on the phone icon at the top of the window. This will initiate a voice call between you and your friend.
Voice chatting on Discord adds a whole new dimension to your gaming experience. It allows for seamless communication and teamwork, which are vital in multiplayer games. Whether you join existing voice channels or create your own, Discord provides a reliable and feature-rich platform for voice communication with your gaming community.
Step 7: Text Chatting on Discord
In addition to voice chat, Discord offers a robust text chat feature that allows for instant messaging and sharing media with your friends and communities. Text chatting on Discord is an integral part of staying connected, sharing information, and organizing gaming sessions. Here’s how you can make the most of the text chat feature on Discord.
Discord provides multiple text channels within each server, allowing for organized and focused discussions. To access a text channel, click on the server where the channel is located and select the desired channel from the list on the left-hand side of the Discord interface.
Once you enter a text channel, you can start communicating with others by typing your messages in the text input field at the bottom of the Discord window. Press the Enter key to send your message to the channel. Messages are displayed chronologically, allowing for easy reading and following of conversations.
Discord also supports various text formatting options to enhance your messages. You can use markdown syntax to make text bold, italicize it, or even create bullet-pointed or numbered lists. Here’s an example:
Bold Text
*Italicized Text*
– Bullet 1
– Bullet 2
1. Numbered Item 1
2. Numbered Item 2
Besides plain text messages, Discord allows you to share media in text channels. To upload an image or video, click on the plus (+) button next to the text input field and select the file you want to share from your computer. Discord also supports image and video previews, making it easy to view the shared media directly in the chat.
In addition to text channels within servers, Discord provides a direct messaging feature for private conversations. To start a direct message, click on a friend’s name in the friends list or the server member list. This will open a direct messaging window, where you can have one-on-one conversations with your friends.
Within the direct messaging window, you can also share media, such as images and videos, by using the same attachment button as in text channels. This allows for seamless sharing of content directly in your private conversations.
Discord also offers features to enhance text communication, such as the ability to edit and delete messages. If you need to correct a message or remove it entirely, simply right-click on the message and choose the appropriate action from the context menu.
Furthermore, Discord provides the option to react to messages using emojis. You can click on the smiley face icon next to a message and select an emoji to express your reaction. This adds an extra layer of interactivity and fun to your text chats.
Text chatting on Discord is a versatile tool that allows for quick and efficient communication, whether it’s for coordinating strategies in a game, sharing important information, or simply having casual conversations. Make use of the various features and formatting options provided by Discord to enhance your text communication and make your messages stand out.
Step 8: Downloading and Installing Oculus App
The Oculus App is the gateway to the exciting world of virtual reality offered by Oculus Rift. Before you can start using your Oculus Rift headset, you need to download and install the Oculus App on your computer. Here’s how you can get started:
To begin, visit the official Oculus website at www.oculus.com. Look for the “Download” option in the top right corner of the website and click on it. This will take you to the Oculus App download page.
On the Oculus App download page, you will find the option to download the Oculus App for your specific operating system, such as Windows or macOS. Make sure to select the correct version that matches your computer’s operating system.
Once you click on the appropriate download link, the Oculus App installer will begin downloading to your computer. The download size may vary depending on your internet speed and the version of the Oculus App.
After the download is complete, locate the Oculus App installer file in your computer’s downloads folder or the location where you saved it. Double-click on the installer to launch the installation process.
Follow the on-screen instructions provided by the Oculus App installer to proceed with the installation. You may need to grant necessary permissions and agree to the terms and conditions of the Oculus software. Make sure to read and understand the terms before proceeding with the installation.
During the installation process, the Oculus App will prompt you to choose the installation location on your computer. You can select the default location or choose a different location of your preference. Once you have selected the installation location, click on “Install” to begin the installation process.
After the installation is complete, the Oculus App will launch automatically on your computer. You will be prompted to create or sign in to your Oculus account. If you already have an Oculus account, use your login credentials to sign in. Otherwise, follow the prompts to create a new account.
Once you have logged in to the Oculus App, you will have access to the Oculus Store, where you can browse and download a wide range of virtual reality games, experiences, and applications compatible with Oculus Rift. The Oculus App is your central hub for managing your virtual reality library and exploring new content.
With the Oculus App successfully downloaded and installed on your computer, you are now one step closer to experiencing the immersive world of virtual reality with your Oculus Rift headset. The next step is to set up your Oculus Rift headset itself, which we will cover in the next section.
Step 9: Setting up Your Oculus Rift
Setting up your Oculus Rift headset is an important step before you can start enjoying virtual reality experiences. In this section, we will guide you through the process of setting up your Oculus Rift and preparing it for use.
The first step is to ensure that your computer meets the minimum system requirements for running Oculus Rift. Check the Oculus website or the documentation that came with your headset for the specific requirements. Make sure your computer has the necessary specifications for a smooth VR experience.
Next, locate the Oculus Rift package that you received. It should contain the headset, sensors, controllers, and necessary cables. Carefully unpack all the components and keep them organized for easy setup.
Connect the Oculus Rift headset to your computer using the included USB and HDMI cables. Make sure you connect the HDMI cable to a compatible HDMI port on your graphics card. Use the USB cable to connect the headset to a USB 3.0 port on your computer. Follow any further instructions provided by the Oculus software during the setup process.
Position the sensors in your play area according to the instructions provided. It is recommended to place the sensors in front of you for optimal tracking. The Oculus software will guide you in positioning the sensors to ensure accurate and responsive tracking during your VR experiences.
Once the sensors are positioned, follow the on-screen instructions to complete the sensor setup. The Oculus software will walk you through the process of configuring the tracking volume and ensuring that the sensors can detect your movements accurately.
After the sensor setup is complete, you will be prompted to set up the Oculus Touch controllers. Make sure the controllers are charged and turned on. Follow the instructions provided by the Oculus software to pair the controllers with your headset and calibrate their position for accurate tracking.
Make any necessary adjustments to the fit and comfort of the Oculus Rift headset. Adjust the straps to ensure a snug fit on your head, and adjust the IPD (interpupillary distance) to match the distance between your eyes for optimal visual clarity. Take your time to ensure that the headset sits comfortably and securely on your head.
Once the physical setup is complete, the Oculus software will guide you through the initial setup process, including configuring audio settings and defining your play area. Follow the prompts and provide any necessary information to complete the setup.
Once the setup is finished, you are ready to start exploring the world of virtual reality with your Oculus Rift headset. Put the headset on, grab the controllers, and get ready to immerse yourself in breathtaking VR experiences, games, and simulations.
Remember to take breaks and adjust the settings to your comfort level. VR experiences can be intense, so it’s important to listen to your body and use the Oculus Guardian system to define a safe play area to avoid accidents or collisions.
Setting up your Oculus Rift properly ensures a smooth and enjoyable virtual reality experience. Follow the instructions provided by the Oculus software and take your time to properly configure the headset, sensors, and controllers. With the setup complete, it’s time to jump into the world of virtual reality and unlock the full potential of your Oculus Rift headset.
Step 10: Linking Discord and Oculus Rift
Linking Discord and Oculus Rift allows you to enhance your virtual reality gaming experience by seamlessly integrating voice chat and communication features. By connecting the two platforms, you can stay connected with your gaming community and communicate with friends while immersed in the virtual worlds of Oculus Rift. Follow these steps to link Discord and Oculus Rift:
1. Launch the Oculus App on your computer. Ensure that your Oculus Rift headset is connected and configured properly.
2. In the Oculus App, navigate to the settings menu by clicking on the gear icon in the top right corner of the window.
3. Within the settings menu, select the “Devices” tab. Here, you will find various options related to your Oculus Rift headset.
4. Scroll down to find the “Voice Chat” section. Click on the “Enable” button to enable voice chat functionality within the Oculus App.
5. Once voice chat is enabled, click on the “Link Discord” button. This will open a browser window that takes you to the Discord website.
6. Log in to your Discord account, or create a new account if you don’t have one already. Ensure that you are logged in to the correct Discord account that you wish to link with Oculus Rift.
7. After logging in, Discord will prompt you to authorize the Oculus App to access your Discord account. Review the permissions and click on the “Authorize” button to proceed.
8. Once you have authorized the integration, Discord and Oculus Rift will be linked. You should see a confirmation message in the Oculus App indicating a successful connection.
9. From now on, whenever you launch a game or enter a virtual reality experience on Oculus Rift, Discord will automatically detect your activity and display it as your status. Your friends on Discord will be able to see that you are using Oculus Rift and the specific game or application you are currently engaged with.
10. Additionally, with Discord and Oculus Rift linked, you can access the voice chat functionality of Discord directly from within the Oculus App. This allows you to join voice channels and communicate with friends without having to switch between applications.
Linking Discord and Oculus Rift is a great way to seamlessly integrate voice chat and communication into your virtual reality gaming experience. It enables you to stay connected with your gaming community and communicate with friends, enhancing collaboration and social interaction while immersed in the world of Oculus Rift.
Step 11: Using Discord Inside Oculus Rift
Once you have linked Discord and Oculus Rift, you can take advantage of the integration by using Discord directly inside your Oculus Rift headset. This allows you to stay connected with your gaming community and communicate with friends without needing to switch between applications. Follow these steps to use Discord inside Oculus Rift:
1. Put on your Oculus Rift headset and make sure it is properly connected and configured.
2. Launch the Oculus App on your computer and navigate to the Oculus Store. Browse for and download the Oculus Rift-compatible Discord app.
3. Once the Discord app is downloaded, it will appear in your Oculus library. Put on your Oculus Rift headset and select the Discord app from the library to launch it.
4. Upon launching Discord inside Oculus Rift, you will be prompted to log in with your Discord account. Use your existing account credentials to log in, or create a new account if you haven’t done so already.
5. After logging in, you will be greeted with the familiar Discord interface within the Oculus Rift environment. You will have access to your friends list, servers, and channels, just like you would on the desktop version of Discord.
6. Use the Oculus Touch controllers to navigate through the Discord menus and interact with different channels. Point at menu options, buttons, or text with your controller and press the buttons to select and navigate.
7. With Discord inside Oculus Rift, you can participate in voice chats with your friends while immersed in virtual reality. Join voice channels within Discord and communicate with other members using your headset’s built-in microphone.
8. In addition to voice chat, you can also use the text chat feature of Discord within the Oculus Rift environment. Participate in text conversations, share media, and coordinate gaming sessions with your friends, all without leaving the virtual reality experience.
9. Use the Oculus Dash, the built-in overlay interface of Oculus Rift, to access Discord while you are in a game or immersed in a virtual reality experience. With Dash, you can bring up the Discord app as a window overlay, allowing you to view and interact with Discord without fully exiting your current activity.
10. When you are done using Discord inside Oculus Rift, simply navigate to the Discord app and log out or close the app. This will exit Discord and bring you back to the Oculus Home or your current virtual reality experience.
By using Discord inside Oculus Rift, you can seamlessly stay connected with your gaming community and communicate with friends while fully immersed in the virtual reality world. The integration between Discord and Oculus Rift enhances collaboration, coordination, and social interaction, making your virtual reality gaming experience even more engaging and enjoyable.
Step 12: Joining Discord Voice Calls in VR
Joining Discord voice calls while in virtual reality (VR) adds another layer of immersion and communication to your gaming experience. By participating in voice calls through Discord, you can stay connected with your friends and gaming community, strategize together, and enjoy seamless communication while immersed in VR. Here’s how to join Discord voice calls in VR:
1. Put on your VR headset, ensuring that it is properly connected and calibrated.
2. Launch the Oculus App or any VR game/application that supports Oculus Dash, the built-in overlay interface.
3. Once inside the virtual reality environment, press the Oculus button on your Touch controller to bring up the Oculus Dash overlay.
4. In the Oculus Dash overlay, navigate to the Discord app or bring it up as a window overlay from within the game/application. This will allow you to view and interact with Discord without fully exiting the VR experience.
5. Log in to your Discord account or ensure that you are already logged in to access voice calls.
6. Once logged in, navigate to the voice channel where your friends are located. This is typically found within a server or a dedicated voice chat room.
7. Click on the voice channel to enter the voice call. The Oculus Rift headset’s built-in microphone will automatically activate, allowing you to speak with your friends in real-time.
8. Communicate with your friends by speaking into the headset’s microphone. The audio will be transmitted to the voice chat channel, allowing others to hear you.
9. Listen to your friends’ voices through the Oculus Rift headset’s audio output. Their voices will play directly into your ears, creating a more immersive experience during the voice call.
10. Take advantage of the various features provided by Discord during the voice call. You can adjust individual volumes, mute/unmute yourself, and use Discord’s push-to-talk feature or voice activity detection for smoother communication.
11. Engage in conversations, discuss strategies, coordinate gameplay, or simply chat with your friends while remaining immersed in the VR experience.
12. Once you are finished with the voice call, you can either leave the call by navigating back to the Discord overlay and clicking on the “Leave Call” button, or simply exit the Oculus Dash overlay to focus solely on the VR experience.
By joining Discord voice calls in VR, you can maintain continuous communication with your friends and gaming community without interrupting your immersive virtual reality experience. The ability to strategize, coordinate, and interact in real-time through voice calls enhances collaboration and further deepens your overall gaming experience in VR.
Step 13: Managing Alerts and Notifications
Managing alerts and notifications on Discord is essential to ensure that you stay informed about important messages and events while maintaining control over your gaming experience. By customizing your Discord settings, you can tailor your alerts and notifications to suit your preferences. Here’s how to manage alerts and notifications on Discord:
1. Open the Discord application on your computer and log in to your Discord account if you haven’t already.
2. Click on the gear icon located in the bottom left corner of the Discord window. This will open the User Settings menu.
3. In the User Settings menu, navigate to the “Notifications” tab. Here, you will find various options to customize your alerts and notifications.
4. Under the “Server Notifications” section, you can choose how and when you receive notifications for messages and server activity. Options include “All Messages”, “Only @mentions”, and “Nothing”. Select the option that best suits your preferences.
5. In the “Direct Messages” section, you can customize the notifications for direct messages from friends and other Discord users. You can choose to receive notifications for all messages or only when mentioned directly.
6. Additionally, you can control how Discord alerts you for different events such as server boosts, friend requests, and new mentions. Adjust these settings based on your personal preferences to ensure you receive notifications for the events that matter to you.
7. Discord also allows you to customize the sound and appearance of your notifications. In the “Sound & Appearance” section, you can select the notification sound you prefer and choose whether to have notifications appear as pop-ups, in the system tray, or both.
8. For advanced customization options, click on the “Text & Images” tab in the User Settings menu. Here, you can further configure notifications related to specific channels and server activity. You can choose to be notified for mentions, replies, and various other events.
9. Additionally, Discord offers a mobile app that allows you to stay connected and receive notifications on your mobile device. Download the Discord mobile app from the App Store or Google Play Store, and customize the notification settings within the app to match your preferences.
10. Remember to periodically review and adjust your notification settings to ensure they align with your current preferences and gaming needs. As your server participation and friend list evolve, you may want to make changes to your notification settings to avoid being overwhelmed by unnecessary alerts.
By managing alerts and notifications on Discord, you can stay informed and in control of your gaming experience. Customizing your notification settings ensures that you receive the most relevant and important alerts while avoiding unnecessary distractions. Take the time to fine-tune your notification preferences and strike a balance that keeps you connected and informed without overwhelming you with constant interruptions.
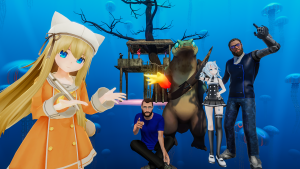
Step 14: Enhancing Your VR Experience with Discord and Oculus Rift
Discord and Oculus Rift are powerful platforms that, when used in conjunction, can greatly enhance your virtual reality (VR) gaming experience. By leveraging the communication features of Discord while immersed in the immersive worlds of Oculus Rift, you can stay connected with your gaming community, coordinate with teammates, and maximize your enjoyment. Here’s how to enhance your VR experience with Discord and Oculus Rift:
1. Utilize Discord for voice chat: Discord’s high-quality voice chat feature allows you to communicate seamlessly with your friends while playing VR games on Oculus Rift. Join voice channels, whether in a server or directly with friends, to strategize, coordinate gameplay, and enhance the overall immersive experience.
2. Use text chat to stay connected: While voice chat is ideal for real-time communication, Discord’s text chat feature can also be valuable in VR. Use Discord’s text channels to share information, coordinate events, and keep the conversation going even in situations where voice chat might not be practical or preferred.
3. Coordinate multiplayer sessions: Discord’s server and friend management features make it easy to arrange multiplayer sessions with your gaming community. Create dedicated channels for specific games or events, share invites, and coordinate gaming sessions with your friends, ensuring everyone is on the same page and ready to jump into VR together.
4. Share and discover VR experiences: Discord provides a platform for gamers to share their VR experiences, game recommendations, and discuss VR-related topics. Join VR-focused servers or game-specific communities to connect with like-minded individuals, share tips and tricks, and discover new VR experiences to try on your Oculus Rift.
5. Customize Discord integration within Oculus Rift: Discord’s integration with Oculus Rift allows you to display your VR activity and game playing status to your friends. Take advantage of this feature to let your friends know when you’re in VR and the specific game or experience you’re engaged with. This can help foster more meaningful connections and create opportunities for shared VR experiences.
6. Stay connected on the go: If you’re away from your gaming setup, you can still stay connected to your gaming community through the Discord mobile app. Download and install the Discord app on your smartphone to receive notifications, chat with friends, and participate in voice calls even when you’re not using Oculus Rift.
7. Explore Discord’s additional features: Beyond voice and text chat, Discord offers a range of features that can elevate your VR experience. Take advantage of screen sharing to showcase your VR gameplay to others, create bots to automate tasks or enhance server management, and customize your profile to showcase your gaming interests and VR accomplishments.
By embracing the integration between Discord and Oculus Rift, you can create a more immersive, social, and collaborative VR experience. Whether through real-time voice chat, text communication, or coordinating gameplay sessions, Discord enhances the social aspect of VR gaming on Oculus Rift, heightening your connection with fellow gamers and elevating your overall VR experience.
Troubleshooting Common Issues
While using Discord and Oculus Rift, you may encounter some common issues that can impact your gaming experience. However, with some troubleshooting, many of these issues can be resolved. Here are some common issues you may encounter and how to troubleshoot them:
1. Audio or microphone not working: If you’re experiencing issues with audio playback or microphone input on Discord or Oculus Rift, make sure that your audio devices are properly connected and selected as the default devices in your computer’s audio settings. Additionally, check the Discord and Oculus settings to ensure the correct audio devices are selected.
2. VR tracking problems: If you are experiencing tracking issues with your Oculus Rift, such as stuttering or loss of tracking, ensure that the sensors are properly positioned and connected. Make sure there are no obstructions between the sensors and your headset. You may also try resetting the Oculus tracking through the Oculus App settings.
3. Server connection issues: If you’re having trouble connecting to a Discord server, check your internet connection and ensure that Discord is not blocked by any firewall or antivirus software. If you continue to have issues, try connecting to a different server or contact Discord support for further assistance.
4. Display problems: If you encounter display issues on your Oculus Rift, such as visual artifacts or the screen going black, try restarting the Oculus App and ensuring that your graphics drivers are up to date. You may also need to adjust the resolution settings in the Oculus App or update your GPU drivers.
5. Performance issues: If you’re experiencing performance issues, such as lag or frame rate drops, ensure that your computer meets the minimum system requirements for both Discord and Oculus Rift. Close any unnecessary background applications that may be affecting performance, and consider optimizing your graphics settings within the Oculus App.
6. Compatibility issues: If you’re encountering compatibility issues between Discord and Oculus Rift, make sure that both applications are up to date with the latest versions. Consider reaching out to the Discord and Oculus support teams for specific guidance and possible solutions.
7. General troubleshooting: If you’re experiencing issues that are not specific to Discord or Oculus Rift, try restarting your computer, clearing cache files, and reinstalling the applications. It’s also a good idea to consult the official documentation, user forums, or support resources provided by Discord and Oculus for further troubleshooting tips.
Remember, a stable internet connection, up-to-date software, and proper configuration are key factors in ensuring a smooth experience with Discord and Oculus Rift. Don’t hesitate to reach out to the respective support teams if you require further assistance in resolving any issues you encounter.