
Preparing Your Oculus Rift for Streaming
Streaming with Oculus Rift allows you to share your virtual reality experiences with the world. However, before diving into the exciting world of streaming, you need to ensure that your Oculus Rift is properly set up for this purpose. Here are the essential steps to prepare your Oculus Rift for streaming:
1. Update your Oculus software: Before you start streaming, make sure that your Oculus software is up to date. This ensures that you have the latest features and bug fixes, providing a smoother streaming experience.
2. Optimize your PC: Streaming VR content can be demanding on your computer’s resources. To ensure smooth gameplay and streaming, optimize your PC by closing any unnecessary background applications and processes. You may also consider upgrading your hardware if needed.
3. Set up your streaming software: To capture and broadcast your Oculus Rift gameplay, you’ll need streaming software. Some popular options include OBS Studio and Streamlabs OBS. Follow the instructions provided by your chosen software to properly install and set it up.
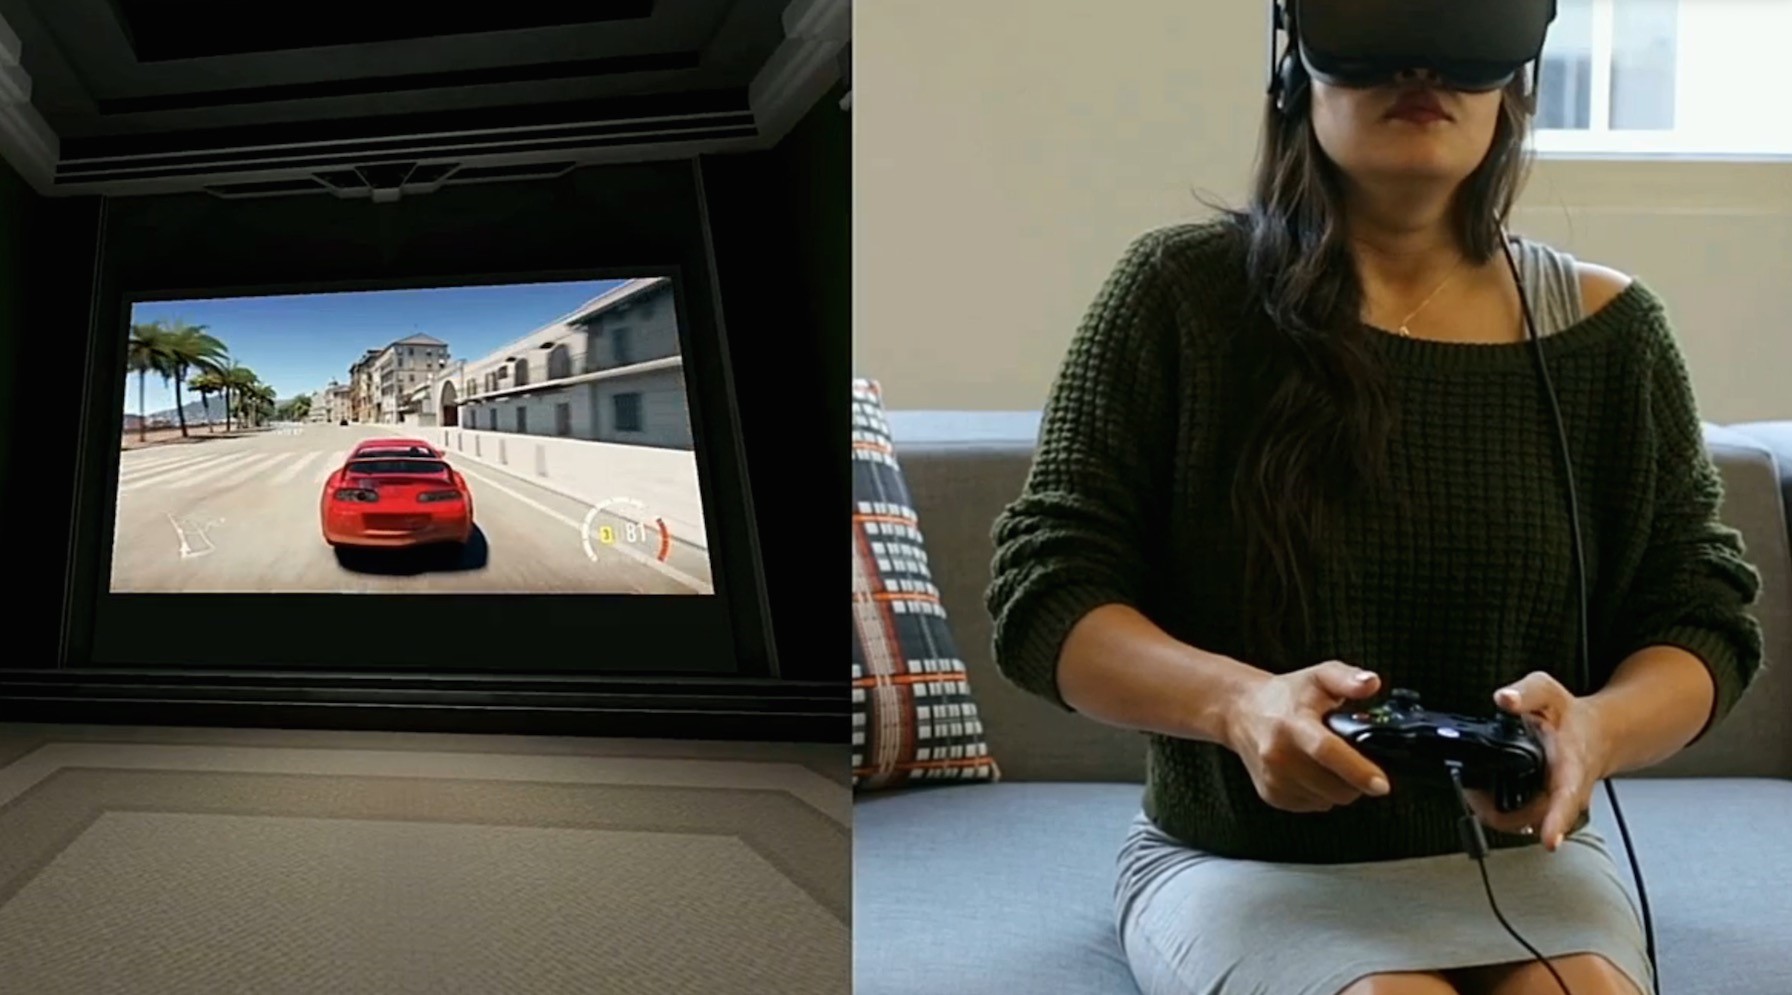
4. Connect your Oculus Rift to your PC: Ensure that your Oculus Rift is properly connected to your PC via the Oculus Link cable or wirelessly if your device supports it. Make sure all the necessary connections are secure and functional.
5. Adjust your Oculus Rift settings: Open the Oculus app on your PC and navigate to the Settings tab. Here, you can customize various settings related to your Oculus Rift, such as audio, display, and tracking options. Adjust these settings according to your preferences and streaming requirements.
6. Configure audio and microphone: In your streaming software, ensure that the audio settings are correctly configured to capture both your VR audio and microphone input. This will allow you to provide commentary and interact with your viewers during the stream.
7. Test your setup: Before going live, it’s essential to test your setup to ensure everything is working as expected. Launch a VR game or application, start your streaming software, and check the video and audio output. Make any necessary adjustments to achieve the desired quality and performance.
By following these steps, you can prepare your Oculus Rift for streaming and ensure a seamless and enjoyable experience for both yourself and your viewers. Once your Oculus Rift is properly set up, you’re ready to dive into the exciting world of streaming virtual reality content.
Choosing the Right Streaming Software for Your Needs
When it comes to streaming with your Oculus Rift, choosing the right software is crucial. The streaming software you select will determine the quality and features of your stream. Here are some factors to consider when choosing the right streaming software for your needs:
1. Compatibility: Ensure that the streaming software you choose is compatible with Oculus Rift. Look for software that supports VR content and provides integration with Oculus features.
2. User-Friendly Interface: Opt for streaming software that offers a user-friendly interface. This will make it easier for you to navigate and set up your stream without any additional hassle. Look for intuitive controls and simple configurations.
3. Streaming Options: Consider the streaming options available in the software. Look for features like customizable overlays, scene transitions, and the ability to add widgets to enhance your stream’s visual appeal.
4. Encoding and Bitrate Control: Look for streaming software that offers control over encoding settings and bitrate. This allows you to optimize your stream’s quality and performance based on your internet connection and hardware capabilities.
5. Integration with Chat and Alerts: Choose software that provides seamless integration with popular chat platforms and alert systems. This enables you to monitor and interact with your viewers easily, enhancing the overall streaming experience.
6. Resource Consumption: Consider the resource consumption of the streaming software. Some software can be more demanding on your PC’s resources than others. Ensure that it is lightweight and optimized for smooth streaming without causing performance issues.
7. Community Support and Updates: Look for streaming software that has an active and supportive community. Regular updates and bug fixes ensure that the software stays up to date with the latest features and improvements.
8. Social Media Integration: If you plan to promote your streams on social media, consider software that offers seamless integration with popular platforms. This allows you to easily share your stream with your followers and attract a wider audience.
By carefully considering these factors, you can choose the right streaming software for your Oculus Rift. Remember to take your specific needs and preferences into account to find a software that aligns with your goals and provides an engaging streaming experience.
Setting Up the Streaming Software with Oculus Rift
Once you have chosen the right streaming software for your Oculus Rift, the next step is to set it up properly. Follow these steps to ensure that your streaming software is correctly configured with your Oculus Rift:
1. Install the streaming software: Download and install the streaming software you have chosen on your computer. Follow the installation instructions provided by the software to ensure a successful setup.
2. Open the streaming software: Launch the streaming software on your computer. You will be greeted with the software’s main interface. Take a moment to familiarize yourself with the various features and options available.
3. Set up your streaming profile: Create a streaming profile within the software specifically for Oculus Rift streaming. This allows you to configure settings tailored to VR streaming, ensuring optimal performance and quality.
4. Configure your video capturing settings: In the settings or preferences section of the streaming software, locate the video capturing settings. Ensure that the software is set to capture the Oculus Rift display. Select the correct display source, which is usually labeled as “Oculus Rift” or a similar name.
5. Adjust audio settings: Navigate to the audio settings section of the streaming software. Set the audio input to capture both the Oculus Rift audio and your microphone input. This allows you to provide commentary and interact with your viewers during the stream.
6. Overlay customization: Most streaming software allows you to add overlays and widgets to your stream. Customize these elements to enhance the visual appeal of your stream. Consider adding elements such as a webcam feed, chat box, and social media alerts to make your stream more engaging.
7. Stream key integration: If you plan to stream on platforms like Twitch or YouTube, integrate your stream key with the streaming software. This allows the software to automatically connect to your preferred streaming platform and stream your content.
8. Save your settings: Once you have configured all the necessary settings, save your changes. This ensures that your streaming software remembers your preferences and applies them every time you start a new stream.
By following these steps, you can set up your streaming software with your Oculus Rift effectively. Take your time to explore the various customization options and tailor your settings to create an immersive and engaging streaming experience.
Configuring Your OBS Studio or Streamlabs OBS Stream
If you have chosen OBS Studio or Streamlabs OBS as your streaming software for Oculus Rift, configuring it correctly is essential to ensure a smooth streaming experience. Follow these steps to configure OBS Studio or Streamlabs OBS for streaming with your Oculus Rift:
1. Open OBS Studio or Streamlabs OBS: Launch OBS Studio or Streamlabs OBS on your computer. You will be presented with the main interface of the software.
2. Create a new scene: In OBS Studio or Streamlabs OBS, a scene is a collection of various sources, such as game capture, webcam, overlays, etc. Create a new scene specifically for your Oculus Rift stream by right-clicking in the Scenes section and selecting “Add Scene.”
3. Add sources: Within the newly created scene, right-click in the Sources section and select “Add.” Choose the appropriate sources for your Oculus Rift stream, such as game capture for capturing your VR gameplay and webcam for showing your face to viewers.
4. Configure sources: Once you have added the necessary sources, configure them by right-clicking on each source and selecting “Properties.” Adjust the settings according to your needs, such as selecting the Oculus Rift display for game capture and setting up proper webcam settings.
5. Arrange and resize sources: Click and drag the sources within the scene to rearrange them or resize them as desired. This allows you to create a visually appealing layout for your stream. Experiment with different arrangements to find the most engaging setup.
6. Set up audio and microphone: In the Audio Mixer section of OBS Studio or Streamlabs OBS, adjust the audio levels of your sources, such as game audio and microphone input. Ensure that your viewers can hear your voice clearly while enjoying immersive VR audio.
7. Configure streaming settings: Go to the Settings section of OBS Studio or Streamlabs OBS and navigate to the Stream tab. Here, select the appropriate streaming platform and enter your stream key if necessary. Adjust the bitrate, resolution, and other streaming settings according to your internet connection and hardware capabilities.
8. Save your settings: Once you have configured all the necessary settings, click on the “Apply” or “Save” button within OBS Studio or Streamlabs OBS to save your changes. This ensures that your configuration is saved for future streams.
By following these steps, you can effectively configure OBS Studio or Streamlabs OBS for streaming with your Oculus Rift. Take your time to explore the various settings and customizations available to create a professional and enjoyable streaming experience with your virtual reality content.
Adjusting Stream Settings for Optimal Performance
When streaming with your Oculus Rift, it’s important to adjust the stream settings to ensure optimal performance. The right settings will enhance the quality of your stream and provide a smooth viewing experience for your audience. Follow these steps to adjust your stream settings for optimal performance:
1. Choose the appropriate bitrate: The bitrate determines the amount of data transmitted per second during your stream. Adjust the bitrate based on your internet upload speed and the resolution of your stream. A higher bitrate results in better video quality, but it requires a stable and fast internet connection.
2. Select the right resolution: Consider the resolution of your Oculus Rift gameplay and the capabilities of your computer. Choose a resolution that strikes a balance between a clear and detailed image and smooth stream playback. Ideally, the resolution should match the native resolution of your Oculus Rift display.
3. Optimize the frame rate: The frame rate determines how many images are displayed per second in your stream. Most streaming platforms and viewers prefer a 30 or 60 frames per second (FPS) stream. Experiment with different frame rates to find the one that offers smooth gameplay without excessively taxing your system.
4. Enable hardware acceleration: Many streaming software, including OBS Studio and Streamlabs OBS, offer hardware acceleration options. Enabling hardware acceleration offloads some of the processing tasks to your computer’s GPU, resulting in improved performance and reduced strain on your CPU.
5. Test your stream settings: Before going live, test your stream settings to ensure they are working as intended. Start a test stream, play a VR game, and monitor the quality of the stream on another device. Make adjustments to the bitrate, resolution, and other settings as needed to achieve the desired performance.
6. Consider using adaptive bitrate streaming: Adaptive bitrate streaming adjusts the quality of your stream in real-time based on the viewer’s internet connection. This ensures a smooth viewing experience for viewers with varying internet speeds. Check if your chosen streaming platform supports adaptive bitrate streaming and enable it if possible.
7. Monitor your system resources: Keep an eye on your computer’s resource usage while streaming. Use software monitoring tools to track the CPU, GPU, and memory usage. If your system is struggling to handle the stream, consider optimizing your settings or upgrading your hardware if necessary.
8. Regularly update your streaming software: Keep your streaming software up to date to take advantage of performance improvements and bug fixes. Regular updates ensure that you’re using the latest version with optimized settings and enhanced functionality.
By adjusting your stream settings for optimal performance, you can deliver high-quality streams that showcase the immersive experience of your Oculus Rift gameplay. Experiment with different settings and monitor the results to find the perfect balance between performance and visual quality.
Testing Your Stream before Going Live
Before you start streaming your Oculus Rift gameplay, it’s crucial to test your stream to ensure everything is working as expected. Testing allows you to identify any potential issues, make necessary adjustments, and provide a seamless streaming experience for your viewers. Follow these steps to test your stream before going live:
1. Prepare your stream setup: Set up your Oculus Rift, streaming software, and any additional equipment, such as a webcam or microphone. Ensure that all connections are secure and devices are functioning properly.
2. Launch your streaming software: Open your chosen streaming software, whether it’s OBS Studio, Streamlabs OBS, or another program. Make sure it detects your Oculus Rift and any other sources you want to capture, such as a webcam or game capture.
3. Configure your stream settings: Double-check that your stream settings, such as bitrate, resolution, and frame rate, are properly adjusted according to your preferences and available internet upload speed. These settings may affect the quality and performance of your stream.
4. Start a test stream: Most streaming software allows you to start a test stream that is not visible to the public. Use this feature to simulate a real stream and monitor the video and audio output on another device, such as a smartphone, tablet, or secondary computer. Ensure that the stream is smooth and visually appealing.
5. Check audio and microphone levels: While your test stream is running, listen to the audio quality and speak into your microphone to ensure your voice is clear and audible. Adjust the audio levels in your streaming software if necessary to achieve a balanced mix between game audio and microphone input.
6. Interact with your stream: Engage with your test stream by interacting with the chat or speaking aloud, as if you were addressing viewers. Keep an eye on the chat window to ensure it’s properly integrated into your stream layout.
7. Monitor system resources: While streaming, keep an eye on your computer’s resource usage, such as CPU and GPU utilization. Check if there are any performance issues or if your system is struggling to handle the stream. Adjust settings or consider upgrading your hardware if necessary.
8. Review and make adjustments: Once the test stream is complete, review the recording or playback of your stream. Take note of any issues or areas that can be improved, such as audio/video synchronization, resolution, or visual quality. Make the necessary adjustments in your streaming software to optimize the stream’s performance and visual appeal.
By thoroughly testing your stream before going live, you can iron out any potential issues and ensure a smooth streaming experience for yourself and your viewers. It allows you to make any necessary adjustments and fine-tune your setup, ultimately delivering a more professional and enjoyable streaming session.
Adding Overlays and Widgets to Your Stream
To enhance the visual appeal and interactivity of your Oculus Rift stream, you can add overlays and widgets. These elements can provide additional information, engage your audience, and personalize your stream. Follow these steps to add overlays and widgets to your stream:
1. Select your streaming software: Choose a streaming software that supports the addition of overlays and widgets. Popular choices include OBS Studio, Streamlabs OBS, and XSplit.
2. Explore available overlays and widgets: Depending on your streaming software, there may be built-in overlays and widgets available for use. These can include webcam frames, chat boxes, subscriber/follower counters, and social media integrations.
3. Download and install additional overlays and widgets: If you’re looking for more customization options, you can find a wide range of overlays and widgets online. Websites like Streamlabs and Nerd or Die offer free and paid overlays and widgets that you can download and install into your streaming software.
4. Add sources: In your streaming software, locate the sources section and add the desired overlays and widgets. This can typically be done by right-clicking within the sources section and selecting “Add” or “Add Image/Text.”
5. Configure overlay/widget properties: Once you’ve added the overlay or widget, you can customize its properties. This may include adjusting the size, position, opacity, and appearance of the overlay. Configure these properties according to your preference and ensure they blend well with your stream layout.
6. Utilize scene transitions: Scene transitions allow you to smoothly switch between different scenes in your stream. This can be done during gameplay transitions or when interacting with your audience. Choose transitions that fit the theme of your stream and add a professional touch to your content.
7. Preview and adjust: Preview your stream to see how the overlays and widgets look in action. Make any necessary adjustments to the placement, scale, or appearance to ensure they don’t obstruct important elements of your gameplay or distract from the overall experience.
8. Test interactivity: Some overlays and widgets offer interactive features, such as a chat box or donation alerts. Test these interactive elements by engaging with them during your stream to ensure they are functioning correctly and enhancing viewer engagement.
Adding overlays and widgets to your stream elevates the visual appeal and engagement factor of your Oculus Rift content. Experiment with different overlays and widgets, and find a combination that suits your stream’s style and creates a unique and immersive experience for your viewers.
Interacting with Viewers and Chat
Engaging with your viewers and chat is an important aspect of streaming with your Oculus Rift. Building a sense of community and actively interacting with your audience can improve the overall streaming experience and encourage viewers to keep coming back. Here are some ways to effectively interact with viewers and chat during your stream:
1. Monitor the chat: Keep a dedicated monitor or device within your line of sight to monitor the chat throughout your stream. Stay attentive to the messages and questions coming in from your viewers.
2. Address viewers by name: When responding to chat messages, address viewers by their usernames to establish a personal connection. This makes your viewers feel acknowledged and valued.
3. Respond to questions and comments: Take the time to read and respond to questions and comments from your viewers. Provide informative and engaging answers to their queries, and acknowledge their comments and contributions to the discussion.
4. Encourage chat participation: Encourage chat participation and create opportunities for viewers to interact with you and each other. Pose questions, host polls, or initiate discussions around the game you’re playing or other related topics.
5. Use viewer suggestions: Consider incorporating viewer suggestions into your gameplay or stream content. This shows that you value your viewers’ input and helps create a more interactive and community-driven stream.
6. Show appreciation: Express your gratitude for viewers who subscribe, donate, or support your stream in any way. Thank them individually and acknowledge their contributions during your stream.
7. Stay positive and enthusiastic: Maintain a positive and enthusiastic attitude throughout your stream. Engage with your viewers in a friendly and energetic manner to keep the atmosphere of the stream lively and enjoyable.
8. Set chat guidelines: Establish clear guidelines for chat behavior to ensure a respectful and inclusive community. Enforce these guidelines and moderate your chat to maintain a friendly and welcoming environment for all viewers.
9. Utilize chatbots: Consider using chatbot functionality to automate certain tasks, such as welcoming new viewers, displaying social media links, or providing information about your stream schedule and commands.
10. Interact during breaks: If you take short breaks from gameplay, make it a point to interact with the chat during these times. Catch up on messages, answer questions, or simply have casual conversations with viewers.
By actively engaging with your viewers and chat, you can foster a sense of community and make your Oculus Rift streams more enjoyable and interactive. Remember to strike a balance between focusing on gameplay and making time to connect with your audience to ensure a well-rounded streaming experience.
Promoting Your Stream on Social Media
Once you’re ready to share your Oculus Rift stream with a wider audience, promoting it on social media can help attract new viewers and grow your streaming community. Leveraging the power of social media platforms allows you to reach potential viewers who share common interests in gaming and virtual reality. Here are some strategies for effectively promoting your stream on social media:
1. Choose the right platforms: Identify the social media platforms that are most popular among your target audience. Focus your efforts on platforms such as Twitch, YouTube, Twitter, Facebook, Instagram, or Discord, where gamers and VR enthusiasts are more likely to be active.
2. Create engaging content: Develop high-quality content related to your stream that catches the attention of your followers on social media. This can include eye-catching images, short clips of exciting VR moments, or teasers of upcoming games you plan to stream.
3. Use relevant hashtags: Utilize relevant hashtags to increase the visibility of your posts. Research popular gaming-related hashtags and include them in your social media captions to reach a wider audience interested in virtual reality and gaming content.
4. Collaborate with other content creators: Form collaborations with other streamers, YouTubers, or influencers in the gaming or virtual reality space. By collaborating, you can cross-promote each other’s streams, sharing audiences and reaching new viewers.
5. Engage with gaming communities: Participate actively in online gaming communities, subreddits, and forums related to Oculus Rift and virtual reality. Share your experiences, provide valuable insights, and subtly mention your stream when relevant. Avoid being overly promotional to maintain a genuine presence in the community.
6. Announce your upcoming streams: Use social media to announce the date, time, and theme of your upcoming Oculus Rift streams. Tease your viewers with exciting game choices or special events you have planned, creating anticipation and encouraging them to tune in.
7. Encourage sharing and word-of-mouth: Prompt your viewers to share your stream announcements and content on their own social media profiles. Offer incentives such as shoutouts, giveaways, or exclusive content for those who help spread the word about your stream.
8. Engage with your social media followers: Respond to comments, messages, and interactions from your followers on social media. Show appreciation for their support and make an effort to build personal connections. This builds loyalty and encourages viewers to join your streams regularly.
9. Share highlights and clips: Clip and share highlights from your stream on social media to showcase the most entertaining or memorable moments. These clips can attract new viewers who may be enticed by the exciting VR gameplay and want to see more.
10. Stay consistent and active: Regularly post updates about your stream, share behind-the-scenes moments, and engage with your social media followers consistently. Building a consistent online presence increases visibility and reinforces your brand as a dedicated and reliable streamer.
By utilizing social media as a promotional tool, you can expand your reach and attract a larger audience to your Oculus Rift stream. Tailor your content to each social media platform, engage with your followers, and collaborate with others to maximize your promotional efforts and create a thriving streaming community.
Troubleshooting Common Streaming Issues with Oculus Rift
Streaming with your Oculus Rift can sometimes present technical challenges that may hinder a smooth streaming experience. Here are some common streaming issues you may encounter with your Oculus Rift and troubleshooting tips to help resolve them:
1. Low stream quality: If your stream quality appears pixelated or blurry, check your bitrate settings. Increasing the bitrate can improve video quality, but be mindful of your internet upload speed and ensure it can handle the higher bitrate.
2. Audio sync issues: If your audio and video are not synchronized, adjust the audio sync settings in your streaming software. Calibrate the delay so that the audio matches the on-screen action. Additionally, ensure that your audio sample rates and channels are correctly configured.
3. Performance drops during streaming: If you experience performance drops, such as frame rate stuttering or lag, check your system resources. Close any unnecessary background applications and reduce the graphical settings in your game to relieve the strain on your CPU and GPU.
4. Stream disconnects or interruptions: If your stream unexpectedly disconnects or experiences interruptions, check your internet connection. Ensure that you have a stable and reliable network connection. Consider using a wired ethernet connection instead of a Wi-Fi connection for more consistent performance.
5. Mic or audio issues: If viewers can’t hear your microphone or there are audio distortions, check your microphone settings. Ensure that the correct input device is selected in your streaming software. Test your microphone separately to rule out any hardware issues.
6. Frame rate drops in VR: If you experience frame rate drops specifically within the VR environment, reduce the graphical settings in the VR game or application you are streaming. Lowering graphical settings can alleviate the strain on your system and improve performance.
7. Green screen or green artifacts: If your stream displays a green screen or green artifacts, ensure that your capture card or video input source is properly connected. Double-check the cables, connectors, and settings to eliminate any potential issues.
8. Inconsistent stream stability: If your stream exhibits inconsistent stability, such as frequent buffering or stream drops, consider lowering your stream settings. Reduce the bitrate, resolution, or frame rate to match your internet connection’s capabilities for a more stable streaming experience.
9. Overheating issues: Extended streaming sessions can generate heat, potentially leading to performance issues or even hardware damage. Monitor your computer’s temperature while streaming and ensure proper ventilation and cooling. Consider using additional cooling solutions like fans or liquid cooling if necessary.
10. Software and driver updates: Regularly update your streaming software, Oculus software, and graphics drivers to ensure they are up to date. Updates often provide bug fixes and performance improvements that can address common streaming issues.
When troubleshooting streaming issues with your Oculus Rift, remember to systematically isolate the problem and consider the specific hardware and software involved. Explore online forums, documentation, or seek assistance from the community to find solutions to more complex issues. With patience and persistence, you can overcome common streaming issues and continue to deliver a high-quality and enjoyable streaming experience with your Oculus Rift.