
Hardware Requirements for Oculus Rift
Before you can immerse yourself in the incredible virtual reality (VR) experiences offered by the Oculus Rift, it is crucial to ensure that your PC meets the necessary hardware requirements. Failure to meet these requirements may result in poor performance or even the inability to use the device at all. Here are the hardware specifications you need to take into account:
- Processor: The CPU is a vital component for running the Oculus Rift smoothly. Your PC should have at least an Intel i5-4590 or an AMD Ryzen 5 1500X processor (or higher) to meet the minimum requirements.
- Graphics Card: The GPU is responsible for rendering the graphics in VR. Oculus recommends using a graphics card that is equivalent to or exceeds the performance of the NVIDIA GTX 970 / AMD R9 290 or better. For optimal performance, an NVIDIA GTX 1060 / AMD RX 480 or better is recommended.
- RAM: Virtual reality applications demand significant memory resources. To ensure smooth operation, your PC should have at least 8GB of RAM.
- Operating System: The Oculus Rift is compatible with Windows 10. Ensure that your PC is running on this operating system version or later to guarantee compatibility.
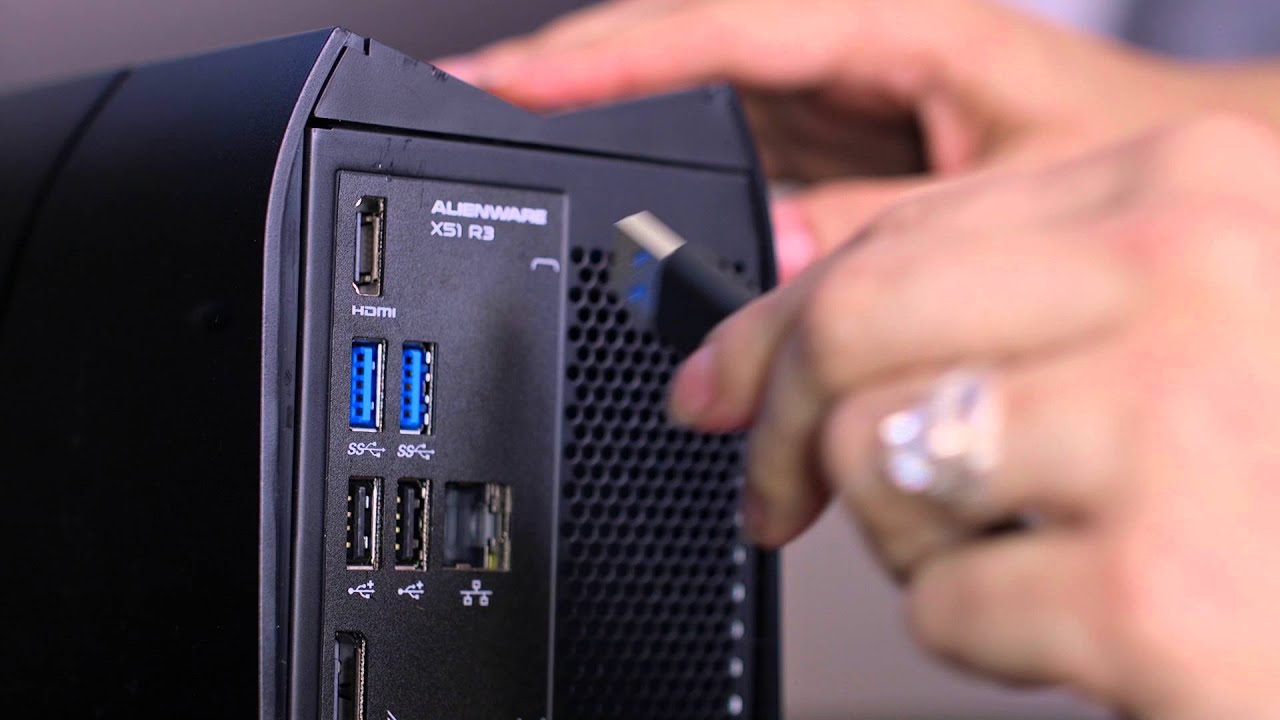
- USB Ports: The Oculus Rift requires multiple USB ports for connecting the headset and sensors. You will need at least three USB 3.0 ports and one USB 2.0 port to properly connect the device and maintain its functionality.
- Display Output: The Oculus Rift relies on a high-resolution display to provide an immersive VR experience. Ensure that your PC has an HDMI 1.3 video output (or DisplayPort 1.2 with adaptor) to connect the Oculus Rift headset.
- Additional Considerations: It is also worth noting that a spacious room, free of obstacles, is ideal for enjoying room-scale VR experiences. A stable internet connection is necessary for downloading and updating Oculus software as well.
By adhering to the hardware requirements listed above, you can ensure that your PC is ready to make the most of the Oculus Rift’s amazing capabilities. Now that you have a clear understanding of the hardware prerequisites, it’s time to learn how to connect the Oculus Rift to your PC and begin your virtual reality adventure!
Connecting Oculus Rift to PC: Step-by-Step Guide
Once you have confirmed that your PC meets the necessary hardware requirements, it’s time to connect your Oculus Rift headset. Follow this step-by-step guide to ensure a smooth and hassle-free setup process:
- Prepare the Oculus Rift: Carefully unpack the Oculus Rift headset and remove any protective covers or plastic film from the lenses. Ensure that all the necessary cables, including the headset cable and sensor cables, are properly connected and not tangled.
- Connect the Headset: Locate the HDMI and USB connectors on the Oculus Rift headset cable. Connect the HDMI end to the HDMI 1.3 video output (or DisplayPort 1.2 with adaptor) on your PC. Connect the USB end to a USB 3.0 port on your PC.
- Position the Sensors: The Oculus Rift requires sensors to track your movements in VR. Place the sensors in a way that allows them to track your movements effectively. It is recommended to position them on your desk or mount them on tripods for better coverage.
- Connect the Sensors: Connect one end of the sensor cables to the sensors and the other end to the USB 3.0 ports on your PC. It is essential to connect each sensor to a separate USB 3.0 port to ensure accurate tracking.
- Power Up the Oculus Rift: Connect the Oculus Rift headset’s power adapter to an electrical outlet. The indicator light on the headset should turn on, indicating that it has power.
- Put on the Headset: Gently place the Oculus Rift headset on your head, adjusting the straps for a comfortable fit. Make sure the lenses are aligned properly with your eyes to ensure a clear and immersive VR experience.
- Follow the Setup Process: Once the Oculus Rift is connected, your PC should automatically detect it. Follow the on-screen instructions to complete the setup process. This may involve downloading and installing the Oculus software, creating an Oculus account, and configuring settings.
- Complete Sensor Setup: During the setup process, you will be prompted to set up the sensors. Follow the instructions to position and calibrate the sensors accurately for optimal tracking performance.
- Start Exploring VR: With the Oculus Rift successfully connected and set up, you are now ready to explore the vast world of virtual reality. Put on the headset, grab the Oculus Touch controllers, and dive into immersive games, experiences, and virtual environments.
By following these step-by-step instructions, you can easily connect the Oculus Rift to your PC and embark on an extraordinary VR journey. Enjoy the thrilling and immersive experiences that await you!
Installing Oculus Rift Software
After connecting the Oculus Rift to your PC, the next step is to install the necessary software to unlock the full potential of the VR experience. Here’s a step-by-step guide on how to install the Oculus Rift software:
- Download the Oculus Software: To get started, visit the official Oculus website (www.oculus.com/setup) and download the Oculus software for your PC. The software is available for Windows, and it is essential to ensure you are downloading the latest version.
- Run the Installer: Locate the downloaded Oculus software file and double-click to run the installer. Follow the on-screen prompts to begin the installation process.
- Accept the License Agreement: During the installation, you will be presented with a license agreement. Read through the terms and conditions thoroughly, and if you agree, check the box to accept the agreement. Then, click on the “Next” button to proceed.
- Choose Installation Location: The installer will prompt you to select the location where you want to install the Oculus software. Choose a suitable destination on your PC and click “Install” to begin the installation process.
- Wait for Installation to Complete: The installation process may take a few minutes to complete. Wait patiently for the software to install on your PC. Avoid interrupting the process to ensure a successful installation.
- Create or Log in to Your Oculus Account: Once the installation is complete, the Oculus software will prompt you to create a new Oculus account or log in to an existing one. Follow the instructions to set up your account or sign in with your credentials.
- Follow On-Screen Set Up: After logging in, the Oculus software will guide you through the initial set-up process. This may include configuring your sensor settings, setting up a guardian system, and performing the necessary calibrations.
- Check for Updates: It is vital to keep your Oculus software up to date to ensure optimal performance and access the latest features. Check for updates regularly by navigating to the Settings section in the Oculus software and clicking on the “Check for Updates” option.
- Start Enjoying VR: With the Oculus software installed and up to date, you are now ready to fully immerse yourself in the virtual reality experiences offered by the Oculus Rift. Launch the Oculus software, put on your headset, and explore an incredible world of games, simulations, and interactive content.
By following these step-by-step instructions, you can easily install the Oculus Rift software and unlock the full potential of your VR device. Prepare yourself for countless hours of excitement and immersion as you delve into the stunning virtual reality landscape.
Configuring Oculus Rift
After installing the Oculus Rift software, it’s important to configure the device to ensure optimal performance and customize the VR experience according to your preferences. Follow these steps to configure your Oculus Rift:
- Adjust Visual Settings: Start by adjusting the visual settings to suit your needs. Launch the Oculus software on your PC and go to the “Devices” tab. From there, select your Oculus Rift headset and click on “Adjust Lens Position” to fine-tune the lens distance for maximum clarity and comfort.
- Audio Configuration: For an immersive experience, it’s crucial to configure your audio settings. In the Oculus software, navigate to the “Devices” tab and choose your Oculus Rift headset. Under the “Audio Output in VR” section, you can select the desired audio device to route sound through while wearing the headset.
- Guardian System: The Guardian system helps prevent any accidental collisions by creating a virtual boundary in your play area. In the Oculus software, go to the “Devices” tab and select your Oculus Rift headset. Click on “Guardian” to set up the guardian system by following the on-screen instructions.
- Hand Tracking: If you have Oculus Touch controllers, configure and calibrate them for accurate hand tracking. In the Oculus software, go to the “Devices” tab and select your Oculus Rift headset. Click on “Pair Touch Controllers” and follow the prompt to pair and calibrate the controllers.
- Software and App Settings: Customize your VR experience further by exploring the various software and app settings available. In the Oculus software, go to the “Settings” tab. From here, you can adjust options such as guardian sensitivity, headset tracking, mic sensitivity, and notifications to suit your preferences.
- Explore the Oculus Store: The Oculus Rift offers a wide range of games and experiences via the Oculus Store. Take some time to explore the store, browse through the available content, and find applications and games that interest you. Install your desired titles and launch them from the Oculus software to begin your VR adventures.
- Stay Updated: It is important to keep your Oculus software and VR applications up to date to ensure the best performance and access to the latest features and improvements. Regularly check for updates in the Oculus software’s “Settings” tab and install any available updates.
By following these steps, you can configure your Oculus Rift headset, customize settings, and enhance your overall VR experience. Take the time to optimize your visuals, audio, and tracking settings to ensure maximum comfort and immersion. Enjoy exploring the vast library of content available and embark on thrilling virtual adventures!
Connecting Oculus Rift Sensors
Properly connecting the sensors is essential for optimal tracking and accurate movement detection in your Oculus Rift VR experience. Here’s a step-by-step guide on how to connect your Oculus Rift sensors:
- Choose Sensor Placement: Decide on the placement of your sensors. For optimal tracking, it is recommended to position the sensors diagonally across from each other.
- Connect Sensor Cables: Connect one end of each sensor cable to the sensors and the other end to available USB 3.0 ports on your PC. It’s important to connect each sensor to a separate USB 3.0 port to ensure accurate tracking.
- Extend Sensor Cables (Optional): If necessary, you can use USB extension cables to extend the reach of your Oculus Rift sensors. Be sure to use high-quality, active USB extensions to maintain the signal quality and prevent signal degradation.
- Mount or Position Sensors: Mount the sensors securely on a stable surface for consistent tracking or use the included sensor stands. Make sure the sensors are positioned at a height of about 6 to 7 feet (1.8 to 2.1 meters) above the ground and angled downward toward your play area.
- Adjust Sensor Angles: Use the pivoting and tilting capability of the sensor stands to adjust the angle of the sensors. Aim to have the cameras of the sensors focused on the center of your play area.
- Check Sensor Connections: After positioning the sensors, ensure that the sensor cables are securely connected to both the sensors and the USB ports on your PC. Double-check that all connections are firm and free from any looseness or wobbling.
- Verify Sensor Setup: Once everything is connected, launch the Oculus software on your PC and navigate to the “Devices” tab. Click on “Configure Rift” and follow the on-screen instructions to confirm that the sensors are recognized and properly set up.
- Test Tracking: To ensure accurate tracking, put on your Oculus Rift headset and launch a VR application. Move around within the play area and confirm that your movements are accurately reflected in the VR environment. If you encounter any issues, consider adjusting the sensor angles or positions.
By following these steps, you can properly connect your Oculus Rift sensors and ensure precise tracking of your movements in the virtual world. Take the time to position and calibrate the sensors accurately for the best VR experience possible. Immerse yourself in the virtual realms and enjoy the amazing possibilities of the Oculus Rift!
Oculus Link: Connecting Oculus Rift to a PC Using a USB-C Cable
Oculus Link is a feature that allows you to connect your Oculus Quest or Quest 2 headset to a PC using a compatible USB-C cable. This enables you to access and play PC VR games and experiences on your Oculus Quest device. Here’s a step-by-step guide on how to set up Oculus Link:
- Check Compatibility: Ensure that your PC meets the minimum system requirements for Oculus Link. This includes having a compatible USB-C port, a compatible USB-C cable, and a compatible graphics card.
- Update Oculus Software: Make sure that your Oculus Quest or Quest 2 headset and your PC’s Oculus software are both up to date. Check for any available updates and install them before proceeding.
- Gather Required Cables: You will need a compatible USB-C cable to connect your Oculus Quest headset to your PC. Use the cable that came with your headset or purchase a high-quality USB-C cable that meets the necessary specifications.
- Enable Oculus Link: Turn on your Oculus Quest headset and put it on. Navigate to the Oculus app on your PC and go to the “Devices” tab. Click on your headset, then select “More Settings” and toggle the switch to enable Oculus Link.
- Connect the Cable: Connect one end of the USB-C cable to the USB-C port on your Oculus Quest headset. Connect the other end to a compatible USB-C port on your PC.
- Allow Access: Once the cable is connected, a prompt may appear on your Oculus Quest headset, asking if you want to allow access to your PC. Select “Allow” to establish the connection.
- Configure Oculus Link: The Oculus app on your PC should automatically detect the connected Oculus Quest headset and guide you through the initial configuration process. Follow the on-screen instructions to calibrate the headset and adjust the settings as desired.
- Launch VR Games and Experiences: After completing the configuration, you can access and play PC VR games and experiences directly from your Oculus Quest headset. Browse the Oculus store on your headset, select a game or experience, and enjoy the immersive world of PC VR.
- Optimize and Troubleshoot: If you encounter any performance issues or connectivity problems, refer to the Oculus support website for troubleshooting tips. You may need to update drivers, adjust graphics settings, or try using a different USB-C cable for better performance.
By following these steps, you can easily connect your Oculus Quest or Quest 2 headset to your PC using Oculus Link and unlock access to a vast library of PC VR content. Enjoy the power of PC virtual reality while utilizing the convenience and portability of your Oculus Quest device.
Setting Up Oculus Rift Guardian System
The Guardian system is a crucial feature of the Oculus Rift that helps keep you safe and aware of your surroundings while immersed in VR experiences. It allows you to set up a virtual boundary to prevent you from bumping into objects or walls. Here’s a step-by-step guide on how to set up the Guardian system:
- Launch Oculus Software: Ensure that the Oculus software is running on your PC and that your Oculus Rift headset is connected and powered on.
- Activate Guardian: Put on your Oculus Rift headset and pick up the Oculus Touch controllers. A prompt will appear in VR, asking you to set up your Guardian system. Follow the on-screen instructions to proceed.
- Define Your Play Area: Hold one of the Oculus Touch controllers and carefully trace the boundary of your play area by pointing the controller at the ground and pressing the trigger button.
- Adjust Guardian Boundaries: After defining the initial boundary, the Guardian system will display the virtual play area in VR. Use the Oculus Touch controllers to adjust the boundaries as needed, ensuring that there is enough space to move around comfortably.
- Set Floor Height: In VR, the Guardian system will prompt you to set the floor height. Using the Oculus Touch controllers, place one controller on the floor and press and hold the Oculus button until the floor height is set.
- Confirm Guardian Setup: Double-check the Guardian boundaries and floor height in VR. Make any necessary adjustments to ensure accurate detection and protection within your play area.
- Visualize Guardian System in VR: Once the Guardian system is set up, it will become visible whenever you approach the boundaries while wearing the Oculus Rift headset. This visual representation helps you stay within your designated play area.
- Modify Guardian Settings: If you need to modify any Guardian settings, such as sensitivity or boundary color, you can do so within the Guardian section of the Oculus app on your PC. Adjust the settings according to your preferences and comfort level.
- Test the Guardian System: To ensure that the Guardian system is working properly, put on your Oculus Rift headset and enter a VR experience. As you approach the boundaries you have set, the Guardian grid will appear as a visual reminder to prevent you from accidentally crossing into the real-world area.
By following these steps, you can set up the Guardian system for your Oculus Rift and enjoy your VR experiences with peace of mind. The Guardian system provides an added layer of safety to ensure that you stay aware of your surroundings and avoid potential accidents while immersed in captivating virtual worlds.
Troubleshooting Oculus Rift Connection Issues
While connecting the Oculus Rift to your PC is usually a straightforward process, you may occasionally encounter connection issues that prevent the headset from working properly. Here are some troubleshooting steps to help you resolve common Oculus Rift connection issues:
- Check Cable Connections: Ensure that all cables, including the headset cable and sensor cables, are securely connected to both the Oculus Rift headset and the corresponding ports on your PC. Double-check for any loose connections or cable damage.
- Restart Oculus Software: Close the Oculus software on your PC and restart it. Sometimes, the software may encounter a glitch that can be resolved simply by restarting it.
- Reconnect the Headset: Disconnect and reconnect the headset cable on both ends, ensuring a secure connection. This can help refresh the connection and resolve any temporary communication issues.
- Update USB Drivers: Outdated USB drivers can cause connection problems with the Oculus Rift. Visit your PC manufacturer’s website or the USB controller manufacturer’s website to download and install the latest drivers for your USB ports.
- Try Different USB Ports: Occasionally, certain USB ports on your PC might not provide sufficient power or have compatibility issues with the Oculus Rift. Try connecting the headset and sensors to different USB ports to see if the issue is resolved.
- Disable Power Saving: Some USB ports may be configured to save power, which can cause intermittent connectivity problems. In your PC’s power settings, disable “USB selective suspend” or any power-saving options related to USB devices.
- Reset USB Devices: Open the Oculus app on your PC, go to the “Devices” tab, and click on “Restart Oculus Service.” This will reset the USB devices and may resolve any connection issues.
- Update Oculus Software: Ensure that both the Oculus Rift headset and the PC’s Oculus software are running the latest version. Check for any available updates in the Oculus app and install them to ensure compatibility and address any bug fixes.
- Restart Your PC: Sometimes, a simple PC restart can help resolve connection issues by refreshing system settings and clearing temporary glitches.
- Contact Oculus Support: If you have tried all the above steps and are still experiencing connection issues, reach out to Oculus Support for further assistance. They have dedicated resources to help troubleshoot and resolve more complex problems.
By following these troubleshooting steps, you can address common connection issues with your Oculus Rift and get back to enjoying the immersive world of virtual reality. Remember to systematically go through each step and test the connection after each adjustment to pinpoint the cause of the problem and find an appropriate solution.
Upgrading PC Hardware for Better Oculus Rift Performance
If you find that your current PC setup is not providing the optimal performance for your Oculus Rift experience, it may be time to consider upgrading your hardware. Here are some key components that you might consider upgrading to enhance your Oculus Rift performance:
- Graphics Card: The graphics card is critical for rendering realistic and immersive virtual reality visuals. Upgrading to a more powerful graphics card, such as the NVIDIA GeForce RTX series or AMD Radeon RX series, can significantly improve your Oculus Rift performance and allow you to enjoy VR games and experiences at higher resolutions and frame rates.
- Processor (CPU): The processor handles the overall computing power required to run VR applications smoothly. Consider upgrading to a faster CPU with more cores, such as an Intel Core i7 or AMD Ryzen 7 series processor, to ensure a seamless and responsive VR experience.
- Memory (RAM): VR applications demand substantial memory resources. Increasing your RAM capacity can help improve overall system performance and prevent slowdowns. Aim for a minimum of 16GB or more for a smoother VR experience.
- Storage Drive: VR games and applications can take up a significant amount of storage space. Consider upgrading to a solid-state drive (SSD) for faster loading times and improved performance. An SSD can reduce loading times and ensure that VR experiences run seamlessly.
- USB Ports: The Oculus Rift relies on USB ports to connect the headset and sensors. If you are experiencing connection issues or poor tracking, consider upgrading to a motherboard with more USB ports or using an additional USB expansion card to ensure that you have enough bandwidth and stable connections.
- Power Supply Unit (PSU): A VR-ready PC requires a sufficient power supply to handle the additional load placed on the system. Ensure that your PSU has enough wattage and the necessary connectors to support the upgraded components in your system.
- Monitor: Although not directly related to Oculus Rift performance, having a high-resolution and high-refresh-rate monitor can provide a better overall visual experience. Consider upgrading to a monitor with a higher resolution and refresh rate to complement your VR experience.
- Thermal Management: As VR gaming can put a strain on the system, consider improving the cooling system within your PC case. Upgrading your CPU cooler and adding additional case fans can help manage temperatures and maintain optimal performance during intense VR sessions.
Before upgrading any hardware component, ensure that it is compatible with your current system and that you have the necessary technical knowledge to perform the installation. It’s also important to consider your budget and prioritize which components will have the most significant impact on your Oculus Rift performance.
By upgrading your PC hardware components strategically, you can optimize your system’s capabilities and ensure that your Oculus Rift experience is smooth, immersive, and visually stunning. Upgrade wisely and enjoy the full potential of virtual reality!
Alternative Connection Methods for Oculus Rift
While the standard connection method for the Oculus Rift involves using cables, there are alternative connection methods that can offer increased flexibility and mobility. These alternative methods allow you to use your Oculus Rift in different scenarios and settings. Here are a few alternative connection methods to consider:
- Oculus Quest with Oculus Link: The Oculus Quest headset can be used with the Oculus Link feature, which allows you to connect the headset to a PC using a compatible USB-C cable. This enables you to access and play PC VR games and experiences on your Oculus Quest device, providing a versatile VR setup.
- Wireless PC Streaming: Instead of using a physical cable, you can utilize wireless PC streaming to connect your Oculus Rift headset to your PC. This method requires a compatible wireless adapter, such as the Virtual Desktop app or other third-party solutions. With wireless streaming, you can eliminate the tethered cable and move around more freely within your play area.
- Oculus Rift with External Sensors: Although the newer Oculus Rift models, such as the Rift S, use inside-out tracking, the original Oculus Rift model relies on external sensors for tracking. If you prefer external sensors for a specific reason, you can still purchase the original Oculus Rift and set it up with the external sensors, allowing for more precise tracking and customization options.
- VR Backpack PCs: Another alternative connection method is using a VR backpack PC. These specialized backpacks have the necessary hardware and connections integrated, allowing you to wear the PC on your back while using the Oculus Rift. VR backpack PCs provide a wire-free experience, offering enhanced mobility for users who want to explore large-scale virtual environments without being limited by cables.
- Wireless Adapters: There are third-party wireless adapters available that can enable wireless connectivity for the Oculus Rift. These adapters connect to the PC and transmit the VR content wirelessly to the headset. While this method introduces additional latency compared to wired connection methods, it provides increased freedom of movement during VR experiences.
Prior to exploring alternative connection methods, carefully research the compatibility, setup process, and any potential limitations or requirements associated with each option. Some alternative methods may require additional hardware, software, or configurations to work properly.
By considering these alternative connection methods, you have the opportunity to tailor your Oculus Rift setup to your specific needs and preferences. Whether you prioritize wireless freedom, external sensors, or compatibility with the Oculus Quest, there are options available to enhance your Oculus Rift experience in different ways.
Oculus Rift S: How Does it Connect to PC?
The Oculus Rift S is a successor to the original Oculus Rift and offers improved features and convenience. When it comes to connecting the Oculus Rift S to your PC, the process is relatively straightforward. Here’s a step-by-step guide to help you set up your Oculus Rift S:
- Prepare the Oculus Software: Ensure that you have downloaded and installed the latest version of the Oculus software on your PC. The software is available for download from the official Oculus website.
- Connect the DisplayPort Cable: Using the cable that comes with the Oculus Rift S, connect one end of the DisplayPort cable to the DisplayPort output on your PC’s graphics card.
- Connect the USB Cable: Connect the other end of the cable to a USB 3.0 port on your PC. It is recommended to use a USB 3.0 port for optimal performance.
- Put on the Headset: Gently put on the Oculus Rift S headset, adjusting the straps for a comfortable and secure fit. Make sure the lenses are aligned properly with your eyes to ensure a clear and immersive VR experience.
- Follow the On-Screen Setup: Once the headset is properly on, follow the on-screen instructions displayed in the Oculus software to complete the initial setup process. This may include configuring guardian boundaries and adjusting the visual settings.
- Install Firmware Updates: It is recommended to check for any available firmware updates for your Oculus Rift S headset and controllers. These updates can provide performance improvements and bug fixes. To check for updates, open the Oculus app on your PC and go to the “Devices” section.
- Update Graphics Card Drivers: To ensure compatibility and optimal performance, it is crucial to keep your graphics card drivers up to date. Visit the website of your graphics card manufacturer (e.g., NVIDIA or AMD) to download and install the latest drivers for your specific graphics card model.
- Enjoy Your VR Experience: With the setup complete, you are ready to enjoy the immersive virtual reality experiences offered by the Oculus Rift S. Launch VR applications and games from the Oculus app on your PC, and let the Oculus Rift S transport you to new worlds and adventures.
By following these steps, you can easily and quickly connect your Oculus Rift S to your PC and start exploring the captivating world of virtual reality. Immerse yourself in stunning visuals and interactive experiences that the Oculus Rift S has to offer, and discover the boundless possibilities of VR.