
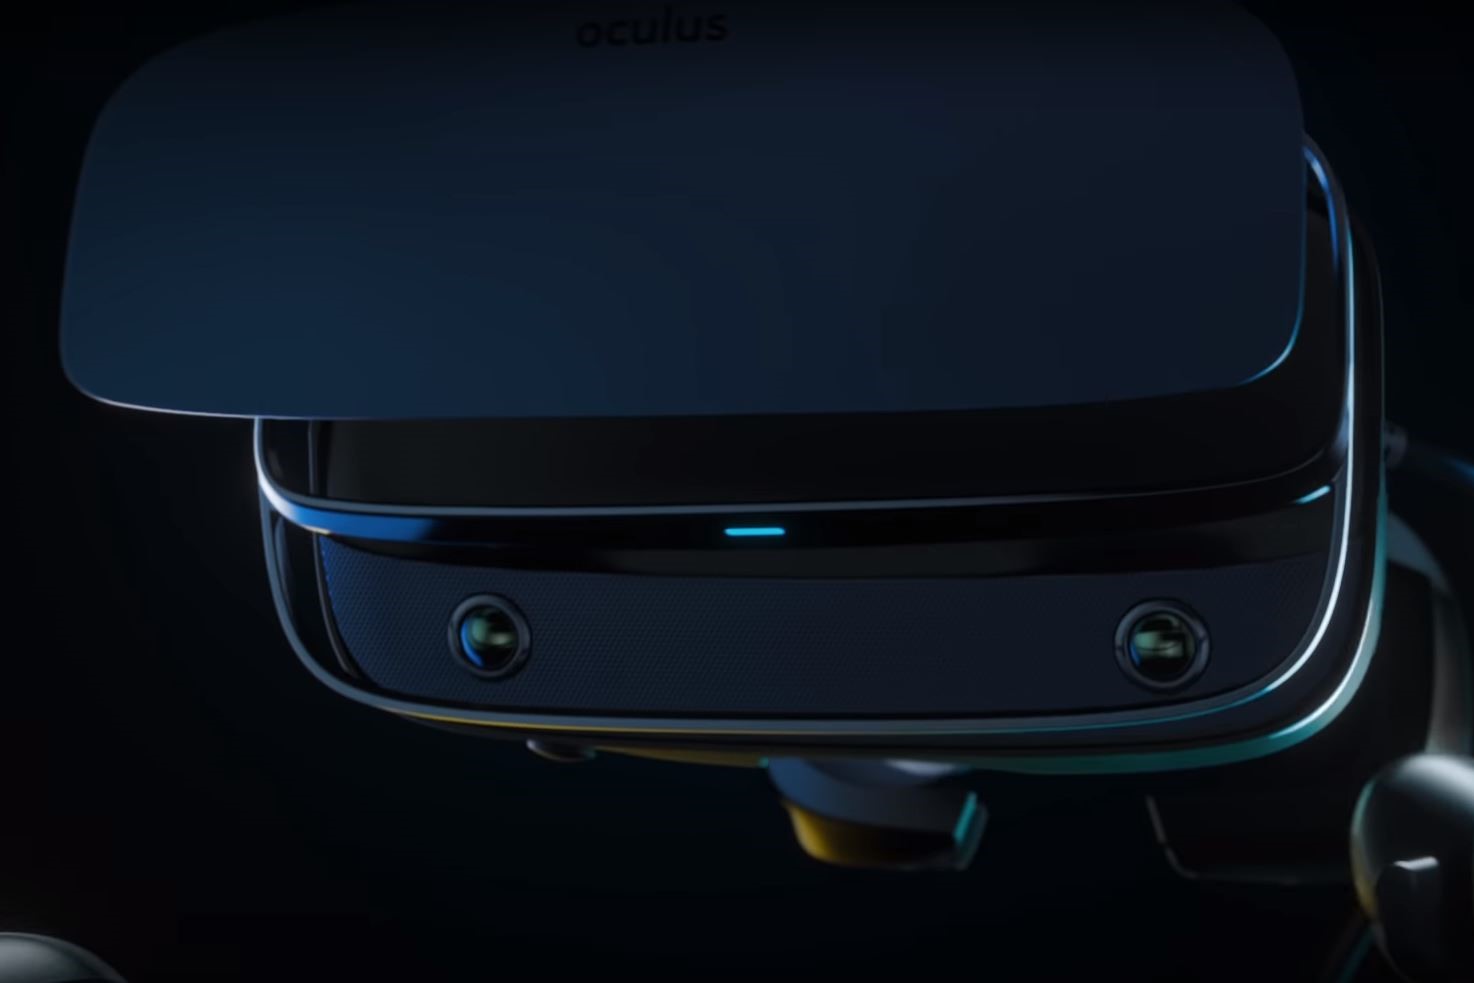
Common Causes of a Black Oculus Rift S Screen
The Oculus Rift S is a popular virtual reality headset that provides users with an immersive gaming and entertainment experience. However, it can be frustrating when the screen of your Oculus Rift S turns black, disrupting your VR experience. There are several common causes for a black screen on the Oculus Rift S, and understanding these causes can help you troubleshoot the issue effectively.
1. Connection Issues:
Poor or faulty connections between the headset and your PC can result in a black screen. Ensure that the HDMI and USB cables are securely plugged into your computer and headset, respectively. Additionally, check for any bent or damaged pins in the connectors.
2. Software and Driver Problems:
Outdated or incompatible graphics drivers and Oculus software can cause the screen to go black. Regularly updating both the graphics drivers and Oculus software can help resolve this issue. Additionally, check for any pending software updates or patches for your operating system.
3. Display and GPU Configuration:
Incorrect display and GPU settings can lead to a black screen on your Oculus Rift S. Make sure that the display settings in the Oculus app and your computer’s graphics control panel are properly configured. By default, your primary display should be set to the Oculus Rift S.
4. Issues with USB Ports:
A weak or malfunctioning USB port can cause the screen to go black. Try plugging the USB cable into different ports on your computer to see if the issue persists. If possible, use a USB 3.0 port for a stable connection.
5. Faulty Hardware or Cable:
Defective hardware components or a damaged cable can also result in a black screen on your Oculus Rift S. Inspect the headset and cable for any visible signs of damage. If you identify any issues, consider contacting Oculus support for further assistance or replacing the faulty components.
6. Power Management Settings:
Power management settings on your computer can interfere with the functioning of the Oculus Rift S, leading to a black screen. Disable any power-saving modes or settings that affect USB ports and the display to prevent interruptions during VR sessions.
By identifying and understanding the possible causes of a black screen on your Oculus Rift S, you can take the necessary steps to troubleshoot and resolve the issue. In the following section, we will discuss some effective troubleshooting methods to help you address the black screen problem on your Oculus Rift S.
Connection Issues
Poor or faulty connections between the Oculus Rift S headset and your PC can often be the culprit behind a black screen issue. If there is a problem with the connections, the headset may fail to receive or transmit the necessary signals, resulting in a blank screen. Here are some steps you can take to address connection issues:
First, check the HDMI and USB cables to ensure they are securely plugged into their respective ports on your computer and the Oculus Rift S headset. Sometimes, the cables can become loose over time, or they may not be properly inserted. Gently push them in, making sure they are snugly fitted.
Next, inspect the connectors for any bent pins or damage. If you notice any abnormalities, it’s essential to address them as they can obstruct the proper transmission of data. In such cases, you may need to replace the cables or contact Oculus support for assistance with repairing or replacing the headset.
It’s also worth checking if you are using the correct ports on your computer. The Oculus Rift S requires a USB 3.0 port and an HDMI 1.3 or higher port. Plugging the cables into USB 2.0 or older HDMI ports can result in compatibility issues and a black screen. If necessary, try connecting the headset to different ports on your computer.
If you are using any extension cables or adapters, ensure they are of high quality and compatible with the Oculus Rift S. Faulty or incompatible accessories can interfere with the signal transmission and cause display issues. Consider removing any unnecessary extensions or adapters to eliminate potential problems.
Lastly, consider using a powered USB hub if you are experiencing persistent connection issues. Some USB ports on your computer may not provide sufficient power to drive the Oculus Rift S properly. A powered USB hub can help ensure a stable power supply, reducing the chances of a black screen.
By checking and addressing any connection issues, you can significantly improve the performance and stability of your Oculus Rift S headset, minimizing the occurrence of a black screen. In the next section, we will explore software and driver problems that can also contribute to this frustrating issue.
Software and Driver Problems
Software and driver issues can be a common cause of a black screen on the Oculus Rift S. Outdated or incompatible Oculus software and graphics drivers can lead to conflicts and prevent the headset from functioning properly. To address these issues, follow the steps below:
Firstly, make sure that you have the latest version of the Oculus software installed on your computer. Oculus regularly releases updates to improve performance and address known issues. Open the Oculus app and navigate to the Settings section to check for any available updates. If an update is available, download and install it to ensure you have the most up-to-date software version.
In addition to the Oculus software, ensure that your graphics drivers are also up to date. Outdated or incompatible graphics drivers can cause compatibility issues and result in a black screen. Visit the website of your graphics card manufacturer, such as NVIDIA or AMD, and download the latest drivers for your specific graphics card model. Install the drivers following the instructions provided by the manufacturer.
If you recently updated your Oculus software or graphics drivers and started experiencing the black screen issue, consider rolling back to a previous version. Sometimes, new updates can introduce bugs or incompatibilities. In the Oculus app, go to Settings > Beta and toggle the Public Test Channel option off. This will revert the software to the stable version. Similarly, you can roll back your graphics drivers by uninstalling the current version and installing an older one.
Before updating or rolling back any software or drivers, it’s advisable to perform a clean installation. This involves uninstalling the existing software or drivers and removing any leftover files or registries. Use tools like Display Driver Uninstaller (DDU) to completely remove graphics drivers, and follow the Oculus support guidelines for uninstalling the Oculus software.
By keeping your Oculus software and graphics drivers up to date, as well as handling updates and installations carefully, you can minimize the chance of encountering a black screen on your Oculus Rift S due to software and driver problems. In the next section, we will explore how display and GPU configuration can impact the headset’s functionality.
Display and GPU Configuration
Incorrect display and GPU settings can cause a black screen issue on the Oculus Rift S. It’s important to ensure that the display settings in the Oculus app and your computer’s graphics control panel are properly configured. Follow the steps below to adjust these settings:
Firstly, open the Oculus app and go to Settings > Devices. Make sure that the Oculus Rift S is set as the primary display. This ensures that the VR content is correctly rendered on the headset instead of being displayed on a different monitor.
Next, check the graphics control panel settings of your computer’s GPU. Right-click on an empty area of your desktop and select the graphics control panel option specific to your GPU manufacturer (such as NVIDIA Control Panel or AMD Radeon Settings). In the control panel, navigate to the display settings and ensure that the Oculus Rift S is selected as the primary display.
It’s also important to verify that the resolution and refresh rate settings are compatible with the Oculus Rift S. The recommended resolution for the Oculus Rift S is 2560×1440, and the preferred refresh rate is 80Hz. Make sure that your computer is set to these values in both the Oculus app and your GPU control panel.
If you have multiple monitors connected to your computer, it’s recommended to disconnect any additional monitors temporarily. Having multiple displays can sometimes lead to conflicts and result in a black screen on the Oculus Rift S. Try disconnecting the additional monitors and see if the issue persists.
Disabling any overlays or gaming-related software running in the background can also help resolve display and GPU configuration issues. Overlays, such as those from Discord or Steam, can sometimes interfere with the Oculus software and cause conflicts. Close or disable these overlays before using the Oculus Rift S.
By ensuring that the display and GPU settings are properly configured, you can avoid black screen issues on the Oculus Rift S and improve the overall performance of the headset. In the next section, we will explore issues related to USB ports and how they can affect the functionality of the headset.
Issues with USB Ports
USB port issues can often be responsible for a black screen problem on the Oculus Rift S. Weak or malfunctioning USB ports can cause interruptions in the data transfer between the headset and the computer, resulting in a loss of display. Follow the steps below to address potential USB port issues:
Firstly, try connecting the Oculus Rift S to different USB ports on your computer. Sometimes, certain ports may not provide enough power or have compatibility issues. Switching to a different USB port, preferably a USB 3.0 port, can help establish a stable connection and resolve the black screen issue.
If you are using any USB hubs or extensions, consider removing them and connecting the Oculus Rift S directly to a USB port on your computer. Certain USB hubs or extensions may not provide sufficient power or may introduce compatibility issues, leading to a black screen. Connecting the headset directly to a USB port eliminates any potential problems caused by intermediate devices.
It’s also important to disable any power-saving settings that may affect the USB ports on your computer. Power management settings can sometimes cause the USB ports to enter a low-power state, resulting in intermittent connectivity or a black screen on the Oculus Rift S. To disable power-saving settings, go to your computer’s Power Options and ensure that USB selective suspend is turned off.
Updating the USB drivers on your computer can also help resolve issues with USB ports. Outdated or incompatible USB drivers may not properly support the Oculus Rift S, leading to connectivity problems and a black screen. Visit the website of your motherboard manufacturer or the manufacturer of your USB controller to download and install the latest USB drivers.
If you have exhausted all the options and are still experiencing USB port issues, it’s advisable that you seek assistance from Oculus support or consult a professional technician. They can help diagnose and resolve any hardware-related problems that may be causing the black screen issue.
By addressing USB port issues, you can ensure a stable connection between the Oculus Rift S and your computer, minimizing the occurrence of black screen problems. In the next section, we will discuss the possibility of faulty hardware or cable causing the display issue.
Faulty Hardware or Cable
Sometimes, a black screen issue on the Oculus Rift S can be attributed to faulty hardware components or a damaged cable. In such cases, troubleshooting the software or settings may not be sufficient, and attention must be given to the physical components. Here are some steps to address potential issues with hardware or cables:
Firstly, carefully inspect the Oculus Rift S headset for any visible signs of damage. Look for any cracks, bent connectors, or loose parts. If you notice any physical damage, it’s recommended to contact Oculus support for further assistance. They can provide guidance on repair options or advise on getting a replacement headset if necessary.
Next, inspect the cable that connects the Oculus Rift S to your computer. Gently examine the entire length of the cable, checking for any frayed wires, kinks, or cuts. Even minor damage to the cable can result in connectivity issues and a black screen. If you find any damage, it’s crucial to replace the cable. Oculus provides replacement cables for purchase on their official website.
When handling the cable, make sure to avoid excessive bending or twisting, as this can weaken the internal wires and lead to future issues. It’s also recommended to route the cable away from sharp edges, heavy objects, or areas with high foot traffic to prevent accidental damage.
In some cases, the issue may not be with the headset itself, but with the connection between the cable and the headset. Ensure that the cable is securely plugged into the headset and that the connector is not loose or damaged. If the connection is not secure, the headset may not receive the necessary signals, resulting in a black screen. Verify that it is properly connected and seated firmly.
If you have access to another compatible computer or Oculus Rift S setup, try connecting your headset to that system. This can help determine if the issue is specific to your computer or if it’s related to the headset itself. If the headset works fine on another system, it’s likely that the problem is related to your computer and may require further troubleshooting.
If all else fails, and you have ruled out any software or configuration issues, it’s advisable to contact Oculus support. They have trained technicians who can provide personalized assistance and guidance based on your specific situation.
By addressing potential hardware or cable issues, you can ensure the optimal performance of your Oculus Rift S and minimize the occurrence of a black screen. In the next section, we will discuss power management settings and how they can impact the functionality of the headset.
Power Management Settings
Power management settings on your computer can often interfere with the normal functioning of the Oculus Rift S, leading to a black screen issue. These settings are designed to conserve power, but they can sometimes interrupt the flow of data and cause interruptions in the display. Here are some steps to adjust power management settings:
Firstly, open the Power Options settings on your computer. You can access this by searching for “Power Options” in the Windows search bar and selecting the corresponding result. In the Power Options window, make sure that the power plan is set to “High performance” or a similar setting that prioritizes performance over power saving.
In the power plan settings, locate the “USB selective suspend” option and make sure it is disabled. USB selective suspend is a feature that allows the operating system to put certain USB devices in a low-power state to conserve energy. However, this can sometimes interfere with the Oculus Rift S, causing a black screen. Disabling USB selective suspend ensures that the USB ports remain active and provide uninterrupted power to the headset.
Additionally, check any other power management settings that may affect the display or USB ports. Look for settings that automatically turn off the display or put the system in sleep mode after a certain period of inactivity. Disable these settings or adjust them to ensure that they do not interfere with your VR sessions.
It’s also worth noting that certain antivirus software or firewall settings can sometimes interfere with the functioning of the Oculus Rift S. These security measures may block necessary connections or interrupt data transfer, resulting in a black screen. Consider adding the Oculus app and related processes to the exception list or temporarily disabling the antivirus software while using the Oculus Rift S.
By adjusting the power management settings on your computer and ensuring that they are optimized for performance, you can help prevent interruptions or black screen issues on the Oculus Rift S. It’s important to note that some changes to power management settings may affect power consumption, so it’s recommended to revert back to default settings after troubleshooting the black screen issue.
If you have tried adjusting the power management settings and are still experiencing a black screen on the Oculus Rift S, it’s advisable to seek further assistance from Oculus support. They can provide additional guidance and help identify any other potential issues that may be causing the problem.
With the power management settings properly configured, you can enjoy uninterrupted VR experiences on your Oculus Rift S. In the following section, we will explore effective troubleshooting methods to help you address the black screen problem.
How to Troubleshoot a Black Oculus Rift S Screen
Experiencing a black screen on your Oculus Rift S can be frustrating, but there are several troubleshooting steps you can take to resolve the issue. Follow these methods to troubleshoot and fix a black screen problem:
1. Check the Connection:
Ensure that the HDMI and USB cables are securely connected to your computer and the Oculus Rift S headset. Inspect the connectors for any damage and try plugging the cables into different ports if necessary. Additionally, check for any bent pins that may be obstructing the connection.
2. Update Software and Drivers:
Regularly update the Oculus software, graphics drivers, and operating system to the latest versions. Outdated or incompatible software and drivers may cause conflicts and result in a black screen. Check for updates in the Oculus app, visit the websites of your GPU manufacturer to download the latest drivers, and install any available updates for your operating system.
3. Adjust Display and GPU Settings:
Make sure that the Oculus Rift S is set as the primary display in the Oculus app and your computer’s graphics control panel. Verify that the resolution and refresh rate settings are compatible with the headset. Disable any overlays or gaming-related software that may be causing conflicts.
4. Check USB Ports:
Connect the Oculus Rift S to different USB ports on your computer to rule out any issues with specific ports. Use a USB 3.0 port for optimal performance and stability. Disable USB power-saving settings and make sure the USB drivers on your computer are up to date.
5. Inspect Hardware and Cable:
Carefully examine the Oculus Rift S headset for any visible damage or loose parts. Inspect the cable for frayed wires or cuts and replace it if necessary. Ensure that the cable is securely connected to the headset and that the connector is not loose or damaged.
6. Adjust Power Management Settings:
Disable power-saving settings that may affect USB ports or the display. Set the power plan to “High performance” or a similar option that prioritizes performance over energy saving. Add the Oculus app and related processes to the exception list of your antivirus software or temporarily disable it while using the Oculus Rift S.
By following these troubleshooting methods, you can address the black screen issue on your Oculus Rift S and enjoy a seamless VR experience. If the problem persists after attempting these steps, it’s recommended to contact Oculus support for further assistance. They can provide additional guidance and help diagnose any other potential issues.
Check the Connection
When encountering a black screen issue on your Oculus Rift S, one of the first steps in troubleshooting is to check the connection between the headset and your computer. A poor or faulty connection can disrupt the flow of data, resulting in a blank screen. Here are some steps to ensure the connection is proper:
First, examine the HDMI and USB cables to ensure they are securely plugged into their respective ports. The HDMI cable connects the headset to your computer’s graphics card, while the USB cable provides both power and data transfer. Ensure that both cables are seated firmly and properly inserted into their corresponding ports.
Next, inspect the connectors on both the headset and the cables for any signs of damage. Look for bent pins, frayed wires, or other visible abnormalities. If you notice any issues, carefully straighten them or consider seeking a replacement cable or headset from Oculus support.
If you are using any extension cables or adapters, ensure they are of high quality and specifically designed for the Oculus Rift S. Low-quality or incompatible extensions can introduce additional connection issues. Consider removing any unnecessary extensions or adapters and connect the headset directly to your computer.
Sometimes, the problem may not lie with the headset itself, but with the connection at the computer end. Check the ports on your computer to ensure they are clean and free from debris. Sometimes, dust or dirt can accumulate, affecting the connection quality. Use compressed air or a soft brush to clean the ports if necessary.
It’s also worth trying different USB and HDMI ports on your computer. Some ports may be more reliable than others, and using a different port can help determine if the problem is specific to a particular port or if it’s related to the headset. Additionally, ensure that you are using USB 3.0 ports for optimal performance.
If you have access to another computer or Oculus Rift S setup, consider testing the headset on that system. This can help determine if the issue lies with the headset or with your computer. If the headset works correctly on a different system, it suggests a problem with your computer’s configuration that requires further troubleshooting.
By checking the connection and ensuring that the cables are properly plugged in and the ports are clean, you can eliminate a common cause of the black screen issue on the Oculus Rift S. If the problem persists despite checking the connection, proceed to the next troubleshooting steps to further diagnose and resolve the issue.
Update Software and Drivers
When facing a black screen issue on your Oculus Rift S, outdated or incompatible software and drivers can be a potential cause. Ensuring that the Oculus software, graphics drivers, and operating system are up to date is important for optimal performance. Follow these steps to update the software and drivers:
Start by opening the Oculus app on your computer. Navigate to the Settings section and check for any available updates. Oculus regularly releases updates to address bugs, improve performance, and introduce new features. If an update is available, follow the prompts to download and install it. It is recommended to keep the Oculus software up to date to avoid compatibility issues.
In addition to the Oculus software, it’s essential to update the graphics drivers for your computer’s graphics card. Your graphics card manufacturer, such as NVIDIA or AMD, regularly releases driver updates that optimize performance for VR applications. Visit their respective websites and locate the driver download section. Enter your graphics card model and download the latest driver version. Install the driver according to the manufacturer’s instructions. Updating the graphics drivers can help resolve compatibility issues and improve the stability of your Oculus Rift S.
It’s also important to keep your operating system up to date. Windows updates often include important bug fixes and security patches. Check for any available updates by going to the Windows Update settings on your computer. Download and install any pending updates to ensure that your operating system is compatible with the Oculus Rift S and its software.
If you recently updated any software components, such as the Oculus software or graphics drivers, and started experiencing the black screen issue, it’s worth considering rolling back to a previous version. Sometimes, new updates can introduce unforeseen bugs or incompatibilities. In the Oculus app, navigate to Settings > Beta and toggle off the Public Test Channel option. This will revert your software to the stable version. Similarly, you can roll back graphics drivers by uninstalling the current version and installing an older, more stable version.
During the update process, it’s important to perform a clean installation of the software and drivers. This involves completely removing the existing software and drivers before installing the updated versions. Use tools like Display Driver Uninstaller (DDU) to completely remove graphics drivers, and follow the Oculus Support guidelines for uninstalling the Oculus software. A clean installation can help eliminate any residual files or conflicts that may be causing the black screen issue.
By ensuring that the Oculus software, graphics drivers, and operating system are up to date, you can resolve compatibility issues and improve the overall performance of your Oculus Rift S. If updating the software and drivers does not resolve the black screen issue, continue to the next troubleshooting steps to further diagnose the problem.
Adjust Display and GPU Settings
Improper display and GPU settings can contribute to a black screen issue on your Oculus Rift S. Ensuring that the display settings in the Oculus app and your computer’s graphics control panel are properly configured is vital for a seamless VR experience. Follow these steps to adjust the display and GPU settings:
Start by opening the Oculus app on your computer. Go to the Settings section and navigate to the Devices tab. Verify that the Oculus Rift S is set as the primary display. This ensures that the VR content is correctly rendered on the headset rather than being displayed on another monitor.
Next, access the graphics control panel of your computer’s GPU. Right-click on an empty area on your desktop and select the graphics control panel option specific to your GPU manufacturer, such as NVIDIA Control Panel or AMD Radeon Settings. Inside the control panel, navigate to the display settings section and make sure that the Oculus Rift S is selected as the primary display.
It’s important to verify that the resolution and refresh rate settings are compatible with the Oculus Rift S. The recommended resolution for the Oculus Rift S is 2560×1440, and the preferred refresh rate is 80Hz. Ensure that these settings are correctly configured in both the Oculus app and your GPU control panel.
If you have multiple monitors connected to your computer, disconnect the additional monitors temporarily and check if the black screen issue persists. Multiple displays can sometimes cause conflicts and result in a black screen on the Oculus Rift S. Disconnecting the extra monitors allows you to identify whether a specific monitor is causing the problem.
Additionally, disabling any overlays or gaming-related software running in the background can help resolve display and GPU configuration issues. Overlays from applications like Discord or Steam can occasionally interfere with the Oculus software and cause conflicts. Close or disable these overlays before using the Oculus Rift S to ensure a smooth and uninterrupted VR experience.
Keep in mind that certain antivirus software or firewall settings can also impact the functioning of the Oculus Rift S. Sometimes, security measures can block necessary connections or interrupt data transfer, leading to a black screen issue. To address this, consider adding the Oculus app and related processes to the exception list of your antivirus software or temporarily disabling it while using the Oculus Rift S.
By adjusting the display and GPU settings, as well as disabling unnecessary overlays and gaming-related software, you can minimize the occurrence of a black screen on your Oculus Rift S. If the issue persists despite adjusting these settings, proceed to the next troubleshooting steps to further diagnose and address the problem.
Check USB Ports
When troubleshooting a black screen issue on your Oculus Rift S, it’s essential to inspect and ensure the proper functioning of the USB ports on your computer. USB port-related issues can disrupt the connection between the headset and the computer, resulting in display problems. Follow these steps to check and address any potential USB port issues:
First, try connecting the Oculus Rift S to different USB ports on your computer. Sometimes, certain ports may not provide enough power or have compatibility issues. By switching to a different USB port, preferably a USB 3.0 port, you can establish a more stable connection and potentially resolve the black screen issue.
If you are using any USB hubs or extensions, consider removing them and connecting the Oculus Rift S directly to a USB port on your computer. Some USB hubs or extensions may not provide sufficient power or can introduce compatibility issues, leading to a black screen. Connecting the headset directly to a USB port eliminates any potential problems caused by intermediate devices.
It’s also important to disable any power-saving settings that may affect the USB ports on your computer. Power management settings can sometimes cause the USB ports to enter a low-power state, resulting in intermittent connectivity or a black screen on the Oculus Rift S. To disable power-saving settings, go to your computer’s Power Options and ensure that the USB selective suspend setting is turned off.
Updating the USB drivers on your computer can also help address issues with USB ports. Outdated or incompatible USB drivers may not properly support the Oculus Rift S, leading to connectivity problems and a black screen. Visit the website of your motherboard manufacturer or the manufacturer of your USB controller to download and install the latest USB drivers.
If you have exhausted all the options and are still experiencing USB port-related issues, it’s advisable to seek assistance from Oculus support or consult a professional technician. They can help diagnose and resolve any hardware-related problems that may be causing the black screen issue.
By checking the USB ports, ensuring a stable connection, disabling power-saving settings, and updating USB drivers, you can help establish a reliable connection between the Oculus Rift S and your computer. This, in turn, minimizes the occurrence of a black screen and allows for a smoother VR experience. If the issue persists, proceed to the next troubleshooting steps to further diagnose and resolve the problem.
Inspect Hardware and Cable
When troubleshooting a black screen issue on your Oculus Rift S, it’s important to inspect the hardware components and cables to ensure they are functioning properly. Hardware defects or a damaged cable can cause interruptions in the display, leading to a black screen. Follow these steps to inspect the hardware and cable:
Firstly, carefully examine the Oculus Rift S headset for any visible signs of damage. Inspect the exterior for cracks, dents, or any other physical damage. Pay special attention to the lenses, as scratches or cracks can affect the quality of the display. If you notice any significant damage, it’s advisable to contact Oculus support for further assistance.
Next, inspect the cable that connects the Oculus Rift S to your computer. Gently run your fingers along the cable’s length to feel for any bumps, kinks, or breaks. Pay close attention to areas where the cable might bend frequently, such as near the connector ends. If you detect any frayed wires or cuts, it’s crucial to replace the cable. Oculus offers replacement cables for purchase on their official website.
Ensure that the cable is securely connected to the Oculus Rift S headset. Sometimes, a loose connection can cause display issues and result in a black screen. Check that the cable is properly inserted into the headset’s port and that the connector isn’t loose or damaged.
When handling the Oculus Rift S and its cable, be mindful of how you store and transport them. Avoid excessive bending, twisting, or pulling on the cable, as this can lead to internal wire damage. It’s also important to protect the headset and cable from accidental damage by storing them in a safe and padded case when not in use.
For additional peace of mind, consider using cable management solutions or accessories that help keep the cable organized and prevent it from tangling or getting damaged. These solutions can help prolong the lifespan of the cable and ensure a more reliable connection.
If you suspect that there may be a hardware issue with the Oculus Rift S, and the headset or cable appears to be undamaged, it’s advisable to contact Oculus support for further assistance. They can provide specialized guidance and help diagnose any potential hardware-related problems that may be causing the black screen issue.
By inspecting the hardware and cable, you can ensure that the Oculus Rift S is in good working condition and minimize the occurrence of a black screen. If the issue persists, proceed to the next troubleshooting steps to further diagnose and resolve the problem.
Adjust Power Management Settings
Power management settings on your computer can sometimes interfere with the proper functioning of the Oculus Rift S, leading to a black screen issue. These settings are designed to conserve power, but they can inadvertently interrupt the flow of data and cause interruptions in the display. To address this, follow these steps to adjust your power management settings:
Begin by opening the Power Options settings on your computer. You can access this by searching for “Power Options” in the Windows search bar and selecting the corresponding result. In the Power Options window, make sure that the power plan is set to “High performance” or a similar setting that prioritizes performance over power saving.
Within the power plan settings, locate the “USB selective suspend” option and make sure it is disabled. USB selective suspend is a feature that allows the operating system to put certain USB devices in a low-power state to conserve energy. However, this can sometimes interfere with the functioning of the Oculus Rift S. Disabling USB selective suspend ensures that the USB ports remain active and provide uninterrupted power to the headset.
Additionally, check for any other power management settings that may affect the display or USB ports. Look for options that automatically turn off the display or put the system in sleep mode after a certain period of inactivity. In these cases, you may want to extend these idle times or disable these settings altogether to prevent interruptions in your VR sessions.
It’s worth noting that certain antivirus software or firewall settings can also impact the functioning of the Oculus Rift S. These security measures may block necessary connections or interrupt data transfer, resulting in a black screen. Consider adding the Oculus app and related processes to the exception list of your antivirus software or temporarily disabling it while using the Oculus Rift S.
By adjusting the power management settings on your computer, you can potentially resolve issues related to power interruptions and black screens on the Oculus Rift S. It’s important to note that some changes to power management settings may affect power consumption, so it’s recommended to revert back to default or balanced settings after troubleshooting the black screen issue.
If adjusting the power management settings does not resolve the problem, proceed with the additional troubleshooting steps to further diagnose and address the black screen issue on your Oculus Rift S.