
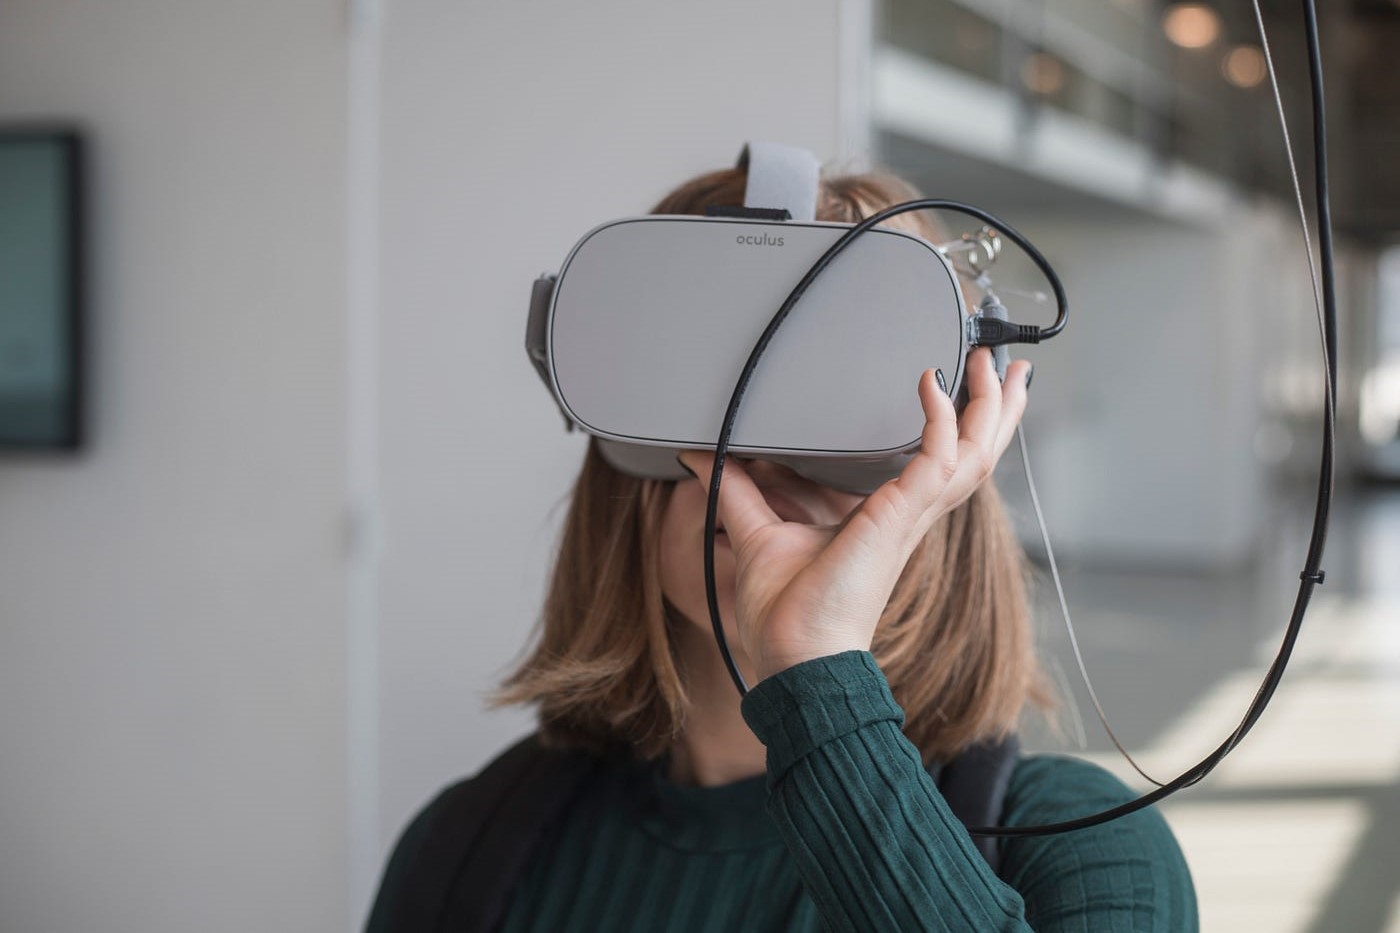
Reasons for Recalibrating the Oculus Rift Headset
As an Oculus Rift user, you may encounter situations where your headset’s tracking may not be as accurate or stable as when you first set it up. This can lead to a less immersive virtual reality (VR) experience, with objects or your own movements appearing slightly off. Recalibrating your Oculus Rift headset can help address these issues and restore optimal tracking performance. Here are some common reasons why you might need to recalibrate your Oculus Rift headset:
- Moving the Sensors: If you have recently relocated your Oculus sensors or changed their positions, the headset may need to be recalibrated to adjust for the new setup.
- Trackable Area Changes: If you have made any modifications to your play area, such as adding or removing furniture, this may affect the tracking capabilities and necessitate recalibration.
- Software Updates: Oculus regularly releases software updates that introduce new features and bug fixes. In some cases, recalibration is recommended to ensure compatibility and improve performance with the latest updates.
- Environmental Interference: External factors like bright lights, mirrors, or other reflective surfaces in your gaming area can interfere with the tracking system. Recalibration can help mitigate such issues and improve accuracy.
- Headset Performance Issues: If you notice consistent tracking issues or erratic behavior from the headset, recalibrating may resolve these problems and restore smooth gameplay.
By regularly checking and recalibrating your Oculus Rift headset, you can maintain optimal tracking performance and ensure an immersive VR experience. It is worth noting that recalibration should be considered as a troubleshooting measure rather than a routine task. If you are experiencing persistent issues, it is recommended to seek further assistance from the official Oculus support team.
Recognizing Tracking Issues
Tracking issues can significantly impact your virtual reality experience with the Oculus Rift headset. Being able to recognize these issues is crucial in identifying when recalibration may be necessary. Here are some common signs of tracking issues to look out for:
- Drifting or Shifting: If you notice that the virtual world seems to move or shift even when you remain still, it indicates a tracking problem. This can make it difficult to interact with objects or navigate VR environments.
- Jittering or Stuttering: If the headset movements appear jittery or stuttering, it is a clear indication of tracking issues. This can negatively impact your immersion and make it challenging to focus on the virtual world.
- Inaccurate or Delayed Movements: When the movements of your head or hands are not accurately mirrored in the virtual environment or have noticeable delays, it indicates tracking inconsistencies.
- Loss of Tracking: If the headset loses tracking entirely, causing the screen to go black or freeze, it signifies a more severe tracking issue that may require recalibration.
- Intermittent Tracking Problems: Tracking issues might not be consistent and could occur intermittently. If you notice sporadic problems with tracking, it is still worth considering recalibration as a troubleshooting step.
It is important to be aware that some level of tracking imperfections is inevitable with any virtual reality system. However, if you experience persistent or frequent tracking issues that significantly affect your gameplay, it is recommended to try recalibrating your Oculus Rift headset.
Keep in mind that other factors, such as low battery levels on controllers, obstructions between the sensors and the headset, or outdated firmware, can also contribute to tracking problems. Therefore, it is advisable to troubleshoot these potential issues before proceeding with recalibration.
Preparing for Recalibration
Before you embark on the recalibration process for your Oculus Rift headset, it’s essential to properly prepare to ensure a smooth and successful experience. Here are some steps to follow in preparation for recalibration:
- Clear the Play Area: Begin by removing any obstacles or clutter from your play area. Ensure that there are no objects, furniture, or other items that could interfere with the sensors’ line of sight to the headset.
- Check the Sensor Setup: Verify that your Oculus sensors are correctly positioned and securely mounted. Ensure that they are angled correctly to capture your movements effectively. If necessary, consult the Oculus setup guide for recommended sensor placement.
- Start with Fully Charged Controllers: If you are using Oculus Touch controllers, make sure they are fully charged or have fresh batteries. Low battery levels can affect the tracking accuracy and performance of the controllers.
- Close Unnecessary Applications: Before recalibrating, close any unnecessary background applications or processes running on your computer. This helps allocate more system resources to the Oculus software, enhancing its performance during the recalibration process.
- Ensure Stable Internet Connection: A stable internet connection is important during the recalibration process as it allows the Oculus software to check for any available firmware updates. Make sure you’re connected to a reliable network before proceeding.
By taking these simple preparatory steps, you can minimize potential disruptions or issues during the recalibration process. It’s important to approach the recalibration process with patience and follow the steps provided by the Oculus software to ensure accurate calibration of your headset and sensors.
Steps to Re-Calibrate the Oculus Rift Headset
Recalibrating your Oculus Rift headset can help resolve tracking issues and restore optimal performance. The recalibration process involves a series of steps to ensure accurate calibration of the headset and sensors. Follow these steps to re-calibrate your Oculus Rift headset:
- Clean the Oculus Sensors: Begin by checking the lenses of your Oculus sensors for any smudges or dust. Use a soft, lint-free cloth to gently clean the lenses. Ensuring clean sensors helps improve the accuracy of the tracking.
- Restart the Oculus Software: Close the Oculus app on your computer and restart it. This can help resolve any software-related issues that might be affecting the tracking performance.
- Re-Calibrate the Sensors: Open the Oculus app and navigate to the “Devices” tab. From there, select “Configure Rift” and then click on “Sensor Setup”. Follow the on-screen instructions to recalibrate your sensors by placing the headset in various positions within the play area.
- Check for Firmware Updates: After recalibrating the sensors, it is essential to check for any available firmware updates for your headset and controllers. Connect your headset to your computer and allow the Oculus software to search for updates. If updates are available, follow the prompts to install them.
- Test the Headset Tracking: Once the recalibration process and firmware updates are complete, it’s crucial to test the headset’s tracking. Put on the headset and move around in your play area, checking for any noticeable improvements in tracking accuracy and stability.
Remember, these steps are provided as a general guide, and the exact process may vary slightly depending on your specific Oculus Rift model and software version. Always follow the instructions provided by the Oculus software during the recalibration process to ensure accurate results.
If you continue to experience persistent tracking issues despite recalibration, it is recommended to reach out to the official Oculus support team for further assistance.
Step 1: Clean the Oculus Sensors
Keeping your Oculus sensors clean is essential for ensuring accurate tracking performance. Over time, dust, smudges, or fingerprints can accumulate on the lenses of the sensors, which may interfere with the tracking capabilities of the Oculus Rift headset. Therefore, it is important to regularly clean the sensors to maintain optimal tracking. Follow these steps to clean the Oculus sensors:
- Gather the Necessary Materials: Before you begin, gather a soft, lint-free cloth and a mild cleaning solution. Avoid using harsh chemicals or abrasive materials that could damage the sensors.
- Power Off the Oculus Sensors: Make sure the Oculus sensors are turned off before cleaning them. This can be done by disconnecting them from the power source or unplugging them from the USB ports on your computer.
- Inspect the Sensors: Carefully examine the lenses of the Oculus sensors for any smudges, dust, or fingerprints. These can cause tracking inaccuracies and affect the overall performance of the headset.
- Apply the Cleaning Solution: Apply a small amount of the mild cleaning solution to the soft cloth. Ensure the cloth is only slightly damp, as excessive moisture can damage the sensors. Avoid spraying the cleaning solution directly onto the sensors.
- Gently Wipe the Lenses: Using the damp cloth, gently wipe the lenses of the Oculus sensors in a circular motion. Be gentle to avoid scratching the lenses. If there are stubborn stains or smudges, you can apply a little more pressure, but always exercise caution.
- Allow the Sensors to Dry: After cleaning, allow the sensors to air dry for a few minutes. Ensure they are completely dry before reconnecting them and initiating the recalibration process.
Regularly cleaning the Oculus sensors is a simple yet effective way to maintain optimal tracking accuracy. By removing any dirt or debris from the lenses, you can help ensure a clear and uninterrupted view, minimizing the chances of tracking issues.
Remember, proper cleaning is crucial for the longevity and performance of your Oculus sensors. It is recommended to clean the sensors periodically or whenever you notice a decline in tracking accuracy.
Step 2: Restart the Oculus Software
Restarting the Oculus software is a simple yet impactful step to troubleshoot tracking issues with your Oculus Rift headset. Sometimes, software-related glitches or conflicts can affect the tracking performance. Restarting the Oculus software can help resolve these issues and restore optimal functionality. Follow these steps to restart the Oculus software:
- Minimize or Close Oculus Apps: If you have any Oculus apps or games open, minimize or close them before proceeding. This ensures a clean restart without any active processes running in the background.
- Exit the Oculus Software: Locate the Oculus app icon on your computer’s taskbar or system tray. Right-click on the icon and select “Close” or “Quit” to exit the Oculus software.
- Wait for a Moment: After closing the Oculus software, wait for a few seconds to allow all related processes to completely shut down.
- Relaunch the Oculus Software: Click or double-click on the Oculus app icon to relaunch the software. Wait for the Oculus app to fully load before proceeding to the next steps.
- Put on the Oculus headset: Put on your Oculus Rift headset and adjust it properly for comfort. Allow the headset to establish a connection with the software.
By restarting the Oculus software, you can often resolve minor software issues that could be affecting the tracking performance of your headset. This step helps refresh the software and establish a fresh connection between the headset and the sensors.
If you continue to experience tracking issues after restarting the Oculus software, proceed to the next step in the recalibration process for further troubleshooting.
Step 3: Re-Calibrate the Sensors
Re-calibrating the sensors is an essential step in resolving tracking problems and ensuring accurate performance with your Oculus Rift headset. The calibration process allows the headset and sensors to establish a baseline and determine the correct orientation and positioning within your play area. Follow these steps to re-calibrate the sensors:
- Open the Oculus App: Launch the Oculus app on your computer. Ensure that your headset is connected and detected by the software.
- Navigate to Sensor Setup: Click on the “Devices” tab at the bottom of the Oculus app window. Then, select “Configure Rift” from the drop-down menu. Next, click on “Sensor Setup” to begin the recalibration process.
- Follow On-Screen Instructions: Once in the Sensor Setup section, carefully read and follow the on-screen instructions provided by the Oculus app. These instructions will guide you through the process of placing the headset in various positions within your play area.
- Move the Headset: As instructed by the app, slowly move your head and hold various positions within the play area. This helps the sensors capture different angles and establish accurate tracking.
- Complete Sensor Calibration: Continue following the on-screen prompts to complete the sensor recalibration process. This typically involves moving the headset to specific locations and angles.
- Confirm Calibration: Once the recalibration process is complete, the Oculus app will confirm that the sensors have been successfully calibrated. Take a moment to ensure that the software recognizes the headset and sensors without any errors.
The re-calibration process may vary slightly depending on the Oculus Rift model and software version. It’s important to carefully follow the instructions provided by the Oculus app during the sensor calibration process to achieve the best results.
After re-calibrating the sensors, test the tracking performance of the headset to ensure that the tracking issues have been resolved. If you continue to experience problems, proceed to the next step in the recalibration process or reach out to Oculus support for further assistance.
Step 4: Check for Firmware Updates
Checking for firmware updates is an important step in the recalibration process for your Oculus Rift headset. Firmware updates often include bug fixes, performance enhancements, and compatibility improvements. Ensuring that your headset and controllers are running the latest firmware versions can help resolve tracking issues and optimize the overall performance of your Oculus Rift system. Follow these steps to check for firmware updates:
- Connect Your Headset: Ensure that your Oculus Rift headset is properly connected to your computer via the provided USB cable or wireless connection. Make sure the headset is powered on.
- Launch the Oculus App: Open the Oculus app on your computer.
- Access the Devices Section: Click on the “Devices” tab located at the bottom of the Oculus app window. This will bring up the device management section.
- Check for Firmware Updates: Within the device management section, look for the option to check for firmware updates for your headset and controllers. The Oculus app will automatically scan for any available updates.
- Download and Install Updates: If firmware updates are found, follow the on-screen prompts to download and install them. It is important not to interrupt the update process and allow it to complete to avoid potential issues.
- Restart Your System: After the updates have been installed, it is recommended to restart your computer to ensure that the changes take effect.
By regularly checking for firmware updates, you can ensure that your Oculus Rift system remains up to date and benefits from the latest improvements and optimizations. Firmware updates can address known issues and provide enhanced compatibility, which may help resolve tracking problems you may have been experiencing.
If you continue to experience tracking issues after updating the firmware, proceed to the next step in the recalibration process or seek further assistance from the official Oculus support team.
Step 5: Test the Headset Tracking
After performing the recalibration process and checking for firmware updates, it is crucial to test the headset tracking to ensure that the tracking issues have been successfully resolved. Testing the tracking will allow you to verify the accuracy and stability of the headset’s movements within the virtual environment. Follow these steps to test the headset tracking:
- Put on the Oculus Rift Headset: Ensure that the Oculus Rift headset is properly fitted and adjusted on your head for a comfortable VR experience.
- Access a VR Application: Launch a VR application or game that supports the Oculus Rift headset. Choose a visually engaging experience that allows you to move around and interact with the virtual environment.
- Move and Rotate Your Head: Begin by moving and rotating your head in different directions within your play area. Pay attention to how the virtual world responds to your movements. Look for smooth and accurate tracking without any noticeable delays or inaccuracies.
- Test Hand and Controller Movements: If you are using Oculus Touch controllers, perform various hand and controller movements within the virtual environment. Check for precise tracking of your hand positions and gestures.
- Move Around the Play Area: Walk or move around your play area, ensuring that the virtual representation of your movements aligns accurately with your real-world actions. Check if there are any instances of drifting, stuttering, or loss of tracking.
- Interact with Objects: Try interacting with objects or elements within the virtual environment. Confirm that your hand movements and gestures are accurately registered by the Oculus Rift system.
Make sure to spend enough time testing the headset tracking in different scenarios to thoroughly assess its performance. If you notice any irregularities or persistent tracking issues during the test, consider re-calibrating the headset or seeking further assistance from Oculus support.
By thoroughly testing the headset tracking, you can ensure that your Oculus Rift system is functioning optimally, delivering an immersive and seamless VR experience.
Other Troubleshooting Tips
If you have followed the previous steps and are still experiencing tracking issues with your Oculus Rift headset, here are some additional troubleshooting tips to consider:
- Check Lighting Conditions: Ensure that the lighting conditions in your play area are appropriate for the Oculus sensors to track your movements accurately. Avoid excessive brightness or dimness, as it can affect tracking performance.
- Remove Reflective Surfaces: Remove or cover any mirrors, glass surfaces, or other highly reflective objects in your play area. These can interfere with the sensors’ tracking capabilities and cause tracking inaccuracies.
- Reconnect and Reset Sensors: Disconnect and reconnect the Oculus sensors to your computer. Additionally, you can try resetting the sensors by going into the Oculus app’s settings and selecting the “Devices” tab. From there, click on “Configure Rift” and then “Reset Sensor Tracking”.
- Check USB Connections: Ensure that all USB connections related to your Oculus Rift system are secure and properly plugged in. Unplug and reconnect the USB cables if needed.
- Update Graphics Drivers: Ensure that your computer’s graphics drivers are up to date. Outdated or incompatible graphics drivers can affect the performance and tracking of the Oculus Rift headset.
- Optimize Computer Performance: Close any unnecessary background applications or processes, as they can consume system resources and impact the Oculus software’s performance. Consider disabling any performance-demanding applications or services while using the Oculus Rift system.
- Reinstall Oculus Software: If all else fails, you can try completely uninstalling and reinstalling the Oculus software. This can help resolve any software-related issues that may be affecting the tracking performance.
Remember, troubleshooting tracking issues can be a trial-and-error process, and it’s important to remain patient. If the tracking issues persist despite attempting these troubleshooting tips, it is advisable to contact the official Oculus support team for further assistance and guidance tailored to your specific issue.
By following these troubleshooting tips, you can enhance the tracking performance of your Oculus Rift headset and enjoy a more immersive virtual reality experience.