
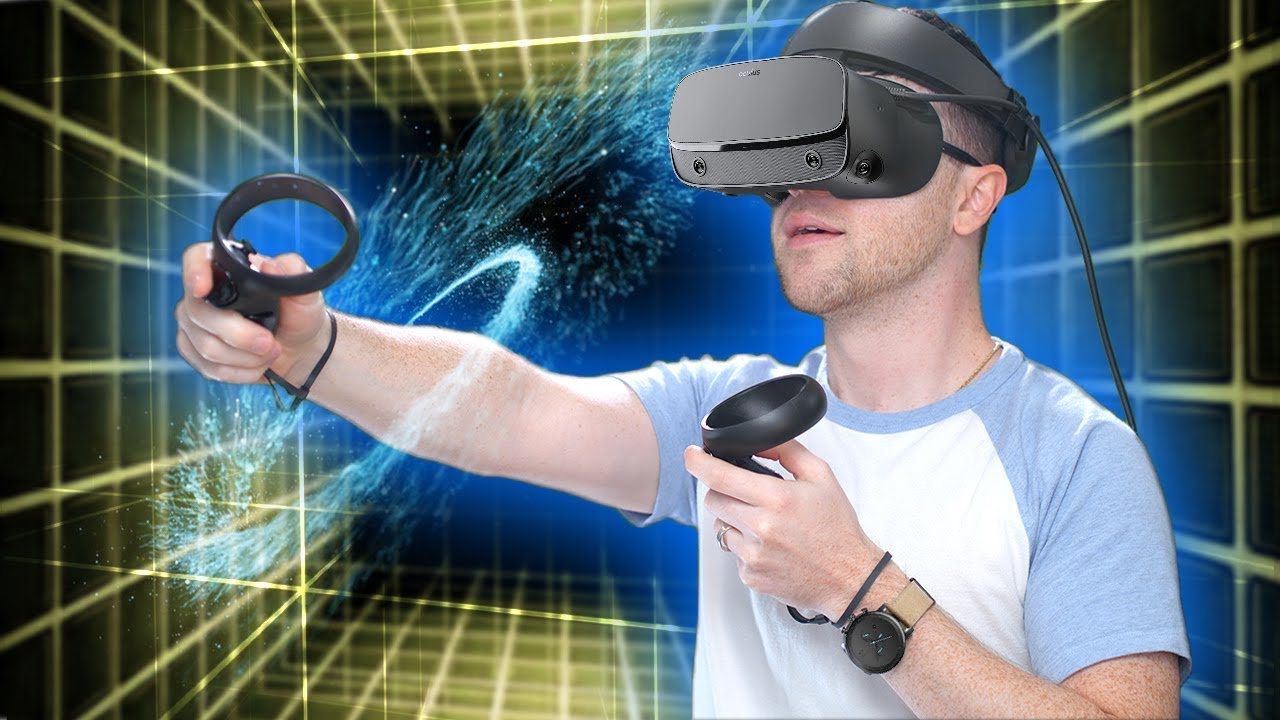
Choosing the Right Hardware
When it comes to getting the most out of your Oculus Rift experience, choosing the right hardware is crucial. The quality of your hardware can greatly impact the performance and immersion of your virtual reality (VR) sessions. Here are some key factors to consider when selecting the hardware for your Oculus Rift:
1. Graphics Card: The graphics card is responsible for rendering the stunning visuals in VR. To ensure a smooth and visually impressive experience, opt for a high-performance graphics card such as the NVIDIA GeForce GTX 1070 or higher. This will provide the necessary power to handle the demanding VR graphics.
2. CPU: A powerful CPU is essential for running VR applications smoothly. Look for a processor with a high clock speed and multiple cores. The Intel Core i7 or AMD Ryzen 7 series are excellent choices for VR gaming.
3. Memory (RAM): VR games and applications require a significant amount of memory to run smoothly. Aim for a minimum of 8GB, but for optimal performance, consider 16GB or more of RAM. This will allow for seamless multitasking and smoother VR experiences.
4. Storage: VR games and applications can take up a substantial amount of storage space. It’s recommended to have a solid-state drive (SSD) with at least 256GB or higher to ensure quick loading times and smooth gameplay.
5. USB Ports: Oculus Rift requires several USB ports for connecting the headset and sensors. Ensure that your computer has enough available USB ports, preferably USB 3.0 or higher for optimal performance.
6. Display: The Oculus Rift provides an immersive VR experience, but having a high-resolution display for your monitor will enhance the visuals even further. Consider investing in a high-quality monitor with at least a 1080p resolution for optimal gaming.
By investing in the right hardware, you can maximize your Oculus Rift experience. Remember to check Oculus’ official website for the latest recommended hardware specifications, as technology is constantly advancing. With the right hardware setup, you’ll be ready to dive into the captivating world of virtual reality.
Optimizing Your Computer
To ensure optimal performance and smooth VR experiences with your Oculus Rift, it’s essential to optimize your computer settings. Here are some key tips for optimizing your computer for VR:
1. Update Graphics Drivers: Keeping your graphics drivers up to date is crucial for optimal performance. Visit the manufacturer’s website for your graphics card (NVIDIA or AMD) to download and install the latest drivers. Regular driver updates often include performance improvements and bug fixes specifically for VR.
2. Close Background Applications: Close any unnecessary background applications that may be using up system resources. This will free up valuable CPU and memory resources for your VR experience. Additionally, disable any CPU-intensive programs or processes that may be running in the background.
3. Disable Power Saving: VR experiences require continuous high-performance processing. To avoid any potential performance issues, adjust your computer’s power settings to “High Performance” or disable power-saving features temporarily. This ensures that your hardware performs at its best during your VR sessions.
4. Adjust Windows Settings: Optimize your Windows settings for VR by disabling unnecessary visual effects. Go to Control Panel > System > Advanced system settings > Performance Settings. Select “Adjust for best performance” or manually disable specific visual effects to prioritize performance over visual aesthetics.
5. Check PC Temperature: VR experiences can put a significant strain on your CPU and graphics card, causing them to heat up. Monitor your computer’s temperature using software like HWMonitor or SpeedFan. If temperatures are too high, consider improving ventilation in your computer case or investing in additional cooling options.
6. Upgrade Hardware if Necessary: If you find that your computer doesn’t meet the recommended specifications for VR, consider upgrading your hardware. Adding more RAM, upgrading your graphics card, or getting a faster CPU can greatly improve your VR experience.
7. Anti-Virus Software: Ensure that your anti-virus software is not interfering with your VR experience. Some anti-virus programs can run continuous background scans, consuming system resources and causing performance issues. Temporarily disable your anti-virus software during VR sessions or whitelist the VR-related applications and folders.
By following these optimization tips, you can ensure that your computer is running at its best for VR gaming and experiences. Remember, a smoothly optimized computer will provide seamless and immersive VR adventures with your Oculus Rift.
Setting Up the Oculus Rift
Setting up your Oculus Rift correctly is crucial for a smooth and immersive VR experience. Here is a step-by-step guide to help you get started:
1. Unboxing: Start by unboxing your Oculus Rift and familiarizing yourself with all the components. The essential components include the headset, touch controllers, sensors, and necessary cables. Ensure that you have all the required components before proceeding.
2. Software Installation: Visit the Oculus website and download the Oculus software. Follow the on-screen instructions to install the software on your computer. This software is essential for setting up and running your Oculus Rift.
3. Sensor Placement: Decide on the placement of your sensors. Ideally, you should have two sensors, one on each side of your play area, facing towards the center. Mount them securely on a stable surface or use the supplied stands. Ensure that they have a clear line of sight to the headset and touch controllers.
4. Headset Setup: Connect the headset to your computer using the supplied HDMI and USB cables. Adjust the straps on the headset to comfortably fit your head. Put on the headset and adjust the lenses for optimal clarity by moving the lenses closer or further from your eyes. Follow the on-screen instructions to complete the setup process.
5. Controller Pairing: To pair your touch controllers with the headset, hold down the Oculus and menu buttons simultaneously until the controllers are detected. Follow the on-screen instructions to complete the pairing process. Ensure that the touch controllers have adequate battery power for uninterrupted gameplay.
6. Room Calibration: Use the Guardian system to set up your play area. The Guardian system creates a virtual boundary to prevent you from bumping into real-world objects during gameplay. Set up the boundary by following the on-screen instructions and physically tracing the play area using the touch controllers.
7. Audio Configuration: The Oculus Rift has built-in headphones. To ensure the best audio experience, adjust the headphones to fit comfortably over your ears. If you prefer using your own headphones, there is a headphone jack on the headset for that purpose.
8. Firmware Updates: It is essential to keep your Oculus Rift firmware up to date for optimal performance and compatibility. Check for firmware updates regularly through the Oculus software and install them as needed.
Once you’ve completed these steps, you are ready to dive into the exciting world of VR with your Oculus Rift. Remember to adjust the straps, sensors, and headphones for maximum comfort before embarking on your virtual adventures.
Calibrating the Tracking System
Calibrating the tracking system of your Oculus Rift is essential to ensure accurate and responsive tracking of your movements within the virtual world. Here’s how to calibrate the tracking system:
1. Sensor Positioning: Make sure that the sensors are positioned correctly and securely mounted. Ensure that they have a clear line of sight to the headset and touch controllers. The sensors should be placed on stable surfaces or mounted using the supplied stands.
2. Sensor Syncing: Open the Oculus app on your computer and go to the Devices tab. Click ‘Configure Rift’ and select ‘Sensor Setup’. Follow the prompts to sync your sensors with the headset. This ensures that the tracking system communicates properly with all the components.
3. Sensor Distance Adjustment: The distance between the sensors can affect the tracking accuracy. Experiment with different sensor placements and adjust their positions until you achieve optimal tracking performance. Ensure that the sensors are at least 3 feet apart for best results.
4. Play Area Calibration: Use the Guardian system to set up your play area. This helps define a virtual boundary so that you don’t accidentally bump into nearby objects. Follow the on-screen instructions to trace your play area using the touch controllers. Ensure that you have enough space to move around comfortably.
5. Sensor Connectivity: Occasionally, you may experience connectivity issues with the sensors. If a sensor becomes disconnected or experiences tracking problems, try unplugging and replugging its USB cable. You can also try connecting the sensor to a different USB port on your computer.
6. Test the Tracking: Once you’ve calibrated the tracking system, it’s important to test its functionality. Put on the headset and pick up the touch controllers. Move around your play area and ensure that the tracking accurately reflects your movements within the virtual environment. Test various movements, such as reaching, crouching, and turning, to ensure smooth and responsive tracking.
7. Lighting Conditions: Lighting conditions can affect the tracking system. Avoid excessive backlighting or bright, direct light sources in your play area, as they can interfere with the sensors’ ability to track accurately. Opt for moderate, even lighting for the best tracking performance.
8. Sensor Firmware Updates: Keep an eye out for firmware updates for your sensors. These updates can improve tracking performance and address any known issues. Check for updates regularly through the Oculus app and install them when available.
By following these calibration steps, you can ensure that the tracking system of your Oculus Rift is fine-tuned for accurate, responsive, and immersive virtual reality experiences.
Adjusting the Settings for Optimal Performance
To ensure optimal performance and smooth gameplay on your Oculus Rift, it’s important to adjust the settings according to your hardware capabilities and personal preferences. Here are some key settings to consider:
1. Graphic Settings: Open the Oculus app on your computer and go to the Devices tab. Click ‘Configure Rift’ and select ‘Graphics Preference’. Here, you can adjust the graphics settings based on your hardware capabilities. If you have a high-performance graphics card, you can increase the resolution and graphical details for a more visually stunning experience. If your hardware is more modest, consider lowering the graphics settings to maintain a consistent frame rate.
2. Supersampling: Supersampling is a technique that renders the VR scene at a higher resolution and then downscales it for the headset display. This can result in improved image quality. However, it comes at the cost of increased performance demand. Experiment with different supersampling settings to find the right balance between visual quality and performance on your system.
3. Refresh Rate: The Oculus Rift offers different refresh rate options, such as 90Hz and 80Hz. A higher refresh rate can result in smoother visuals, but it requires more processing power from your computer. Adjust the refresh rate according to your hardware capabilities and personal preferences. Keep in mind that not all VR games and experiences support different refresh rates.
4. Audio Settings: Customize the audio settings to suit your preference. You can choose to use the built-in headphones of the Oculus Rift or connect your own headphones. Adjust the volume levels accordingly for an optimal audio experience. Additionally, you can configure how 3D audio is rendered to enhance your immersion in the virtual environment.
5. Comfort Settings: The Oculus app allows you to customize comfort settings, such as reducing motion sickness through techniques like snap-turning, limiting FOV (field of view) changes, or displaying a static virtual horizon. Experiment with these settings to find what works best for you and ensures a comfortable VR experience.
6. Application-Specific Settings: Some VR applications have their own settings that can be adjusted for optimal performance. Pay attention to in-game settings or configuration files that allow you to tweak graphics options, controller mappings, and other parameters to suit your preferences and hardware capabilities.
7. Power Management: Adjust your computer’s power management settings to prevent it from entering sleep mode during VR sessions. This ensures uninterrupted gameplay without sudden screen blackouts or interruptions.
8. Environmental Considerations: Ensure that you have adequate airflow and ventilation around your computer to prevent overheating during extended VR sessions. Consider investing in additional cooling solutions like fans or liquid cooling if necessary.
By adjusting these settings, you can optimize your Oculus Rift experience for optimal performance, visual quality, and comfort. Remember to test different settings and find the balance that works best for your hardware and personal preferences.
Exploring the Oculus App Store
The Oculus App Store is a hub for a wide range of exciting virtual reality (VR) games and experiences. With numerous titles to choose from, exploring the app store is an essential part of getting the most out of your Oculus Rift. Here’s what you need to know:
1. Accessing the App Store: Open the Oculus app on your computer and click the ‘Store’ tab. This will take you to the Oculus App Store, where you can browse and discover various VR applications. You can also access the app store directly from the Oculus headset by selecting the ‘Store’ option from the main menu.
2. Game Categories: The Oculus App Store categorizes games and experiences in various genres, such as action, adventure, sports, puzzle, and more. This makes it easy to find the types of games and experiences that interest you the most. Browse through the categories to discover new and exciting titles.
3. Top Charts and Recommendations: The Oculus App Store features a ‘Top Charts’ section that highlights the most popular and highly recommended VR games and experiences. It’s a great way to discover trending titles and see what other users are enjoying. Additionally, the app store provides personalized recommendations based on your preferences and past interactions.
4. User Reviews and Ratings: When exploring the Oculus App Store, take into account user reviews and ratings for the games and experiences you’re interested in. User reviews can provide valuable insights into the gameplay, performance, and overall experience of a particular title. Use this feedback to make informed decisions and find the best VR experiences for you.
5. Demos and Free Content: The Oculus App Store often offers demos or free content for you to try before making a purchase. Take advantage of these opportunities to experience a taste of different VR games and experiences. It’s a great way to test the compatibility, gameplay, and overall enjoyment factor of a title before committing to buy it.
6. Developer Support: The Oculus App Store showcases games and experiences from a variety of developers. Some developers actively engage with the community by providing updates, addressing user feedback, and adding new content. Consider checking the developer’s website or community forums to get more information about ongoing support and future updates for a specific title.
7. User-generated Content: The Oculus App Store also features user-generated content, such as custom mods, levels, and experiences. These contributions can greatly enhance your VR experience and provide a unique twist to popular games. Keep an eye out for user-generated content that can add additional value and variety to your VR library.
8. Sales and Discounts: The Oculus App Store regularly offers sales and discounts on various games and experiences. Keep an eye on these promotions to grab your favorite titles at a discounted price. Additionally, consider joining the Oculus newsletter or following official Oculus social media channels to stay updated on the latest sales and deals.
Exploring the Oculus App Store opens up a world of thrilling VR games and experiences. Take the time to browse, read reviews, and try out demos to find the titles that resonate with your interests and provide unforgettable virtual adventures.
Discovering Must-Try Games and Experiences
The world of virtual reality (VR) is filled with an abundance of captivating games and experiences. Exploring and discovering these must-try titles is an exciting part of owning an Oculus Rift. Here are some tips to help you find the best games and experiences for your VR adventures:
1. Top-Rated and Best-Selling: Start by checking out the top-rated and best-selling games and experiences on the Oculus App Store. These titles often have high user ratings and positive reviews, indicating their popularity and quality. They are a reliable choice to begin your VR exploration.
2. Genre Preferences: Consider your personal preferences when it comes to gaming genres. If you enjoy action-packed adventures, look for VR games in the action or adventure categories. If you prefer puzzle-solving challenges, explore the puzzle genre. By focusing on genres you enjoy, you’re more likely to discover games and experiences that resonate with your interests.
3. Recommendations and Reviews: Pay attention to recommendations and reviews from both users and gaming websites. User reviews offer valuable insights into the gameplay, immersion, and overall experience of a VR title. Professional reviews can provide in-depth analysis and comparisons, helping you make informed choices. Take into account both positive and negative feedback to get a comprehensive understanding of each title.
4. Community Feedback: Engage with the Oculus community to discover hidden gems and get recommendations from fellow Oculus Rift users. Participate in forums, social media groups, and online communities dedicated to VR gaming. Share your experiences, ask for recommendations, and learn from the experiences of others. Community feedback can help you unearth lesser-known but incredible games and experiences.
5. Demo Versions: Many VR games and experiences offer demo versions that allow you to try a limited portion of the gameplay before making a purchasing decision. Take advantage of these demos to test the mechanics, controls, and overall enjoyment factor of a title. Trying demos can help you determine whether a game or experience suits your preferences and offers the level of immersion you desire.
6. Developer Pedigree: Consider the reputation and history of the developers behind the games and experiences. Established developers with a track record of producing high-quality titles are more likely to deliver exceptional VR experiences. Keep an eye out for titles from renowned developers and studios known for their expertise in VR game development.
7. Awards and Recognitions: Look for games and experiences that have received awards or critical acclaim in the VR gaming industry. Awards such as “Best VR Game” or “Game of the Year” indicate a certain level of excellence and can serve as a good starting point for your exploration.
8. Social Media and Streaming Platforms: Follow VR-focused social media accounts and content creators on streaming platforms like YouTube or Twitch. These platforms often feature gameplay videos, reviews, and recommendations from enthusiasts who are passionate about VR gaming. You can gain valuable insights and discover new titles through their content.
By using a combination of these strategies, you can discover must-try VR games and experiences that cater to your interests and provide immersive and unforgettable adventures with your Oculus Rift.
Customizing Your VR Environment
One of the exciting aspects of owning an Oculus Rift is the ability to customize your virtual reality (VR) environment. Customization allows you to create a personalized and immersive space that enhances your overall VR experience. Here are some ways you can customize your VR environment:
1. Home Environment: Oculus provides a default VR home environment, but you can customize it to reflect your style and preferences. Choose from a variety of VR home environments or even import your own 3D models and create a unique VR space that feels like home. Personalize your surroundings with decorations, furniture, and interactive objects.
2. Avatars: Customize your virtual avatar to represent yourself or a desired persona in VR. You can choose from a range of pre-designed avatars or create a custom one that suits your preferences. Customize the appearance, clothing, accessories, and even gestures of your avatar, allowing you to express your individuality in the virtual space.
3. Social Spaces: Connect with friends and other VR enthusiasts in live social spaces provided by Oculus or third-party apps. Customize your experience by interacting with others, exploring virtual environments together, and participating in multiplayer activities. Some social platforms also allow further customization options for your personal space within the shared virtual environments.
4. Virtual Desktop: Utilize virtual desktop applications that enable you to create a virtual workspace within VR. Customize the virtual environment to match your preferred working environment, complete with virtual monitors, customizable backgrounds, and productivity tools. This allows you to create a productive and immersive workspace within the virtual realm.
5. Soundscapes and Music: Enhance your VR environment with personalized soundscapes or music playlists. Utilize apps or settings within the Oculus software to add your favorite songs or ambient sound effects that accompany your virtual adventures. Personalized soundscapes can heighten immersion and create a more engaging VR experience.
6. Lighting Effects: Some VR games and experiences allow you to customize lighting effects in your virtual environment. Adjust the brightness, color, and intensity of lights to set the mood and atmosphere according to your preferences. This customization adds a layer of personalization and control over the visual aesthetics of your VR experiences.
7. Interface and Menu Customization: Explore the Oculus settings and options to customize the interface and menu experience. Adjust the color schemes, layout, and display preferences to suit your visual preferences. Consider enabling or disabling certain features based on your needs and preferences to create a streamlined and personalized menu experience.
8. Third-Party Tweaks: Explore third-party software and mods that offer additional customization options for your VR environment. These tools can enhance your ability to modify visual, audio, and other aspects of the virtual reality experience. However, exercise caution and ensure that any third-party software is safe, reputable, and compatible with your Oculus Rift setup.
Customizing your VR environment allows you to create a space that reflects your personality and enhances your immersion in virtual reality. Explore the available customization options within the Oculus software and consider third-party tools to truly make your VR experience your own.
Troubleshooting Common Issues
While the Oculus Rift delivers an immersive virtual reality (VR) experience, it’s not uncommon to encounter common issues that can disrupt your gaming sessions. Here are some troubleshooting tips for addressing common issues that may arise:
1. Display or Black Screen Issues: If you encounter a display issue or a black screen, start by checking the physical connections. Ensure that the headset and cables are securely connected to your computer. If the problem persists, try restarting the Oculus software or rebooting your computer. Additionally, make sure that your graphics card drivers are up to date.
2. Tracking Problems: Tracking issues may occur if the sensors are not properly positioned or if there are obstructions within your play area. Ensure that the sensors have a clear line of sight to the headset and touch controllers. If you continue to experience tracking problems, try recalibrating the sensors using the Oculus setup software.
3. Audio Issues: If you’re experiencing audio problems, check that the headset speakers are properly positioned over your ears and securely connected. Ensure that the audio settings are correctly configured in the Oculus app and on your computer. You can also try unplugging and replugging the audio cable or using a different audio output port.
4. Controller Connectivity: If the touch controllers are not connecting or responding, make sure they are powered on and have sufficient battery life. Press and hold their respective power buttons to turn them on. If the controllers are still not connecting, try removing and replacing the batteries or re-pairing them with the headset using the Oculus software.
5. Software Updates: Oculus regularly releases software updates that include bug fixes, performance enhancements, and new features. Ensure that both the Oculus software and your Oculus Rift firmware are up to date. Perform regular updates to ensure compatibility and address any known issues.
6. System Requirements: Make sure that your computer meets the recommended system requirements for running the Oculus Rift. Insufficient hardware specifications can cause performance issues and compatibility problems. Refer to Oculus’ official website for the latest system requirements and check if any hardware upgrades are necessary.
7. USB Port Troubles: Oculus Rift relies on USB ports for connectivity. If you experience issues with USB connections, try connecting the headset or sensors to different USB ports on your computer. Avoid using USB hubs or extension cables, as they can cause data or power transfer issues. If needed, consider adding a PCIe USB expansion card to ensure sufficient USB connectivity.
8. Support and Community: If troubleshooting on your own doesn’t resolve the issue, reach out to Oculus support for further assistance. Additionally, explore online forums, community groups, and social media platforms where Oculus Rift users share their experiences and solutions. Others may have encountered similar issues and can offer helpful advice.
Remember, troubleshooting will vary depending on the specific issue you’re facing. If the problem persists or seems to be hardware-related, it’s recommended to contact Oculus support for further assistance. With proper troubleshooting and support, you can quickly overcome common issues and enjoy a seamless VR experience with your Oculus Rift.
Extending the Oculus Rift’s Reach
If you’re looking to expand the capabilities of your Oculus Rift and take your virtual reality (VR) experiences to the next level, there are several ways to extend its reach and enhance your gameplay. Here are some methods to consider:
1. Room-Scale VR: Room-scale VR allows you to move freely within a designated play area, enhancing immersion and interaction. To set up room-scale VR, consider adding extra Oculus sensors to your setup. Position the sensors strategically to cover a larger play area and ensure optimal tracking. This will give you the freedom to explore virtual worlds to their fullest extent.
2. Wireless Adapter: While the Oculus Rift is initially tethered to your computer, you can free yourself from cables by using a wireless adapter. Wireless adapters enable you to experience VR without restrictions, allowing for a more immersive and untethered experience. Research and select a wireless adapter that is compatible with your Oculus Rift model for a seamless wireless VR setup.
3. VR Accessories: Consider enhancing your VR experience with additional accessories. Accessories like VR treadmills or haptic vests can provide additional immersion by simulating movements or sensations. Look for accessories specifically designed for VR that are compatible with the Oculus Rift to enhance various aspects of your virtual adventures.
4. VR Game Mods and Community Content: The VR community is a source of incredible content and game mods that can extend the replay value and variety of your VR library. Explore websites, forums, and social media groups dedicated to VR gaming to discover user-generated content, custom maps, and game modifications. These additions can bring fresh experiences and extend the lifespan of your favorite VR titles.
5. Oculus Link: Oculus Link is a software feature that allows you to connect your Oculus Quest headset to a PC, providing access to a wider range of PC VR experiences. With Oculus Link, you can harness the power of your computer to play PC VR games on your Quest headset, expanding your gaming options beyond the capabilities of standalone VR.
6. Content Creation and Development: If you have a creative streak and wish to extend the reach of your Oculus Rift, consider exploring VR content creation and development. Dive into VR game development, 3D modeling, or VR filmmaking. There are various tools and resources available to help you unleash your creativity and contribute to the ever-growing VR ecosystem.
7. Multiplayer and Social VR: Engaging with others in multiplayer or social VR experiences can significantly extend the reach of your Oculus Rift. Collaborate with friends or fellow VR enthusiasts in multiplayer games or social VR platforms. Interacting with others in virtual environments creates unique social experiences and expands the possibilities of shared gaming adventures.
8. Continuous Software Updates and New Releases: Oculus continually updates the software and releases new content for the Oculus Rift. Stay informed about software updates, patches, and new game releases through the Oculus software, official Oculus website, and VR gaming communities. Keeping your software up to date ensures compatibility with the latest developments in VR technology and access to new and exciting experiences.
By exploring these methods to extend the reach of your Oculus Rift, you can unlock new VR experiences, push the boundaries of immersion, and create memorable gaming moments within the virtual realm.