
Superscript and Subscript in Google Docs
Google Docs is a powerful and versatile web-based word processing tool that offers a wide range of features to enhance your documents. One such feature is the ability to add superscript and subscript text. Superscript is used to position text or numbers above the baseline, while subscript is used to position them below the baseline.
Enabling superscript and subscript in Google Docs is simple. You can access these options through the menu bar at the top of the document editor or by using keyboard shortcuts.
To enable superscript in Google Docs, you can highlight the text you want to format and click on the “Format” tab in the menu bar. From there, select “Text” and then “Superscript.” Alternatively, you can use the keyboard shortcut “Ctrl + .” (period) on Windows or “Cmd + .” on Mac to instantly convert selected text to superscript.
Similarly, for subscript, highlight the text and navigate to the “Format” tab. Choose “Text” and then “Subscript.” The keyboard shortcut for subscript is “Ctrl + ,” (comma) on Windows or “Cmd + ,” on Mac.
Customizing superscript and subscript settings in Google Docs allows you to change the default formatting, such as font size and position. To do this, you can select the formatted text, right-click, and choose “Paragraph Styles.” From here, you can modify the superscript or subscript style to suit your preferences.
It’s worth noting that superscript and subscript are commonly used in scientific formulas, mathematical equations, chemical notations, footnotes, and citations. With Google Docs’ built-in equation editor, you can seamlessly incorporate superscript and subscript within complex equations and mathematical expressions.
While Google Docs primarily focuses on creating and editing text documents, the ability to use superscript and subscript text is also available in Google Sheets and Google Slides. These features allow for consistent formatting and seamless collaboration across different platforms.
By utilizing the superscript and subscript feature in Google Docs, you can enhance the visual appeal and clarity of your documents. Whether you’re working on a research paper, a presentation, or a scientific report, implementing superscript and subscript effectively will ensure that your data and information are presented accurately.
Enabling Superscript and Subscript
To make text appear as superscript or subscript in Google Docs, you can easily enable these formatting options through the menu bar or by using keyboard shortcuts.
To access the formatting options through the menu bar, simply select the text you want to format and navigate to the “Format” tab at the top of the Google Docs editor. From there, click on “Text” and then choose either “Superscript” or “Subscript” depending on your desired effect. Once selected, the text will instantly transform to appear as superscript or subscript.
If you prefer using keyboard shortcuts for a quicker formatting process, you can utilize the following shortcuts:
- For superscript: Press “Ctrl + .” (period) on Windows or “Cmd + .” on Mac.
- For subscript: Press “Ctrl + ,” (comma) on Windows or “Cmd + ,” on Mac.
These shortcuts allow you to toggle between normal text and superscript or subscript format without having to navigate through the menu bar.
It’s important to note that you can apply the superscript or subscript formatting to individual characters or whole words. Simply select the text you want to format and then choose the desired option from the menu or use the appropriate keyboard shortcut.
Additionally, you can customize the superscript and subscript settings in Google Docs to suit your preferences. By right-clicking on the formatted text and selecting “Paragraph Styles,” you can modify the font size and position of the superscript or subscript. This allows you to make adjustments to the formatting to ensure it aligns with the overall style of your document.
Superscript and subscript are commonly used in various fields such as mathematics, science, and academic writing. These formatting options facilitate the proper representation of equations, chemical formulas, footnotes, and more.
Furthermore, it’s worth mentioning that the ability to enable superscript and subscript is not limited to Google Docs alone. Google Sheets and Google Slides also offer these options, allowing for consistent formatting across different Google Workspace applications.
Enabling superscript and subscript in Google Docs provides you with the flexibility to format your text in a visually appealing and professional manner. By utilizing these formatting options, you can enhance the readability and clarity of your documents.
Superscript Shortcut
To streamline the process of applying superscript formatting in Google Docs, you can utilize a keyboard shortcut that allows you to quickly toggle between normal text and superscript.
The shortcut for enabling superscript is as follows:
- For Windows users: Press “Ctrl + .” (period).
- For Mac users: Press “Cmd + .” (period).
To use this shortcut, select the text you want to format as superscript and then press the corresponding key combination. The selected text will immediately transform to appear above the baseline, giving it the characteristic superscript appearance.
The superscript shortcut simplifies the process of formatting text, especially when you need to frequently use superscript in your document. Instead of manually navigating through the menu bar to enable the formatting or applying it using the formatting options with the mouse, you can apply superscript with just a simple keyboard command. This helps to save time and improve your workflow while working on your document.
It’s important to note that the superscript shortcut is not limited to individual characters. You can select multiple characters or even whole words to be formatted as superscript. This comes in handy when working with mathematical equations, chemical formulas, footnotes, or any other instances where you need to raise text above the baseline.
By harnessing the power of the superscript shortcut, you can effortlessly format your text in an efficient manner. Whether you’re writing a research paper, creating educational materials, or simply adding annotations to your document, the superscript shortcut in Google Docs provides a convenient way to achieve the desired formatting without interrupting your creative flow.
Subscript Shortcut
In addition to the superscript shortcut, Google Docs also offers a convenient keyboard shortcut to quickly apply subscript formatting to your text.
The shortcut for enabling subscript is as follows:
- For Windows users: Press “Ctrl + ,” (comma).
- For Mac users: Press “Cmd + ,” (comma).
To apply subscript using the shortcut, highlight the text you want to format and then press the appropriate key combination. The selected text will instantly shift below the baseline, giving it the characteristic subscript appearance.
The subscript shortcut simplifies the process of formatting text as subscript. Instead of manually navigating through the menu bar or using the formatting options with the mouse, you can apply subscript with a quick keyboard command. This allows for a seamless and efficient workflow while working on your document.
Similar to the superscript shortcut, the subscript shortcut is not limited to individual characters. You can select multiple characters or even whole words to be formatted as subscript. This is particularly useful when dealing with chemical formulas, mathematical notations, footnotes, or any other instances where text needs to be positioned below the baseline.
The subscript shortcut in Google Docs provides you with greater ease and speed in formatting your text. Whether you’re working on scientific papers, academic documents, or any other content that requires subscript text, this feature allows you to effortlessly apply the desired formatting without interrupting your creative flow.
It’s worth noting that the subscript shortcut is not exclusive to Google Docs. You can also use the same keyboard shortcuts to enable subscript formatting in other Google Workspace applications like Google Sheets and Google Slides. This consistency across the suite of applications ensures a unified experience when working with text formatting and promotes a seamless transfer of skills among different projects.
By leveraging the power of the subscript shortcut in Google Docs, you can enhance the clarity and precision of your documents. Whether you’re conveying scientific data, inputting mathematical equations, or structuring annotated content, the subscript shortcut streamlines the formatting process, allowing you to focus on content creation.
Customizing Superscript and Subscript
In addition to enabling superscript and subscript formatting in Google Docs, you have the ability to customize these formatting options to suit your preferences. Customization allows you to adjust the default settings, such as font size and position, for a more personalized look.
To customize superscript and subscript settings in Google Docs, follow these steps:
- Select the formatted text that you want to customize.
- Right-click on the selected text to open the context menu.
- Choose “Paragraph Styles” from the menu.
- A sidebar will appear on the right side of the Google Docs editor, displaying various formatting options.
- Under the “Text” section, you will find “Superscript” and “Subscript” options.
- Click on the dropdown arrow next to the desired option to expand the customization settings.
- Modify the settings based on your preferences. You can adjust the font size, vertical position, and even apply special effects.
- Preview the changes in real-time as you make adjustments.
- Once you are satisfied with the customization, click outside the sidebar to exit the customization mode.
Customizing superscript and subscript allows you to create a consistent and visually appealing document that aligns with your desired style. By adjusting the font size and position, you can ensure that the superscript and subscript elements complement the surrounding text and improve readability.
It’s important to note that the customization options for superscript and subscript in Google Docs are limited to the font, size, and position within the text. If you require more advanced customization options or complex mathematical notation, consider using the built-in Equation Editor in Google Docs. The Equation Editor provides additional tools and special characters specifically designed for mathematical and scientific notations.
By customizing superscript and subscript settings, you can add a personal touch to your document. This customization feature enables you to create engaging and professional-looking documents that visually enhance your content.
Superscript and Subscript in Equation Editor
In addition to the standard superscript and subscript formatting options in Google Docs, there is a dedicated Equation Editor that provides more advanced functionality for mathematical equations, scientific notations, and complex formulas.
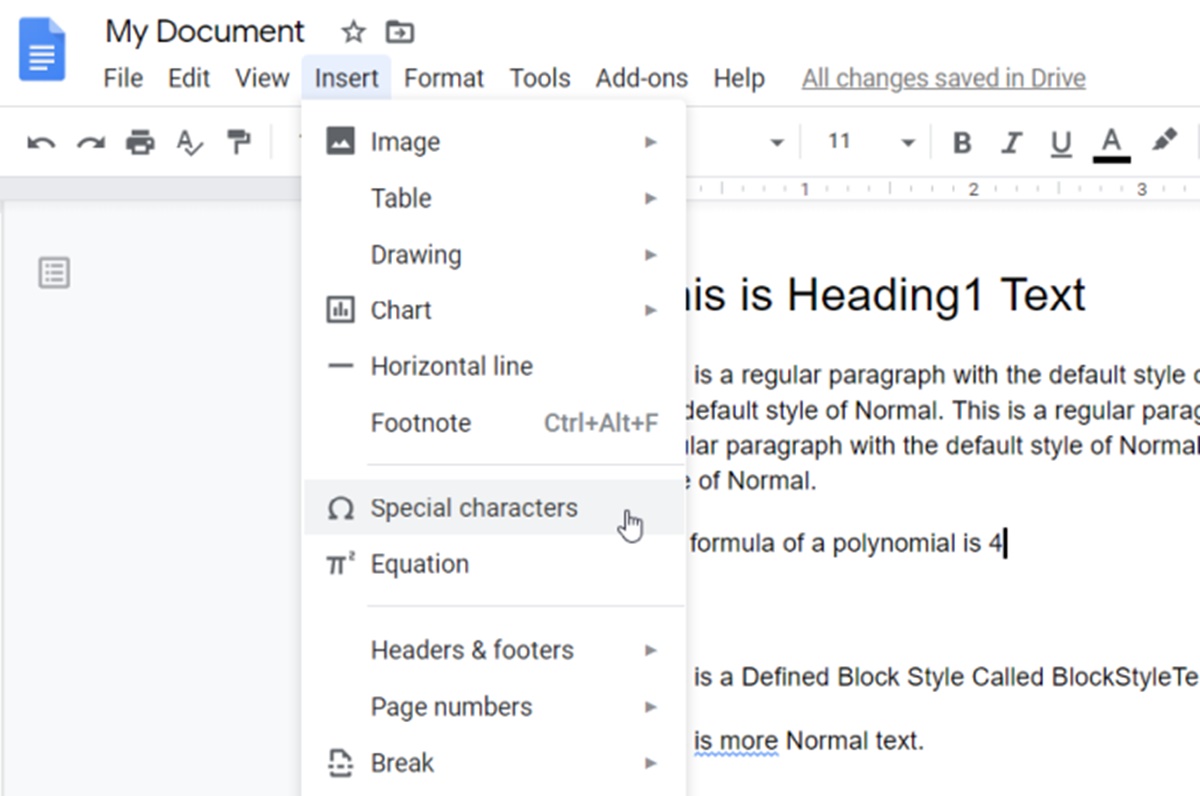
To access the Equation Editor in Google Docs, follow these steps:
- Click the “Insert” tab in the menu bar at the top of the Google Docs editor.
- Select “Equation” from the dropdown menu.
- A toolbar with various mathematical symbols and formatting options will appear at the top of the document editor.
- To add superscript or subscript in the Equation Editor, click on the corresponding buttons in the toolbar.
- Type or input the desired text or equation in the input field provided in the Equation Editor.
- Select the specific part of the equation that you want to format as superscript or subscript.
- Use the superscript or subscript buttons, located in the toolbar, to apply the formatting to the selected part of the equation.
- Continue composing your equation using the various mathematical symbols and formatting options available in the Equation Editor.
- Once you have finished creating your equation, click outside the Equation Editor to return to your regular Google Docs document.
The Equation Editor in Google Docs provides a comprehensive set of tools and options to create professional-looking mathematical equations and scientific notations. It enables you to customize the styling, positioning, and composition of superscripts and subscripts within the equation.
Using the Equation Editor ensures that complex mathematical expressions and scientific formulas are accurately represented in your document. Whether you’re working on academic papers, technical reports, or any other mathematical or scientific content, the Equation Editor in Google Docs empowers you to present your ideas and findings in a clear and professional manner.
By combining the standard superscript and subscript formatting options with the more advanced capabilities of the Equation Editor, you can effectively incorporate superscripts and subscripts into your equations and technical content, making them more visually appealing and easier to comprehend.
Superscript and Subscript in Google Sheets
Google Sheets, a popular spreadsheet application, also provides the ability to format text as superscript and subscript. This feature is especially useful when working with scientific data, mathematical equations, chemical formulas, or any other content that requires superscript or subscript formatting.
To apply superscript or subscript formatting in Google Sheets, follow these steps:
- Open your Google Sheets document containing the text you want to format.
- Select the cell or range of cells containing the text you want to format.
- Right-click on the selected cell(s) to open the context menu.
- Click on “Format cells” in the context menu.
- A dialog box will appear. Go to the “Text” tab within the dialog box.
- Under the “Text decoration” section, you will find options for superscript and subscript.
- Choose either “Superscript” or “Subscript” depending on your formatting needs.
- Click “Apply” to apply the chosen formatting to the selected cell(s).
- Alternatively, you can use the keyboard shortcuts: “Ctrl + .” (period) for superscript and “Ctrl + ,” (comma) for subscript.
By default, the superscript and subscript formatting in Google Sheets will be applied to the entire selected cell or range of cells. However, you can also format specific parts of the text within a cell by selecting the desired characters and applying the superscript or subscript formatting using the steps mentioned above.
The ability to format text as superscript and subscript in Google Sheets makes it easy to create visually appealing and professional-looking spreadsheets. This feature is particularly useful when working with scientific or mathematical data, as it allows you to properly represent equations, formulas, and annotations within your spreadsheet.
With the option to apply superscript and subscript in Google Sheets, you can effectively communicate complex information and ensure that your data is accurately represented. Whether you’re building financial models, conducting data analysis, or creating scientific reports, the ability to format text as superscript and subscript in Google Sheets adds an extra level of clarity and professionalism to your spreadsheets.
Superscript and Subscript in Google Slides
Google Slides, a powerful presentation tool, allows you to include superscript and subscript formatting in your slides. Whether you’re creating educational presentations, scientific slides, or giving a technical talk, the ability to format text as superscript and subscript enhances the visual appeal and clarity of your content.
To apply superscript or subscript formatting in Google Slides, follow these steps:
- Open your Google Slides presentation or create a new slide.
- Select the text box or text placeholder where you want to insert superscript or subscript text.
- Highlight the text that you want to format.
- Right-click on the selected text to open the context menu.
- Choose “Format options” from the menu.
- A sidebar will appear on the right side of the Google Slides editor. Click on the “Text” tab.
- Under the “Text style” section, you will find options for superscript and subscript.
- Toggle the “Superscript” or “Subscript” switch to apply the selected formatting.
- Alternatively, you can use the keyboard shortcuts: “Ctrl + .” (period) for superscript and “Ctrl + ,” (comma) for subscript.
Applying superscript and subscript in Google Slides allows you to visually enhance your presentation by properly formatting mathematical equations, chemical formulas, footnotes, or any other instances where raised or lowered text is required. It ensures that your audience can easily understand complex information and follow along with your message.
Just like in Google Docs and Google Sheets, the capability to format text as superscript and subscript in Google Slides offers consistency across the Google Workspace suite. This means that you can create a cohesive visual experience by using the same formatting options in all your files, promoting a unified design language throughout your presentations, documents, and spreadsheets.
By leveraging the superscript and subscript options in Google Slides, you can effectively communicate your ideas in a visually engaging and professional manner. Whether you’re delivering a pitch, sharing research findings, or explaining scientific concepts, utilizing superscripts and subscripts elevates the quality and clarity of your content, leaving a lasting impression on your audience.