
What are Superscripts and Subscripts?
Superscripts and subscripts are types of formatting used to present content in a raised or lowered position in relation to the rest of the text. They are commonly used in various fields, such as mathematics, chemistry, and physics, to denote exponents, footnotes, chemical formulas, and more. Superscripts typically appear as smaller characters above the baseline, while subscripts are displayed as smaller characters below the baseline.
Superscripts and subscripts play a crucial role in conveying important information without disrupting the flow of the main text. They help reduce clutter and minimize distractions while drawing attention to specific details. Whether you’re creating a science presentation, mathematical equation, or academic document, mastering the art of using superscripts and subscripts can significantly enhance the clarity and professionalism of your content.
In Google Slides, a powerful online presentation tool, you can easily incorporate superscripts and subscripts to enhance your visual presentations and effectively communicate complex concepts. Understanding how to access and utilize these formatting options in Google Slides can help you create engaging and informative presentations that captivate your audience.
Now let’s explore how to access superscript and subscript options in Google Slides, and learn some useful tips and tricks along the way.
How to Access Superscript and Subscript Options in Google Slides
In Google Slides, accessing the superscript and subscript formatting options is a straightforward process. Here’s how you can do it:
- Open your Google Slides presentation and navigate to the slide where you want to add superscripts or subscripts.
- Select the text or character that you want to format as a superscript or subscript.
- With the text or character selected, go to the “Format” menu at the top of the screen.
- In the drop-down menu, hover over the “Text” option, and you will see the “Superscript” and “Subscript” options appear.
- Click on either “Superscript” or “Subscript” to apply the formatting to the selected text or character.
Once you’ve applied the superscript or subscript formatting, you will immediately see the changes in your slide. The text or character will now be displayed as raised or lowered, depending on the formatting option you chose.
It’s worth noting that you can also use keyboard shortcuts to quickly access the superscript and subscript options in Google Slides. Pressing “Ctrl + .” (period) will activate the superscript formatting, while pressing “Ctrl + ,” (comma) will activate the subscript formatting. This can significantly speed up your workflow and make it easier to add superscripts and subscripts on the go.
Now that you know how to access the superscript and subscript options in Google Slides, let’s explore some additional tips and tricks to maximize their versatility.
Using Keyboard Shortcuts for Superscripts and Subscripts
Working with superscripts and subscripts in Google Slides becomes even more convenient when you utilize keyboard shortcuts. Instead of navigating through menus, you can quickly apply the formatting with a simple key combination. Here are the keyboard shortcuts you can use:
- To create a superscript: Press Ctrl and . (period) keys simultaneously.
- To create a subscript: Press Ctrl and , (comma) keys simultaneously.
These shortcuts work instantly, and you can use them while editing text in a text box or working in the slide notes section. Remember, using keyboard shortcuts can save you valuable time and make the process of adding superscripts and subscripts more efficient.
However, it’s important to note that keyboard shortcuts may vary depending on your operating system or browser. If the above shortcuts don’t work, try using alternative combinations such as Ctrl + Shift + + for superscript or Ctrl + Shift + - for subscript. Refer to your specific device or browser documentation for the correct shortcuts if needed.
Now that you know how to access the superscript and subscript options using keyboard shortcuts, let’s explore another method for adding symbols as superscripts or subscripts.
Inserting Symbols as Superscripts or Subscripts
Google Slides offers a wide range of symbols and special characters that you can use as superscripts or subscripts. This feature comes in handy when you need to include mathematical symbols, special notations, or other unique characters in your presentations. Here’s how you can insert symbols as superscripts or subscripts:
- Place the cursor in the text box or location where you want to add the symbol.
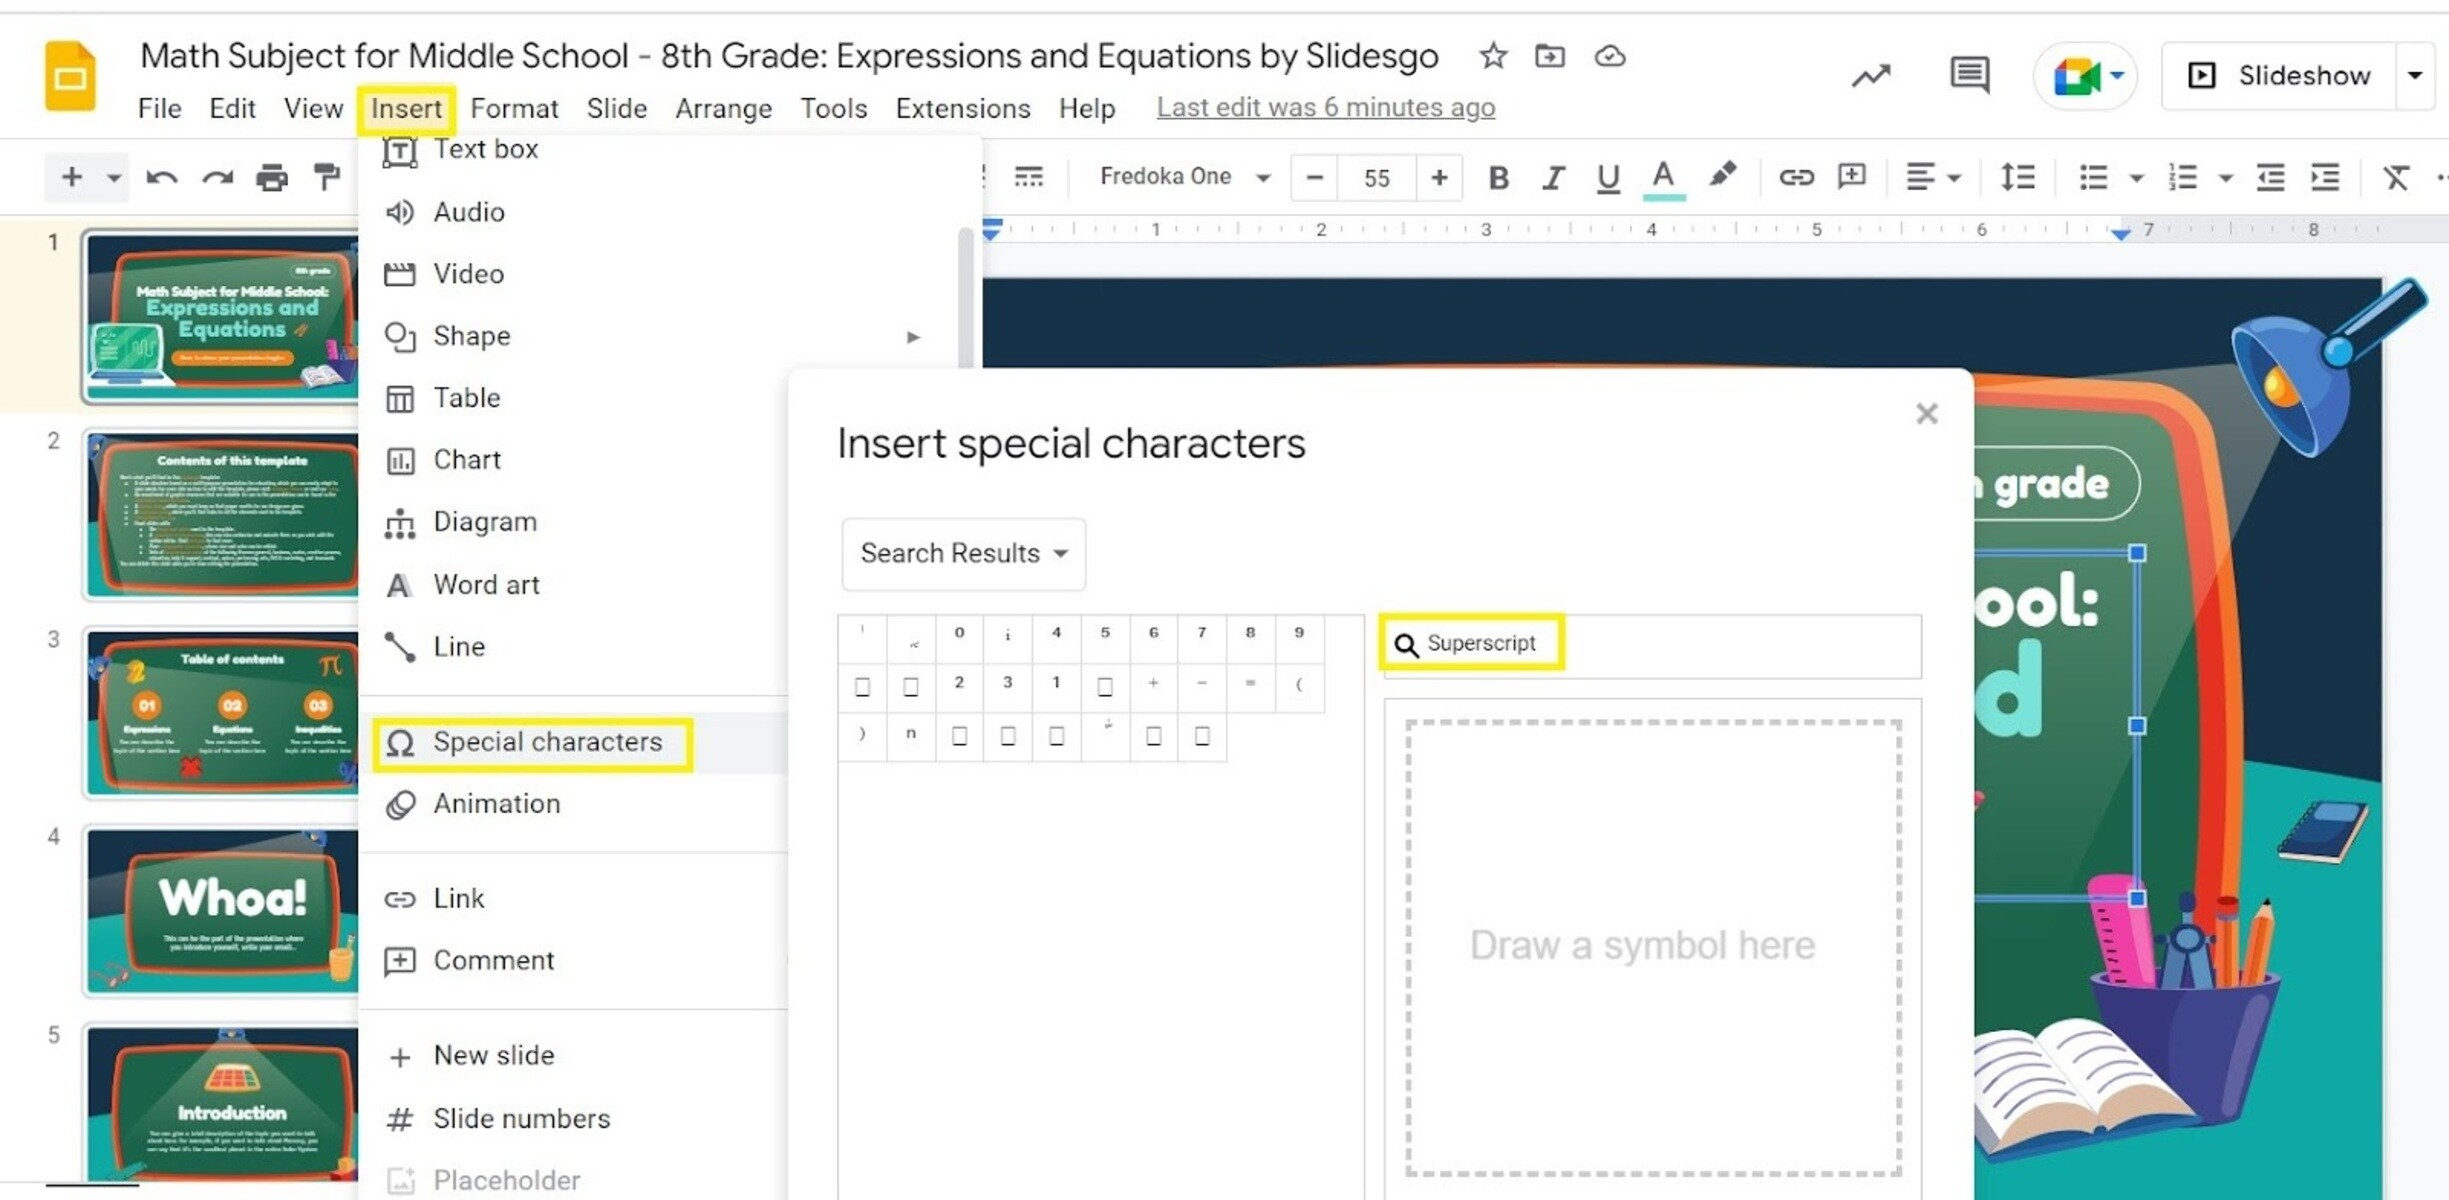
- Go to the “Insert” menu at the top of the screen and select “Special characters.”
- In the “Special characters” panel that appears, you can either browse through the categories or search for specific symbols using keywords.
- When you find the symbol you want to use, click on it to insert it into your slide.
- To convert the symbol into a superscript or subscript, select the inserted symbol and apply the respective formatting using the “Format” menu or the keyboard shortcuts mentioned earlier.
By using symbols as superscripts or subscripts, you can enhance the visual representation of your content and make it more engaging and informative. It’s a great way to present complex mathematical equations, chemical formulas, or any other specialized notation in clear and concise manner.
Remember, it’s always a good practice to double-check the accuracy and clarity of the inserted symbols to ensure they align with your intended meaning. Additionally, be mindful of the font size and positioning of the symbols to maintain a consistent and professional appearance.
Now that you know how to insert symbols as superscripts or subscripts, let’s explore how to adjust the size and positioning of these elements.
Adjusting the Size and Positioning of Superscripts and Subscripts
In Google Slides, you have the flexibility to customize the size and positioning of your superscripts and subscripts to suit your specific needs. Here are some methods you can use to adjust the size and positioning:
1. Changing the font size: Select the superscript or subscript text or character, then use the font size dropdown in the toolbar to increase or decrease the size of the formatting. Experiment with different sizes until you achieve the desired appearance.
2. Adjusting the vertical position: Sometimes, the default positioning of superscripts or subscripts may not align perfectly with the main text. To make adjustments, select the formatted text or character and go to the “Format” menu. From there, choose “Text” and then “Line spacing options.” In the panel that appears, you can adjust the vertical alignment using the “Offset” option.
3. Using the ruler: Another method to adjust the vertical position of the superscripts and subscripts is by utilizing the ruler. Go to the “View” menu, click on “Ruler,” and you will see horizontal and vertical rulers appear at the top and left side of the slide. Select the formatted text or character and drag the superscript or subscript upwards or downwards on the vertical ruler to adjust its position.
By customizing the size and positioning, you can ensure that your superscripts and subscripts blend seamlessly with the rest of your text and maintain proper visual hierarchy. It helps to create a clean and professional look while effectively conveying your intended message.
Now that you know how to adjust the size and positioning of superscripts and subscripts, let’s delve into formatting text styles specifically for these elements.
Formatting Text Styles for Superscripts and Subscripts
When using superscripts and subscripts in Google Slides, it’s essential to pay attention to the formatting to ensure consistency and readability. Here are some key aspects to consider when formatting the text styles for superscripts and subscripts:
1. Font style: Choose a font style that complements the rest of your presentation and ensures legibility. It’s generally recommended to use a sans-serif font for better clarity, especially for smaller superscripts and subscripts.
2. Font color: Use a color that provides sufficient contrast and makes the superscripts and subscripts easily identifiable. Ensure that the color contrast adheres to accessibility standards to accommodate users with visual impairments.
3. Font weight and emphasis: Consider using a lighter font weight or a less pronounced emphasis for the superscripts and subscripts compared to the main text. This helps differentiate them without overpowering the primary content.
4. Spacing: Pay attention to the spacing between the superscripts or subscripts and the adjacent text. Avoid overcrowding or excessive gaps, as they can affect the overall appearance and readability. Adjust the spacing as needed to maintain a balanced and visually pleasing layout.
5. Consistent formatting: Maintain consistency with your formatting choices throughout the presentation. Ensure that all superscripts and subscripts follow the same font style, size, color, and positioning to create a cohesive look and enhance the overall professionalism of your slides.
By carefully formatting the text styles for your superscripts and subscripts, you can create a visually appealing and well-designed presentation that effectively conveys your information.
Now that you understand the importance of text style formatting, let’s delve into troubleshooting common issues that may arise when working with superscripts and subscripts in Google Slides.
Troubleshooting Common Issues with Superscripts and Subscripts
While working with superscripts and subscripts in Google Slides, you may encounter some common challenges. Here are a few troubleshooting tips to help you overcome these issues:
1. Alignment issues: Sometimes, when using different font sizes or adjusting the positioning of superscripts and subscripts, the alignment with the main text may become inconsistent. To resolve this, select the formatted text or character and use the alignment options in the toolbar to ensure proper alignment with the rest of the text.
2. Lost formatting after editing: If you notice that your superscripts or subscripts lose their formatting after making edits to the surrounding text, make sure to select the affected text and reapply the superscript or subscript formatting. This will ensure that the formatting remains intact.
3. Incorrect rendering in certain devices or browsers: While Google Slides aims for consistent rendering across various platforms, some devices or browsers may not fully support all superscript and subscript features or display them accurately. In such cases, consider using alternative formatting options or symbols that are more universally supported.
4. Overlapping or illegible formatting: If your superscripts or subscripts appear too large or overlap with adjacent characters, adjust the font size, spacing, or positioning as needed. You might need to experiment with different settings to achieve the desired legibility and clarity.
5. Inconsistent styling across slides: When working with multiple slides or a presentation template, ensure that the formatting of superscripts and subscripts remains consistent throughout. Double-check each slide for any unintentional changes or discrepancies and make the necessary adjustments for a unified and professional look.
By addressing these common issues, you can ensure that your superscripts and subscripts are accurately displayed and enhance the overall quality of your presentation.
Now that we’ve explored troubleshooting tips, let’s summarize what we’ve learned about using superscripts and subscripts in Google Slides.