
What is a Philips Hue Smart Plug?
A Philips Hue Smart Plug is a versatile device that allows you to control your electrical appliances from anywhere using your smartphone or voice commands. It is a smart home solution that seamlessly integrates with your existing Philips Hue lighting system, offering convenience and flexibility in managing your connected devices.
This compact plug acts as a bridge between your electrical outlet and your appliances, enabling you to turn them on or off remotely or schedule them to operate at specific times. It provides a convenient way to automate your daily routines and make your home smarter and more energy-efficient.
One of the standout features of the Philips Hue Smart Plug is its compatibility with popular voice assistants, such as Amazon Alexa, Google Assistant, and Apple HomeKit. By simply using voice commands, you can control your devices hands-free, creating a hands-free and hassle-free smart home experience.
The Philips Hue Smart Plug also offers energy monitoring capabilities, allowing you to track the energy consumption of each connected device. This feature helps you gain insight into your energy usage patterns and identify opportunities to reduce energy waste and save money on your utility bills.
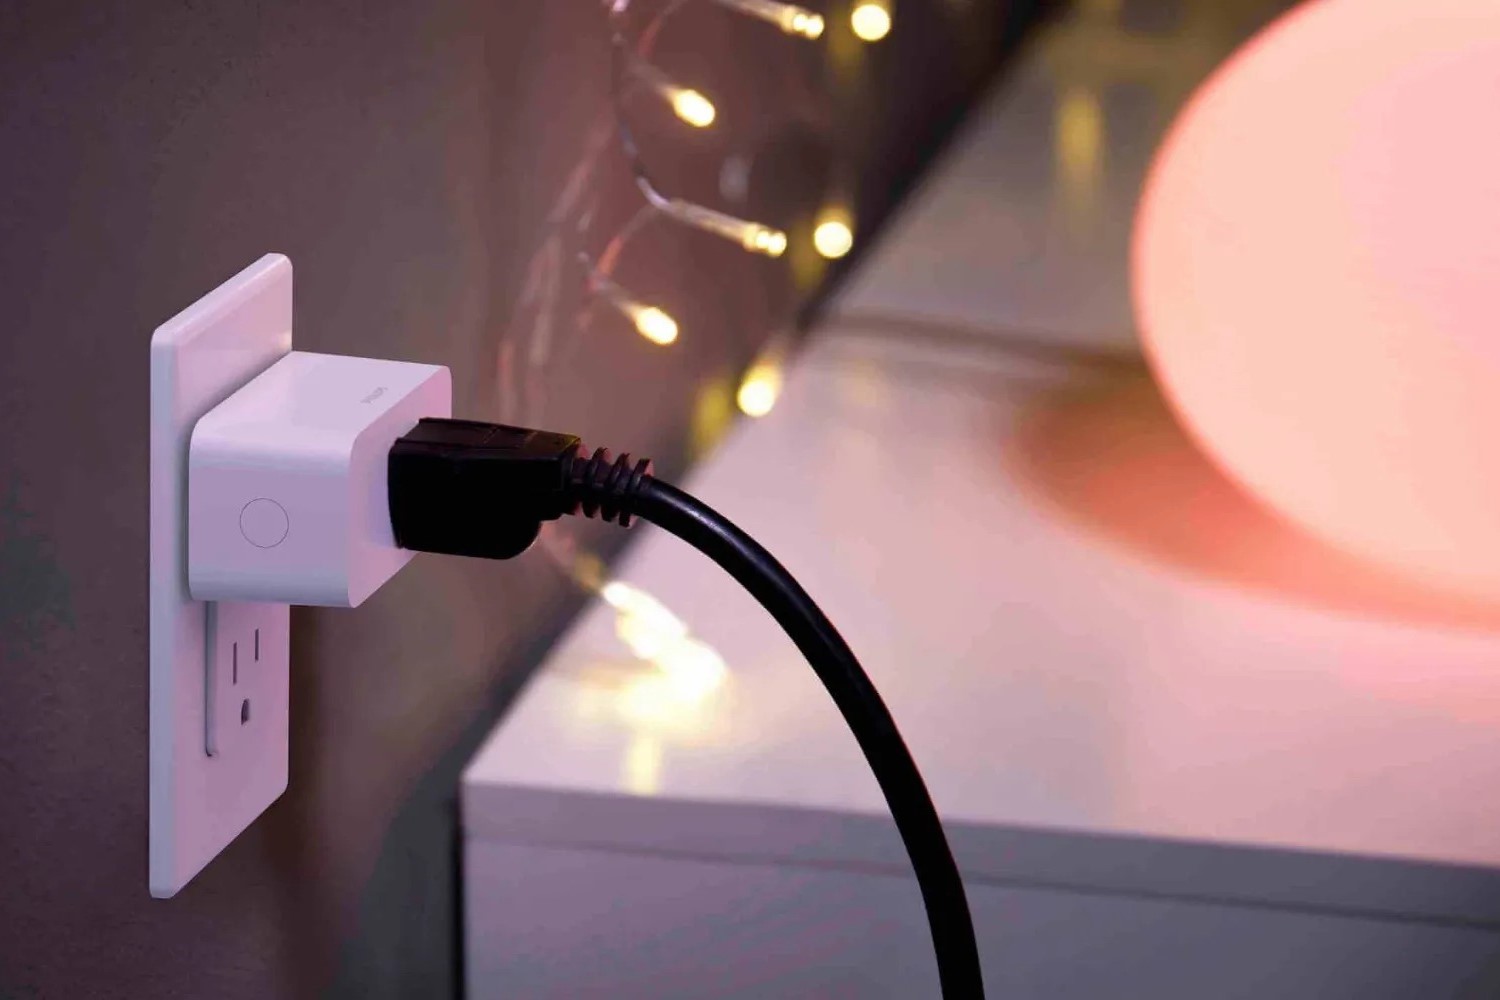
With its sleek and compact design, the Philips Hue Smart Plug blends seamlessly into any home decor. It can be easily plugged into any standard electrical outlet without blocking adjacent outlets, making it a convenient and user-friendly addition to your smart home ecosystem.
Whether you want to remotely control your lamps, fans, coffee makers, or any other electrical appliance, the Philips Hue Smart Plug provides a simple and intuitive solution. All you need is a stable Wi-Fi connection and the Philips Hue app, and you’ll have complete control over your devices.
Overall, the Philips Hue Smart Plug is a versatile and powerful device that brings convenience, automation, and energy efficiency to your smart home. It enhances your everyday life by simplifying the control of your appliances and integrating seamlessly with your existing Philips Hue ecosystem.
What can you control with a Philips Hue Smart Plug?
A Philips Hue Smart Plug gives you the ability to control a wide range of electrical devices and appliances in your home. Whether it’s controlling individual devices or managing groups of devices, the smart plug offers convenience and flexibility in managing your connected devices.
Here are some of the things you can control with a Philips Hue Smart Plug:
- Lamps and Lighting: Connect your indoor or outdoor lights to the smart plug and easily control them using the Philips Hue app or voice commands. You can turn them on or off, adjust the brightness, and even schedule them to turn on automatically at specific times.
- Fans and Air Conditioners: Control your fans or air conditioners with ease. Use the smart plug to turn them on or off remotely, ensuring you have a comfortable environment whenever you need it.
- Home Entertainment Systems: Connect your TV, soundbar, or gaming console to the smart plug and enjoy the convenience of turning them on or off with a simple voice command or through the app.
- Kitchen Appliances: Control your coffee maker, kettle, or any other kitchen appliance connected to the smart plug. You can schedule your coffee to be ready when you wake up or have the kettle boil water before you even step into the kitchen.
- Smart Home Devices: The smart plug can also work with other smart home devices like smart locks, cameras, and more. You can create automation routines that allow different devices to work together seamlessly.
By integrating these devices with the Philips Hue Smart Plug, you can enjoy the convenience of controlling them all from one central location, whether it’s using the Philips Hue app on your smartphone or using voice commands with a compatible voice assistant.
It’s important to note that the Philips Hue Smart Plug is compatible with a wide range of devices that are compatible with standard electrical outlets. However, it’s always recommended to check the compatibility of your specific devices before connecting them to the smart plug.
Overall, the Philips Hue Smart Plug offers immense control and flexibility over your everyday devices, giving you the power to automate and customize your home to fit your lifestyle. With its extensive compatibility and user-friendly interface, it’s a valuable addition to any smart home ecosystem.
Things to consider before setting up the Philips Hue Smart Plug
Before setting up the Philips Hue Smart Plug, there are a few important factors to consider to ensure a smooth installation process and optimal functionality:
- Compatibility: Make sure the devices and appliances you plan to connect to the smart plug are compatible with standard electrical outlets. Check the power requirements of each device to ensure they are within the range of the smart plug’s capabilities.
- Wi-Fi Coverage: Ensure that your Wi-Fi signal is strong and covers the area where the smart plug will be installed. A stable Wi-Fi connection is crucial for seamless control and communication between the smart plug, your devices, and the Philips Hue app.
- Available Electrical Outlets: Consider the number of available electrical outlets in the area where you plan to install the smart plug. Make sure there is adequate space for the smart plug without obstructing other outlets or interfering with other electrical devices.
- Network Security: As with any smart home device, it’s important to prioritize network security. Ensure that your Wi-Fi network is password protected and regularly update the firmware of your smart plug and any other connected devices to ensure the highest level of security.
- Smart Home Ecosystem: If you already have a Philips Hue lighting system or other smart home devices, consider how the Philips Hue Smart Plug will integrate with your existing ecosystem. Check compatibility and ensure that the smart plug can be easily controlled and managed alongside your other devices.
- Usage Requirements: Determine how you plan to use the smart plug and what features are essential for your needs. Consider if you require features like energy monitoring, scheduling, or voice control, and ensure that the smart plug you choose meets these requirements.
By considering these factors before setting up the Philips Hue Smart Plug, you can ensure a successful installation and enjoy the full benefits of this versatile smart home device. Taking the time to review compatibility, network strength, and usage needs will help you make informed decisions and optimize your smart home experience.
Step by Step Guide to Set Up the Philips Hue Smart Plug
Setting up the Philips Hue Smart Plug is a straightforward process that can be completed in just a few simple steps. Follow this step-by-step guide to get your smart plug up and running:
- Prepare your smart plug: Start by unpacking your Philips Hue Smart Plug and ensure that you have all the necessary components, including the plug itself and any accompanying cables or instructions.
- Connect the smart plug: Plug the smart plug into a standard electrical outlet. Ensure that the outlet is energized and functioning properly. The LED indicator on the smart plug should start flashing, indicating that it is ready for setup.
- Download the Philips Hue app: If you haven’t already, download the Philips Hue app on your smartphone. The app is available for both iOS and Android devices and can be found in the respective app stores.
- Open the Philips Hue app: Launch the Philips Hue app and ensure that your smartphone is connected to the same Wi-Fi network that you plan to use for the smart plug.
- Add a new device: In the Philips Hue app, navigate to the settings menu and select “Add Device” or a similar option. This will initiate the process of adding the smart plug to your Philips Hue ecosystem.
- Follow the on-screen instructions: The app will guide you through the setup process, providing step-by-step instructions and prompts. Follow these instructions carefully to ensure a successful connection between the smart plug and your Philips Hue system.
- Connect to the Philips Hue Bridge: If you have a Philips Hue Bridge, the app will prompt you to pair the smart plug with it. Follow the instructions provided to establish a connection between the smart plug and the bridge.
- Configure settings: Once the smart plug is successfully connected to your Philips Hue ecosystem, you can customize its settings according to your preferences. This includes naming the device, assigning it to rooms or zones, and configuring any desired automation or scheduling options.
- Test and enjoy: After completing the setup process, take a moment to test the smart plug’s functionality. Use the Philips Hue app or voice commands to turn the connected devices on or off and ensure that they respond as expected.
That’s it! You have now successfully set up your Philips Hue Smart Plug. You can now enjoy the convenience and flexibility of controlling your connected devices from anywhere using your smartphone or voice commands.
Remember that these steps serve as a general guideline, and the specific setup process may vary slightly depending on the version of the Philips Hue app, firmware updates, and any additional requirements or features specific to your smart plug model.
Connecting the Philips Hue Smart Plug to the Philips Hue Bridge
If you have a Philips Hue Bridge, connecting the Philips Hue Smart Plug to it will enhance its functionality and provide additional control options. Follow these steps to establish a connection between the smart plug and the Hue Bridge:
- Ensure the Philips Hue Bridge is set up: Before connecting the smart plug, make sure you have already set up and connected the Philips Hue Bridge to your Wi-Fi network. Refer to the instructions provided with the Bridge if you need assistance with this.
- Place the smart plug within range: Position the smart plug within a reasonable distance of the Philips Hue Bridge to ensure a reliable connection. Ideally, there should be no physical obstructions or interference between the two devices.
- Turn on the smart plug: Plug the smart plug into a working electrical outlet and ensure that it is powered on. The LED indicator on the smart plug should start flashing, indicating that it is ready for connection.
- Open the Philips Hue app: Launch the Philips Hue app on your smartphone. Ensure that your smartphone is connected to the same Wi-Fi network as the Philips Hue Bridge.
- Add a new device: In the Philips Hue app, navigate to the settings menu and select “Add Device” or a similar option to initiate the process of adding the smart plug to your Hue Bridge.
- Follow the on-screen instructions: The app will guide you through the process of connecting the smart plug to the Hue Bridge. This typically involves pressing the button on the Bridge and then following the prompts on the app to pair the devices. Follow these instructions carefully to ensure a successful connection.
- Wait for confirmation: Once the smart plug is successfully connected to the Hue Bridge, the app will provide a confirmation message. You can then proceed to configure the settings and control options for the smart plug within the app.
- Test the connection: After connecting the smart plug to the Hue Bridge, use the Philips Hue app or voice commands to control the connected devices. Turn them on or off to confirm that the Hue Bridge is communicating with the smart plug accurately.
By connecting the Philips Hue Smart Plug to your Hue Bridge, you can unlock additional features such as voice control, advanced automation options, and integration with other Philips Hue devices within your lighting system. Enjoy the expanded functionality and convenience of managing your devices seamlessly from the Philips Hue app or your preferred voice assistant.
Note that these steps are a general guideline, and the specific process may vary slightly depending on the version of the Philips Hue app, firmware updates, and any additional features specific to your smart plug model or Hue Bridge version.
Adding the Philips Hue Smart Plug to the Philips Hue app
After setting up your Philips Hue Smart Plug physically, the next step is to add it to the Philips Hue app. Follow these steps to seamlessly integrate the smart plug into the app:
- Open the Philips Hue app: Launch the Philips Hue app on your smartphone or mobile device. Ensure that your device is connected to the same Wi-Fi network as the smart plug.
- Navigate to the settings: In the app, locate and tap on the settings menu icon. This is usually represented by three horizontal lines or a gear icon and is typically found in the top-left or bottom-right corner of the app.
- Tap on “Add Device” or similar: Look for an option within the settings menu that allows you to add a new device. The specific wording may vary, but it is generally called “Add Device,” “Set Up New Device,” or similar.
- Select the type of device: In the device setup section, choose the appropriate category for the smart plug. This may be listed as “Smart Plug,” “Socket,” or something similar. Follow the on-screen instructions to proceed.
- Put the smart plug into pairing mode: The app will guide you through the process of putting the smart plug into pairing mode. This may involve pressing and holding a button on the smart plug until an LED indicator starts flashing.
- Wait for the app to detect the smart plug: The app will search for the smart plug on the same Wi-Fi network. It may take a few moments, but the app should detect the smart plug and display it as an available device for pairing.
- Select the smart plug for pairing: Tap on the detected smart plug in the app to pair it with your Philips Hue system. Follow any additional instructions or prompts provided by the app to complete the pairing process.
- Assign a name and location: Once the smart plug is successfully added to the app, you can assign a unique name and a location to it. This will help you identify and control the device easily, especially when you have multiple smart plugs or other Philips Hue devices.
- Test the smart plug: After adding the smart plug to the app, you can test its functionality by using the app’s controls to turn it on or off. Ensure that the smart plug responds correctly and that you can control it seamlessly through the app.
By following these steps, you can effortlessly add the Philips Hue Smart Plug to the Philips Hue app and enjoy the convenience of controlling it alongside your other Philips Hue devices. The app provides a user-friendly interface for managing and customizing the smart plug’s settings and automation options.
Remember that the specific steps and options within the Philips Hue app may vary depending on the app version and any updates released by Philips. However, the general process outlined above should guide you through the setup process with ease.
Naming and organizing your Philips Hue Smart Plug
Once you have added the Philips Hue Smart Plug to the Philips Hue app, it’s important to name and organize it properly to easily identify and manage it alongside your other devices. Follow these steps to effectively name and organize your smart plug:
- Open the Philips Hue app: Launch the Philips Hue app on your smartphone or mobile device and ensure that you are on the main screen that displays all your connected devices.
- Locate the smart plug: Scroll or browse through your list of connected devices in the app to locate the smart plug you want to name and organize.
- Tap on the smart plug: Tap on the smart plug to access its individual settings and details. This may include options like power control, scheduling, and automation options.
- Access device settings: Look for an option within the smart plug’s settings to edit its name or assign it to a specific room or location. This is usually represented by an icon or text that indicates “Settings,” “Edit,” or similar.
- Assign a name: Enter a unique and descriptive name for the smart plug that helps you easily identify and control it. Avoid using generic or ambiguous names to prevent confusion, especially if you have multiple smart plugs or other devices.
- Assign to a room or zone: If desired, assign the smart plug to a specific room or zone within the app. This enhances organization and allows you to control devices grouped together more efficiently.
- Save the changes: Once you have provided a name and assigned a room or location, save the changes to apply them to the smart plug within the Philips Hue app.
- Repeat for other smart plugs: If you have multiple smart plugs connected, repeat the above steps to name and organize each one individually. This will ensure a well-organized and efficient setup within the app.
- Test and verify: After naming and organizing the smart plug, test its functionality within the app. Ensure that you can easily locate and control the smart plug by its designated name and that it responds reliably to your commands.
By effectively naming and organizing your Philips Hue Smart Plug, you can easily identify and manage it within the Philips Hue app. This allows for a more intuitive and efficient smart home experience, especially when controlling multiple devices and automating routines.
Remember that the specific steps for naming and organizing the smart plug may vary slightly depending on the version of the Philips Hue app and any updates released by Philips. However, the general process outlined above should guide you through the necessary steps to effectively manage your smart plug within the app.
Setting up schedules and automations with the Philips Hue Smart Plug
One of the key features of the Philips Hue Smart Plug is the ability to set up schedules and automations. This allows you to create customized routines and automate the behavior of your connected devices. Follow these steps to set up schedules and automations with the Philips Hue Smart Plug:
- Open the Philips Hue app: Launch the Philips Hue app on your smartphone or mobile device and ensure that you are on the main screen that displays all your connected devices.
- Select the smart plug: Scroll or browse through your list of connected devices in the app to locate the smart plug for which you want to set up schedules and automations.
- Access device settings: Tap on the smart plug to access its individual settings and details. Look for an option that allows you to set up schedules or automations. This may be labeled as “Schedules,” “Automations,” or similar.
- Create a schedule: In the schedules or automations section, create a new schedule by following the app’s prompts and instructions. Specify the desired time and days for the smart plug to automatically turn on or off.
- Customize the schedule: Fine-tune the schedule settings to meet your specific needs. Some options may include adjusting the brightness, duration, and repetition settings of the smart plug’s behavior.
- Add multiple schedules: If desired, you can add multiple schedules for the smart plug to accommodate different scenarios throughout the day or week. For example, you can set up a schedule to turn on the smart plug in the morning and turn it off at night.
- Create automations: Explore the automation options to further enhance your smart plug’s functionality. Automations allow you to create custom rules and triggers, such as turning on the smart plug when a motion sensor detects movement or when the sun sets.
- Save and activate: Once you have customized the schedules and automations to your preference, save the changes and activate the schedules or automations within the app.
- Test the schedules and automations: Test the functionality of the schedules and automations by waiting for the designated times or triggering the specified conditions. Verify that the smart plug behaves as expected and follows the set schedules and automations.
By setting up schedules and automations with the Philips Hue Smart Plug, you can effortlessly control your connected devices without manual intervention. This helps create a more convenient and personalized smart home experience, saving you time and energy.
Remember that the specific options and features for setting up schedules and automations may vary slightly depending on the version of the Philips Hue app and any updates released by Philips. However, the general process outlined above should guide you through the necessary steps to configure schedules and automations for your smart plug.
Troubleshooting common issues with the Philips Hue Smart Plug
While the Philips Hue Smart Plug is designed to provide a seamless experience, you may occasionally encounter some common issues. Here are some troubleshooting steps to help you resolve these issues:
- No power or connectivity: Ensure that the smart plug is properly plugged into a working electrical outlet and that the outlet has power. If the smart plug is not connecting to the app, check your Wi-Fi network settings and ensure that the smart plug is within range of the network.
- Device not responding: If a connected device is not responding to commands through the app, ensure that the device is powered on and connected to the smart plug. Try unplugging and reconnecting the device to the smart plug to establish a fresh connection.
- Interference with other devices: If you experience interference or connectivity issues, check for nearby devices or appliances that may be causing interference. Move the smart plug or the interfering device to different locations to minimize any potential interference.
- App connectivity issues: If you are experiencing problems connecting to the Philips Hue app, try restarting both your smartphone and the Philips Hue Bridge. Ensure that your app and devices are running the latest firmware and app versions.
- Resetting the smart plug: To start with a fresh setup, you may need to reset the smart plug. Refer to the user manual or instructions provided by Philips to learn how to reset the specific model of your smart plug. After resetting, you can set it up again following the initial setup steps.
- Wi-Fi network issues: If your Wi-Fi network is experiencing problems, other devices in your smart home ecosystem may be affected. Troubleshoot your Wi-Fi network by checking for any network disruptions, ensuring you have a stable internet connection, and contacting your internet service provider if necessary.
- Compatibility issues: If you are experiencing compatibility issues with certain devices, ensure that they are indeed compatible with the smart plug. Double-check the specifications and requirements of both the smart plug and the device to ensure proper compatibility.
- Check for firmware updates: Stay up to date with the latest firmware updates for your smart plug and Philips Hue Bridge. Often, updates fix bugs and improve the device’s performance and reliability.
- Contact customer support: If you have tried all troubleshooting steps and are still experiencing issues, don’t hesitate to reach out to Philips customer support. They can provide further assistance and guidance to resolve any persisting problems.
By following these troubleshooting steps, you can effectively address common issues that may arise with your Philips Hue Smart Plug. Remember that each issue may have unique causes and solutions, so it’s important to approach each problem with patience and thoroughness.
If you encounter persistent issues or require further assistance, don’t hesitate to reach out to the Philips customer support team. They are equipped to provide personalized assistance and help you enjoy a hassle-free experience with your Philips Hue Smart Plug.