
Step 1: Gather the necessary materials
Before you begin installing the Philips Hue Bridge on your wall, it’s crucial to gather all the necessary materials. Having everything ready will ensure a smooth and hassle-free installation process. Here are the essential items you’ll need:
- Philips Hue Bridge
- Wall-mounting bracket or adhesive tape
- Screws and wall anchors (if using a bracket)
- Power adapter
- Ethernet cable
- Screwdriver or drill (if using screws)
- Level (optional, for precise alignment)
The Philips Hue Bridge is the heart of your smart lighting system, so make sure you have it on hand. The wall-mounting bracket provides a secure attachment to the wall, while adhesive tape offers a simple, non-permanent solution. Depending on your preference and the surface of your wall, choose the appropriate method. If you opt for screws and wall anchors, ensure they are suitable for your wall type (e.g., drywall, concrete).
The power adapter is necessary for supplying electricity to the Hue Bridge, while the ethernet cable connects the Bridge to your home network. Make sure the cable is long enough to reach the nearest ethernet port. If you plan to mount the Bridge far from the router, consider using a longer cable or a wireless extender to ensure a stable connection.
If you’re using screws for mounting, a screwdriver or drill will come in handy. This ensures a secure attachment and prevents the Bridge from falling off the wall. It’s also a good idea to have a level available to ensure the Bridge is properly aligned during installation.
By gathering all these materials beforehand, you’ll save time and avoid interruptions during the installation process. Once you have everything ready, you can move on to the next step of determining the location for your Philips Hue Bridge.
Step 2: Determine the location for the Hue Bridge
Choosing the right location for your Philips Hue Bridge is crucial for optimal performance and convenience. Here are some factors to consider when determining the placement:
- Proximity to the router: Ensure that the Hue Bridge is located within a reasonable distance from your Wi-Fi router. This will ensure a strong and stable connection between the Bridge and your home network.
- Avoiding interference: Keep the Hue Bridge away from sources of interference, such as large appliances, electronic devices, or metal objects. These can disrupt the wireless signal and affect the performance of your smart lighting system.
- Accessibility: Place the Hue Bridge in an easily accessible location. This will make it convenient to connect additional devices to the Bridge or troubleshoot any issues that may arise.
- Aesthetics: Consider the aesthetic aspect when selecting the location for your Hue Bridge. If you prefer a clean and minimalist look, you may choose to hide the Bridge behind furniture or use cable management solutions to keep the cables neat and tidy.
Additionally, make sure that the chosen location has a power outlet nearby. Having easy access to power will eliminate the need for long extension cords and messy cable arrangements.
Remember, the Hue Bridge needs to remain plugged in at all times to ensure your smart lighting system functions properly. Therefore, choose a location that is practical and allows for uninterrupted power supply.
Once you’ve considered these factors, you can proceed to the next step of preparing the wall for installation. This will ensure a secure attachment and provide a stable foundation for the Hue Bridge.
Step 3: Prepare the wall for installation
Before mounting the Philips Hue Bridge on the wall, it’s important to prepare the wall to ensure a secure and stable installation. Follow these steps to prepare the wall:
- Clear the area: Remove any obstacles or objects near the desired installation spot. This will give you a clear workspace and prevent accidental damage to the Bridge during the installation process.
- Clean the wall: Wipe down the area where you plan to mount the Hue Bridge. Remove any dust, dirt, or residue that could affect the adhesion if you’re using adhesive tape or the stability if you’re using a wall-mounting bracket.
- Mark the mounting location: Use a pencil or marker to mark the exact spot where you want to install the Bridge. Ensure the marking is level if you desire precise alignment.
- If using a wall-mounting bracket: Attach the bracket to the wall following the manufacturer’s instructions. Make sure it is firmly secured with screws and wall anchors, providing a solid base for the Hue Bridge.
- If using adhesive tape: Cut the desired length of adhesive tape and attach it to the back of the Hue Bridge. Peel off the protective layer and press the Bridge firmly against the wall, applying even pressure to ensure proper adhesion.
It’s essential to properly prepare the wall to guarantee a reliable and durable installation. By clearing the area, cleaning the wall, and marking the mounting location, you’ll set a solid foundation for mounting the Philips Hue Bridge.
Next, you’ll learn how to mount the Hue Bridge on the wall securely and connect the necessary cables to ensure it functions seamlessly.
Step 4: Mount the Hue Bridge on the wall
Now that you’ve prepared the wall, it’s time to mount the Philips Hue Bridge securely. Follow these steps to ensure a proper installation:
- If using a wall-mounting bracket: Place the Hue Bridge onto the bracket, aligning the screw holes on the Bridge with those on the bracket. Use the provided screws to attach the Bridge firmly to the bracket. Make sure the Bridge is level and tightly fastened.
- If using adhesive tape: Peel off the protective layer from the tape on the back of the Hue Bridge. Align the Bridge with the marking on the wall and press it firmly against the surface, applying even pressure to ensure a secure attachment.
Ensure that the Hue Bridge is mounted parallel to the floor and aligned with your desired orientation. This will not only provide a visually pleasing look but allow for easy access to the ports and buttons on the Bridge.
If you’re using a wall-mounting bracket, make sure that it is securely attached to the wall and provides a stable support for the Bridge. Double-check the tightness of the screws to ensure that the Bridge doesn’t wobble or become loose over time.
If you’re using adhesive tape, apply enough pressure to ensure that the Bridge adheres firmly to the wall. Avoid moving the Bridge immediately after installation to allow the adhesive to bond properly.
By following these steps, you’ll mount the Philips Hue Bridge on the wall securely, providing a stable and reliable foundation for your smart lighting system.
Next, you’ll learn how to connect the power adapter and ethernet cable to the Hue Bridge, allowing it to communicate with your home network.
Step 5: Connect the power adapter and ethernet cable
Now that the Philips Hue Bridge is securely mounted on the wall, it’s time to connect the necessary cables to power and connect the Bridge to your home network. Follow these steps to ensure a proper connection:
- Locate the power adapter: Connect one end of the power adapter to the power port on the back of the Hue Bridge.
- Plug into a power outlet: Connect the other end of the power adapter to a nearby power outlet. Ensure the outlet is easily accessible and has a consistent power supply. The Hue Bridge needs to be powered at all times to operate properly.
- Connect the ethernet cable: Locate an available ethernet port on your router or modem. Connect one end of the ethernet cable to the ethernet port located on the back of the Hue Bridge. Connect the other end of the cable to the ethernet port on your router or modem.
Make sure the ethernet cable is securely connected to both the Hue Bridge and the router/modem. This will establish a stable network connection, allowing the Bridge to communicate with your smart devices and the Philips Hue app.
Double-check all connections to ensure they are snug and secure. Loose connections can result in intermittent connection issues or poor performance of your smart lighting system.
Once the power adapter is connected and the ethernet cable is properly plugged in, you’re ready to proceed to the next step. We’ll cover how to organize and secure the cables to maintain a clean and organized installation.
Step 6: Organize and secure the cables
With the Philips Hue Bridge connected to power and your home network, it’s important to organize and secure the cables to maintain a tidy and well-organized installation. Follow these steps to achieve a clean cable setup:
- Route the cables: Neatly route the power adapter cable and ethernet cable along the wall or baseboard towards the power outlet and router, respectively. Avoid tangles and ensure the cables are not twisted or bent excessively.
- Use cable clips or ties: To keep the cables securely in place and prevent them from dangling or becoming a tripping hazard, use cable clips or ties. These accessories can be easily attached to the wall, baseboard, or furniture to hold the cables in position.
- Label the cables: If you have multiple cables running along the same path, consider using cable labels or color-coded tags to identify each cable. This will make it easier to troubleshoot or make changes in the future without confusion.
- Consider a cable management solution: If you prefer a more polished and professional look, you can invest in a cable management solution. These products are designed to hide and organize cables discreetly, such as cable raceways or cord covers.
By organizing and securing the cables, you not only improve the aesthetics of your installation but also facilitate maintenance and troubleshooting if needed. Tangled or loose cables can lead to accidental disconnections or difficulties in identifying specific cables.
Take the time to ensure that the cables are neatly arranged and properly secured. This will result in a cleaner and more visually appealing installation of your Philips Hue Bridge and smart lighting system.
Next, we’ll cover how to verify the connection of the Hue Bridge to your home network, ensuring that it is successfully communicating with your smart devices and the Philips Hue app.
Step 7: Verify the Hue Bridge connection
After connecting the Philips Hue Bridge to power and your home network, it’s important to verify that the Bridge is successfully communicating and functioning as intended. Follow these steps to ensure a proper connection:
- Ensure power and network connectivity: Confirm that the power adapter is securely plugged into the Hue Bridge and a power outlet. Check that the ethernet cable is securely connected to both the Bridge and your router/modem.
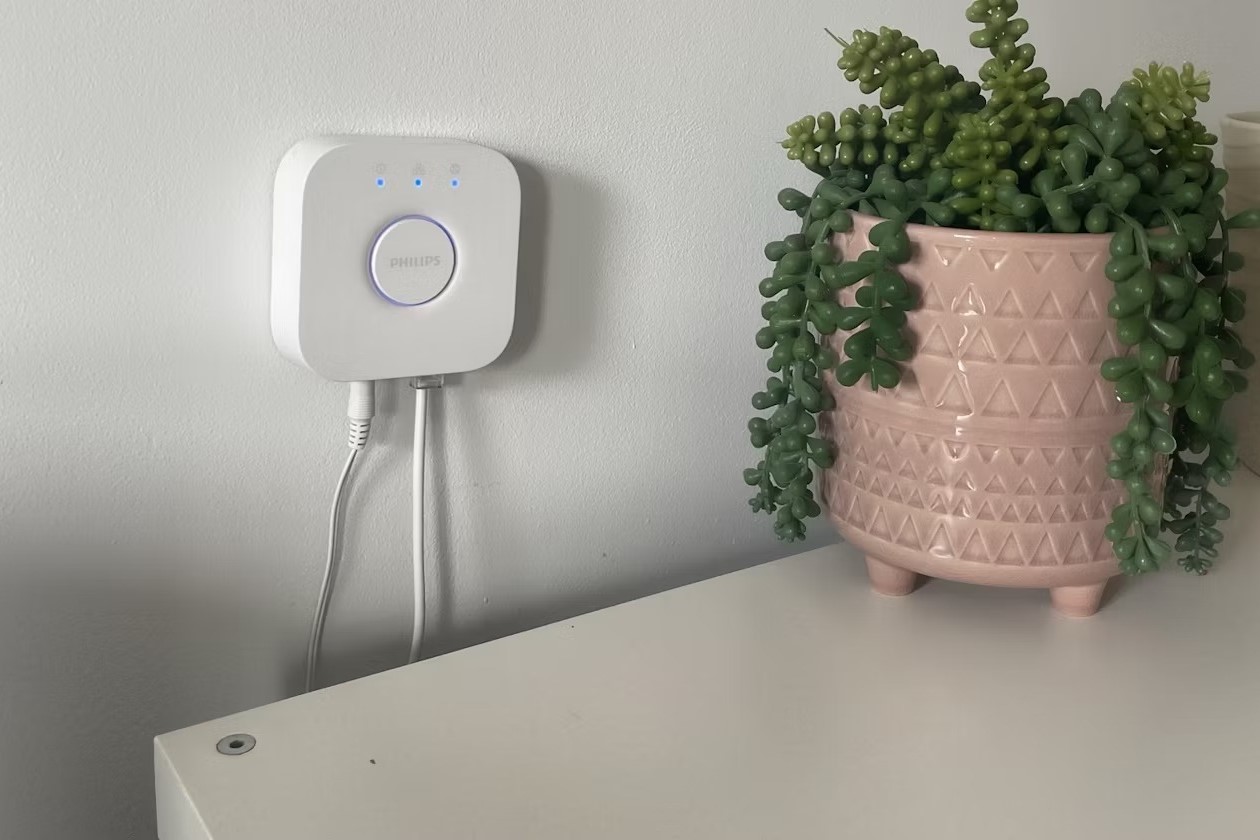
- Check the LED indicators: The Hue Bridge has LED indicators that provide valuable information about its status. Look for a solid green light on the Bridge, indicating that it has successfully connected to your network.
- Open the Philips Hue app: Launch the Philips Hue app on your smartphone or tablet. If you haven’t installed the app yet, you can download it from the App Store or Google Play Store.
- Connect to the Bridge: Follow the app’s instructions to connect to your Hue Bridge. This typically involves pressing the “Connect” button in the app and then pressing the “Link” button on the Hue Bridge.
- Verify device connectivity: Once connected, the app should be able to detect and control your Philips Hue lights. Test various lighting scenes, colors, brightness levels, and other features to ensure that the Bridge is communicating properly with your smart devices.
If you encounter any issues during the verification process, double-check the connections and make sure your network is functioning properly. Restarting the Bridge and your router/modem can also help resolve any connectivity issues.
If you’re still experiencing problems, consult the user manual or visit the Philips Hue support website for troubleshooting tips and resources.
By verifying the connection of the Philips Hue Bridge, you can ensure that your smart lighting system is up and running smoothly. This step is crucial to confirm that the Bridge is successfully communicating with your devices and allows you to fully enjoy the features and capabilities of your lighting setup.
Next, we’ll provide you with some troubleshooting tips in case you encounter any difficulties while setting up or using your Philips Hue Bridge.
Step 8: Troubleshooting tips
While setting up and using your Philips Hue Bridge, you may encounter some common issues. Here are a few troubleshooting tips to help you resolve these problems:
- Check power and network connections: Ensure that the power adapter is firmly connected to the Hue Bridge and a power outlet. Double-check the ethernet cable connections at both ends to ensure a stable network connection.
- Restart the Bridge and router/modem: Sometimes, a simple restart can resolve connectivity issues. Try turning off the Hue Bridge, unplugging it from the power source, and also restart your router or modem. After a few minutes, plug in the Bridge again and allow it to reconnect.
- Update firmware and app: Make sure that your Philips Hue Bridge has the latest firmware version installed. Check for firmware updates in the Philips Hue app or through the Hue Bridge settings. Additionally, keep your app up to date by downloading any available updates from the app store.
- Move closer to the router: If you’re experiencing weak or intermittent connectivity, try moving the Hue Bridge closer to your router. This can help improve the signal strength and stability.
- Reset and reconfigure: If all else fails, you can try resetting the Hue Bridge to factory settings. This will erase all settings and configurations, so you’ll need to set it up again. Follow the instructions provided by Philips Hue to reset and reconfigure the Bridge.
- Consult Philips Hue support: If you’re still experiencing difficulties, don’t hesitate to reach out to Philips Hue customer support. They have a wealth of knowledge and can provide personalized assistance to troubleshoot and resolve any issues you may be facing.
By following these troubleshooting tips, you can overcome common hurdles and ensure a smooth experience with your Philips Hue Bridge. Remember to remain patient and thorough when diagnosing and resolving issues.
If you’re unable to resolve the problem on your own, professional assistance may be needed. Reach out to a qualified technician or contact Philips Hue support for further assistance.
With these troubleshooting tips, you can ensure that your Philips Hue Bridge is functioning optimally, allowing you to enjoy the full benefits of your smart lighting system.