
Checking Compatibility
Before setting up your AirPods Pro, it’s important to ensure that they are compatible with your device. AirPods Pro are designed to work seamlessly with Apple devices, but they can also be used with Android devices. Here’s how to check compatibility:
1. Apple Devices:
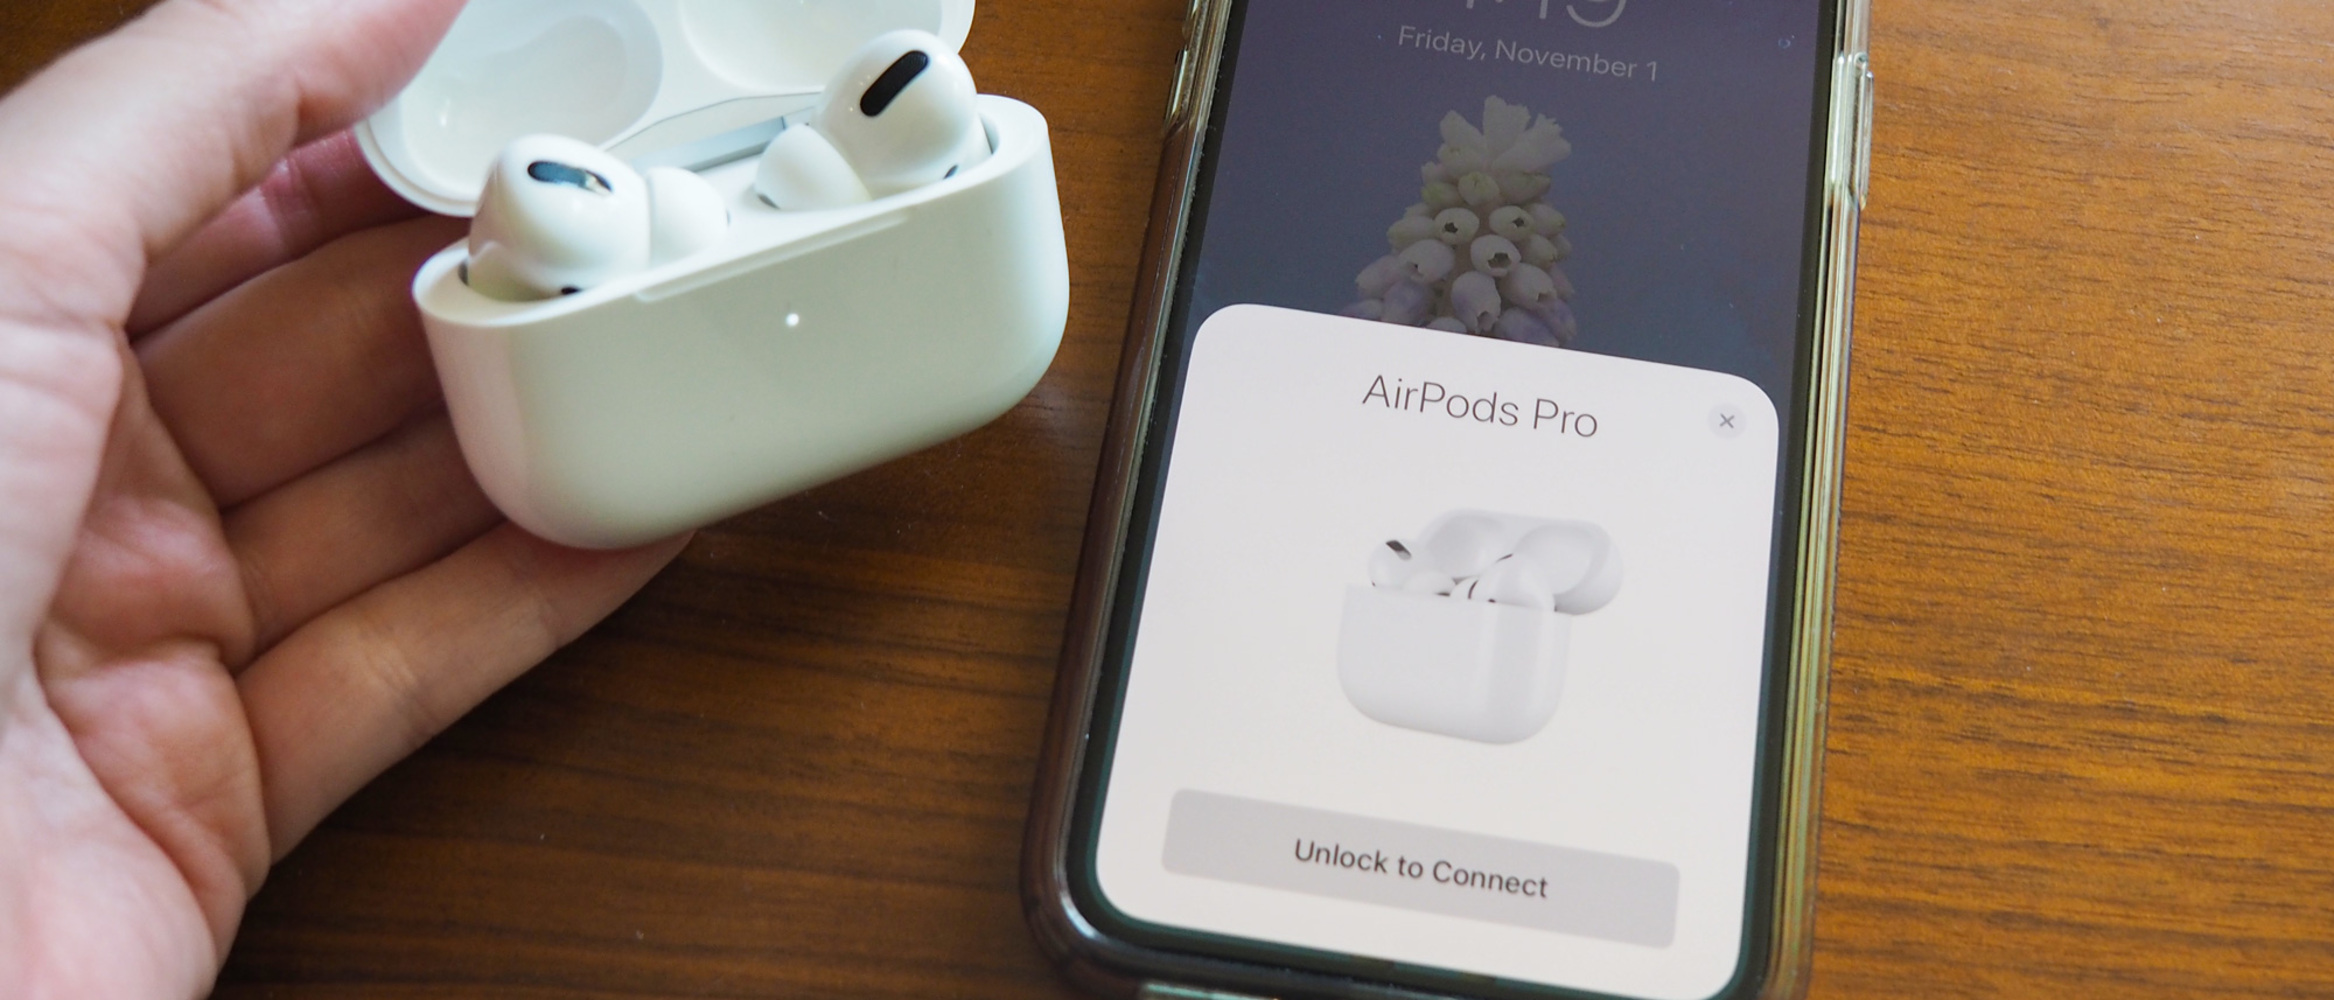
If you have an iPhone, iPad, or iPod touch running iOS 14.2 or later, your device is compatible with AirPods Pro. Simply open the lid of the AirPods Pro case next to your device and follow the on-screen instructions to pair them.
2. Mac:
If you have a Mac running macOS Catalina 10.15.1 or later, your device is compatible with AirPods Pro. Open the lid of the AirPods Pro case, go to the Apple menu on your Mac, select “System Preferences,” then click on “Bluetooth.” Your AirPods Pro should appear in the list of Bluetooth devices. Click on them to pair.
3. Apple Watch:
If you have an Apple Watch running watchOS 6.1 or later, your device is compatible with AirPods Pro. Open the lid of the AirPods Pro case, go to the Home screen on your Apple Watch, tap on “Settings,” then select “Bluetooth.” Your AirPods Pro should appear in the list of Bluetooth devices. Tap on them to pair.
4. Android Devices:
AirPods Pro can also be used with Android devices, although some features may not be available. Ensure that your Android device has Bluetooth capability and follow the manufacturer’s instructions to pair your AirPods Pro.
Remember that to take full advantage of the features and functionalities of AirPods Pro, it’s recommended to use them with an Apple device. Now that you’ve checked the compatibility of your device, let’s move on to the next step: charging your AirPods Pro.
Charging Your AirPods Pro
Before you start using your AirPods Pro, you need to ensure they are charged properly. Here’s what you need to know about charging your AirPods Pro:
1. Charging Case:
Your AirPods Pro come with a wireless charging case. To charge the case, simply place it on a Qi-compatible wireless charging mat or connect it to a Lightning cable. When the case is placed on a charging mat, the LED light on the front of the case will indicate the charging status. If you’re using a Lightning cable, the LED light will be located on the inside of the case.
2. Charging the AirPods:
When you place your AirPods Pro in the charging case, they will automatically start charging. The LED light on the front of the case will show the charging status of the AirPods. Green means they’re fully charged, and amber means they’re still charging.
3. Charging Time:
The AirPods Pro have a fast-charging feature. With just 5 minutes of charging, you can get up to 1 hour of listening time. A full charge will give you up to 4.5 hours of listening time or around 3.5 hours of talk time. The charging case can provide multiple charges, giving you a total of up to 24 hours of listening time or 18 hours of talk time.
4. Checking Battery Life:
To check the battery life of your AirPods Pro, you can do the following:
- – On an iPhone or iPad, swipe down from the top-right corner of the screen to access the Control Center. The battery status of your AirPods Pro will be displayed here.
- – On a Mac, click on the Bluetooth icon in the menu bar and hover over your AirPods Pro. The battery status will be displayed.
- – On an Apple Watch, swipe up from the watch face to access the Control Center. The battery status of your AirPods Pro will be shown here.
Now that your AirPods Pro are charged, you’re ready to pair them with your device. In the next section, we’ll cover how to pair AirPods Pro with your iPhone or iPad.
Pairing with iPhone or iPad
Pairing your AirPods Pro with your iPhone or iPad is a simple process. Just follow the steps below:
1. Unlock your device and make sure Bluetooth is turned on. You can do this by swiping down from the top-right corner of the screen to access the Control Center. Tap on the Bluetooth icon to enable it.
2. Open the lid of the AirPods Pro case. The LED light on the front of the case should start blinking white, indicating that the AirPods Pro are ready to pair.
3. A setup animation should appear on your device’s screen. Tap on “Connect” to start the pairing process.
4. Follow the on-screen instructions to complete the pairing process. This usually involves tapping “Done” when the pairing is successful.
5. Once your AirPods Pro are paired with your iPhone or iPad, they will automatically connect whenever they are within range and Bluetooth is enabled on your device. If you’ve set up iCloud on your device and signed in with your Apple ID, your AirPods Pro will also automatically connect to any other Apple devices linked to your iCloud account.
6. To check the battery status of your AirPods Pro, you can do so through your device’s Control Center. Simply swipe down from the top-right corner of the screen and check the battery widget.
That’s it! You’ve successfully paired your AirPods Pro with your iPhone or iPad. Now you can enjoy wireless audio and convenient controls. In the next section, we’ll cover how to pair AirPods Pro with a Mac.
Pairing with Mac
To pair your AirPods Pro with your Mac, follow these simple steps:
1. Make sure your Mac is running macOS Catalina 10.15.1 or later. Click on the Apple menu in the top-left corner of your screen and select “About This Mac” to check your macOS version.
2. Open the lid of your AirPods Pro case. The LED light on the front of the case should be blinking white, indicating that the AirPods Pro are in pairing mode.
3. On your Mac, click on the Apple menu in the top-left corner and select “System Preferences.” Then, click on “Bluetooth.”
4. In the Bluetooth preferences window, you should see your AirPods Pro listed under “Devices.” Click on them to initiate the pairing process.
5. Follow the on-screen instructions to complete the pairing process. Once the pairing is successful, the status of your AirPods Pro in the Bluetooth preferences window will change to “Connected.”
6. Once your AirPods Pro are paired with your Mac, they will automatically connect whenever they are in range and Bluetooth is enabled on your Mac. To check the battery status of your AirPods Pro, click on the Bluetooth icon in the menu bar and hover over your AirPods Pro.
That’s it! Now you can enjoy the convenience of using your AirPods Pro with your Mac. In the next section, we’ll cover how to pair AirPods Pro with an Apple Watch.
Pairing with Apple Watch
Pairing your AirPods Pro with your Apple Watch allows you to enjoy wireless audio and easy access to controls directly from your wrist. Here’s how to pair your AirPods Pro with an Apple Watch:
1. Make sure your Apple Watch is running watchOS 6.1 or later. To check the watchOS version, open the Settings app on your Apple Watch, go to “General,” and then select “About.”
2. Open the lid of your AirPods Pro case. The LED light on the front of the case will start blinking white, indicating that the AirPods Pro are ready to pair.
3. On your Apple Watch, swipe up from the watch face to access the Control Center. Tap on the AirPlay icon, which looks like a triangle with concentric circles.
4. In the AirPlay menu, you should see your AirPods Pro listed under “Audio Devices.” Tap on them to initiate the pairing process.
5. Follow the on-screen instructions to complete the pairing process. Once the pairing is successful, your AirPods Pro will be connected to your Apple Watch.
6. To check the battery status of your AirPods Pro on your Apple Watch, swipe up from the watch face and locate the battery widget. The battery status of your AirPods Pro will be displayed here.
That’s it! You’ve successfully paired your AirPods Pro with your Apple Watch. Now you can enjoy your favorite music and take calls on the go. In the next section, we’ll cover how to pair AirPods Pro with an Android device.
Pairing with Android
Although AirPods Pro are designed to work seamlessly with Apple devices, they can also be paired with Android devices. Here’s how to pair your AirPods Pro with an Android device:
1. Make sure your Android device has Bluetooth capability. Enable Bluetooth by going to the Settings menu and selecting “Bluetooth.”
2. Open the lid of your AirPods Pro case. The LED light on the front of the case will start blinking white, indicating that the AirPods Pro are ready to pair.
3. On your Android device, go to the Bluetooth settings and tap on “Pair New Device” or a similar option. Your Android device will start scanning for available Bluetooth devices.
4. In the list of available devices, you should see your AirPods Pro listed. Tap on them to initiate the pairing process.
5. Follow the on-screen instructions to complete the pairing process. Your Android device may prompt you to enter a passcode or confirm a pairing request. Simply follow the prompts to proceed.
6. Once the pairing is successful, the LED light on the front of the AirPods Pro case will turn solid white. Your AirPods Pro are now paired and ready to use with your Android device.
Keep in mind that while pairing AirPods Pro with an Android device allows you to listen to audio, some features may not be available or may have limited functionality compared to pairing with Apple devices. However, you can still enjoy the wireless freedom and quality sound of your AirPods Pro on your Android device.
That’s it! You’ve successfully paired your AirPods Pro with an Android device. In the next section, we’ll cover how to configure your AirPods Pro settings.
Configuring AirPods Pro
Once you have paired your AirPods Pro with your device, you can configure various settings to customize your listening experience. Here’s how to configure your AirPods Pro:
1. Open the Settings app on your paired device, such as an iPhone, iPad, or Mac.
2. Tap on “Bluetooth” and locate your AirPods Pro in the list of connected devices. Tap on the “i” icon next to your AirPods Pro.
3. In the AirPods Pro settings, you’ll find a range of options to customize. These may include:
- – Name: You can change the display name of your AirPods Pro.
- – Microphone: You can choose whether to use the microphone on the left, right, or automatically switch between them.
- – Ear Tip Fit Test: This feature helps you determine if you have the right size ear tips for a secure and comfortable fit.
- – Noise Control: You can adjust the level of noise cancellation or enable Transparency mode, which allows you to hear your surroundings while still enjoying your music.
- – Automatic Ear Detection: This setting allows your AirPods Pro to automatically pause when you remove them from your ears.
- – Press and Hold Function: You can customize the press and hold function on the AirPods Pro stems to control playback, activate Siri, or switch between noise control modes.
4. Adjust the settings according to your preferences. You can experiment with different options to find the configuration that suits you best.
5. Once you have configured your AirPods Pro settings, they will be saved and applied whenever you use them with your device.
By customizing the settings of your AirPods Pro, you can optimize your listening experience and tailor it to your specific needs and preferences. In the next section, we’ll delve into customizing the controls on your AirPods Pro.
Customizing Controls
One of the great features of AirPods Pro is the ability to customize the controls, allowing you to easily manage your audio playback and access Siri. Here’s how you can customize the controls on your AirPods Pro:
1. Open the Settings app on your paired device, such as an iPhone or iPad.
2. Tap on “Bluetooth” and locate your AirPods Pro in the list of connected devices. Tap on the “i” icon next to your AirPods Pro.
3. In the AirPods Pro settings, scroll down to find the “Press and Hold AirPods” section.
4. You can customize the function of each AirPods Pro stem by selecting “Left” or “Right” and choosing from the available options:
- – Siri: Choose this option to activate Siri by pressing and holding on the stem of the corresponding AirPod.
- – Play/Pause: Select this option to control audio playback with a single press on the stem.
- – Next Track/Previous Track: Choose this option to skip to the next or previous track by double-pressing on the stem of the respective AirPod.
- – Off: This option disables any customization for the corresponding AirPod stem.
5. Customize each AirPod according to your preferred function. You can have different functions assigned to the left and right AirPods Pro, or have them both set to the same function.
6. Once you have customized the controls, they will be applied whenever you use your AirPods Pro with your paired device.
By customizing the AirPods Pro controls, you can easily manage your audio playback and access Siri without having to reach for your device. This allows for a more convenient and seamless listening experience. In the next section, we’ll cover how to adjust the Transparency mode on your AirPods Pro.
Adjusting Transparency
The Transparency mode on AirPods Pro allows you to hear and connect with your surroundings while still enjoying your audio. It’s a useful feature in situations where you need to be aware of your environment. Here’s how you can adjust the Transparency mode on your AirPods Pro:
1. Make sure your AirPods Pro are connected to your device.
2. To activate Transparency mode, you can use one of the following methods:
- – Press and hold the force sensor on the stem of either AirPod Pro until you hear a chime or a “ding” sound, indicating that Transparency mode is enabled.
- – On your paired device, open the Control Center and long-press on the volume slider. This will expand the volume control, and you’ll see an icon that looks like an ear. Tap on this icon to toggle Transparency mode on or off.
- – You can also activate Transparency mode through Siri by saying, “Hey Siri, turn on Transparency mode.”
3. Once Transparency mode is enabled, it will enhance the audio transparency of your AirPods Pro, allowing you to hear external sounds and conversations while still enjoying your music or podcasts.
4. If you want to adjust the level of transparency, you can do so through the Control Center on your paired device. Simply open the Control Center, long-press on the volume slider, and adjust the slider labeled “Transparency” to your desired level.
5. Finding the right balance of transparency is important for your comfort and safety, so you can adjust it according to your preference and the specific environment you are in.
By adjusting the Transparency mode on your AirPods Pro, you can stay connected to your surroundings, whether you’re on a run, commuting, or simply need to hear what’s happening around you. In the next section, we’ll cover how to use Siri with your AirPods Pro.
Using Siri
With AirPods Pro, you can easily access Siri, Apple’s virtual assistant, without having to take out your iPhone or iPad. Here’s how to use Siri with your AirPods Pro:
1. Ensure that your AirPods Pro are connected to your device.
2. To activate Siri, you have a few options:
- – Double-press the force sensor on the stem of either AirPod Pro. This will activate Siri, and you will hear a chime or a “ding” sound.
- – Say, “Hey Siri” followed by your command. This will activate Siri hands-free, and you can directly speak your query or command.
3. Once Siri is activated, you can ask questions, make phone calls, send messages, control playback, get directions, set reminders, and more. Just speak your command or question clearly and wait for Siri’s response.
4. To end the Siri session, you can either wait for a few moments of inactivity, or you can simply say, “Thank you,” or “Goodbye.”
5. If you encounter any issues with Siri’s response or understanding, you can try rephrasing your command or question. Siri continuously learns and adapts to improve its accuracy and effectiveness.
Using Siri with your AirPods Pro provides you with convenient and hands-free access to a wide range of features and functions. Whether you need to make a quick phone call, get directions, or set a reminder, Siri is just a voice command away. In the next section, we’ll cover how to update the firmware on your AirPods Pro.
Updating Firmware
Updating the firmware of your AirPods Pro is important as it ensures that you have the latest features, bug fixes, and performance improvements. Here’s how to update the firmware on your AirPods Pro:
1. Make sure that your AirPods Pro are connected to your device and have sufficient battery life.
2. Ensure that your paired device (such as an iPhone or iPad) is connected to the internet, either through Wi-Fi or cellular data.
3. Place your AirPods Pro in their case and ensure that the lid is open.
4. Position your device near the AirPods Pro case and make sure that Bluetooth is enabled on your device.
5. Wait for a few moments. If a firmware update is available for your AirPods Pro, it will be automatically downloaded and installed.
6. During the update process, it’s important to keep your AirPods Pro in the case and ensure that they are in close proximity to your device to ensure a stable connection.
7. The update process can take several minutes, so be patient and avoid interrupting the process by closing the lid of the AirPods Pro case or moving your AirPods Pro away from your device.
8. Once the firmware update is completed, you will receive a notification on your device indicating a successful update.
It’s worth noting that firmware updates for AirPods Pro are typically delivered automatically and silently. Your AirPods Pro will usually update when they are connected to a paired device and in their case, as long as an update is available.
By regularly updating the firmware of your AirPods Pro, you ensure that you have access to the latest improvements and features, providing you with an optimal experience. In the rare case that you encounter any issues with your AirPods Pro, a firmware update may also help to resolve them. In the next section, we’ll cover how to reset your AirPods Pro.
Resetting AirPods Pro
If you’re experiencing connectivity issues or other problems with your AirPods Pro, performing a reset can often resolve the issue. Here’s how to reset your AirPods Pro:
1. Put your AirPods Pro in their case and close the lid.
2. Wait for about 30 seconds.
3. Open the lid of the AirPods Pro case.
4. On your paired device (such as an iPhone or iPad), go to the Settings app and tap on “Bluetooth.”
5. Locate your AirPods Pro in the list of connected devices and tap on the “i” icon next to them.
6. Tap on “Forget This Device” to remove your AirPods Pro from the Bluetooth settings of your device.
7. Confirm the action by tapping on “Forget Device.”
8. Place your AirPods Pro close to your device and open the lid of the case.
9. A setup animation should appear on your device’s screen. Follow the on-screen instructions to re-pair your AirPods Pro with your device.
By resetting your AirPods Pro, you essentially start the pairing process from scratch. This can help resolve issues related to connectivity, audio quality, or other software-related problems that you may be experiencing.
Keep in mind that resetting your AirPods Pro will remove them from the list of Bluetooth devices on your paired device. You will need to re-pair them to your device after the reset.
If you’re still experiencing issues after resetting your AirPods Pro, you may need to contact Apple Support for further assistance. In the next section, we’ll provide some troubleshooting tips to help you troubleshoot common problems with your AirPods Pro.
Troubleshooting Tips
While AirPods Pro are known for their seamless performance, occasional issues may still arise. Here are some troubleshooting tips to help you resolve common problems with your AirPods Pro:
1. Check Battery Level:
Ensure that your AirPods Pro and the charging case have enough battery life. Charge them if necessary.
2. Restart Your Device:
If you’re experiencing connectivity issues, try restarting your paired device (such as an iPhone, iPad, or Mac).
3. Reconnect and Reset Bluetooth:
On your paired device, turn off Bluetooth, wait a few moments, and then turn it back on. Alternatively, you can try forgetting and re-pairing your AirPods Pro.
4. Clean the AirPods Pro:
Dust or debris may interfere with the sensors or audio quality. Gently clean your AirPods Pro, especially the ear tips and charging contacts, using a soft, lint-free cloth.
5. Try a Different Eartip Size:
If your AirPods Pro don’t fit well or the sound quality is compromised, experiment with different ear tip sizes to find the best fit for your ears.
6. Reset Your AirPods Pro:
If problems persist, perform a reset by following the steps outlined in the “Resetting AirPods Pro” section above.
7. Ensure Proper Placement:
Ensure that the AirPods Pro are positioned correctly in your ears. The stem should point downwards and slightly towards the front.
8. Update Firmware:
Check for firmware updates for your AirPods Pro and install them to benefit from the latest bug fixes and improvements.
9. Contact Apple Support:
If the above steps didn’t resolve your issue, it’s advisable to contact Apple Support for further assistance.
By following these troubleshooting tips, you can often resolve common issues and enjoy a smooth experience with your AirPods Pro. If all else fails, reaching out to Apple Support will ensure that you receive the appropriate guidance and support.