
What are email headers?
Email headers are hidden pieces of information that provide detailed metadata about an email. They contain a wealth of information about the message, including the sender’s and recipient’s email addresses, the subject line, date and time of transmission, and other technical details. Think of email headers as the “envelope” of an email, containing information about its origin, delivery path, and characteristics.
Email headers are not typically visible when you open an email in your inbox. Instead, they are usually hidden and can be accessed through specific methods in your email client or service. Email headers are primarily intended for diagnostic purposes and provide valuable insights for troubleshooting issues related to email delivery, identifying spam or spoofed emails, or investigating potential security breaches.
While the content of an email is the actual message you see when you open it, email headers provide a behind-the-scenes glimpse into how that message was transmitted and processed by various mail servers along the way. The information contained within the email headers can be crucial in determining the authenticity, origin, and integrity of an email.
It’s important to note that email headers can be quite technical and may contain jargon associated with email protocols and server communications. However, with a basic understanding of how to interpret email headers, you can unlock valuable insights about the emails you receive and gain a deeper understanding of their origins and characteristics.
Why would you want to see full email headers?
While email headers may seem like a technical aspect of emails that most users wouldn’t bother with, there are several reasons why you might want to take the time to view the full email headers:
1. Checking the authenticity of an email: Email headers can provide valuable information to help you determine if an email is genuine or if it has been forged. By examining the email headers, you can verify the sender’s IP address and domain, ensuring that the email is coming from a trusted source.
2. Identifying potential phishing or scam attempts: Email headers can reveal clues that help you identify suspicious emails. By examining the headers, you can look for signs of spoofing, such as mismatched sender and reply-to addresses or unusual routing paths. This information can help you avoid falling victim to phishing attempts or scams.
3. Troubleshooting email delivery issues: If you’re experiencing problems receiving or sending emails, examining the full email headers can provide valuable insights into the cause of the issue. You can identify any errors or delays in the delivery process, helping you diagnose and resolve the problem more effectively.
4. Verifying the source of an email: Email headers display the route an email took to reach your inbox, including the servers it passed through. This information can be useful for confirming whether an email originated from the claimed sender or if it was altered or redirected along the way.
5. Analyzing spam and managing email filters: Email headers often contain valuable information for identifying spam messages. By analyzing the headers, you can identify patterns or specific markers that can help you create or refine your email filters, reducing the amount of unwanted email that reaches your inbox.
6. Resolving disputes or legal matters: In certain situations, such as legal disputes or harassment cases, email headers can provide crucial evidence concerning the origin and transmission of specific emails. Having access to the full email headers allows you to gather the necessary information to support your case.
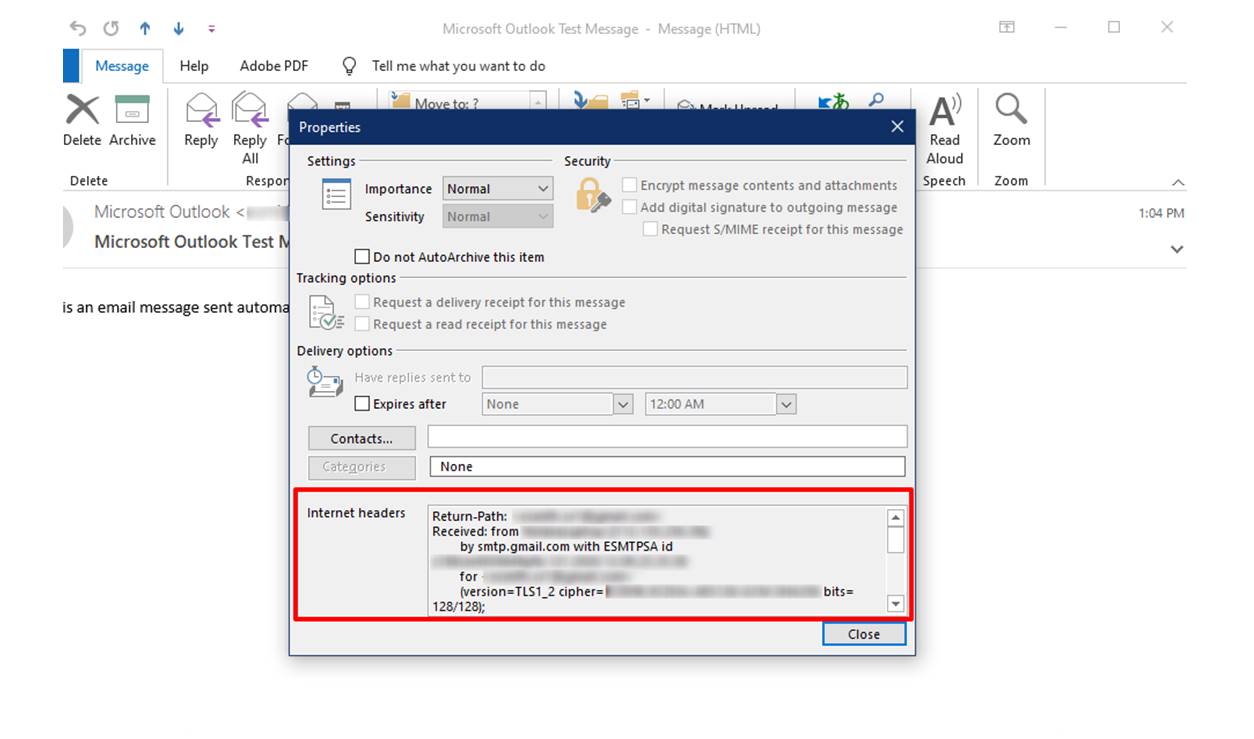
How to see full email headers in Outlook.com:
If you’re using Outlook.com as your email service provider, there are several methods you can use to view the full email headers:
Method 1: View headers in the reading pane
1. Log in to your Outlook.com account and open the email you want to view the headers for.
2. In the reading pane, locate the “More Actions” button (represented by three dots) at the top of the email.
3. Click on the “More Actions” button to open a drop-down menu.
4. From the options provided, select “View message details”.
5. A new window will open, displaying the full email headers at the top of the message.
Method 2: View headers in a new window
1. Log in to your Outlook.com account and open the email you want to view the headers for.
2. At the top-right corner of the email, locate the three dots icon.
3. Click on the three dots to open a menu.
4. From the menu, select “View message source”.
5. A new window or tab will open, displaying the complete email source code, including the headers.
Method 3: View headers in the message source
1. Log in to your Outlook.com account and open the email you want to view the headers for.
2. In the toolbar of the email, click on “Actions”.
3. From the drop-down menu, select “View message source”.
4. A new window or tab will open, displaying the complete email source code, containing the email headers.
By following one of these methods, you can access the full email headers in Outlook.com. Remember, email headers may appear technical, but they contain essential information that can help you analyze and interpret the email’s origin, delivery path, and other details.
Method 1: View headers in the reading pane
The first method to view email headers in Outlook.com is through the reading pane. Follow these steps:
1. Log in to your Outlook.com account and open the email for which you want to view the headers.
2. In the reading pane, locate the “More Actions” button represented by three dots at the top of the email.
3. Click on the “More Actions” button to reveal a drop-down menu.
4. From the options in the menu, select “View message details”.
5. A new window will pop up, displaying the full email headers at the top of the message.
By following these steps, you can easily access the email headers without leaving the reading pane. This method is convenient as it allows you to quickly view the headers without opening a separate window or tab.
Once you have the email headers visible, you can analyze the information contained within them. The headers typically include details such as the sender’s email address, the recipient’s email address, the subject line, the date and time of transmission, and various other technical information.
Understanding the different sections of the email headers can be valuable in various situations. For example, if you suspect an email to be spam or a phishing attempt, examining the headers can help you identify any inconsistencies or signs of deception. Additionally, if you are troubleshooting email delivery issues, the headers can provide insights into the routing and possible causes of delays or errors.
Remember to be cautious when dealing with email headers, especially when it comes to interpreting the information they provide. While the headers can be a valuable resource, they may also contain technical jargon and complex data. If you are unsure about the content of the headers or need further assistance, it is recommended to consult with a technical expert or refer to official documentation.
Method 2: View headers in a new window
If you prefer to view email headers in a separate window or tab in Outlook.com, you can follow these steps:
1. Log in to your Outlook.com account and open the email for which you want to view the headers.
2. At the top-right corner of the email, look for the three dots icon.
3. Click on the three dots to reveal a menu.
4. From the menu options, select “View message source”.
5. A new window or tab will open, displaying the complete email source code, including the headers.
By using this method, you can access the full email headers in a separate window, allowing for a more detailed and focused examination of the information contained within them.
In the new window, you will be presented with the source code of the email, which includes the headers. The headers are usually located at the beginning of the source code and provide essential details about the email, such as the sender’s email address, recipient’s address, subject line, and more.
Examining the email headers can be particularly useful in various scenarios. For instance, if you are trying to identify the source or authenticity of an email, the headers can reveal details about the server it originated from and the path it took to reach your inbox.
When analyzing email headers, keep in mind that they may contain technical terms and abbreviations associated with email protocols. However, paying attention to key sections such as the “From”, “To”, “Subject”, “Date”, and “Received” fields can provide valuable insights into the email’s origin and transmission.
Remember to exercise caution and avoid sharing personal or sensitive information based solely on the information present in the email headers. If you have any concerns or require assistance in interpreting the headers, it is advisable to consult with an expert or refer to official documentation.
Method 3: View headers in the message source
If you prefer to view the email headers directly from the message source in Outlook.com, you can use the following method:
1. Log in to your Outlook.com account and open the email for which you want to view the headers.
2. In the toolbar of the email, click on “Actions”.
3. From the drop-down menu, select “View message source”.
4. A new window or tab will open, displaying the complete email source code, which includes the email headers.
By using this method, you can navigate through the actual source code of the email and locate the section containing the headers.
When viewing the message source, you will see the raw data of the email, including information such as the sender’s email address, recipient’s address, subject line, date and time of transmission, and various technical details related to the email’s routing and processing.
The message source provides a more comprehensive and detailed view of the email headers, allowing for a deeper analysis of the information contained within them.
Understanding the different sections of the email headers can be helpful in various situations. For example, if you’re investigating a suspicious email, examining the headers can reveal valuable information about the email’s origin or whether it has been tampered with or redirected.
When reviewing the headers in the message source, keep in mind that the information can be technical in nature, including terms and acronyms associated with email protocols. However, focusing on key fields such as “From”, “To”, “Subject”, “Date”, and the “Received” section can provide valuable insights into the email’s journey and characteristics.
Take caution when dealing with email headers alone and avoid making assumptions solely based on the information present. If you need further interpretation or assistance, it’s advisable to consult with a technical expert or refer to official documentation.
Understanding the different sections of an email header:
Email headers consist of various sections, each providing specific information about the email. Understanding these sections can help you interpret the headers and gain insights into the email’s origin and characteristics. Here are some key sections commonly found in email headers:
1. Message ID:
The Message ID is a unique identifier assigned to each email message. It helps track the email’s path and allows servers to identify and organize messages.
2. From:
The From section specifies the email address of the sender, providing insight into who initiated the email. It typically contains the sender’s name and their corresponding email address.
3. To:
The To section lists the recipient’s email address, indicating the intended recipient(s) of the email. It may include multiple email addresses if the message was sent to multiple recipients.
4. Subject:
The Subject line represents the topic or purpose of the email. It provides a brief summary of the email’s content and helps recipients understand the message at a glance.
5. Date:
The Date section indicates the date and time when the email was sent. It helps track the timeline of the email’s transmission and can be useful for determining timestamps or identifying potential delays in delivery.
6. MIME-Version:
The MIME-Version identifies the version of Multipurpose Internet Mail Extensions (MIME) used in the email. MIME is a standard for sending multimedia and non-ASCII content within emails.
7. Content-Type:
The Content-Type specifies the type of content included in the email, such as text, HTML, attachments, or embedded images. It helps email clients render the email correctly.
8. Return-Path:
The Return-Path field identifies the email address to which bounced or undeliverable emails should be returned. It provides a way for email servers to handle errors or delivery issues.
9. X-Sender:
The X-Sender field contains auxiliary information provided by the sender’s email client or server. It may include additional details about the sender or the software used to send the email.
10. X-Received:
The X-Received section lists the servers through which the email passed during transmission. It helps track the route and identify any potential delays or problems encountered.
11. Received:
The Received field provides a chronological record of the servers that handled the email. It shows the IP addresses, domain names, and timestamps of each server involved in the email’s delivery.
Understanding the different sections of an email header allows you to interpret the information and gain insights into the email’s origin, routing, and other attributes. By examining these sections, you can analyze the email more effectively and make informed decisions based on the information provided.
Message ID
The Message ID is a unique identifier assigned to each email message. It plays a crucial role in email communication, allowing servers to track the email’s path and enabling various operations, such as handling replies, tracking delivery status, and preventing duplicate messages.
When an email is sent, the sender’s email server generates a Message ID and embeds it within the email headers. This identifier is typically a long string of characters and numbers, designed to be globally unique. Each email message has its own unique Message ID.
The Message ID serves several purposes:
1. Tracking email conversations:
By including the Message ID in subsequent replies or forwarded messages, email clients and servers can establish threads or conversations. This allows participants to easily follow and organize their email exchanges in a threaded view.
2. Preventing duplicate messages:
When email servers receive a message with a known Message ID, they can check their records to see if the exact same email has already been received. This helps prevent duplicate messages from being delivered to recipients.
3. Routing and delivery:
As an email moves from the sender to the recipient, intermediating email servers use the Message ID to track the email’s progress. The Message ID allows servers to relay the message to the correct destination and maintain a record of its delivery route.
4. Diagnosing delivery issues:
Should an email encounter delivery issues or delays, the Message ID can aid in troubleshooting. By examining the email headers and tracing the Message ID, system administrators can identify where the problem occurred, such as a misconfigured server or a network routing issue.
When analyzing email headers for the Message ID, you will typically find the ID listed with a “Message-ID:” or “X-Message-ID:” prefix, followed by the unique identifier. It is essential to note that the format and location of the Message ID may vary depending on the email client or server.
Understanding the Message ID is valuable in various scenarios, such as organizing and tracking email conversations, troubleshooting delivery issues, and preventing duplicate emails. By leveraging this unique identifier, email servers and clients can efficiently manage and handle email messages throughout the entire communication process.
From
The “From” section in an email header identifies the email address of the sender. It provides crucial information about the origin of the email and helps recipients determine who initiated the communication.
The “From” field typically includes the sender’s name and their corresponding email address. It allows recipients to recognize who the email is coming from and provides them with a way to respond or initiate further communication.
In most email clients, the “From” field is displayed prominently, making it easily visible to the recipient. It is usually located at the top of the email, just below the subject line.
When examining the “From” section in email headers, it is essential to verify the sender’s email address for authenticity. Email spoofing is a common practice where malicious senders forge the “From” address to deceive recipients. As a result, the displayed “From” address may not accurately represent the actual sender.
Understanding the “From” section helps recipients evaluate the legitimacy and credibility of the email. By examining the sender’s email address, recipients can identify familiar senders or recognize suspicious or unfamiliar addresses. This information is especially crucial in identifying potential phishing attempts or fraudulent emails.
It’s important to note that while the “From” section displays the sender’s email address, it can be manipulated by knowledgeable individuals to make the email appear to come from a different source. This practice is commonly employed in phishing attacks and email scams.
When reviewing the “From” section, it’s advisable to scrutinize the email address and consider other factors, such as the content of the email, the context of the communication, and any unusual requests or discrepancies. If there are suspicions about the authenticity of the email, it’s crucial to exercise caution and verify the sender’s identity through alternate means.
By paying attention to the “From” section in email headers, recipients can make informed decisions about the legitimacy and trustworthiness of the sender. It acts as the starting point for evaluating the credibility of the email and helps recipients determine how to proceed with the message.
To
The “To” section in an email header provides information about the recipient(s) of the email. It specifies the email address(es) to which the message is intended to be delivered. The “To” field helps ensure that the email reaches the correct recipients and facilitates efficient communication.
In an email header, the “To” field typically displays the email address(es) of the primary recipient(s) of the message. This can be an individual’s email address or multiple addresses separated by commas. The “To” field is crucial for indicating who the email is directed towards and serves as a direct indicator of the intended audience.
When examining the “To” section, it’s important to note that the recipient’s email address may be visible to others who receive the email. In some cases, the email may be addressed to multiple recipients, and each recipient’s email address would be visible to others in the “To” field. However, in other instances, the email may be sent as a blind carbon copy (BCC), where the recipient’s email address is not visible to other recipients.
The “To” field plays an essential role in email communication as it facilitates direct correspondence and accurately identifies the recipients of the email. Recipients rely on the “To” field to determine if an email is addressed to them, helping them organize, prioritize, and respond to incoming messages.
It’s important to note that the “To” field in email headers can be manipulated or altered by senders. In some cases, email addresses may be hidden or masked, making it more difficult to identify the true recipients of the email. This can be done intentionally to protect privacy or to conduct mass email campaigns.
By analyzing the “To” section, email recipients can ensure that the email was intended for them and validate the relevance and importance of the message. It also allows recipients to assess if they are part of a larger recipient list or if the email was sent exclusively to them.
Understanding the “To” section helps recipients determine their role in the email communication and provides clarity about who should receive replies or follow-up actions. It is an essential component of email headers that helps facilitate effective communication and ensures that emails are sent to the appropriate recipients.
Subject
The “Subject” section in an email header is a brief summary or description of the email’s content. It provides recipients with an indication of what the email is about, allowing them to quickly assess its relevance and prioritize their responses and actions.
The “Subject” field appears prominently in most email clients, located just below the recipient and sender information. It is typically displayed in a larger font size or bolded, making it easily noticeable at a glance.
A well-crafted subject line can have a significant impact on how recipients perceive and engage with an email. Clear and concise subject lines help recipients quickly understand the purpose or topic of the email, increasing the chances of the email being opened and responded to in a timely manner.
When examining the “Subject” section in email headers, it’s important to assess the content of the subject line itself. The subject line should accurately reflect the content and intent of the email. It should provide enough information for recipients to determine the email’s significance and relevance to them.
Additionally, the subject line can play a pivotal role in categorizing and organizing email messages. Recipients can use the subject line to search for specific emails, archive important messages, or prioritize their responses based on urgency and importance.
It’s worth noting that the subject line can be manipulated or crafted in ways that may mislead or deceive recipients. Malicious senders may use attention-grabbing or misleading subject lines in an attempt to trick recipients into opening the email or taking unwanted actions. It is essential for recipients to exercise caution and evaluate the credibility and authenticity of the email, considering other factors such as the sender’s identity and the email’s content.
By analyzing the “Subject” section, email recipients can quickly determine the topic or purpose of the email, enabling them to manage their inbox efficiently and respond to critical messages promptly. A well-crafted subject line enhances communication, improves email organization, and facilitates effective engagement between senders and recipients.
Date
The “Date” section in an email header indicates the date and time when the email was sent by the sender. It helps recipients track the chronology of their emails, prioritize their responses, and assess the timeliness of the message.
The “Date” field is a critical component of email headers as it provides recipients with a timestamp for the email’s transmission. It allows them to understand the email’s age and determine when it was originally sent.
When examining the “Date” section, it’s important to note that the timestamp reflects the sender’s local time. It may not necessarily align with the recipient’s local time zone. However, most email clients adjust the displayed time to the recipient’s local time, making it easier to understand the email’s timing.
The “Date” field is particularly useful in managing and prioritizing emails. By knowing when an email was sent, recipients can make informed decisions about the urgency and importance of the email. It enables them to prioritize their responses, ensuring timely communication and efficient email management.
It’s important to keep in mind that the “Date” field can be manipulated or altered by senders. However, email clients and email servers typically assign the timestamp based on when the email was first processed within the server infrastructure. Therefore, changes to the date are less likely to occur unless intentional manipulation has taken place.
Additionally, the “Date” section can be instrumental in identifying potential delays in email delivery. By comparing the timestamp in the headers to the time of receipt, recipients can determine if there were significant delays in the transit of the email.
It’s worth noting that in some cases, an email may have an incorrect or ambiguous date due to issues with the sender’s email client or server. If the date appears unusually old or future-dated, it may warrant further scrutiny or contact with the sender to confirm the timing of the email.
By considering the “Date” section in email headers, recipients can effectively manage their inbox and prioritize their email responses based on the time-sensitive nature of the messages. It serves as a valuable tool in ensuring timely communication and enhancing overall productivity in email correspondence.
MIME-Version
The “MIME-Version” section in an email header indicates the version of Multipurpose Internet Mail Extensions (MIME) used in the email. MIME is a standard protocol that allows emails to carry various types of multimedia content and non-ASCII characters.
The “MIME-Version” field is an essential component of email headers, providing information about the encoding and formatting of the email’s content. It ensures that email clients can correctly interpret and display the multimedia or non-textual elements within the message.
When examining the “MIME-Version” section, you may typically encounter a value of “1.0”. This indicates that the email conforms to MIME version 1.0, which is the most widely supported and commonly used version of the MIME standard.
MIME allows emails to incorporate rich content types, such as images, audio files, video files, and other types of attachments. It provides a standardized way of representing and encoding these multimedia elements so that different email clients can accurately interpret and display them.
The “MIME-Version” field is crucial for seamless email communication, as it ensures that email clients are compatible with the content types included in the email. This field enables email clients to determine if they can correctly handle the different media types or if additional software or plugins are necessary for proper interpretation.
Although the MIME standard is widely supported, discrepancies in how email clients handle certain content types may occasionally occur. Incompatibilities or limitations in MIME support can lead to rendering issues or the inability to display specific content types correctly.
It’s important to note that the “MIME-Version” field is typically automatically added by the email client or server used to send the email. Recipients generally do not need to interact or manage this field directly unless there are specific requirements or compatibility concerns.
By including the “MIME-Version” field in email headers, the email system ensures that messages can carry diverse content types and guarantees compatibility across different email clients. It enriches email communication by enabling the seamless integration of multimedia and non-ASCII content within messages.
Content-Type
The “Content-Type” section in an email header indicates the type of content included in the email. It plays a critical role in informing email clients how to interpret and display the message, ensuring proper rendering of the email’s content.
The “Content-Type” field specifies the media type and any additional parameters associated with the content within the email. It ensures that the email client can accurately handle and process various types of content, such as text, HTML, attachments, or embedded images.
When examining the “Content-Type” section, you may encounter different values depending on the email’s content. The most common values within the “Content-Type” field include:
- text/plain: Indicates that the content is plain text, typically used for simple text-based emails.
- text/html: Specifies that the content is in HTML format, allowing for the inclusion of formatted text, images, links, and other HTML elements.
- multipart/mixed: Indicates that the email includes multiple parts, such as both plain text and HTML versions, or attachments along with the main body of the message.
- multipart/alternative: Specifies that different versions of the email are available and the email client should display the most suitable version based on its capabilities.
- application/octet-stream: Signifies that the content is an attachment with a binary data format, and the receiving client should handle it accordingly.
The “Content-Type” field also includes parameters that further describe the content. These parameters may include character encoding, language, content disposition, and other relevant information.
By including the “Content-Type” field in email headers, the email system ensures that the client can render and interpret the content correctly. Email clients utilize this information to determine how to display the email, whether as plain text, HTML, or another specified format.
It’s worth noting that the interpretation and handling of the “Content-Type” field may vary depending on the email client and its capabilities. Different email clients may have different levels of support for content types, resulting in variations in how the email is displayed.
Understanding the “Content-Type” section in email headers helps recipients comprehend the format and nature of the email’s content. It ensures that email clients can reliably render the emails they receive, facilitating effective communication and the seamless display of diverse content types within the messages.
Return-Path
The “Return-Path” section in an email header indicates the email address to which bounced or undeliverable emails should be returned. It is a crucial component of email headers that helps facilitate error handling and ensures that delivery failure notifications reach the appropriate sender.
When an email encounters delivery issues, such as when it fails to reach the intended recipient or is rejected by a mail server, the “Return-Path” field specifies the email address that should receive notifications regarding the delivery failure.
It’s important to note that the “Return-Path” field is typically set by the sending email server, and it may not always reflect the actual sender’s email address displayed in the “From” field. In certain cases, it can be different, especially when using mailing lists or when emails are sent on behalf of someone.
The “Return-Path” field serves several purposes:
1. Error handling:
When an email cannot be delivered to the recipient’s address or encounters other delivery errors, mail servers reference the “Return-Path” field to determine where to send the delivery failure notifications and bounced email messages.
2. Undeliverable email notification:
If an email bounces back, the “Return-Path” field enables the recipient’s mail server to send a notification to the specified address, informing the sender about the failed delivery attempt.
3. Preventing email loops:
The “Return-Path” field also helps prevent email loops. When a bounced email is returned, the “Return-Path” field ensures that it does not trigger a continuous loop of returned and bounced messages.
The “Return-Path” field is typically added by the sender’s email server when the email is initially sent. It may contain the sender’s email address or an address designated specifically for handling undeliverable emails.
Understanding the “Return-Path” section in email headers allows senders to be notified about delivery failures and undeliverable emails. By specifying the appropriate return address, email administrators can effectively manage and troubleshoot email delivery issues, ensuring smooth and reliable communication.
X-Sender
The “X-Sender” section in an email header provides additional information about the sender or the software used to send the email. It is an optional field that can offer insights into the origin or routing of the message.
The “X-Sender” field is typically added by the sender’s email client or server as an auxiliary piece of information. It can contain various details, such as the sender’s name, the software or platform used to send the email, or additional identification related to the sending entity.
While the “X-Sender” field can be helpful in certain scenarios, it is important to note that it is not standardized and may not be supported by all email clients or servers. As a result, the inclusion and interpretation of the “X-Sender” field can vary between different email systems.
Some possible uses for the “X-Sender” field include:
1. Identifying the sender:
The “X-Sender” field may provide information about the individual or entity responsible for sending the email. It can include the sender’s name, email address, or any other pertinent identification.
2. Indicating the software or method of sending:
The “X-Sender” field might specify the email client or email-sending program used by the sender. This information can be useful for troubleshooting or identifying compatibility issues in handling email messages.
3. Auxiliary information:
Occasionally, the “X-Sender” field may contain supplementary details about the email or the sending entity. This might include organizational identification, referral codes, or other custom information deemed relevant by the sender.
It’s important to exercise caution when using or interpreting the “X-Sender” field. As a non-standardized field, it may not always be reliable or consistent across different email systems. Therefore, it is generally recommended to rely on more standard fields, such as the “From” or “Reply-To” sections, for accurate identification of the sender.
While the “X-Sender” field can provide additional context about the email’s origin or sending method, it should not be considered as the primary source of sender identification. It is advisable to cross-reference this information with other reliable sources or consult with technical experts as needed.
X-Received
The “X-Received” section in an email header provides a chronological record of the servers through which the email passed during transmission. It offers valuable insights into the routing and delivery process of the email, allowing for a better understanding of its journey from the sender to the recipient.
The “X-Received” field is added by each email server that handles the message, with each server appending its details to the field. As a result, the “X-Received” section is typically organized in reverse chronological order, with the most recent server listed first.
When examining the “X-Received” section, you will encounter information such as the server’s host name or IP address, the date and time the server received the email, and possibly other related details.
The “X-Received” section serves several purposes:
1. Tracking the email’s route:
The “X-Received” field allows you to trace the email’s path from the sender to the recipient. By examining the listed servers, you can identify the sequence of servers through which the email passed, providing insight into the journey of the message.
2. Identifying potential delays or bottlenecks:
If there are delays in email delivery, the “X-Received” field can help pinpoint the server or servers where the delay occurred. This information can aid in troubleshooting and identifying any potential bottlenecks or issues in the email delivery process.
3. Verifying email legitimacy:
The “X-Received” field can provide verification of an email’s authenticity. By examining the servers listed in the field and comparing them against reputable or trusted sources, you can confirm that the email’s routing is consistent with legitimate emails.
It’s important to note that the “X-Received” field can include technical information, such as IP addresses and server names, that may be unfamiliar to non-technical users. However, focusing on the server sequence and the timestamps can provide valuable insights into the email’s delivery process.
While the “X-Received” field is a useful tool for understanding the path of an email, it’s important to exercise caution when using it as a definitive source of information. Server configurations and email forwarding systems can sometimes alter or omit entries, leading to incomplete or inaccurate information in the “X-Received” section.
By analyzing the “X-Received” section in email headers, you can gain valuable knowledge about the email’s transmission path, identify potential delivery issues, and verify the legitimacy of the email. This information contributes to a better understanding of how the email reached your inbox and aids in troubleshooting any delays or other concerns related to email delivery.
Received
The “Received” section in an email header provides a chronological record of the servers that handled the email during its transmission. Each server that the email passes through appends its own “Received” entry to the header, creating a traceable path of the email’s journey from the sender to the recipient.
The “Received” field is a vital component of email headers, as it documents the order of the servers involved in the email delivery process. This information allows you to gain insights into the routing, delivery, and handling of the email.
When examining the “Received” section, you will encounter information such as the hostnames or IP addresses of the servers, timestamps indicating when each server received the email, and sometimes additional details, such as server software or network protocols used.
The “Received” section serves several purposes:
1. Tracking email delivery:
The “Received” field provides a clear indication of the email’s path from the sender to the recipient. By inspecting the listed servers in chronological order, you can visualize the journey that the email took through various network nodes and mail transfer agents (MTAs).
2. Diagnosing email delivery issues:
If there are any issues with the delivery of the email, such as delays or failures, the “Received” field can help identify the problematic server or network segment. This knowledge assists in troubleshooting and resolving any problems encountered during email transmission.
3. Verifying email authenticity:
The “Received” field can aid in verifying the authenticity of an email. By examining the servers listed, you can identify if the email originated from a legitimate source or if it shows signs of having been tampered with or spoofed.
When reviewing the “Received” section, it’s important to note that the entries are added by various email servers along the transmission path. However, it’s possible for servers to omit or alter entries due to technical configurations or privacy considerations.
Properly interpreting the “Received” section may require technical knowledge, as server hostnames, IP addresses, and other technical information are commonly included. However, focusing on the server order, timestamps, and any notable discrepancies can provide valuable insights into the email’s delivery path.
By analyzing the “Received” section in email headers, you can gain a clearer understanding of how the email traveled from the sender to your inbox. This information can be invaluable for troubleshooting delivery issues, verifying the authenticity of an email, and comprehending the overall email ecosystem.
Tips for Interpreting Email Headers
Interpreting email headers can provide valuable insights into the origins, routing, and characteristics of an email. Here are some tips to help you effectively analyze and interpret email headers:
1. Familiarize yourself with common header fields:
Understanding the purpose and significance of common header fields, such as “From,” “To,” “Subject,” “Date,” and “Received,” will provide a foundation for comprehending the email header’s content.
2. Analyze the sequence of “Received” entries:
Review the “Received” section from the bottom up to trace the email’s path. Pay attention to the server names or IP addresses, timestamps, and any irregularities that may indicate delays or redirections.
3. Examine the “From” and “Return-Path” fields:
Compare the “From” field with the “Return-Path” field to ensure consistency. If they differ significantly, it may indicate spoofing or tampering attempts.
4. Verify email authentication mechanisms:
Check if email authentication methods like SPF (Sender Policy Framework) and DKIM (DomainKeys Identified Mail) are present in the header. These mechanisms help validate the email’s authenticity and integrity.
5. Be cautious with unfamiliar or suspicious senders:
If the “From” field contains an unfamiliar email address, exercise caution, particularly when the email appears suspicious or involves sensitive information. Consider additional verification steps before taking any actions the email requests.
6. Validate the email’s route through trusted servers:
Verify if the email passed through reputable email servers or entities known for handling legitimate emails. Cross-reference server names or IP addresses with reliable sources to assess the email’s authenticity.
7. Seek expert assistance if uncertain:
If you encounter complex header structures or face challenges interpreting specific entries, consult with technical experts or refer to reliable resources. They can provide guidance and help you accurately analyze the email headers.
Remember that email headers can contain technical details that may require some technical knowledge to interpret fully. By applying these tips, you can enhance your ability to analyze email headers effectively and make informed judgments about the authenticity, origin, and routing of the emails you receive.
Checking the Origin of an Email
Checking the origin of an email is an important step in assessing its authenticity and determining if it comes from a trustworthy source. Here are some tips to help you verify the origin of an email:
1. Examine the “From” field:
Start by inspecting the “From” field in the email header. Check the email address and verify if it matches the expected sender. Be cautious if the “From” address appears suspicious or unfamiliar.
2. Cross-reference with known contacts:
If the email claims to be from someone you know, compare the sender’s email address with the one you have on record. Confirm its accuracy before assuming the email is genuinely from the stated sender.
3. Look for signs of spoofing or phishing:
Be on the lookout for indications of email spoofing or phishing attempts. These may include misspelled domain names, unusual email addresses, or requests for personal information. Trust your instincts and exercise caution when encountering such emails.
4. Analyze email headers:
Inspect the email headers for information about the email’s origin. Look for the “Received” entries, which show the servers the email passed through. Identify any inconsistencies or unexpected server names or IP addresses.
5. Investigate the email’s route:
Review the sequence of “Received” entries to understand the email’s path from the sender to your inbox. Identify any unexpected or suspicious routing patterns that might suggest the email has been redirected or tampered with.
6. Validate email authentication mechanisms:
Check if the email uses email authentication methods like SPF (Sender Policy Framework) and DKIM (DomainKeys Identified Mail). These mechanisms help verify the email’s authenticity and integrity by confirming that it is authorized to be sent from the claimed domain.
7. Use a reputable email service provider:
Using a reliable and secure email service provider can help prevent the risk of receiving fraudulent emails. Reputable providers often have robust security measures in place to identify and block suspicious emails.
Remember that determined attackers can employ sophisticated techniques to deceive email recipients. If you have any doubts about the origin or legitimacy of an email, it is always advisable to err on the side of caution and seek additional verification before taking any further action.
Identifying Spoofed or Forged Emails
Spoofed or forged emails are deceptive messages that appear to come from a legitimate source but have been deliberately altered or falsified. These emails can be challenging to identify, but there are some techniques you can use to help detect them:
1. Inspect the “From” field:
Examine the sender’s email address in the “From” field. Look for misspellings, subtle alterations, or slight variations that may indicate an attempt to mimic a known sender or organization. Be cautious if the email address seems suspicious or unfamiliar.
2. Check for impersonal greetings:
Spoofed emails often use generic greetings instead of personalized ones. Be wary of emails that address you as “Dear Customer” or “Valued User” instead of using your name or a known identifier.
3. Analyze the email content and formatting:
Pay attention to the language, grammar, and formatting of the email. Poor spelling or grammar, inconsistent fonts, or unusual formatting errors may suggest the email is fraudulent.
4. Validate hyperlinks and URLs:
Hover your cursor over any embedded links in the email without clicking on them. Check if the URL matches the displayed hyperlink, and be cautious if the link redirects to unfamiliar or suspicious websites.
5. Be wary of urgent requests or threats:
Spoofed emails often employ urgency or fear to prompt recipients to take immediate actions. Be skeptical of emails that demand urgent responses or threaten negative consequences if you don’t comply.
6. Review email headers:
Examine the email headers for any inconsistencies or irregularities. Look for unusual routing patterns, unexpected server names or IP addresses, or missing or altered “Received” entries that may indicate tampering or forgery.
7. Verify with known contacts:
If the email claims to be from someone you know, verify its authenticity by reaching out to the sender through a separate channel, such as a phone call or a known email address. Confirm whether they sent the email or if their account might have been compromised.
While these techniques can assist in identifying spoofed or forged emails, it is important to remain vigilant and use common sense. If you have any doubts about the legitimacy of an email, err on the side of caution and verify its authenticity before providing sensitive information or taking any requested actions.
Investigating Email Delivery Issues
Email delivery issues can occur for various reasons, such as server errors, misconfigurations, or network problems. Here are some steps to help you investigate and troubleshoot email delivery problems:
1. Check for typos or errors:
Review the email addresses (both sender and recipient) for any typos or inaccuracies. Even a small mistake in the email address can prevent successful delivery.
2. Verify email account status:
Ensure that the sender’s and recipient’s email accounts are active and functional. Confirm with the email service provider if there are any temporary suspensions or blocks on the accounts.
3. Review spam or junk filters:
Check the spam or junk folder of both the sender and recipient for mistakenly filtered emails. Marking legitimate emails as spam can result in delivery problems.
4. Monitor bounce notifications:
If an email bounces back, it indicates a delivery failure. Examine the bounce notification for error codes or messages that provide insights into the reason for the failure.
5. Analyze email headers:
Inspect the email headers to trace the email’s route. Look for delays or errors in the “Received” entries, as they can indicate where the problem occurred during transit.
6. Contact email service provider(s):
If you suspect that the issue lies with your email service provider, reach out to their support team for assistance. Provide them with relevant information, such as error codes or bounce notifications.
7. Test with alternate email addresses or providers:
Try sending and receiving emails to and from alternate email addresses or different email service providers. This can help identify if the issue is specific to a particular domain or email service.
8. Collaborate with the recipient’s IT team:
If you are experiencing persistent delivery issues with a specific recipient, communicate with their IT team or email administrator. They can check their email server logs for any issues or blocks on their end.
9. Consider email authentication methods:
Implement email authentication protocols like SPF (Sender Policy Framework) and DKIM (DomainKeys Identified Mail). These protocols help verify the authenticity of the email and can prevent delivery issues caused by unauthorized senders.
Remember that investigating email delivery issues may require technical expertise. If you are unsure about how to proceed or encounter complex problems, consulting with IT professionals or reaching out to your email service provider’s support team can provide valuable assistance in resolving the issue.
Analyzing Spam or Phishing Attempts
Spam and phishing attempts are common forms of cyberattacks where malicious actors send deceptive emails to trick recipients into providing sensitive information or taking unwanted actions. Here are some key steps to help you analyze and identify spam or phishing attempts:
1. Examine the email sender:
Check the sender’s email address in the “From” field. Look for suspicious or unfamiliar email addresses, misspellings, or slight variations from known legitimate sources.
2. Assess email content for urgency or fear tactics:
Be cautious of emails that create a sense of urgency, fear, or excitement. Phishing attempts often employ tactics such as warning of account suspension, urgent action required, or promising unexpected rewards.
3. Verify URLs and hyperlinks:
Carefully inspect any embedded links in the email. Hover over the links without clicking to see the actual URL. Look for misspelled or fake domain names, extra characters, or unusual domain extensions.
4. Watch out for requests for personal information:
Phishing emails often request personal or sensitive information, such as login credentials, credit card details, or social security numbers. Legitimate organizations generally do not ask for confidential information through email.
5. Examine email formatting and language:
Review the email’s formatting, grammar, and spelling. Poorly written emails with noticeable errors may indicate a fraudulent attempt. Legitimate organizations typically maintain a professional and polished communication style.
6. Analyze email attachments:
Exercise caution when opening email attachments, especially if they are unexpected or from unknown senders. Malicious attachments can contain malware or viruses that can compromise your computer or data.
7. Check for official branding and logos:
Verify if the email contains legitimate branding and logos of the supposed sender. However, keep in mind that fraudulent emails can replicate official branding, so cross-referencing with a known legitimate source is necessary.
8. Report suspicious emails:
If you suspect an email is spam or a phishing attempt, report it to your email service provider or the appropriate authority. Most email clients include options to report spam or suspicious emails.
9. Stay informed:
Keep up-to-date with the latest spam and phishing techniques. Stay informed about common signs of fraudulent emails and regularly educate yourself to better protect against such threats.
Remember, caution and attentiveness are key to identifying and protecting against spam and phishing attempts. By staying vigilant and following these tips, you can minimize the risk of falling victim to these deceptive tactics and protect your personal information and online security.