
Check the Contents of the Box
Before diving into the exciting world of virtual reality with your new Oculus Rift, it’s crucial to start by checking the contents of the box. This ensures that you have received all the necessary components and accessories to set up your VR experience. Follow these steps to verify the items in the package:
- Inspect the outer packaging: Begin by examining the box for any signs of damage during shipping. Look for dents, tears, or punctures that may have affected the contents inside. If everything appears intact, proceed to the next step.
- Remove the outer packaging: Carefully remove any plastic wrap or protective coverings around the box. Set it aside as you prepare to open the package.
- Lift the lid of the box: Gently lift the lid of the Oculus Rift box to reveal its contents. Take a moment to appreciate the anticipation of what’s inside.
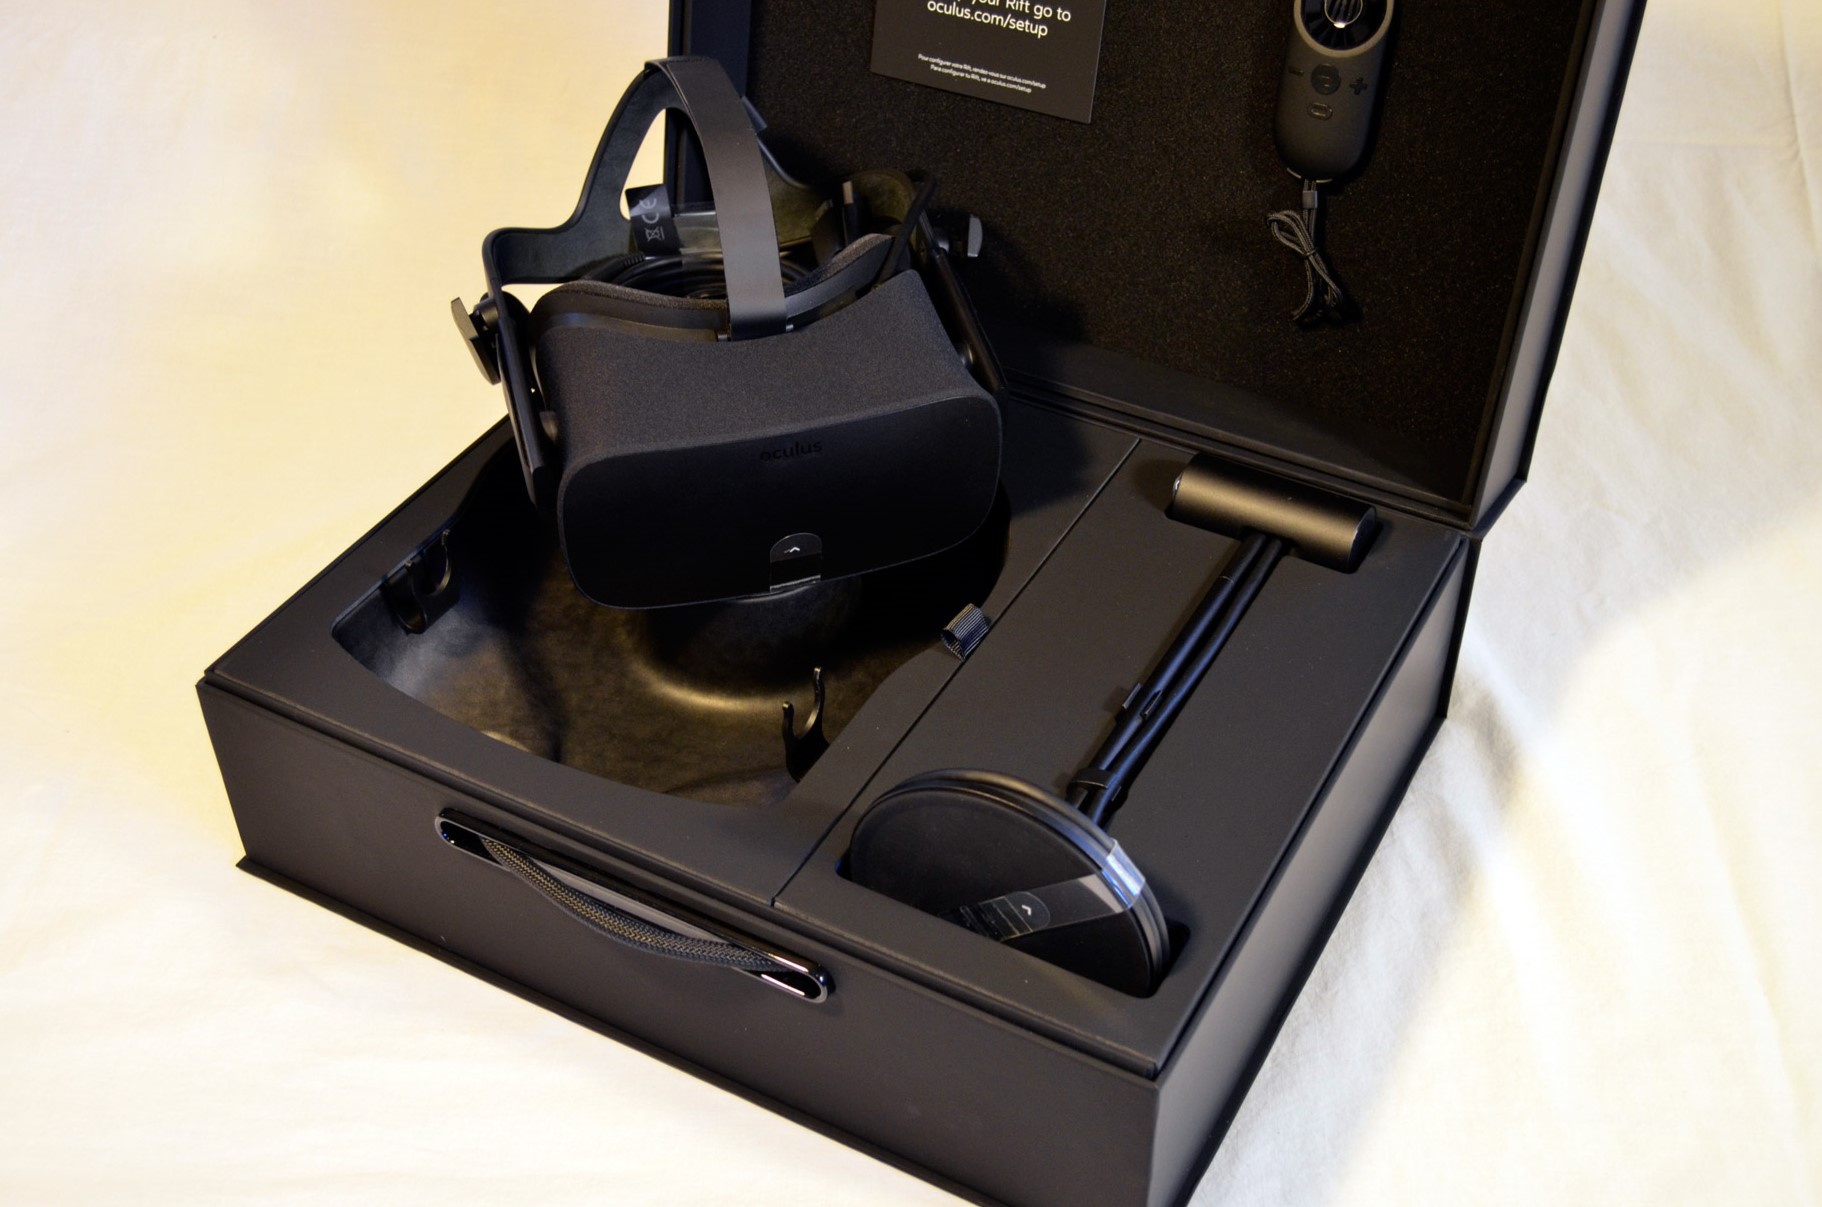
- Identify the Oculus Rift headset: The centerpiece of the package is the Oculus Rift headset. Look for the sleek, black device nestled within the protective foam.
- Remove the protective foam: Lift the foam to expose the Oculus Rift headset fully. Check for any damages or visible defects. If everything looks good, proceed to the next step.
- Locate the Oculus Touch controllers: Next, search for the Oculus Touch controllers. These small, handheld devices play a crucial role in your virtual reality experience.
- Remove the controllers from the packaging: Open any plastic wraps or protective coverings encasing the Oculus Touch controllers. Take a moment to admire their ergonomic design and innovative features.
- Find the Oculus Sensor: Look for the Oculus Sensor, a small device that helps track your movements in virtual reality. It plays a vital role in delivering an immersive experience.
- Take out the Oculus Sensor from packaging: Remove any plastic bags or protective materials around the Oculus Sensor. Check for any damages or missing components before proceeding.
- Locate the Oculus Touch controller batteries: Look for the batteries that power the Oculus Touch controllers. These batteries ensure that you can enjoy hours of uninterrupted virtual reality adventures.
- Open the battery compartments: Find the battery compartments on the Oculus Touch controllers and open them. Ensure that the batteries are securely placed inside and make sure to follow the correct battery orientation.
- Remove the batteries from packaging: Retrieve the batteries from their packaging and insert them into the battery compartments of the Oculus Touch controllers. Make sure to place the positive and negative ends of the batteries correctly.
- Find the power adapter and cable: Locate the power adapter and cable that provide the necessary power to your Oculus Rift setup.
- Remove the power adapter and cable from packaging: Take out the power adapter and cable from their packaging. Ensure there are no damages to the adapter or cable before connecting them.
- Locate the lens cloth and documentation: Look for the included lens cloth used for cleaning the VR headset lenses. Also, find any user manuals or setup guides provided by Oculus.
- Take out the lens cloth and documentation from packaging: Remove the lens cloth and documentation from their packaging. Keep them in a safe place for reference during the setup process.
- Remove any remaining packaging or accessories: Double-check the box for any additional packaging materials or accessories that may require removal.
- Organize the components and accessories: Take a moment to organize all the components and accessories neatly. Having everything readily accessible will streamline the setup process.
- Read the setup and safety information: Before proceeding with setting up your Oculus Rift, it’s essential to read through the setup and safety information provided in the user manual or documentation. Familiarize yourself with any precautions or guidelines to ensure a smooth and safe VR experience.
By following these steps and thoroughly checking the contents of the box, you’ll be well-prepared to begin your virtual reality journey with the Oculus Rift.
Remove the Outer Packaging
After confirming the contents of the box, it’s time to remove the outer packaging to gain easy access to all the components. Follow these steps to safely remove the packaging:
- Inspect the outer packaging: Carefully examine the box for any tape, stickers, or seals that hold the packaging together.
- Find the opening mechanism: Look for any flaps, tabs, or openings that allow you to access the inside of the package.
- Open the box: Utilize the opening mechanism to carefully open the box. Take your time to avoid causing any damage to the packaging or its contents.
- Set aside the outer packaging: Once the box is open, remove the outer packaging materials such as plastic wrap or cardboard covers. Set them aside safely.
- Check for any additional packaging: Inspect the interior of the box for any other layers of packaging or protective materials.
- Remove additional packaging: If there are any additional layers of packaging, carefully remove them to reveal the products inside.
- Dispose of the packaging responsibly: Properly dispose of the outer packaging, making sure to recycle or dispose of any materials according to local regulations.
Removing the outer packaging allows for easier handling and access to all the components of your Oculus Rift. Remember to handle the packaging materials with care and dispose of them responsibly to minimize any environmental impact.
Lift the Lid of the Box
Once you have removed the outer packaging, it’s time to delve deeper into your Oculus Rift experience by lifting the lid of the box. Follow these steps to uncover the excitement inside:
- Securely hold the box: Ensure that you have a firm grip on the bottom of the box to prevent any accidental dropping or mishandling.
- Locate the lid: Identify the top part of the box, which serves as the lid. It may be slightly larger than the bottom portion.
- Slide your fingers under the lid: Gently slide your fingers under the edge of the lid, providing a bit of leverage to lift it up.
- Slowly lift the lid: Lift the lid of the box upwards, using controlled and smooth movements. Take your time to avoid any sudden jerks or impacts.
- Set the lid aside: Once the lid is fully lifted, carefully set it aside, ensuring it doesn’t collide with any nearby objects or cause any damage.
- Observe the contents inside: Take a moment to observe the contents of the box, arranged neatly within.
As you lift the lid of the box, you reveal the treasures that await you on your virtual reality journey with the Oculus Rift. Enjoy the anticipation and excitement as you proceed to the next steps of unboxing and preparing your VR system.
Take Out the Oculus Rift Headset
Now that you have lifted the lid of the box, it’s time to retrieve the centerpiece of your Oculus Rift experience – the headset itself. Follow these steps to safely take out the Oculus Rift headset:
- Locate the Oculus Rift headset: Look for the Oculus Rift headset, which is the primary component of the package. It is typically housed in the center of the box.
- Gently grasp the headset: With great care, grasp the sides of the Oculus Rift headset. Ensure that your fingers are secure and that you do not apply excessive pressure on any delicate parts.
- Lift the headset out of the box: Lift the Oculus Rift headset out of the box, keeping it level and stable as you extract it from its resting place.
- Inspect the headset: Take a moment to visually inspect the headset for any signs of damage or defects. Check the lenses, the straps, and all the ports to ensure everything is in proper condition.
- Handle the headset with care: Always handle the Oculus Rift headset delicately and avoid any rough handling or sudden movements that could potentially cause damage.
With the Oculus Rift headset in your hands, you’re one step closer to immersive virtual reality experiences. Carefully hold the headset as you prepare to proceed with the unboxing process and set up your VR system.
Remove the Protective Foam
Now that you have taken out the Oculus Rift headset from the box, the next step is to remove the protective foam that keeps it secure during shipping. Follow these steps to safely remove the foam:
- Inspect the protective foam: Take a moment to examine the foam surrounding the Oculus Rift headset. Look for any tears or damages that may have occurred during transit.
- Identify the tabs or openings: Look for tabs or openings in the foam that allow you to lift or remove it. These are usually designed for easy access to the headset.
- Lift the foam: Using the tabs or carefully grasping the foam, lift it up and away from the Oculus Rift headset. Be gentle to avoid any unnecessary movements that could jostle the headset.
- Set aside the foam: Once the foam is removed, set it aside in a safe place. You may need it to store and protect your Oculus Rift headset when not in use.
- Check the headset for any remaining foam: Inspect the Oculus Rift headset to ensure no fragments of foam remain attached. If you spot any, carefully remove them.
By removing the protective foam, you unveil the sleek and futuristic design of the Oculus Rift headset. Take a moment to appreciate the craftsmanship before moving on to the next step of your virtual reality journey.
Locate the Oculus Touch Controllers
The Oculus Rift experience wouldn’t be complete without the Oculus Touch controllers, which allow you to interact with the virtual world. Let’s locate these essential components within the packaging:
- Identify the Oculus Touch controllers: Look for the Oculus Touch controllers, which are vital for navigating and interacting with your virtual reality environment. They should be located near the Oculus Rift headset.
- Observe the design: Take a moment to appreciate the sleek and ergonomic design of the Oculus Touch controllers. Notice how they fit comfortably in your hands, providing intuitive control over your VR experiences.
- Ensure both controllers are present: Confirm that there are two Oculus Touch controllers included in the packaging. Each controller consists of a left and right version.
- Locate any protective covers or packaging: Check if there are any plastic wraps, stickers, or protective covers on the Oculus Touch controllers. These may need to be removed before usage.
- Inspect the controllers for damages: Carefully examine the Oculus Touch controllers for any visible damages or defects. Look for scratches, cracks, or loose components that may affect their functionality.
The Oculus Touch controllers play a significant role in your virtual reality experience, enhancing immersion and interactivity. Once you have located and inspected them, you’re one step closer to fully engaging with your Oculus Rift system.
Remove the Touch Controllers from Packaging
Now that you have located the Oculus Touch controllers, it’s time to remove them from their packaging. Follow these steps to safely extract the controllers:
- Check for any packaging materials: Look for any plastic bags, protective covers, or adhesive tapes that may be securing the Oculus Touch controllers.
- Remove any packaging materials: Carefully remove any packaging materials surrounding the Oculus Touch controllers. Take your time to avoid damaging the controllers or accidentally tearing any important components.
- Inspect the controllers: Once the packaging materials are removed, inspect the Oculus Touch controllers for any visible damages or defects. Check for scratches, scuffs, or loose parts.
- Familiarize yourself with the controller layout: Take a moment to familiarize yourself with the layout of the Oculus Touch controllers. Note the buttons, triggers, thumbsticks, and tracking sensors.
- Ensure proper orientation: Properly orient the controllers in your hands, aligning the left controller with your left hand and the right controller with your right hand.
- Hold the controllers securely: Take a firm but comfortable grip on the Oculus Touch controllers, ensuring that your fingers are placed correctly on the buttons and triggers.
By removing the Oculus Touch controllers from their packaging, you’re preparing to immerse yourself in the virtual world. Once you have inspected and familiarized yourself with the controllers, you’re ready to proceed with the setup and start exploring the endless possibilities of your Oculus Rift system.
Find the Oculus Sensor
The Oculus Sensor is a crucial component of your Oculus Rift system as it helps track your movements in virtual reality. Let’s locate the Oculus Sensor within the packaging:
- Check the contents of the box: Ensure you have unpackaged all the components from the Oculus Rift box and set them aside.
- Look for the Oculus Sensor: Locate the Oculus Sensor, which is a small, rectangular device that enables accurate tracking of your head movements.
- Check nearby areas: The Oculus Sensor may be nestled alongside the Oculus Rift headset or other accessories within the box.
- Inspect the packaging: If you cannot locate the Oculus Sensor within the box, check for any dedicated packaging or compartments that may hold the sensor separately.
- Remove any packaging materials: Carefully remove any protective covers, plastic bags, or packaging that might be surrounding the Oculus Sensor.
- Examine the Oculus Sensor: Take a moment to examine the Oculus Sensor for any visible damages or defects. Check the lenses and make sure there are no scratches or smudges affecting its performance.
The Oculus Sensor is a key component for precise tracking and enhancing your virtual reality experience. Once you have located and inspected the Oculus Sensor, you’re ready to set it up and continue with the setup process for your Oculus Rift system.
Take Out the Oculus Sensor from Packaging
After locating the Oculus Sensor, it’s time to remove it from its packaging. Follow these steps to safely extract the Oculus Sensor:
- Inspect the packaging: Check for any plastic wraps, protective covers, or adhesive tapes securing the Oculus Sensor.
- Carefully remove packaging materials: Remove any packaging materials surrounding the Oculus Sensor, ensuring you do so gently to avoid any unintentional damage.
- Handle with care: Hold the Oculus Sensor delicately, paying attention to any fragile components or sensitive areas.
- Examine the Oculus Sensor: Take a moment to visually inspect the Oculus Sensor for any visible defects or damages. Look for cracks, scratches, or any signs of wear.
- Set aside the packaging: Place the packaging materials aside or dispose of them properly, ensuring you keep a clean workspace.
By safely extracting the Oculus Sensor from its packaging, you’re now ready to incorporate it into your Oculus Rift setup. Always handle the Oculus Sensor with care to preserve its functionality and ensure optimal tracking accuracy during your virtual reality experiences.
Locate the Oculus Touch Controller Batteries
The Oculus Touch controllers require batteries to power them and enable you to fully engage with your virtual reality experiences. Let’s locate the batteries for the Oculus Touch controllers within the packaging:
- Check the contents of the box: Ensure that you have unpacked all the components and accessories that came with your Oculus Rift system.
- Inspect the packaging: Look for any compartments or dedicated areas within the packaging that may hold the batteries for the Oculus Touch controllers.
- Locate the batteries: Find the designated batteries specifically designed for the Oculus Touch controllers.
- Check for packaging materials: If the batteries are wrapped or sealed in plastic, carefully remove the packaging materials.
- Inspect the batteries: Take a moment to examine the batteries for any defects or damages. Ensure they are not expired and are suitable for use.
By locating the batteries for the Oculus Touch controllers, you are now prepared to power the controllers and enjoy the immersive virtual reality experiences that await you. Remember to handle the batteries with care and dispose of any used batteries responsibly according to applicable regulations.
Open the Battery Compartments
Now that you have located the batteries for the Oculus Touch controllers, the next step is to open the battery compartments. Follow these steps to access the compartments:
- Inspect the Oculus Touch controllers: Take a moment to familiarize yourself with the layout and design of the controllers.
- Identify the battery compartments: Look for the designated areas on the Oculus Touch controllers that house the batteries.
- Determine the battery compartment access method: Observe the battery compartment design to identify how it opens. Some models may have a latch or a door that needs to be released.
- Open the battery compartments: Using your fingers or a small tool if necessary, open the battery compartments according to the designated access method.
- Ensure proper orientation: Take note of the correct battery orientation, typically indicated by the polarity (+/-) symbols or markings inside the compartments.
Once the battery compartments are open, you’re ready to insert the batteries and power up the Oculus Touch controllers. Exercise caution while opening the battery compartments, making sure not to apply excessive force or damage any components of the Oculus Touch controllers.
Remove the Batteries from Packaging
With the battery compartments open, it’s time to retrieve the batteries for the Oculus Touch controllers. Follow these steps to safely remove the batteries from their packaging:
- Inspect the battery packaging: Check for any plastic wraps or seals that secure the batteries in their packaging.
- Remove the packaging materials: Carefully unwrap or open the packaging materials surrounding the batteries.
- Inspect the batteries: Take a moment to examine the batteries for any visible defects, leaks or damages. Ensure they are the correct type and suitable for use with the Oculus Touch controllers.
- Handle the batteries with care: Grasp the batteries gently, avoiding any harsh movements or dropping them.
- Ensure proper orientation: Check the positive “+” and negative “-” markings on the batteries and align them correctly with the corresponding markings inside the battery compartments.
- Insert the batteries: Slide the batteries into the battery compartments, ensuring a secure fit and proper contact with the electrical terminals.
- Close the battery compartments: Once the batteries are inserted, carefully close the battery compartments, ensuring they are securely fastened.
By removing the batteries from their packaging and inserting them into the battery compartments, you are powering up the Oculus Touch controllers. Make sure to handle the batteries responsibly and dispose of any used batteries following appropriate recycling or disposal guidelines specific to your area.
Find the Power Adapter and Cable
Locating the power adapter and cable is the next step in setting up your Oculus Rift system. These components provide the necessary power supply for your VR experience. Follow these steps to find the power adapter and cable:
- Inspect the contents of the Oculus Rift package: Take a moment to ensure that you have unpacked all the components and accessories from the box.
- Search for the power adapter: Look for a specific component that resembles a power adapter, which is typically a rectangular box shape.
- Identify the power cable: Look for a cable that is compatible with the power adapter and has the appropriate connectors on each end.
- Check the packaging materials: If the power adapter and cable are enclosed in separate packaging, carefully remove any plastic wraps or protective materials.
- Inspect the power adapter and cable: Examine the power adapter and cable for any visible damages, such as frayed wires or bent connectors. Ensure they are in good working condition.
Once you have located the power adapter and cable, you are one step closer to bringing your Oculus Rift system to life. These components are essential for supplying power to your headset and other peripherals, so make sure to keep them readily accessible during the setup process.
Remove the Power Adapter and Cable from Packaging
Now that you have located the power adapter and cable for your Oculus Rift system, it’s time to remove them from their packaging. Follow these steps to safely extract the power adapter and cable:
- Inspect the packaging: Check for any plastic bags, protective covers, or adhesive tapes that may be securing the power adapter and cable within the packaging.
- Carefully remove the packaging materials: Gently remove any packaging materials surrounding the power adapter and cable, taking care not to damage or fray the cable in the process.
- Examine the power adapter and cable: Take a moment to visually inspect the power adapter and cable for any visible defects or damages. Check for any loose or exposed wires.
- Confirm compatibility: Ensure that the power adapter and cable are the correct match for your Oculus Rift system, as specified in the setup guide or user manual.
By removing the power adapter and cable from their packaging, you are now ready to connect and supply power to your Oculus Rift headset and other peripherals. Always handle the power adapter and cable with care to prevent any unnecessary damage and ensure a smooth and safe setup process.
Locate the Lens Cloth and Documentation
Aside from the essential components, the Oculus Rift package may include additional items that enhance your overall experience. Let’s locate the lens cloth and documentation within the packaging:
- Inspect the contents of the box: Ensure that you have unpacked all the components and accessories from the Oculus Rift package.
- Search for the lens cloth: Look for a small cloth specifically designed for cleaning the lenses of your Oculus Rift headset.
- Identify the documentation: Locate any documentation or user manuals that provide instructions and information about the setup and usage of your Oculus Rift system.
- Check packaging materials: In some cases, the lens cloth and documentation may be enclosed in a separate packaging or tucked inside compartments.
- Inspect the lens cloth and documentation: Once found, examine the lens cloth for cleanliness and any visible damages. Also, review the documentation for completeness and legibility.
The lens cloth is essential for keeping the lenses of your Oculus Rift headset clean and ensuring optimal visual clarity. The documentation provides valuable information on how to set up, operate, and maintain your Oculus Rift system. It’s important to keep them easily accessible for reference during the setup process and throughout your virtual reality adventures.
Take Out the Lens Cloth and Documentation from Packaging
Now that you have located the lens cloth and documentation for your Oculus Rift system, it’s time to remove them from their packaging. Follow these steps to safely retrieve the lens cloth and documentation:
- Inspect the packaging: Check for any plastic wraps, seals, or protective covers that may be securing the lens cloth and documentation within the packaging.
- Carefully remove the packaging materials: Gently remove any packaging materials surrounding the lens cloth and documentation, taking care not to tear or damage them in the process.
- Retrieve the lens cloth: Take out the lens cloth, which is specifically designed for cleaning and maintaining the lenses of your Oculus Rift headset.
- Extract the documentation: Retrieve the documentation, including user manuals, setup guides, and any other informative materials that provide valuable information about your Oculus Rift system.
- Inspect the lens cloth and documentation: Take a moment to visually inspect the lens cloth for any visible defects or damages. Review the documentation for completeness and legibility.
By taking out the lens cloth and documentation from their packaging, you now have important tools at hand. The lens cloth allows you to maintain crystal-clear vision in your virtual reality experiences, while the documentation guides you through the setup process and provides essential information for operating your Oculus Rift system effectively.
Remove Any Remaining Packaging or Accessories
Now that you have retrieved the essential components and accessories from the Oculus Rift packaging, it’s important to check for any remaining packaging or accessories that may still be inside. Follow these steps to ensure you have removed everything:
- Inspect the interior of the box: Take a careful look inside the Oculus Rift packaging for any additional packaging materials or accessories.
- Remove any remaining packaging: If you spot any plastic bags, foam inserts, or other packaging materials, remove them from the box.
- Check for overlooked accessories: Double-check for any smaller accessories that may have been tucked away in compartments or hidden beneath the packaging.
- Verify completeness: Ensure all the listed components and accessories mentioned in the instruction manual or setup guide are present.
By removing any remaining packaging or accessories, you eliminate any potential obstructions or unwanted materials from interfering with your Oculus Rift setup. It also ensures that you have all the necessary components and accessories required for a complete and seamless virtual reality experience.
Organize the Components and Accessories
Now that you have unpacked and removed all the components and accessories from the Oculus Rift packaging, it’s time to organize them systematically. This will not only make the setup process more efficient but also ensure that everything is readily accessible when you need it. Follow these steps to organize your Oculus Rift components and accessories:
- Clear a clean workspace: Begin by clearing a designated area where you can sort and organize the components. This will help prevent any accidental damage or misplacement of the items.
- Group similar items together: Categorize the components and accessories into groups based on their functionality. For example, group the Oculus Rift headset and Oculus Touch controllers together.
- Arrange items neatly: Arrange the grouped components neatly next to each other. This will allow for easy identification and access during the setup process.
- Keep cables organized: Coil the cables neatly and secure them with twist ties or cable management solutions to avoid any tangling or confusion later on.
- Set aside the documentation: Keep the user manuals, setup guides, and other documentation in a safe and easily accessible place. You may want to refer to them during the setup process or for troubleshooting in the future.
- Store accessories properly: If your Oculus Rift package includes additional accessories like lens cloths or extra cables, store them in a designated compartment or bag to keep them organized and prevent loss.
- Label containers or compartments: If you are using containers or compartments to store the components and accessories, consider labeling them to easily identify what goes where.
By organizing your Oculus Rift components and accessories, you create a systematic and clutter-free setup process. This ensures that you have everything you need at hand and decreases the likelihood of misplacing or damaging any important components during the setup or storage phase.
Read the Setup and Safety Information
Before diving into the setup process of your Oculus Rift system, it’s essential to take the time to read through the setup and safety information provided in the user manuals or documentation. This valuable information will guide you through the setup process and ensure your safety while enjoying your virtual reality experiences. Follow these steps to familiarize yourself with the setup and safety guidelines:
- Locate the user manuals and setup guides: Gather all the documentation that came with your Oculus Rift system, including the user manuals and setup guides.
- Find a quiet and well-lit area: Choose a comfortable and well-lit space where you can concentrate on reading through the setup and safety information without distractions.
- Read through the setup guide: Begin by reading the setup guide, which will provide step-by-step instructions on how to properly set up your Oculus Rift system.
- Pay attention to safety guidelines: Read the safety information carefully to understand any precautions or warnings associated with using the Oculus Rift system.
- Take note of any specific requirements: Make sure to understand any specific software, hardware, or environmental requirements mentioned in the setup and safety information.
- Refer to troubleshooting and support sections: Familiarize yourself with the troubleshooting and support sections of the documentation in case you encounter any issues during the setup or usage of your Oculus Rift system.
- Retain the documentation for future reference: Keep the user manuals and setup guides in a safe place for future reference. They will come in handy when performing updates, troubleshooting, or exploring advanced features of your Oculus Rift system.
By reading the setup and safety information, you gain a comprehensive understanding of how to set up your Oculus Rift system correctly, ensure your safety during usage, and troubleshoot any potential issues. This knowledge will empower you to make the most of your virtual reality experiences while maintaining a safe and enjoyable environment.