
Reasons to Find the Serial Number of a Laptop
When it comes to laptops, the serial number is an essential piece of information that every owner should know. It is a unique identifier assigned by the manufacturer, allowing you to differentiate your device from others. While it may seem like a small detail, there are several important reasons why knowing and keeping track of your laptop’s serial number is crucial:
- Proof of Ownership: The serial number serves as proof that you are the legitimate owner of the laptop. In case of theft or loss, having this information will be invaluable in filing a police report or making an insurance claim.
- Warranty Purposes: Your laptop’s serial number is often required when seeking warranty services or repairs. It allows the manufacturer or authorized service providers to verify the device’s warranty status and determine if it is eligible for free repairs or replacements.
- Software and Driver Updates: Some software and driver updates may be specific to certain laptop models. By providing the serial number, you can ensure that you download the correct updates and avoid compatibility issues.
- Device Identification: If you have multiple laptops or devices, knowing the serial number of each one can make it easier to differentiate and track them. This is particularly useful in organizations or households with several identical models.
- Selling or Donating: If you plan to sell or donate your laptop in the future, having the serial number can help establish its authenticity and increase buyer confidence. It also allows you to deregister the device from any services or accounts tied to it.
- Insurance Coverage: Some insurance policies may require you to provide the laptop’s serial number when making a claim. It helps ensure that the device in question is the same one covered by your policy.
Given these reasons, it is clear that knowing and keeping track of your laptop’s serial number is essential. Now that we understand its importance, let’s explore the various methods for finding the serial number on different operating systems and devices.
Ways to Find the Serial Number on Windows
If you’re a Windows user and need to find the serial number of your laptop, there are several methods you can try. Here are four commonly used methods:
- Using Command Prompt: Open the Command Prompt by pressing the Windows key + R, typing “cmd,” and pressing Enter. In the Command Prompt window, type “wmic bios get serialnumber” and press Enter. The serial number will be displayed on the screen.
- Using System Information: Press the Windows key + R, type “msinfo32,” and press Enter. In the System Information window, scroll down to the “System Model” or “Serial Number” section to find the laptop’s serial number.
- Under the Laptop Battery: If your laptop has a removable battery, power off the laptop and remove the battery. Look for a sticker or engraved label underneath the battery compartment. The serial number is often located on this sticker.
- On the Original Packaging: If you still have the original packaging of your laptop, check for a label or sticker on the box. The serial number is usually printed on the packaging.
By utilizing these methods, you can easily find the serial number of your Windows laptop. Make sure to note down the serial number in a safe place for future reference.
Method 1: Using Command Prompt
One of the quickest ways to find the serial number of a Windows laptop is by using the Command Prompt. Follow these steps:
- Press the Windows key + R to open the Run dialog box.
- Type “cmd” and press Enter to open the Command Prompt.
- In the Command Prompt window, type “wmic bios get serialnumber” (without quotes) and press Enter.
- The Command Prompt will display the serial number of your laptop.
This method uses the “wmic” command, which stands for Windows Management Instrumentation Command-line. By executing the “bios get serialnumber” command, you retrieve the serial number information from your laptop’s BIOS (Basic Input/Output System).
It’s worth noting that some laptops may have the serial number encoded differently in the BIOS, so the Command Prompt method may not work for every device. In such cases, try the alternative methods mentioned earlier to find the serial number.
Remember to jot down the serial number once you have retrieved it from the Command Prompt. It’s essential to have this information readily available for warranty claims, service requests, or any other situations where it may be required.
Method 2: Using System Information
If you’re unable to find the serial number of your Windows laptop using the Command Prompt, another reliable method is using the System Information tool. Here’s how you can do it:
- Press the Windows key + R to open the Run dialog box.
- Type “msinfo32” and press Enter to open the System Information window.
- In the System Information window, navigate to the “System Model” or “Serial Number” section.
- The serial number of your laptop will be displayed in this section.
The System Information tool provides detailed information about your computer’s hardware and software configuration. It includes essential details such as the operating system version, BIOS version, system model, and, most importantly, the serial number of your laptop.
In most cases, the serial number will be listed as “Serial Number,” “Serial,” or a similar term in the System Information window. The specific location and terminology may vary slightly depending on the manufacturer and Windows version.
Once you have located the serial number, be sure to document it in a safe place for future reference. Storing it digitally or in a physical notebook can be helpful to prevent loss or misplacement.
Using the System Information method is ideal when you prefer a graphical interface or when the Command Prompt method doesn’t yield the desired results. It provides an easy way to access vital laptop information without requiring any technical expertise.
Method 3: Under the Laptop Battery
If you’re still unable to locate the serial number of your Windows laptop using the previous methods, try checking under the laptop battery. Here’s how:
- Power off your laptop and unplug any power source.
- Flip the laptop over and locate the battery release latch or switch.
- Slide or push the latch/switch to unlock and remove the battery.
- Inspect the area beneath the battery for a sticker or engraved label.
- The serial number is often printed or etched on this label.
Note that this method only applies if your laptop has a removable battery. If your laptop has an integrated or non-removable battery, you will need to explore other methods to find the serial number.
Finding the serial number under the laptop battery can be a convenient way to access this information, especially if the label is not easily visible when the laptop is in normal use. However, it’s essential to handle the battery and laptop with care and ensure it is powered off and disconnected from any power source before attempting to remove the battery.
Once you have located the serial number, make sure to document it for future reference. Keeping a record of the serial number in a safe place can be helpful in case the physical label wears off or becomes unreadable over time.
Method 4: On the Original Packaging
If you’re struggling to find the serial number of your Windows laptop through other methods, checking the original packaging can often provide the necessary information. Here’s how you can locate the serial number on the packaging:
- Retrieve the original box or packaging in which your laptop was delivered.
- Inspect the exterior of the packaging for any labels or stickers.
- Look for a specific section on the packaging that displays the laptop’s serial number.
- The serial number is usually printed on a label alongside other details such as the model number and barcode.
Keeping the original packaging of your laptop can be useful for various reasons, with finding the serial number being one of them. The packaging typically contains important information and specifications related to your laptop, making it a reliable source to retrieve the serial number if all other attempts have failed.
If you have discarded or misplaced the original packaging, you might consider looking for any digital copies or receipts from your purchase that may include the serial number. Retailers or online platforms often provide electronic invoices or confirmation emails that contain the necessary details.
Once you have found the serial number on the original packaging, make sure to record it in a secure place. Digital storage options, such as password-protected files or cloud-based storage services, can help ensure you have easy access to the serial number whenever needed.
Keep in mind that the availability of the serial number on the packaging may vary depending on the manufacturer and retailer. Some laptops may display the serial number prominently, while others may place it in a less obvious location. Be thorough in your examination to ensure you don’t miss out on this crucial information.
Ways to Find the Serial Number on Mac
If you’re a Mac user and need to find the serial number of your laptop, there are several methods you can try. Here are four commonly used methods:
- Using Apple Menu: Click on the Apple menu in the top-left corner of your screen and select “About This Mac.” In the Overview tab, you will find the serial number listed under the “Serial Number” or “System Serial#” section.
- Using System Report: Click on the Apple menu, and select “About This Mac.” In the Overview tab, click on the “System Report” button. In the System Report window, expand the “Hardware” section and select “Hardware Overview.” The serial number will be listed next to “Serial Number (system)”.
- On the Original Packaging: If you still have the original packaging of your Mac laptop, check for a label or sticker on the box. The serial number is usually printed on the packaging.
- In iCloud: If your Mac is synced with iCloud, you can find the serial number by logging into iCloud.com and selecting “Find iPhone.” Locate your device on the map, click on the “i” icon, and the serial number will be displayed.
These methods provide convenient ways to find the serial number of your Mac laptop without the need for any technical expertise. By using these methods, you can easily access the necessary information and keep it on hand for future reference.
Method 1: Using Apple Menu
One of the easiest ways to find the serial number of your Mac laptop is by using the Apple Menu. Follow these steps:
- Click on the Apple menu located in the top-left corner of your screen.
- Select “About This Mac” from the dropdown menu.
- In the Overview tab, you will find the serial number listed under the “Serial Number” or “System Serial#” section.
When you click on the Apple menu and select “About This Mac,” a window will appear displaying information about your Mac, including the version of macOS, processor, and memory. The serial number is also included in this window, making it easy to find.
The location of the serial number may vary slightly depending on the version of macOS you are using. It could be listed as “Serial Number,” “System Serial#,” or a similar term. Take note of the serial number and keep it in a safe place for future reference.
Using the Apple Menu method is simple and convenient. It provides you with quick access to essential information about your Mac, including the serial number. This method is ideal for users who prefer a graphical interface over command-line options.
By knowing the serial number of your Mac laptop, you can easily identify it when needed, whether for warranty purposes, software updates, or troubleshooting assistance from Apple or authorized service providers.
Method 2: Using System Report
If you’re unable to find the serial number of your Mac laptop using the Apple Menu method, another effective way is to use the System Report. Follow these steps:
- Click on the Apple menu in the top-left corner of your screen and select “About This Mac”.
- In the Overview tab, click on the “System Report” button.
- In the System Report window, expand the “Hardware” section and select “Hardware Overview”.
- The serial number will be listed next to “Serial Number (system)”.
The System Report provides detailed information about your Mac’s hardware, software, and network connections. By following the steps above, you can access the System Report and easily locate your laptop’s serial number.
Once you have opened the System Report window, navigate to the “Hardware Overview” section. You will find the serial number listed next to “Serial Number (system)”. Take note of this serial number and keep it in a safe place for future reference.
The System Report method is particularly useful if you need to access additional information about your Mac’s hardware configuration. It provides a comprehensive overview that includes the serial number, making it convenient for troubleshooting, warranty claims, or software compatibility checks.
Remember, the location of the serial number within the System Report may vary slightly depending on the macOS version and your Mac’s model. Take your time to explore the window and locate the correct section to find the serial number.
Method 3: On the Original Packaging
If you have the original packaging of your Mac laptop, it can be a reliable source to find the serial number. Here’s how you can locate it:
- Retrieve the original box or packaging in which your Mac laptop was delivered.
- Inspect the exterior of the packaging for any labels or stickers.
- Look for a specific section on the packaging that displays the laptop’s serial number.
- The serial number is usually printed on a label alongside other details such as the model number and barcode.
When you purchase a Mac laptop, the packaging contains vital information about the product, including the serial number. It is often displayed on a label or sticker, typically located on the exterior surface of the packaging.
Check all sides of the packaging, including the top, bottom, and sides, for any labels or stickers that indicate the serial number. Look for sections specifically dedicated to providing product details or identifiers. The serial number is usually printed in a prominent position, making it easy to find.
If you cannot locate the original packaging, you may want to consider checking any invoices or electronic purchase confirmations. Some retailers or online platforms include the serial number in their transaction documents, offering an alternative source to retrieve this information.
Once you have found the serial number on the original packaging or in digital records, it’s important to record it for future reference. Keep the serial number in a safe place, such as a password-protected file, note-taking app, or physical notebook, to ensure you can easily access it whenever needed.
Utilizing the original packaging to find the serial number is a convenient method, especially if you have retained the box. It can provide a surefire way to locate this essential information without the need to navigate through any software interfaces or settings on your Mac.
Method 4: In iCloud
If you have synced your Mac laptop with iCloud, you can find the serial number by accessing your iCloud account. Here’s how:
- Visit the iCloud website (icloud.com) and log in with your Apple ID and password.
- Click on “Find iPhone.”
- In the list of devices, locate and click on your Mac laptop.
- A pop-up window will appear with various details, including the serial number of your Mac.
By logging into your iCloud account and accessing the “Find iPhone” feature, you can easily locate the serial number associated with your Mac laptop. This method is particularly useful if you have several devices linked to your iCloud account.
Once you have clicked on your Mac laptop in the list of devices, a pop-up window will provide detailed information about the device, such as its location, battery status, and serial number. Take note of the serial number and store it securely for future reference.
Using iCloud to find the serial number is beneficial if your Mac laptop is not readily accessible or if you prefer a web-based method. It allows you to retrieve the serial number remotely and can be especially helpful in situations where you may have misplaced or cannot physically access your laptop.
Ensure that you protect your iCloud account with a strong, unique password to safeguard the privacy and security of your personal information, including the serial number of your Mac laptop.
Ways to Find the Serial Number on Chromebook
If you’re using a Chromebook and need to find its serial number, there are several methods you can try. Here are four commonly used methods:
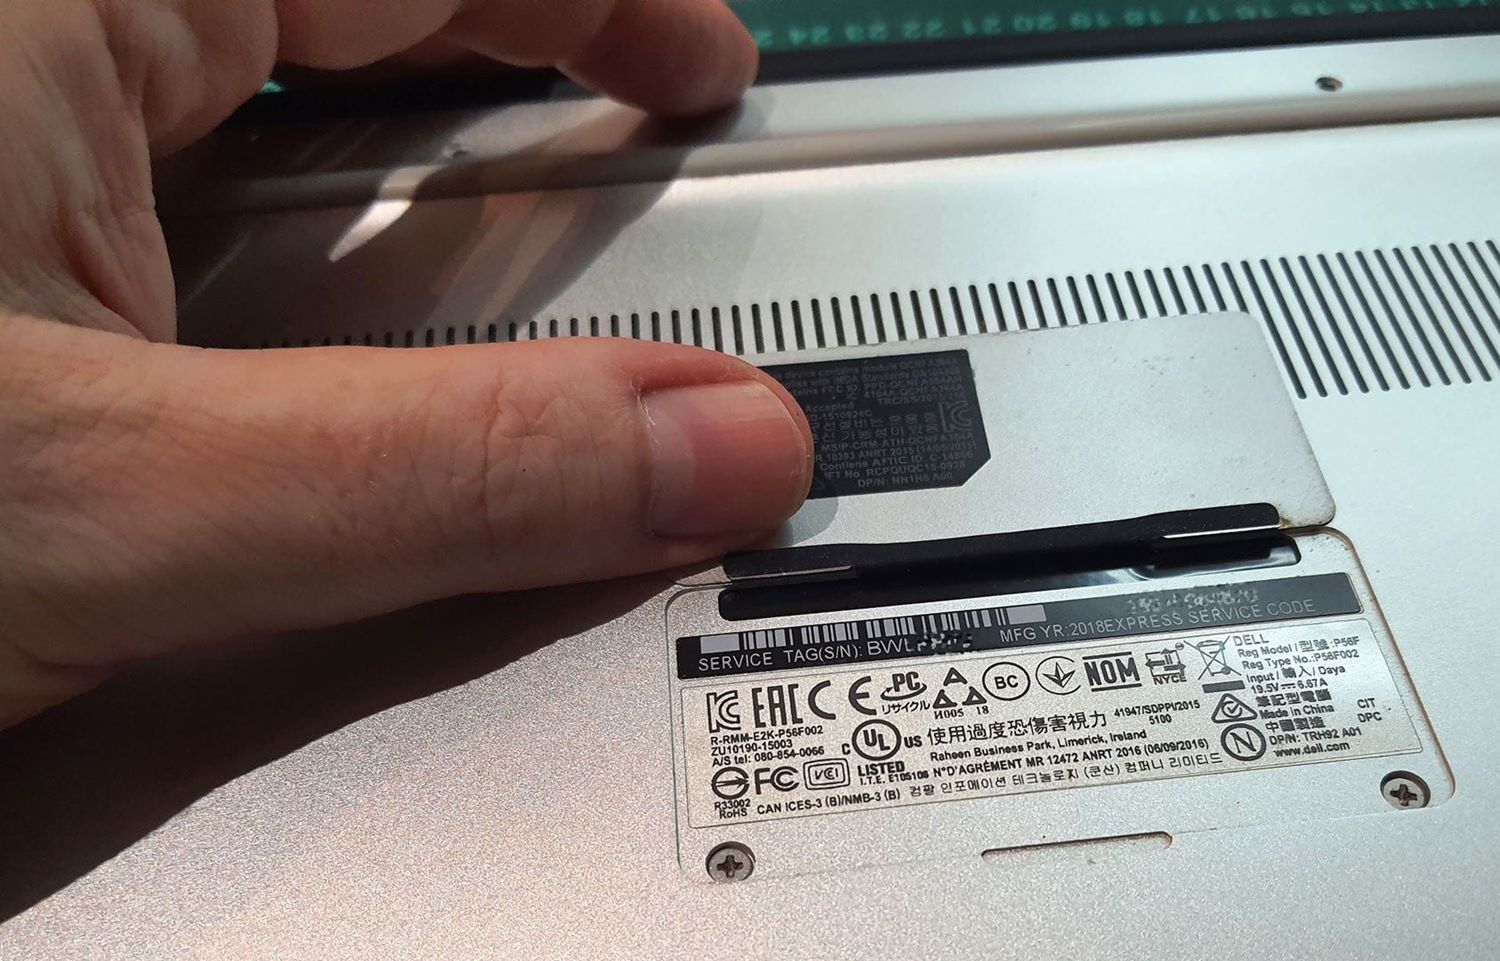
- On the Device: Look for a sticker or label on the bottom of your Chromebook. The serial number is often printed on this label, along with other information such as the model number and regulatory information.
- In the System Tray: Click on the time in the bottom-right corner of your Chromebook’s screen. In the pop-up window, click on the gear-shaped icon to access the settings menu. Scroll down and click on “About Chrome OS.” The serial number will be listed under the “Device” section.
- In Google Admin Console: If your Chromebook is managed by a school or organization, sign in to the Google Admin Console using your administrative account. Navigate to the “Devices” section and find your Chromebook. The serial number will be displayed alongside other device details.
- Using the Chromebook Desktop: Click on the Time in the bottom-right corner and then click on the gear-shaped icon to open the settings menu. Scroll down and click on “About Chrome OS.” Press the “Ctrl + Alt + T” keys to open the crosh shell. Then, type “shell” and press Enter. Finally, type “cat /sys/class/dmi/id/product_serial” without the quotes and press Enter. The serial number will be displayed.
If you’re having trouble finding the serial number using one method, try another until you locate it. Once you have found the serial number, make sure to keep it in a safe place for future reference.
Understanding how to find the serial number of your Chromebook is essential, as it can assist in various scenarios, including warranty claims, technical support, and device identification. Make sure to note down the serial number accurately and utilize the method that works best for your specific Chromebook model and situation.
Method 1: On the Device
One of the simplest and most straightforward ways to find the serial number of your Chromebook is by looking for a sticker or label on the device itself. Follow these steps to locate the serial number:
- Flip your Chromebook over to expose the underside of the device.
- Inspect the bottom surface for a sticker or label.
- The serial number is often printed on this label, along with other information such as the model number and regulatory details.
The location of the sticker or label may vary depending on the specific Chromebook model, but it is usually found towards the center or bottom of the device’s underside. Look for a section specifically dedicated to providing device information.
The serial number is typically clearly labeled and may be preceded by “SN,” “S/N,” or a similar abbreviation. Make sure to accurately note down the serial number, as it will be required for various purposes, including warranty claims or technical support inquiries.
Keep in mind that the sticker or label may wear off over time, especially with regular use or handling. If the serial number becomes faded or illegible, consider using one of the other methods mentioned earlier to retrieve the serial number.
Using the “On the Device” method is convenient, as you do not need to access any software or settings on your Chromebook. It provides you with immediate access to the required information, making it a quick and hassle-free option to find the serial number.
Once you have found the serial number on your Chromebook, record it in a secure place for future reference. This will ensure that you always have this critical piece of information readily available when needed.
Method 2: In the System Tray
If you prefer a software-based approach to find the serial number of your Chromebook, you can do so through the System Tray. Follow these steps:
- Click on the time in the bottom-right corner of your Chromebook’s screen.
- In the pop-up window, click on the gear-shaped icon to access the settings menu.
- Scroll down and click on “About Chrome OS.”
- The serial number will be listed under the “Device” section.
By following these steps, you can quickly access the Chrome OS settings and find the serial number in the System Tray. The System Tray is the area where various system settings and notifications are displayed on your Chromebook.
When you click on the time in the bottom-right corner, a pop-up window will appear with several options. Clicking on the gear-shaped icon will open the settings menu, where you can access various system preferences and configurations.
From the settings menu, scroll down until you find and click on “About Chrome OS.” This will open a new window that provides detailed information about your Chromebook’s operating system, hardware, and software versions.
In the “About Chrome OS” window, navigate to the “Device” section, where you will find the serial number listed. It may be labeled as “Serial number” or a similar term. Take note of the serial number and keep it in a secure place for future reference.
Using the System Tray method allows you to find the serial number without the need for additional tools, commands, or external sources. It provides a quick and straightforward way to access the necessary information directly from your Chromebook’s settings.
Remember to double-check the accuracy of the serial number you have noted down. Ensuring the correct serial number is crucial for warranty claims, support requests, or any other situations that require the use of this unique identifier.
Method 3: In Google Admin Console
If your Chromebook is managed by a school or organization, you can find the serial number by accessing the Google Admin Console. Here’s how:
- Sign in to the Google Admin Console using your administrative account.
- Navigate to the “Devices” section.
- Find and locate your Chromebook in the list of devices.
- The serial number will be displayed alongside other device details.
The Google Admin Console is a web-based administration tool that allows administrators to manage and control Chromebook devices within an organization. If your Chromebook is part of a school or business network, the Google Admin Console provides an easy way to retrieve the serial number.
Once you have signed in to the Google Admin Console, locate the “Devices” section. This section provides an overview of all the managed devices in your organization, including Chromebooks. Find your specific Chromebook in the list and click on it to view its details.
Within the device details, the serial number will be prominently displayed, along with other pertinent information like the device model, status, and assigned user. Make sure to record the serial number accurately and keep it in a safe place for future reference.
Using the Google Admin Console method is especially useful if you need to manage multiple Chromebooks or maintain centralized control over your organization’s devices. It provides an efficient way to access device information, including the serial number, from a central administration console.
Ensure that you have the necessary administrative privileges and permissions to access the Google Admin Console. This method may not be applicable to Chromebooks used primarily for personal purposes or those not enrolled in a managed device program.
By using the Google Admin Console method, you can retrieve the serial number of your Chromebook conveniently and efficiently, making it easier to manage and support your organization’s devices.
Method 4: Using the Chromebook Desktop
If you prefer to find the serial number of your Chromebook directly from the desktop interface, you can use the crosh shell. Follow these steps:
- Click on the time in the bottom-right corner of your Chromebook’s screen.
- Click on the gear-shaped icon to open the settings menu.
- Scroll down and click on “About Chrome OS.”
- Press the “Ctrl + Alt + T” keys simultaneously to open the crosh shell.
- Type “shell” and press Enter to switch to the Linux shell.
- Finally, type “cat /sys/class/dmi/id/product_serial” (without quotes) and press Enter.
Following these steps will open the crosh shell, which stands for Chrome OS Developer Shell. The crosh shell provides access to additional features and commands, including retrieving the serial number of your Chromebook.
Once you are in the crosh shell, initiate the Linux shell by typing “shell” and pressing Enter. This allows you to use Linux-based commands within the crosh shell.
To retrieve the serial number, type “cat /sys/class/dmi/id/product_serial” without quotes and press Enter. The serial number of your Chromebook will be displayed in the terminal.
Note that this method requires typing commands and may feel less user-friendly to those less familiar with command-line interfaces. However, it provides a direct way to access essential details, including the serial number, without needing to navigate through various menus or settings.
Ensure that you accurately note down the serial number displayed in the terminal. It is crucial to record the serial number correctly to use it for warranty claims, technical support, or any other situations that require this unique identifier.
Using the Chromebook Desktop method allows you to retrieve the serial number without the need for additional tools or external sources. It provides a direct approach to accessing the necessary information from your Chromebook’s desktop interface.
Tips for Keeping Track of the Serial Number
As you have seen, the serial number of your laptop or Chromebook is a valuable piece of information that can be crucial in various situations. To ensure you can easily access and keep track of your device’s serial number, consider these helpful tips:
- Record it immediately: Once you have found the serial number, write it down or save it digitally as soon as possible. It is easy to forget or misplace this information if you do not document it promptly.
- Create a digital copy: Take a photo or screenshot of the serial number label or document it digitally in a secure file, note-taking app, or password-protected document. This way, you will have a backup even if the physical label wears off or becomes unreadable.
- Keep a physical record: If you prefer tangible records, consider writing down the serial number in a designated notebook or on an index card. Store it in a safe place, such as a locked drawer or a fireproof safe.
- Associate it with the warranty: When filing warranty information, include the serial number along with the purchase date, receipt, and any relevant warranty documentation. This will ensure all essential information is consolidated in one place.
- Use a password manager: If you use a password manager, consider creating a secure note specifically for storing important details like the serial number. This way, you can access it securely whenever needed.
- Label device and packaging: Consider labeling your device and its original packaging with your name, contact information, and the serial number. This can help distinguish your belongings and serve as a reminder of the serial number if it ever becomes necessary.
- Regularly check and update: Periodically verify that your recorded serial number is accurate and up-to-date, especially if you have recently acquired a new device or had repairs done. Update your records accordingly.
By following these tips, you can better organize and keep track of the serial number of your laptop or Chromebook. These small actions can save you time and effort when dealing with warranty claims, technical support, or any other situations requiring the use of this essential identifier.
Remember, the serial number is unique to your device and serves as proof of ownership. Treat it as sensitive information and take appropriate measures to protect it from unauthorized access or loss.
Why Serial Numbers are Important
Serial numbers play a crucial role in the identification, documentation, and tracking of laptops and other electronic devices. Here are several reasons why serial numbers are important:
- Proof of Ownership: Serial numbers act as unique identifiers, providing concrete proof of ownership. This is especially valuable when filing a police report in case of theft or when making insurance claims for lost or damaged devices.
- Warranty and Service: Manufacturers and authorized service providers use serial numbers to verify the warranty status of a device. It helps determine eligibility for repairs, replacements, or other services covered by the warranty.
- Product Authenticity: Serial numbers are used to verify the authenticity of devices, especially in the pre-owned market. Buyers can cross-reference the serial number with manufacturer databases to ensure they are purchasing a genuine product.
- Software and Driver Updates: Some software updates or driver installations require specific versions tailored to a particular device model. The serial number helps ensure that users download the correct updates and maintain system compatibility.
- Device Identification: In organizations or households with multiple similar devices, serial numbers aid in differentiating and tracking individual devices. This is especially useful for inventory management, maintenance tracking, and asset management purposes.
- Selling or Donation: When selling or donating a laptop, providing the serial number increases trust and transparency for the recipient. It validates the authenticity and ownership of the device, facilitating smooth transactions.
- Insurance Coverage: Serial numbers play a vital role in insurance claims, enabling insurance companies to verify that the device in question matches the insured item. This ensures accurate coverage and prevents fraudulent claims.
Without serial numbers, it would be challenging to establish ownership, determine warranty eligibility, track devices, or provide accurate support and service. Serial numbers serve as a critical piece of information that helps protect both consumers and manufacturers.
Therefore, it is essential to keep track of the serial number of your laptop or device and ensure it is safely stored for future reference. This simple step can save you time, help protect your investment, and streamline any interactions related to your device’s ownership, support, and insurance.